Bring on the Bloodys!
I drink a lot of Bloody Marys. I blog about Bloody Marys. I taste test Bloody Mary mixes and review them. I co-founded a Bloody Mary app to help match users to great Bloody Marys. (Did you download it yet? Its free!) So it’s not surprising that I often get put in charge of “Bringing the Bloodys” to just about every occasion amongst our friends and family. We’re talking birthday parties, brunches, game day parties, Sundays because…Sundays. You get the point, right?
Well, I was really frustrated by transporting my Bloody Mary Mix in pitchers that always spilled, had a limited capacity, (which didn’t always cut it) and then to make it worse, I had to either serve them in plastic cups or use what ever the host had for me to work with. Presentation means a lot to me so the cup thing was the final straw. Something had to change if I was going to continue to “Bring the Bloodys.
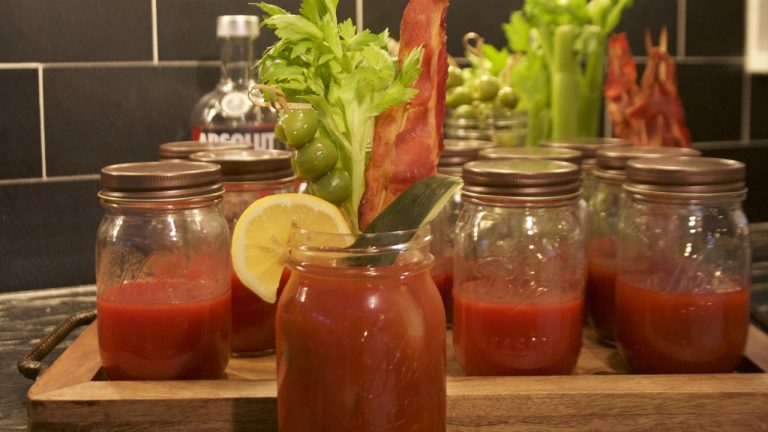
Then it hit me. The most obvious, simple answer of all time. The classic, the modest, the amazing… The Mason Jar. And lots of them. Serving them this way allows me to make them ahead of time, in individually portioned sizes, ready for drinking. It’s perfect.
It’s all about the Mason Jar…and the lid.
I use mason jars for everything including our everyday drinking glasses, storage of leftovers, precut veggies, prepped ingredients, pantry storage and even crafting and tool supply organization. Understanding and embrasing the versatility of the mason jar has made me more organized, as well as creative, in the kitchen and beyond.
Because I love mason jars and use them for so many thing, I invested in screw on tops and it was one of the best investments I’ve ever made. They are fantastic for everyday use. I purchased 2 sets over 3 years ago, they work super well I don’t need to fumble around with the 2 part sealing lids and bands. (Note- these lids are not intended for canning.)
How to Serve Bloody Marys to a Crowd
- In a large pitcher, make your favorite Bloody Mary recipe. (Don’t have a recipe? Try mine.) Be sure not to include the vodka. The vodka gets to come to the party later.
- Pour the Bloody Mary mix into the mason jars until just about half way. Screw on the lids, clean up your mess and put the jars in the fridge. (I put them right back into the box I bought my Mason jars in, which makes storage and/or transportation super easy.) They can stay like this for at least 3 days, probably more.
Ok, lets fast forward. It’s time to serve some Bloody Marys.
First, set up your prep station, or create a build your own Bloody Mary Bar. For either you will need:
- The pre-filled jars
- vodka, tequila,or both
- Ice
- Straws
- Garnish(es) of your choice.
Next, put it all together.
- Unscrew the lid of a prepared jar, add an ounce of vodka (or two, if you’re feeling spunky.)
- Fill the jar with ice.
- Screw the top back on and shake! (Sing the song ‘Shake it Baby’ while shaking to encourage laughter at your expense.)
- Finally, unscrew the lid, add garnish, insert a straw and serve. Or, don’t do anything and let guests do it themselves.
You are now the hit of the party. And you are welcome.


