Melon Salad with Mint & Amaretto

melon salad with mint and basil

Fruit salad never tasted so good!”

Melon means summer. So does fresh herbs. This Giada De Laurentiis recipe combines melon and mint to produce a summer fresh fruit salad that stands far above the rest.

Our garden is full of mint. It grows wild, and is a perennial that spreads, so each year our abundance increases. I used to fight it, but it turns out, most animals, especially deer, don’t like it’s fragrance and since I can use all the help I can get keeping the wildlife away from my plants, I just let it grow. I also found that it was much easier to find new recipes and ways to use the mint, than to try and fight its invasive ways. One of those recipes I found was this melon salad with mint.

This recipe is delicious, can be made in advance, and sure beats any fruit salad from a store! It is perfect for a Sunday brunch or as a light, refreshing, summer dessert.

Melon Salad with Mint & Amaretto

Prep Time30 minutes
Cook Time5 minutes
Total Time35 minutes
Course: brunch, Dessert
Cuisine: American, Italian
Keyword: fruit, fruit salad
Author: Giada De Laurentiis

Ingredients

  • 1 bunch fresh mint chopped
  • 1/4 cup lemon juice from about 1 lemon
  • 1/4 cup simple syrup recipe follows
  • 1/8 teaspoon amaretto
  • 2 cups watermelon balls from about half a watermelon
  • 2 cups cantaloupe balls from about 1 cantaloupe

Simple Syrup:

  • 1/2 cup water
  • 1 cup sugar

Instructions

  • In a blender, combine mint, lemon juice, simple syrup, and amaretto. Blend until smooth.
  • In a large bowl, combine the watermelon and the cantaloupe. Add the vinaigrette and toss. Transfer to a serving bowl and serve.

Simple Syrup:

  • In a saucepan, combine water and sugar over medium heat. Bring to a boil, then reduce heat and simmer for 5 minutes, until the sugar has dissolved. Take pan off heat and cool the syrup. Any extra cooled syrup can be saved in an airtight container in the refrigerator.

Parmesan Roasted Broccoli

The only broccoli recipe you’ll ever need

Broccoli is the king of the vegetable kingdom. Well, at the vest least, the king of my vegetable drawer.  It’s my favorite vegetable and simply roasted, it is my go-to side dish most days of the week.  I know I’m not alone in this and I think that is probably why none of us think about broccoli as anything special and certainly not the side dish you think to include when planning a special occasion dinner. But THIS Parmesan Roasted Broccoli recipe from Ina Garten is life changing!

This dish, however, is another story. It’s not just good enough for a special occasion dinner, it may actually compete for the best thing on the plate. I have more people comment on this side dish than any other always saying the same thing, “This is the best broccoli I have ever had. What did you do to it?” Well, the answer is simple- I followed the recipe!

This is my absolute favorite broccoli recipe and  just trust me, it will be yours too!

The trick to this dish is about preparing the ingredients ahead of time because it gets assembled quickly at the end of its roasting time.

Pro Tip:

Prep ALL the ingredients and set aside before beginning to roast your broccoli. Then right as it comes out of the oven and you are preparing to serve, find a sous chef to assist you. Have them toss the broccoli in a large mixing bowl while you add in the prepared and measured ingredients. This will ensure even distribution of flavors and ingredients. Otherwise, you’ll have pockets of too much lemon, or too much salt, etc., so it’s important to be prepared with an extra set of hands!

The Recipe

Parmesan Roasted Broccoli

A delightful twist on a classic vegetable dish. Parmesan roasted broccoli combines the earthy goodness of broccoli with the zesty brightness of lemon and the salty richness of Parmesan cheese.
Prep Time20 minutes
Cook Time25 minutes
Total Time45 minutes
Course: Side Dish
Cuisine: International
Keyword: broccoli, side dish, vegetarian
Servings: 6
Author: By Ina Garten

Ingredients

  • 4 to 5 pounds broccoli
  • 4 garlic cloves peeled and thinly sliced
  • Good olive oil
  • 1 1/2 teaspoons kosher salt
  • 1/2 teaspoon freshly ground black pepper
  • 2 teaspoons grated lemon zest
  • 2 tablespoons freshly squeezed lemon juice
  • 3 tablespoons pine nuts or slivered almonds toasted
  • 1/3 cup freshly grated Parmesan cheese
  • 2 tablespoons julienned fresh basil leaves about 12 leaves

Instructions

  • Preheat the oven to 425 degrees F.
  • Cut the broccoli florets from the thick stalks, leaving an inch or two of stalk attached to the florets, discarding the rest of the stalks. Cut the larger pieces through the base of the head with a small knife, pulling the florets apart. You should have about 8 cups of florets. Place the broccoli florets on a sheet pan large enough to hold them in a single layer. Toss the garlic on the broccoli and drizzle with 5 tablespoons olive oil. Sprinkle with the salt and pepper. Roast for 20 to 25 minutes, until crisp-tender and the tips of some of the florets are browned.
  • Meanwhile prepare all the remaining ingredients, measured out and set aside ready to toss in quickly when the broccoli comes out of the oven. (You’ll need to move quickly!)
  • Remove the broccoli from the oven and immediately toss with 1 1/2 tablespoons olive oil, the lemon zest, lemon juice, pine nuts, Parmesan, and basil. Serve hot.

Roasted Oysters

roasted oysters in a cast iron tray

These oysters are as ‘Rich as Rockefeller!’

My husband Brett and I have an obsession with oysters, but specifically roasted oysters. It started a while back after a weekend trip to Newport, Rhode Island where seafood is abundant and can be found at every eatery. We were out late night and saw a tray of roasted oysters go by, namely the most famous of roasted oysters – Oysters Rockefeller. We had to have them. And then we had to have more.

And there it began….our obsession with the history of Oysters Rockefeller and roasted oysters in general.

After doing a deep dive, we learned that there is a long history, and a bit of a mystery, surrounding the original Oysters Rockefeller recipe. 

The History of Oysters Rockefeller – the most famous of all roasted oysters.

In 1840 Antoine Alciatore opened the doors to “Antoines” – a French Creole restaurant in New Orleans. Antoine’s was a thriving restaurant that specialized in amongst other things, escargot. After Antoine’s death, his son Jules Alciatore took over as head chef and the restaurant continued to thrive.

On a late night in 1899, a hungry unnamed person ordered Antoine’s Escargot, but the Escargot had been 86’d. (That means they ran out.) Not discouraged but certainly disappointed, he asked the chef to create him something from the kitchen. It was late, and only scraps of vegetables lay around the kitchen. Inspired by the butter and herb mixture used to make the escargot, the chef combined these scraps with Oysters and baked them.  Upon tasting the dish the hungry man exclaimed, “Why this is as rich as Rockefeller!” Thus, the legend of oysters rockefeller was born.

Roasted Oysters in Tray

Jules Alciatore went to his grave with the original recipe that was born that night. However, Antoine’s restaurant is still turning out the same dish to this very day in New Orleans. They keep their recipe a secret and it seems that no one will ever know how close todays version is to the one created that night back in 1899.

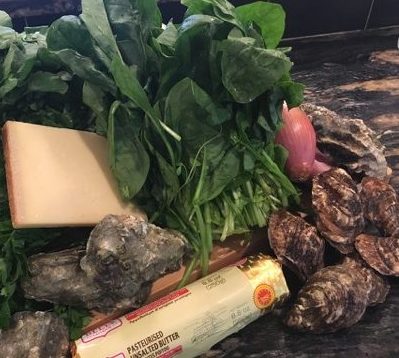
What are the ingredients of Oysters Rockefeller?

Oysters Rockefeller Ingredients

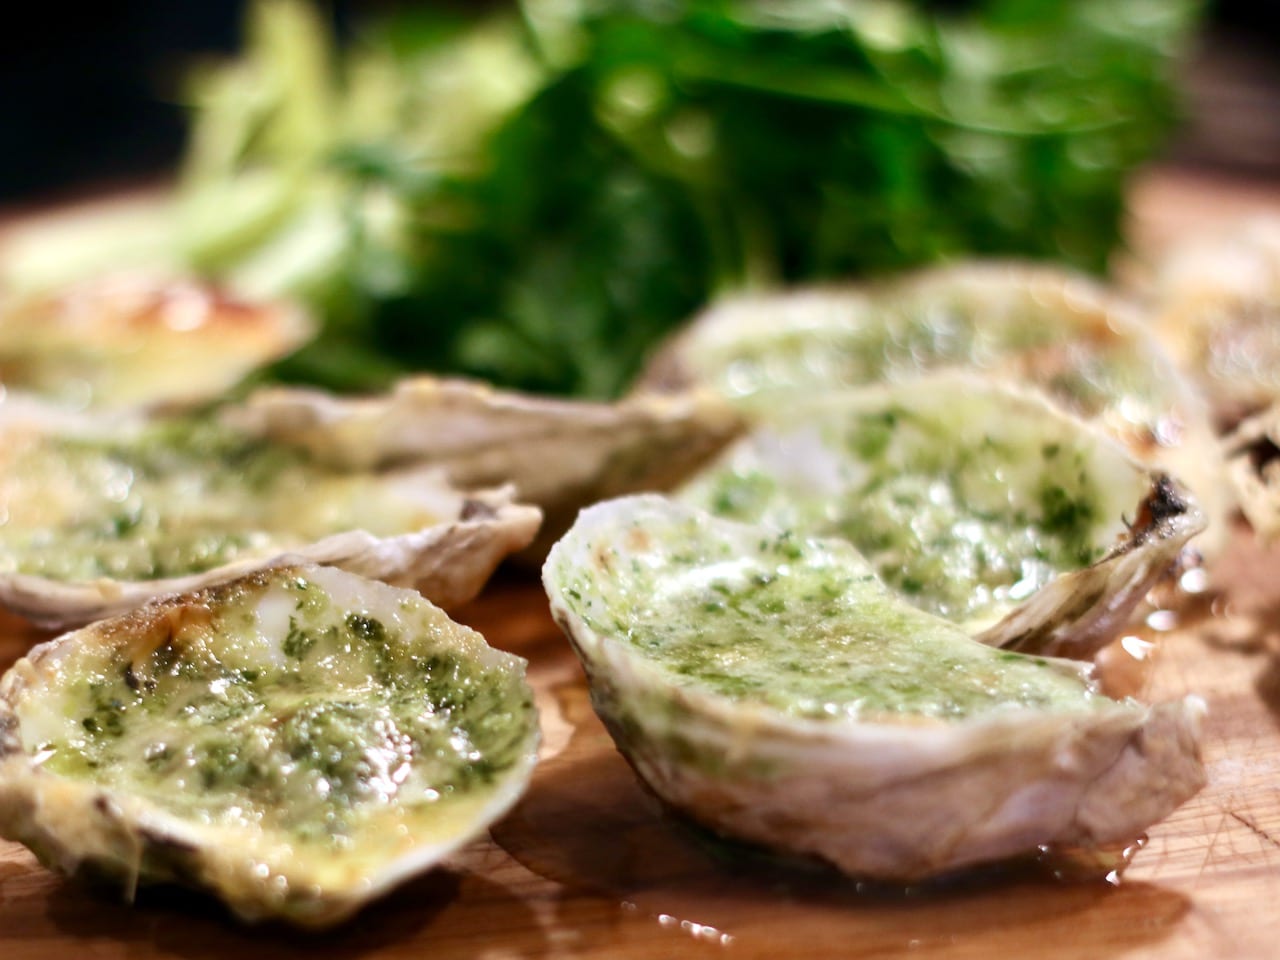
With the story above as our inspiration, we got to thinking. What ingredients were available in New Orleans in 1899? What would have been in the kitchen? Antoine’s was almost 60 years old when they invented Oyster Rockefeller which means they had established dishes, recipes, clientele, and chefs. That would have played a part in the creation. There are numerous reports of it being a bright green color, which if you have ever seen escargot before it is cooked, you know this is common with this dish as well. Was that all it was? Could it be the recipe for escargot applied to oysters? Or was there more to it? We think a little bit of both.

Likely it was the escargot sauce elevated with less garlic and the addition of new herbs and greens to compliment the briny taste and delicate texture of the oyster.

Keep in mind- Oysters were a main source of food in America dating back to the first settlers. Oysters were plentiful all over the United States, and even were shipped on trains before beef was shipped. The point here is that the chef at Antoines knew how to cook Oysters. He was a talented chef who knew how to handle oysters and how to cook traditional french snails. He most likely simply adapted the classic escargot recipe that Antoine’s had been severing for 60 years and there you have it.

Roasted Oysters in Tray
Preparing Roasted Oysters with cheese
Roasted Oysters in Tray

We tested a few different approaches including with cream and without, with cheese and without, with spinach and without. Here is what we discovered in our test kitchen – any oyster baked with butter, herbs and cheese in any combination will never disappoint. So we started roasted oysters obsessively!

Raw oysters in cast iron roasting tray

How to Select Oysters for Roasting

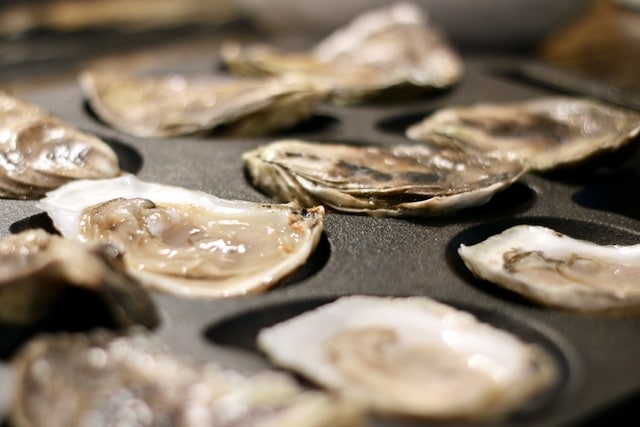
When selecting oysters to roast or grill, tell your fish monger you are looking for oysters with a belly shape, not flat ones. This will provide a plumper cooked oyster and also keep them protected in the shell while roasting which prevents them from drying out.

Special Equipment

I purchased a Cast Iron Roasting tray from Sur La Table made for roasting oysters. While this makes it easier if you roast oysters often, you can also simply use a sheet pan and some tin foil to create some supports to nestle the oysters.
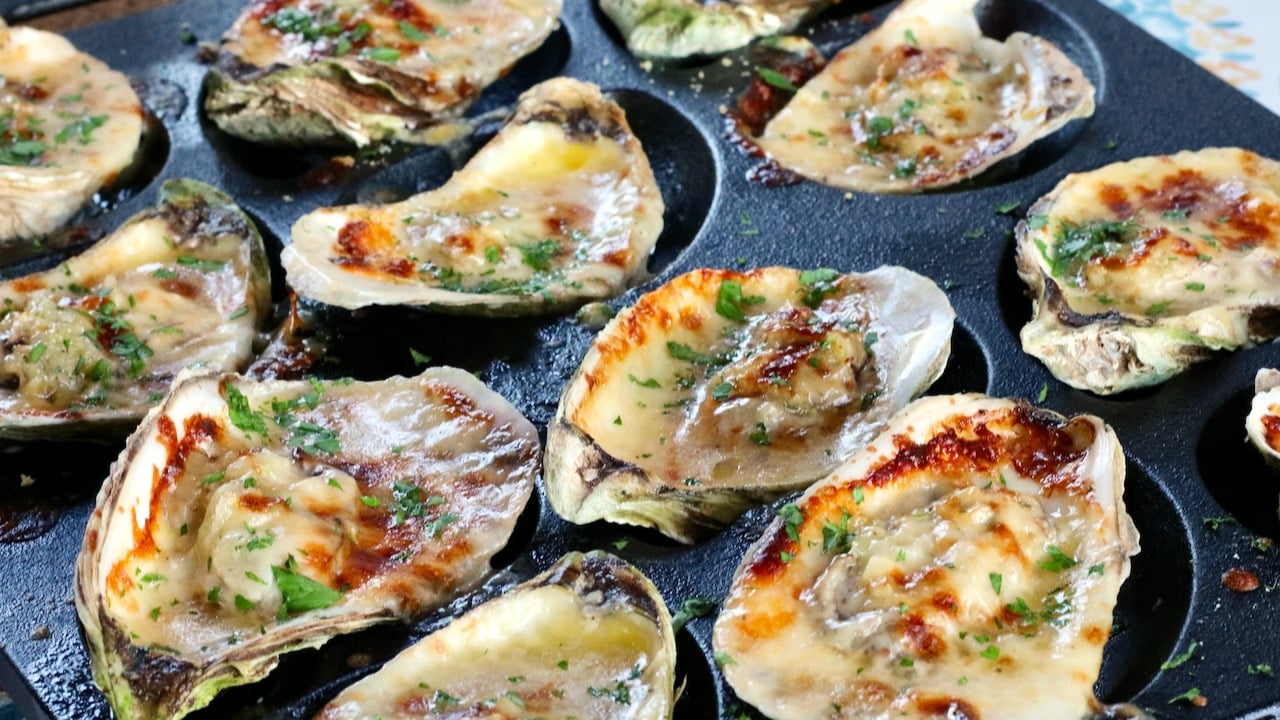
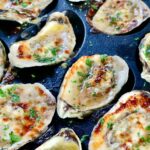
Roasted Oysters in Tray
Print Recipe
5 from 2 votes

Roasted Oysters

These baked oysters are succulent and rich and oh so delicious! 
Prep Time35 minutes
Cook Time10 minutes
Total Time45 minutes
Course: Appetizer
Cuisine: Seafood
Keyword: oysters

Ingredients

  • 1 stick butter
  • 1/4 cup finely chopped fresh parsley (and/or any combination of basil, tarragon or chives)
  • 1/8 cup minced celery with leaves (optional, but recommend!)
  • 2 tablespoons finely minced shallots
  • 1 1/2 teaspoons grated lemon zest
  • 1 tablespoon finely minced garlic
  • Kosher salt and freshly ground pepper
  • 3 ounces gruyere cheese (or similar nutty cheese)
  • Sprinkle of breadcrumbs- optional
  • 12-24 fresh oysters (in the shell)

Instructions

  • If you have a oyster roasting pan now is the time to use that! If you don’t, prepare a baking sheet with a roasting grate to support the oysters, or make a bed of dried rice or rock salt to nestle the oysters into on the sheet pan to keep them supported so they do not spill their liquor or the butter sauce you will add.
  • Preheat the oven to 425 degrees F. 
  • Open the oysters with an oyster knife. (if you don’t know how to safely do this, don’t make this recipe!)  
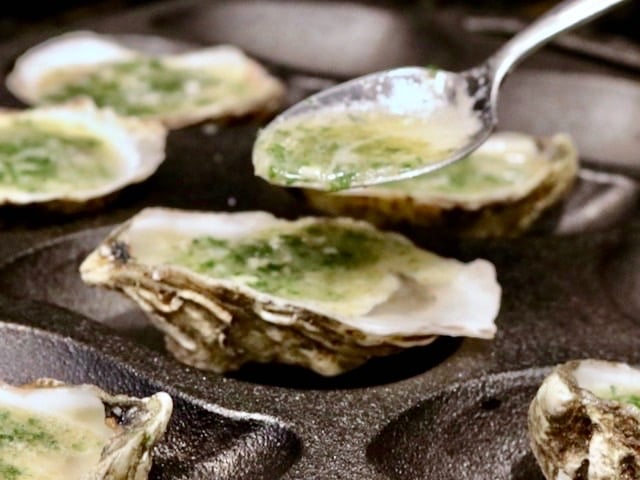
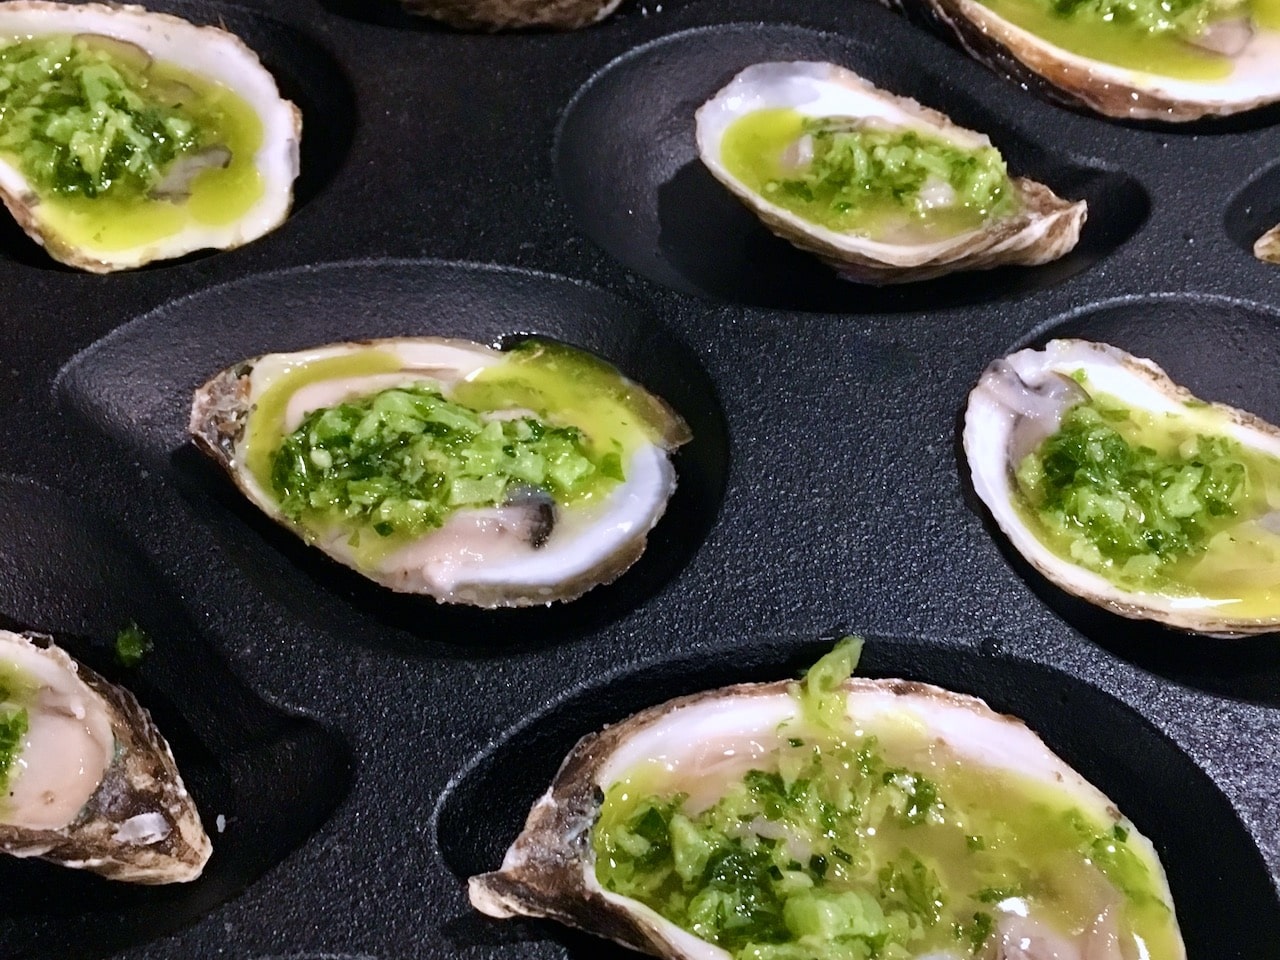
  • Meanwhile, melt together the butter, herbs, shallots, lemon zest, garlic and a dash of salt and pepper. (Feel free to add a dash of white wine) Be careful not to burn the butter sauce but cook it enough to cook down the shallots and garlic. 
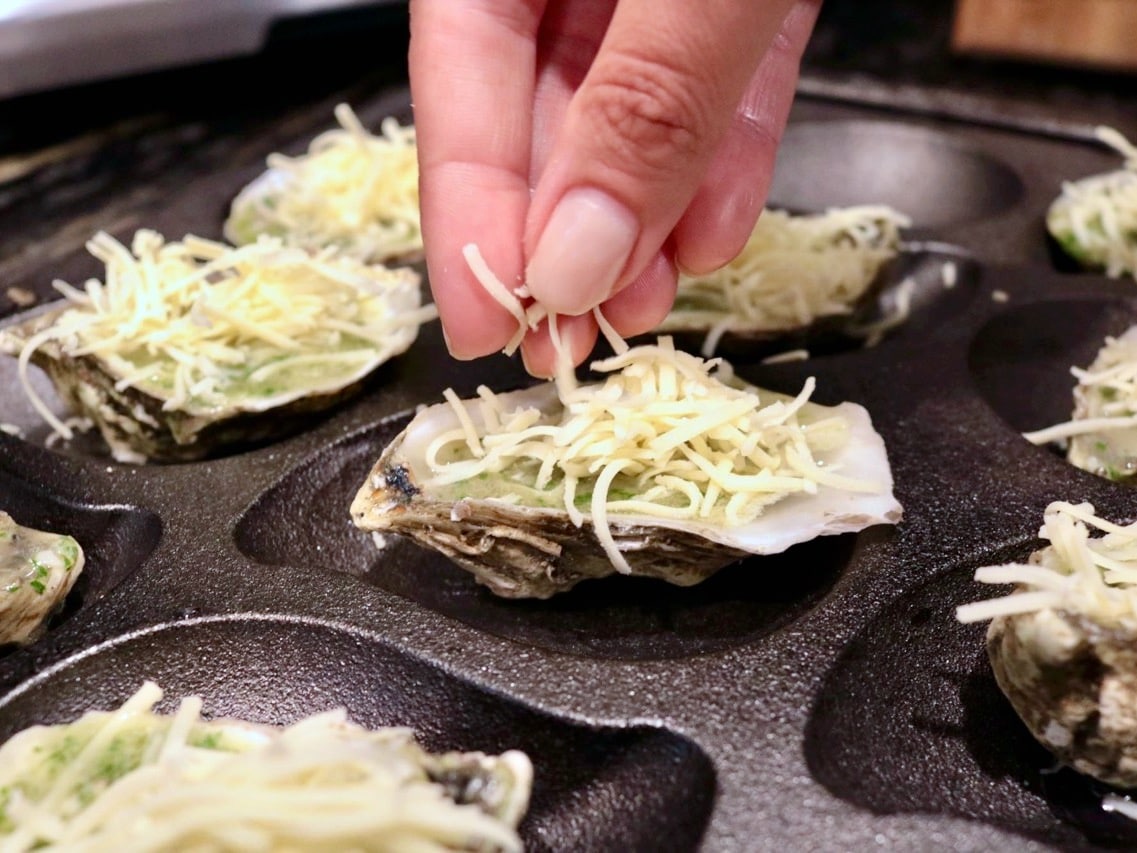
  • Once all oysters are in place on your roasting tray, add a heaping teaspoon of the melted butter mixture on top of each oyster. Top with about a teaspoon of shredded cheese followed by a pinch of breadcrumbs, if using. 
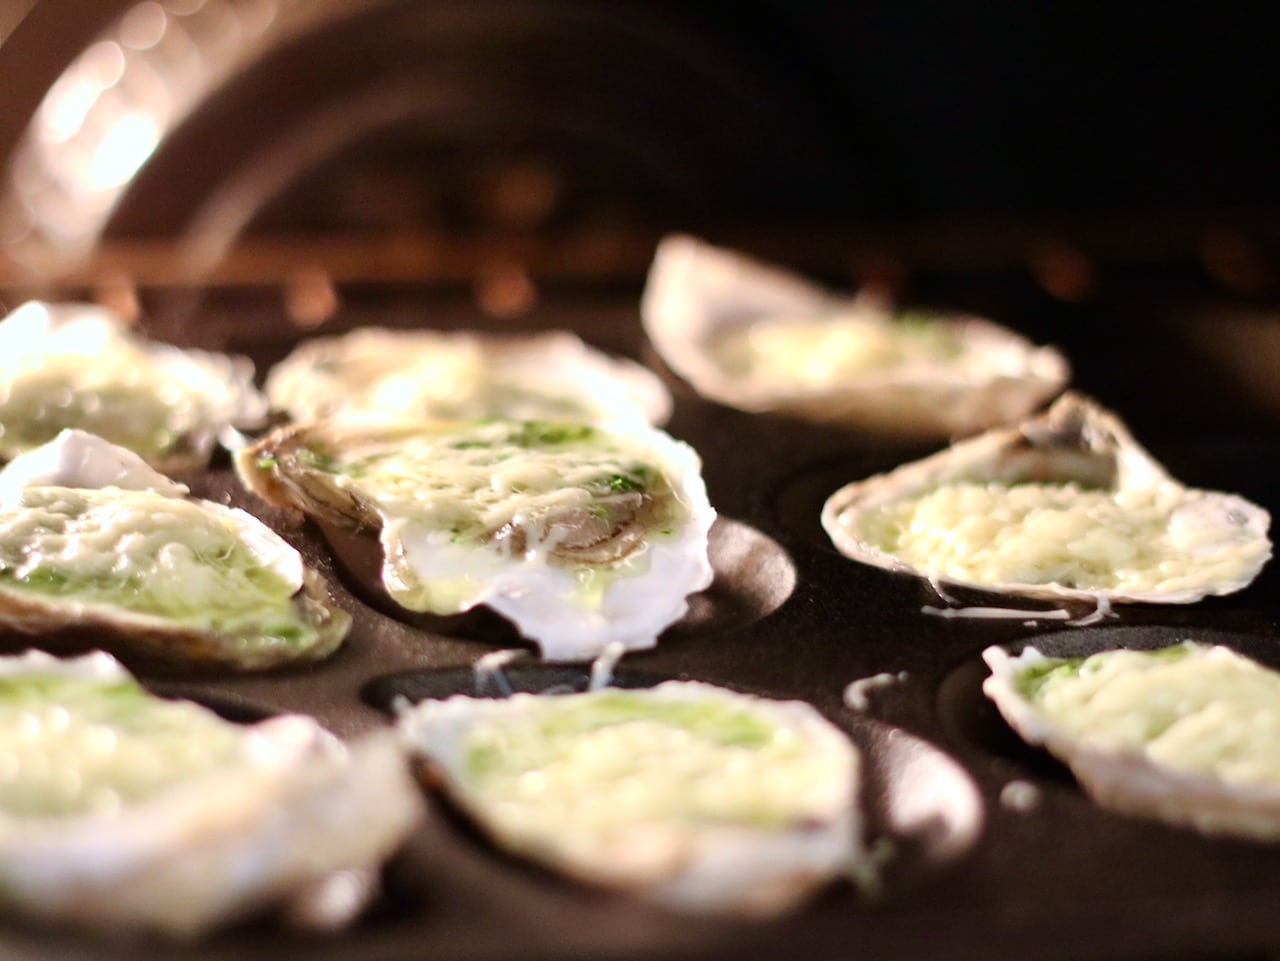
  • Roast the oysters until the the oysters are just cooked through and the cheese is melted and turning golden brown. (About 8 to 10 minutes) Serve immediately.

Notes

If your cheese is not browning or you really want a nice dark brown color, Put the oysters on broil for the last 2 minutes.  

Jumbo Lump Crab Cakes

jumbo lump crab cakes

Nothing screams summer more than dining al fresco on some fresh seafood accompanied by a glass of crisp white wine. Crab cakes are a perfect dish to serve at your next summer soiree – they are not only extremely delicious and impressive, but they are baked, not fried, and can be made several hours in advance. This recipe is loaded with fresh, delicious crab meat and seasoned perfectly to elevate the crab’s delicate flavor.

Restaurants & pre-made crab cakes tend to use lots of fillers like celery, peppers, loads of breadcrumbs and more. Store bought frozen versions are often also contain several types of preservatives. Hey…I get it, but doesn’t mean I have to stand for it. Restaurants also tend to use lower cost crab, like back fin, which has a much fisher flavor and doesn’t provide those luscious lumps of delicate meat the way lump and jumbo lump does.

These crab cakes are packed with flavor, simple to make, and better than anything you’ll get out.

If you can’t find jumbo lump or don’t feel like springing for the high cost, you can confidently substitute lump crab in this recipe. I talk more about how to choose crab in my Ultimate Spicy Crab Dip Post.

To make this recipe gluten free, I have successfully substituted Ritz Crackers for gluten free butter crackers.

Crab cakes

This crab cake recipe is all about the crab and none of fillers. Be sure to use fresh crab to best results! 
Prep Time10 minutes
Cook Time6 minutes
Total Time26 minutes
Cuisine: Seafood

Ingredients

  • 1 large egg
  • 2 heaping tablespoons mayonnaise
  • 1 teaspoon Dijon mustard
  • 1 teaspoon Worcestershire sauce
  • 1 teaspoon hot sauce
  • Few drops of fresh lemon juice not to exceed 1/4 teaspoon
  • 1 teaspoon Old Bay Seasoning
  • 1/4 teaspoon kosher salt
  • 1/8 teaspoon fresh ground black pepper
  • 1/2 cup crushed Ritz crackers
  • 2 tablespoons chopped fresh parsley
  • 1 pound fresh crabmeat (drained, patted dry an picked over for shells or cartilage)
  • Non-stick cooking spray

Instructions

  • In a medium bowl, combine the egg, mayonnaise, mustard, Worcestershire, Tabasco, lemon juice, Old Bay, salt and pepper. Mix so that all the ingredients are well-incorporated.
  • Add the cracker crumbs and parsley and mix well.
  • Gently fold in crabmeat until just combined (try not to break up lumps of crabmeat too much).
  • Using slightly wet hands, shape mixture into patties or use a round cookie cutter to pack and shape.
  • Put the crab cakes on a baking sheet lined with parchment as they're shaped. Cover loosely with foil and refrigerate for 1 hour before cooking.
  • Set oven on broil at 450. Spray a baking sheet with non stick spray and use a spatula to place crab cakes on tray and place in oven on medium height rack.
  • Cook for about 5 minutes or until golden brown. (Keep an eye on them- every broiler cooks differently. If they are burning rather than browning, move them down to a lower rack.)
  • Serve with lemon and tartar sauce, or seafood remoulade.

[/vc_column_text][/vc_column][/vc_row][vc_row][vc_column][mk_padding_divider size=”20″][/vc_column][/vc_row][vc_row fullwidth=”true” fullwidth_content=”false” css=”.vc_custom_1543287131561{padding-top: 30px !important;padding-bottom: 30px !important;background-color: #4c4c4c !important;}”][vc_column][vc_custom_heading text=”Love Crab? Try these recipes too!” font_container=”tag:h2|text_align:center|color:%23ffffff” use_theme_fonts=”yes”][/vc_column][/vc_row][vc_row][vc_column][mk_padding_divider size=”20″][vc_basic_grid post_type=”ids” element_width=”6″ item=”2224″ initial_loading_animation=”none” grid_id=”vc_gid:1589473528859-14bd08be-cde9-7″ include=”2306, 2585″][/vc_column][/vc_row]