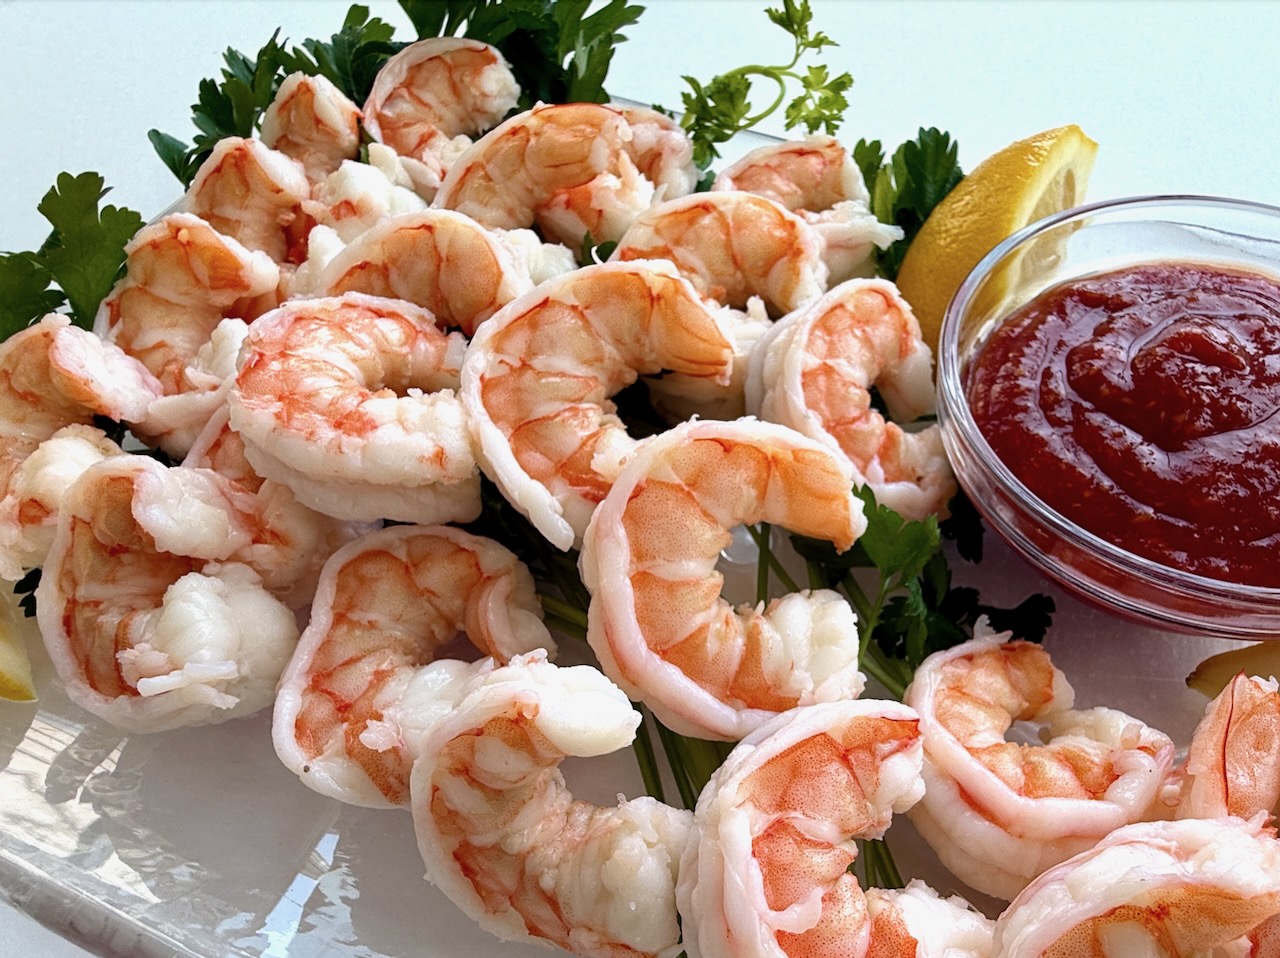
Shrimp cocktail is an elegant yet simple appetizer that’s always a crowd-pleaser. Plus, it’s easy to prepare in advance, making it perfect for entertaining!
How to choose shrimp
Whenever possible, buy fresh shrimp from a reliable fish shop. While thats not always possible, just be aware that frozen, farmed shrimp is most common at typical grocery stores and they are treated with preservatives and that often affects the texture and taste.
If you have a a good fish market, they will often clean the shrimp for you. Otherwise, you can devein the shrimp yourself using kitchen shears and a small paring knife.
Cooking Times for Different Size Shrimp:
26-30 count shrimp → 1½ minutes
21-25 count shrimp → 2 minutes
13-15 count shrimp → 4 minutes
Make-Ahead Instructions:
Shrimp can be cooked a day ahead and served chilled.
With its perfect balance of freshness and bold flavors, this shrimp cocktail is a guaranteed hit. Whether you’re serving it as an appetizer for a dinner party or as a light snack, it’s an effortless classic that never disappoints. I hope you enjoy!
Shrimp cocktail is an elegant yet simple appetizer that’s always a crowd-pleaser. Plus, it’s easy to prepare in advance, making it perfect for entertaining!
Course: Appetizer
Cuisine: American, global, Mediterranean
Servings: 6people or more
Ingredients
6cupswater
1/4cupkosher salt
1/4cupsugar
2lbex-large fresh fresh shrimp16-20 count, peeled & deveined. (Leaving the tails on is traditional, but optional.)
Ice-for an ice bath
Instructions
Prepare the Cooking Liquid
In a medium pot, combine the water, 1/4 cup kosher salt, and 1/4 cup sugar. Cover and bring to a rolling boil over medium-high heat.
Set Up an Ice Bath
Fill a large bowl with ice and cold water. Keep it next to the sink for easy access.
Cook the Shrimp
Add the shrimp to the boiling water and leave uncovered. Cook for exactly 3½ minutes, or until they turn pink and opaque. The water won’t fully return to a boil, and that’s completely fine.
Shock the Shrimp
Drain the shrimp in a colander, then immediately transfer them to the ice bath. This stops the cooking process and keeps them tender. Let them chill for about 10 minutes.
Refrigerate & Serve
Pat dry and refrigerate in a ziplock bag or sealed container for up to 48 hours. Serve chilled with cockotail sauce and lemon wedges.
Notes
Cooking Times for Different Sizes:26-30 count shrimp → 1½ minutes21-25 count shrimp → 2 minutes13-15 count shrimp → 4 minutes
The Perfect Homemade Hummus: A Recipe Worth Dipping into
Superior to store bought, this creamy and flavorful dip can be enjoyed with pita bread, fresh vegetables or used as a spread in sandwiches and wraps. Hummus is a great base for any number of toppings, including slow roasted tomatoes & feta cheese, chopped olives or roasted peppers. The possibilities are endless!
Cheap Eats
If you are in the market for an inexpensive appetizer that feeds a crowd, look no further. 1 pound of dried chickpeas costs about $1.50 which is the main ingredient and makes about 2 quarts of hummus. You’ll also need to purchase a jar of Tahini which runs anywhere from $5-10 (depending on where you shop) but will last a long time in the refrigerator, and typically will make at least 4 batches of hummus for an average size jar.
How to make Hummus
This recipe is a two step process. Two very easy steps! The first requires combining the dried chickpeas with water and a pinch of baking soda into a slow cooker. Turn it on and walk away for a few hours. When the chickpeas are soft, drain the water and set the chickpeas aside to cool.
Once the chickpeas are cool, use a food processor to puree the chickpeas, tahini, garlic, lemon juice, olive oil, and salt to make the hummus. That’s it!
Once you have the hummus made, it can be served immediately or stored in the refrigerator for 3-4 days.
Creative Ways to Serve Hummus
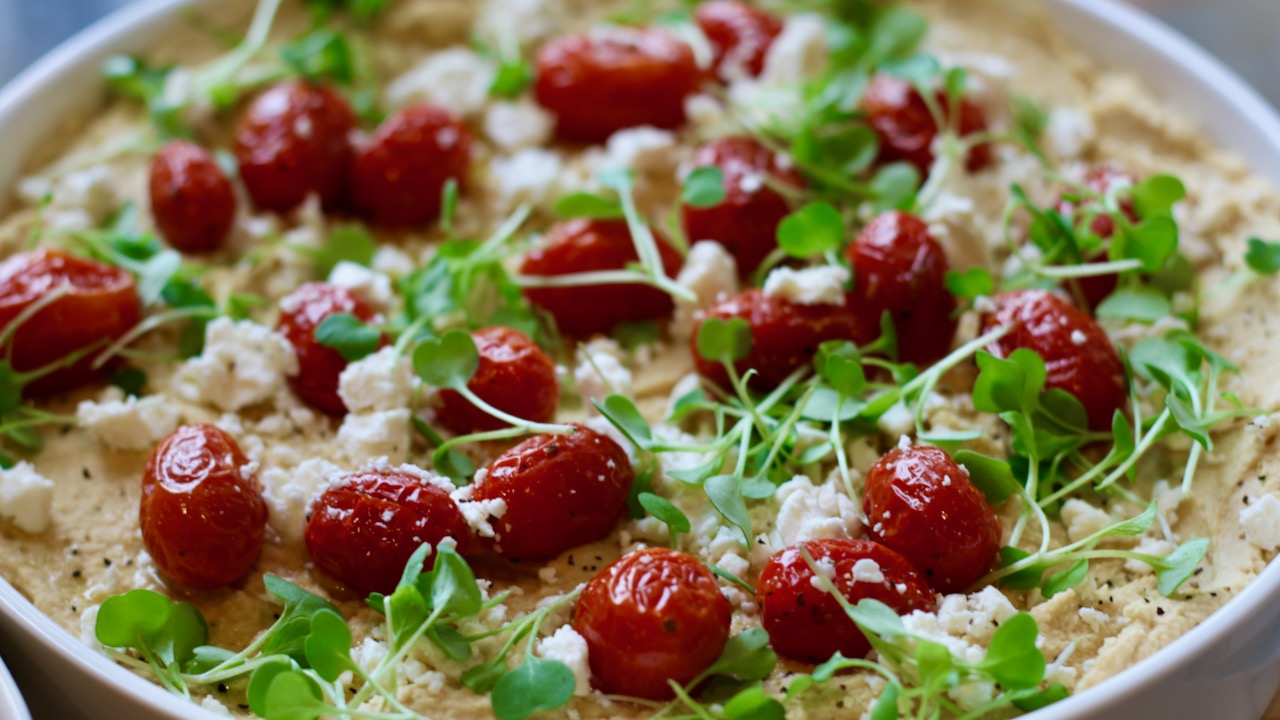
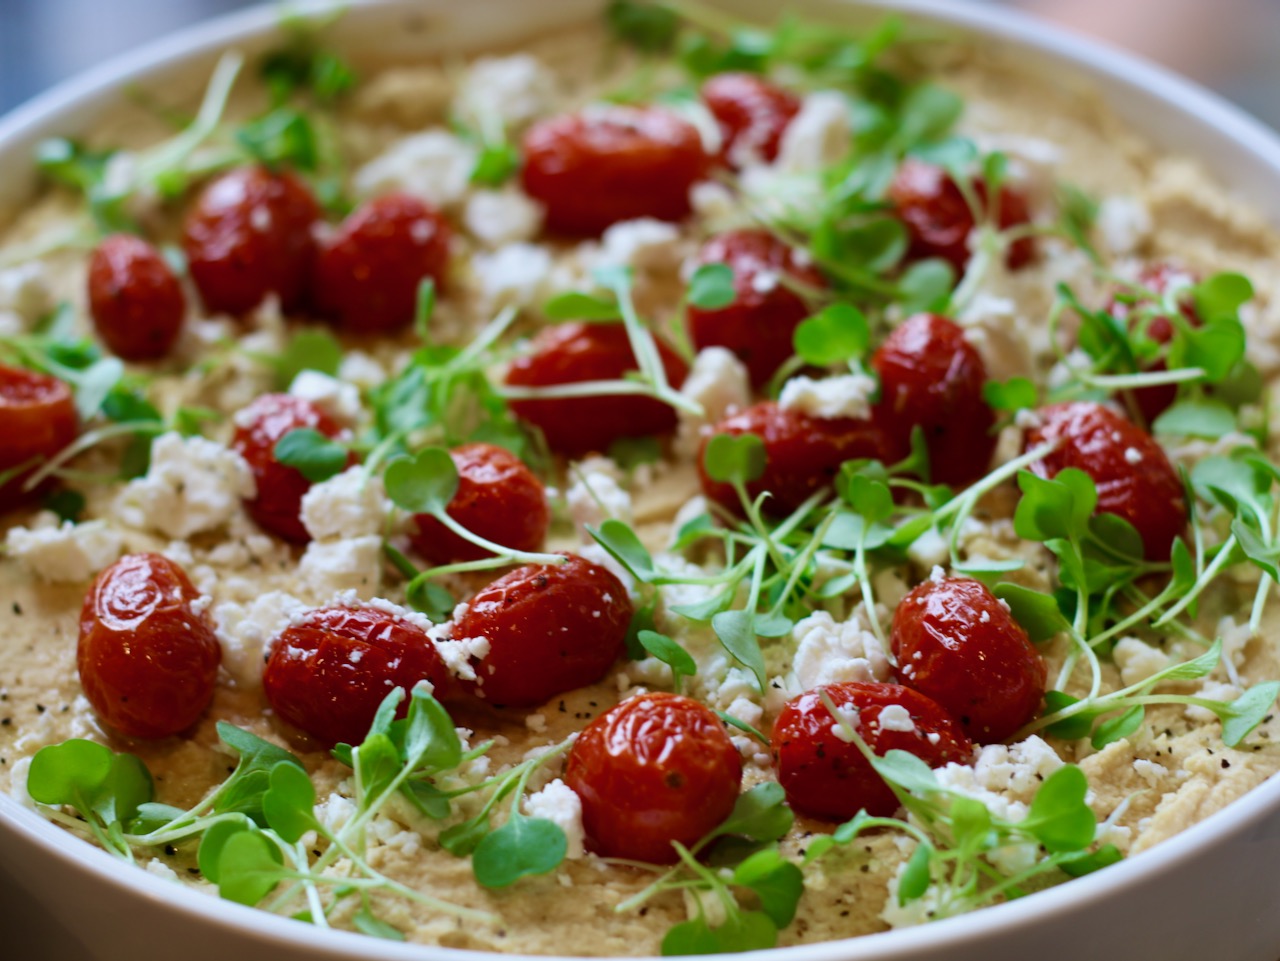
Hummus can often be considered boring by many. But it’s not! Think of hummus as a base that you top with all kinds of flavors and textures. It can be served individually in cute cups or in a shared platter for everyone to scoop from. Either way, get creative with hummus and you’ll be amazed at the results. I love serving it with slow roasted tomatoes, feta cheese and micro greens with a hearty swirl of olive oil – this is always a hit and looks absolutely stunning.
Other toppings include chopped olives, roasted red peppers or a simple blend of olive oil and herbs.
This creamy and flavorful dip can be enjoyed with pita bread, fresh vegetables or used as a spread in sandwiches and wraps. Hummus is a great base for any number of toppings, including slow roasted tomatoes & feta cheese, chopped olives or roasted peppers. The possibilities are endless!
Course: Appetizer, condiment
Cuisine: middle eastern
Keyword: hummus
Equipment
Slow Cooker
Ingredients
Slow Cooker Chickpeas
7cupswater
1pounddry chickpeassorted and rinsed
1/4teaspoonbaking soda
Hummus
1poundSlow Cooker Chickpeascooled.
2clovesgarlicminced
1 1/2teaspoonskosher salt
5tablespoonsfreshly squeezed lemon juice
1/4cupwater
1/3cuptahinistirred well
1/4cupextra-virgin olive oilplus extra for serving
Instructions
Slow Cooker Chickpeas
Place the water, chickpeas, and baking soda in a 2 1/2-quart slow cooker. Cover and cook on high heat for 4 hours, or on low heat for 8 to 9 hours, or until tender. Drain and serve immediately, or use in desired dish.
Make the Hummus
Place the chickpeas, garlic, and kosher salt in the bowl of a food processor. Process for 15 to 20 seconds. Stop, scrape down the sides of the bowl, and process for another 15 to 20 seconds. Add the lemon juice and water. Process for 20 seconds. Add the tahini. Process for 20 seconds, then scrape down the sides of the bowl. With the processor running, drizzle in the olive oil. Taste for seasoning.
Serve in a bowl, topped with a drizzle of olive oil and herbs or a topping of your choice.
These delicious tomatoes can be used in various dishes such as pasta, salads, bruschetta or as a flavorful topping for meats and fish.
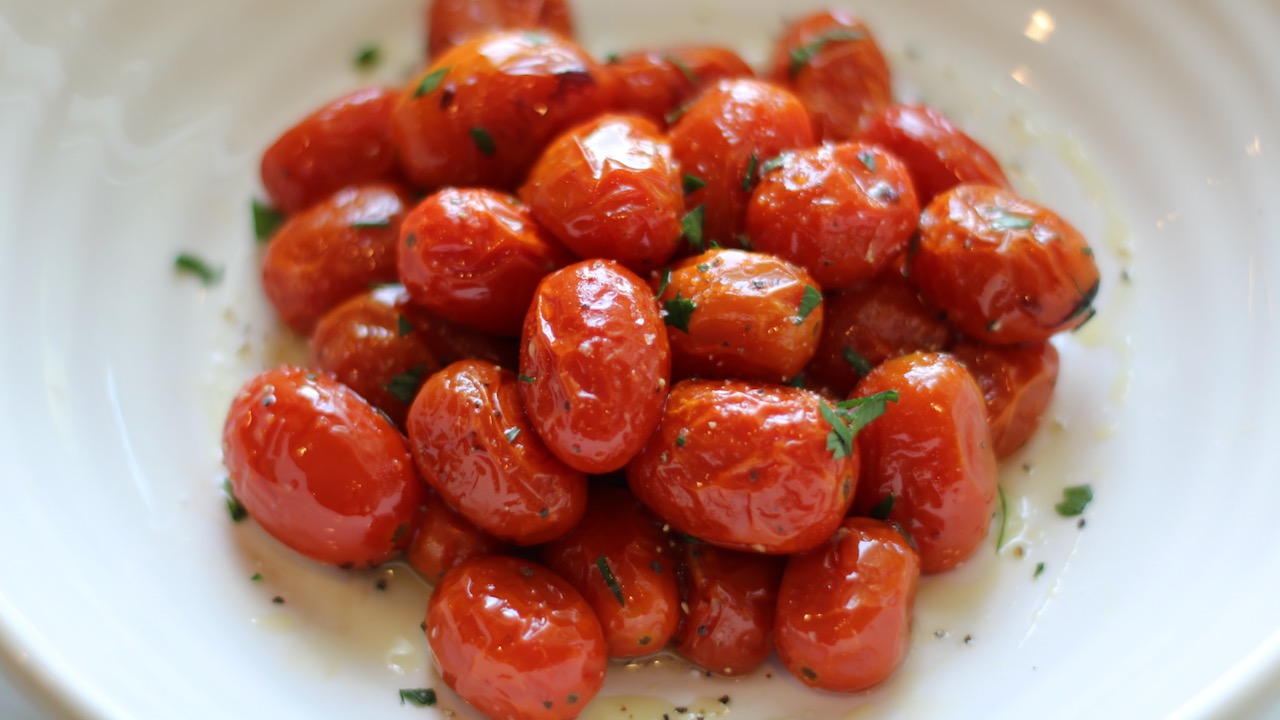
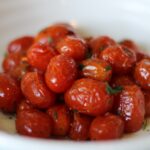
Slow roasted cherry tomatoes are sweet and have an incredibly robust depth of flavor. The slow roasting process intensifies the natural sweetness and flavor of the tomatoes while creating a tender, caramelized texture. Once made, the opportunities are endless on ways to enjoy them.
The process to make these incredible tomatoes is so simple. Simple toss the tomatoes with olive oil, balsamic vinegar, salt, pepper & sugar and roast on a sheet pan for about 2 hours. The tomatoes are done when they are just about to start to burst. Once cooked, they can be served warm as a side dish or stored in the fridge ready for any use for several days.
How to Serve Roasted Tomatoes
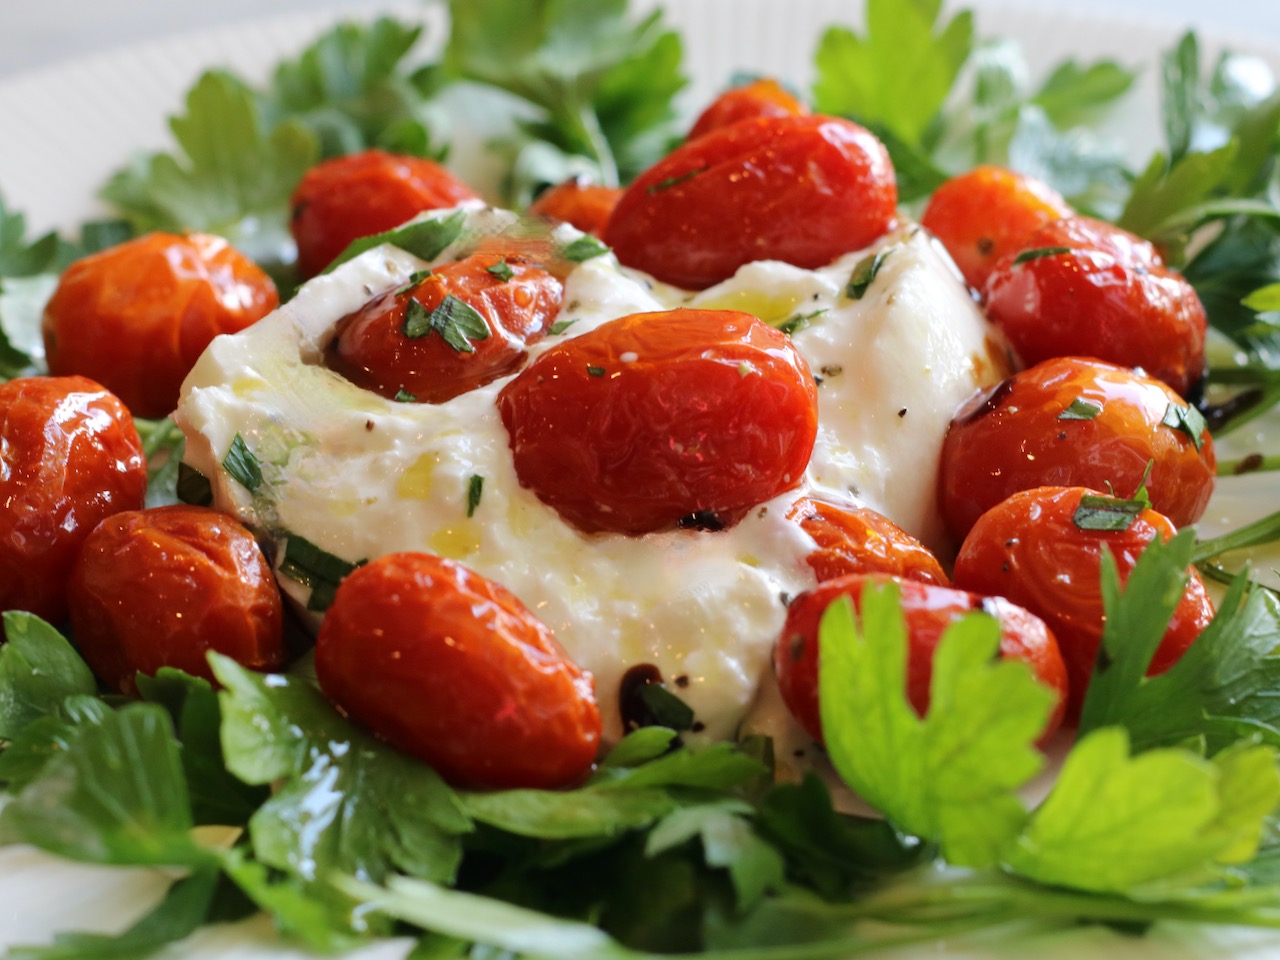
Burrata & Slow Roasted Tomatoes
Homemade Hummus with Slow Roasted Tomatoes & Feta Cheese
Slow roasted cherry tomatoes are sweet and have a robust depth of flavor. The slow roasting process intensifies the natural sweetness and flavor of the tomatoes while creating a tender, caramelized texture. They can be used in various dishes such as pasta, salads, bruschetta or as a flavorful topping for meats and fish.
Prep Time10 minutesmins
Cook Time2 hourshrs
Course: Side Dish
Cuisine: Italian
Keyword: tomatoes, vegetables, vegetarian
Servings: 8people or more
Ingredients
2lbs3 pints cherry or large grape tomatoes
¼cupextra-virgin olive oil
1½tablespoonsbalsamic vinegar
2teaspoonssugar
1teaspoonsalt
½teaspoonfreshly ground black pepper
2clovesgarlicminced
Instructions
Preheat the oven to 275°F and set an oven rack in the middle position. Line a baking sheet with wide heavy-duty aluminum foil or parchment paper.
Toss the tomatoes with the olive oil, vinegar, sugar, salt, pepper, and garlic. Roast for 2 hours, checking frequently, until the tomatoes are soft and beginning to burst. Serve hot or at room temperature.
Tomatoes can be stored in the refrigerator for up to 4 days.
Serving Suggestions: Serve with Burrata, fresh mozzarella and basil, over hummus or as a side dish to roasted chicken or grilled steak.
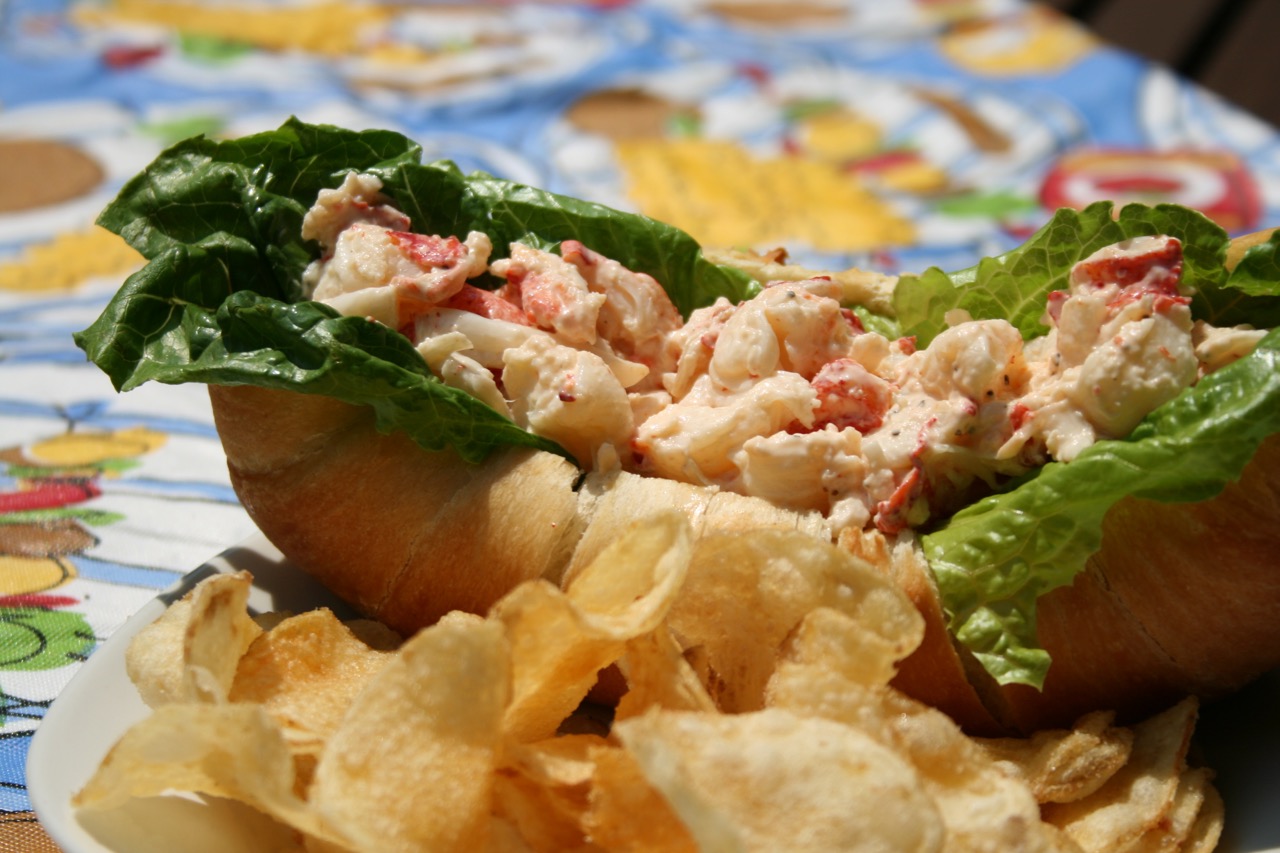
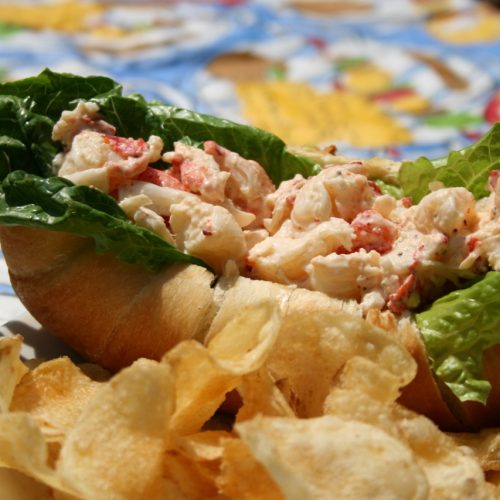
If you’re a seafood lover, then you’re likely to be very familiar with the beloved lobster roll. While nothing is quite as satisfying in summer than stopping at a quintessential Lobster Shack, that you can find scattered along the New England coast, for a loaded lobster roll, it’s not exactly an option for most of us when the craving hits! With only a few simple ingredients, you can make a lobster roll at home and it’s a lot less expensive!
For a seafood lover, nothing is better than a loaded lobster roll in summer.
Team Butter VS Team Mayo
Depending on where you live this debate is also known as the “Maine Lobster Roll” vs the “Connecticut Lobster Roll.” While both styles feature deliciously fresh lobsters as the star ingredient, they offer different taste experiences. The Connecticut-style lobster roll features warm chunks of lobster, coated in butter and nestled inside a toasted hot dog bun, sometimes seasoned with a sprinkle of salt and pepper. The Maine-style lobster roll, like the one we are making in this recipe, consists of cold, cooked chunks of lobster mixed with mayonnaise, lemon juice, salt, pepper, and sometimes other seasonings like herbs or spices. It is then loaded into a split-top bun that has been toasted or grilled and brushed with butter. There is no wrong answer here- its simply a matter of preference and the scenario in which you are serving it.
How to make a Loaded Lobster Roll
To start off, you’ll obviously need lobster meat. Ideally, cooked and shelled lobster meat works best, which can often be found at a local seafood shop, or you can steam and shell your own. I happen to live near many lobster purveyors so I have no excuse not to use fresh lobster meat. However, if you can’t find fresh lobsters, pre-packaged frozen lobster meat can be used as well- just be sure to defrost it slowly and dry it very well.
Next up- combine mayonnaise, a squeeze of lemon juice, finely chopped parsley, salt & pepper. The mayo based mixture adds creaminess to the filling while allowing all the flavors to blend together harmoniously. Be sure to taste as you go along to ensure that the flavors are well-balanced according to your preference. Optional twists: Use a pinch of celery seed, Old Bay seasoning or a sprinkle of fresh dill for a more complex flavor.
Just Say No…. To Celery!
While some folks swear by the addition of celery in the lobster roll, I do not. In fact, when I see the seafood store using it in their mixture, I simply do not buy it. While celery has its place elsewhere, it does not belong on a lobster roll- plain and simple. It’s watery crunch is used by many for one reason and one reason only – to add filler. There will be none of that here!
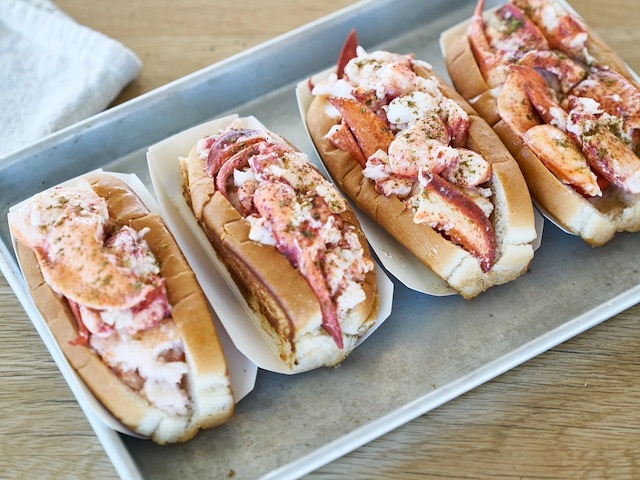
Assemble the Rolls
Now comes the fun part – assembling your lobster roll! Traditionally, Split top, New England-style hot dog buns are used because they perfectly cradle the lobster meat allowing for really great bites! However, if those aren’t readily available in your area, regular hot dog buns will just have to do!
For an extra touch of indulgence, brush melted butter onto each bun before lightly grilling or toasting them until golden brown. (Mmmm… who could resist?!)
Finally, fill each bun generously with your prepared lobster mixture and serve with lemon wedges on the side for an added zing of citrus freshness.
What to serve with Lobster Rolls
The lobster is the star here so when it comes to sides, I always opt for something simple. Potato chips and a pickle are a great choice for an afternoon lobster roll lunch. If serving for dinner, make a summer corn salad or herbed potato salad.
At the end of the day, I think we can all agree, a good Lobster Roll never disappoints in satisfying a seafood craving.
Luke’s Lobster Rolls
Enjoy lobster rolls from Maine anytime you want!
Bring the flavors of coastal New England to your home or send a fabulous gift to the lobster lover in your life. Lukes Lobster Roll kits include everything you need to make these award winning lobster rolls right at home!
Following a meticulous rating system based on portion, meat texture and sweetness, saucing, bun, extraneous additions (e.g. the dreaded lettuce), and shack ambiance, Yankee Magazine set out on a singular mission: to find the best lobster roll in Maine.
For a seafood lover, nothing is better than a loaded lobster roll in summer. Decadent chunks of lobster meat are lightly dressed with a blend of mayonnaise, lemon juice and seasoning then nestled perfectly inside a toasted split-top bun.
Course: dinner, lunch
Cuisine: Seafood
Keyword: lobster
Servings: 4people
Ingredients
1poundcooked lobster meat- picked over for shells and cartilage
3tbsMayonnaise (or more to taste)
1 1/2tspFreshly Squeezed Lemon Juice
Pinch of Kosher Salt & Fresh Ground Pepper
4New England Style (Split Top) Hot Dog Buns
4leaves of Boston Lettuce
2 tbsunsalted butter, softened
1tsp Finely chopped parsley, chives or dill – choose according to your preference or availability.
Optional spice seasoning: sprinkle of Old Bay or Celery Seed seasoning.
Instructions
Chop the cooked lobster meat. If using tail meat cut into 1/2-inch pieces and cut the claw meat slightly larger into 3/4 inch pieces. If using only knuckle and claw meat, cut into 3/4 inch pieces. Set aside.
In a medium sized bowl, whisk together the mayonnaise, lemon juice, herbs of choice, 1/8 tsp salt and 1/4 tsp pepper in large bowl. Add lobster and gently toss to combine. Taste and adjust seasoning.
At this stage, you can serve immediately or cover tightly and refrigerate for 24 hours.
When ready to serve, place a nonstick skillet over med-low heat. Butter both sides of Split-top buns with the softened butter. Toast buns until golden brown and then flip and repeat. (About 2-3 minutes.)
Line each bun with a lettuce leaf. Generously spoon lobster salad into buns and serve with a lemon wedge.
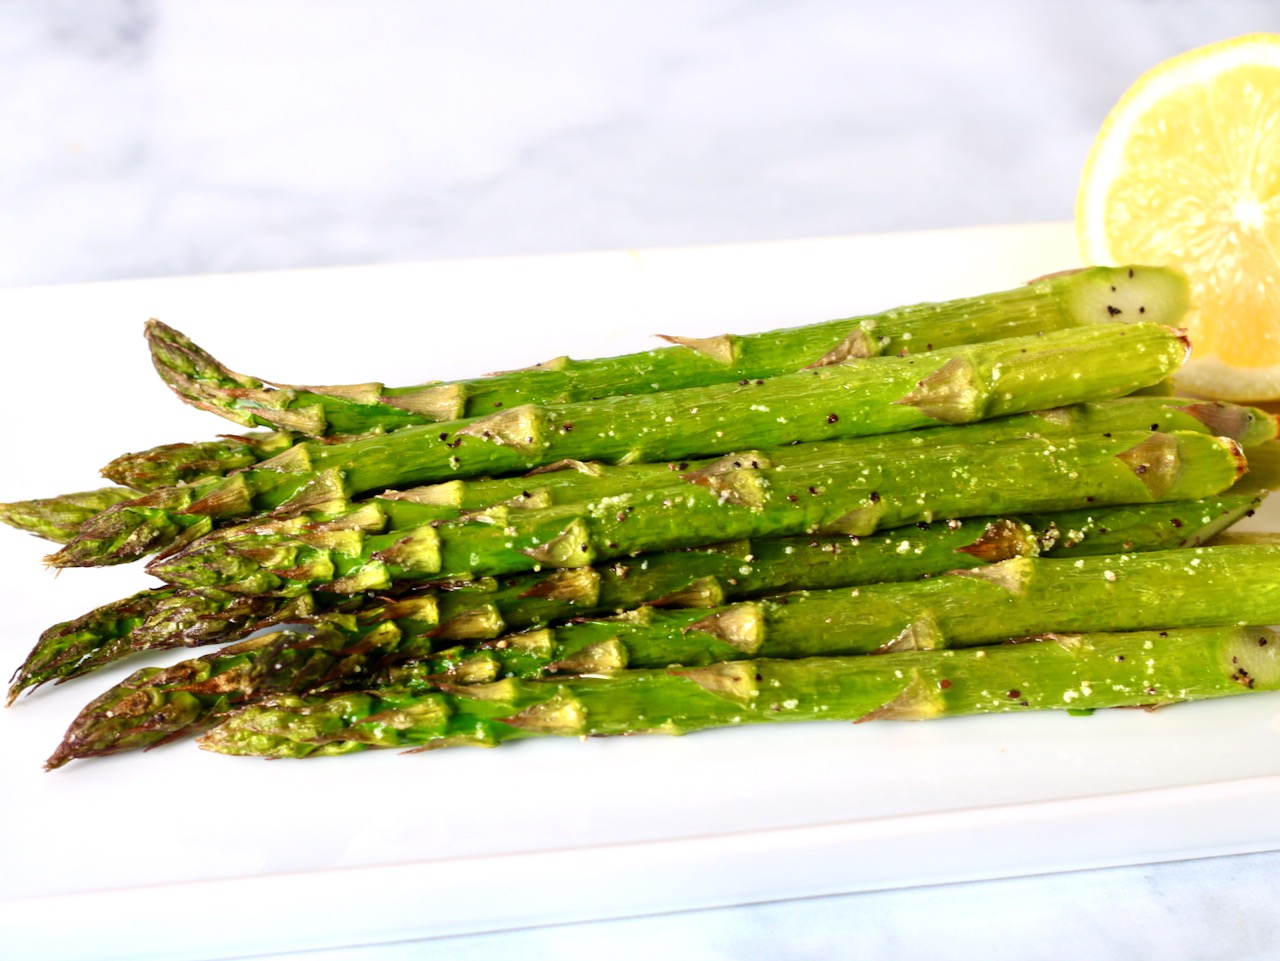
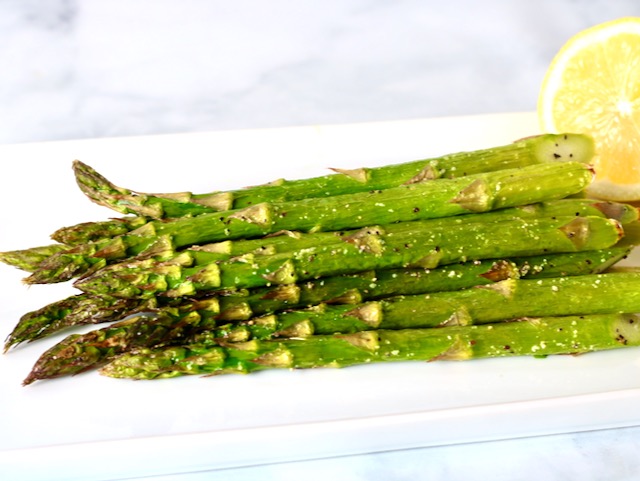
Roasted asparagus is not just a side dish — it’s a celebration of spring’s bounty, ready to elevate your meals and nourish your body. So, roll up your sleeves and lets get roasting!
Roasted Asparagus is healthy, easy and versatile.
Asparagus is one of the most well known symbols of the season when it comes to seasonal cooking in the spring. It springs from the earth year after year as one of the only perennial vegetables and grows abundantly from early spring until the days get too warm, making room for the summer produce to begin to take over center stage
Asparagus is rich in essential vitamins such as A, C, E, and K, as well as folate and fiber. This nutritious vegetable is also a natural source of antioxidants and anti-inflammatory compounds, which can promote heart health, improve digestive function, and support the immune system. If you want to dive deeper into the health benefits of asparagus, check out this informative informative article by Healthline.
Asparagus Inspiration
While the most common way to enjoy roasted asparagus is as a simple side dish, its versatility allows it to shine in various culinary applications. For a hearty main course, incorporate roasted asparagus into pasta dishes or risotto. Asparagus can be used to add depth and texture to salads or grain bowls. It is also a wonderful addition to an omelette or frittata. The versatility of roasted asparagus is impressive and just waiting for you to explore the endless ways to enjoy this spring vegetable.
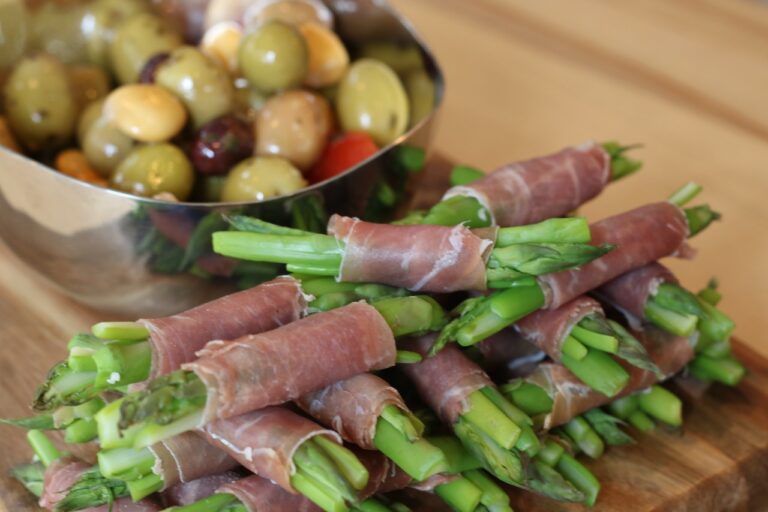
Two Ingredient Appetizer: Prosciutto wrapped Asparagus
Bite sized pieces of asparagus wrapped in prosciutto are an elegant and easy addition to any cocktail hour or dinner party for friends!
To roast asparagus, simply toss with olive oil, salt & pepper and bake for 12-15 minutes until tender. Adjust cook time based on the thickness of the stem.
Course: Side Dish
Cuisine: American, Italian, Mediterranean
Ingredients
2lbsFresh asparagus (not too skinny)
1tbs olive oil
Salt & Pepper
Instructions
Preheat oven to 425°F
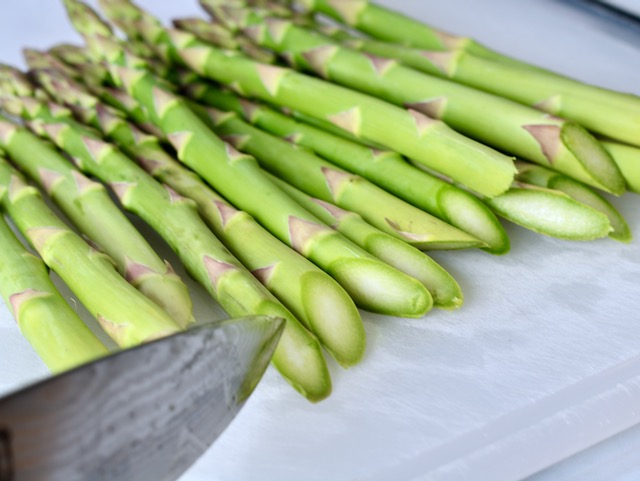
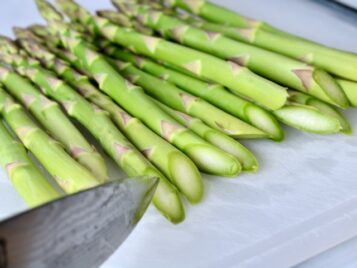
Begin by trimming the tough ends off the asparagus spears. For a nice presentation, slice the spears on an angle.
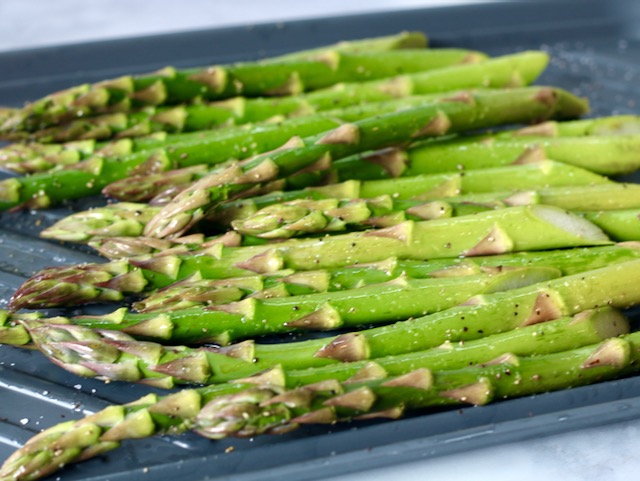
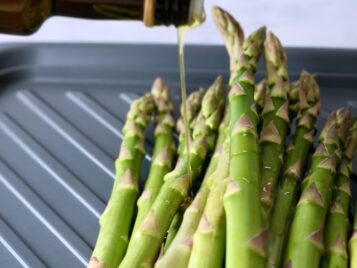
Place the asparagus on a dish and drizzle with olive oil. Then, sprinkle with kosher salt and freshly cracked pepper. Toss them well to evenly coat the spears.
Transfer the seasoned asparagus to a parchment-lined baking sheet, arranging them in a single layer to ensure even cooking. (This is so you leave any excess oil behind on the prep tray)
Bake in an oven preheated to 425°F (220°C) for 12-15 minutes, depending on the thickness of the spears. You want them tender and slightly crispy.
Optional: For an added touch, garnish with a squeeze of fresh lemon juice or grate some Parmesan cheese on top before serving.
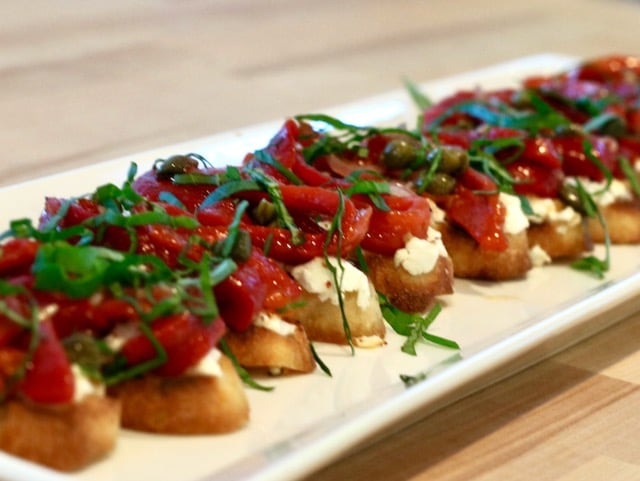
This Goat Cheese and Roasted Pepper Crostini is the perfect balance of creamy, tangy, and smoky flavors. Crispy toasted baguette slices are layered with smooth goat cheese, sweet roasted red peppers, and a hint of fresh herbs for an elegant yet easy appetizer.
Course: Appetizer
Cuisine: Italian
Ingredients
1cupthinly sliced roasted peppers – drained and pated dry.
2TbspExtra Virgin Olive Oil
1Tbspbalsamic vinegar
2clovesminced garlic
.5 tsp kosher salt
1/2tspfresh ground pepper
and 2 tbsp drained capers
8ozgoat cheeseroom temperature
Instructions
In a medium sized bowl, combine the thin sliced roasted peppers with 2 Tbsp Extra Virgin Olive Oil, 1 Tbsp balsamic vinegar, 2 cloves minced garlic, .5 tsp kosher salt (or to taste), 1/2 tsp fresh ground pepper and 2 tbsp drained capers. Cover and marinate for 3-4 hours at room temp. Taste for seasoning.
Top toast points with generous portion of room temperature goat cheese and then top with the roasted pepper mixture. Ensure each piece has a few capers. Garnish with fresh basil and serve immediately.
Ina Garten’s Fried Chicken Sandwich recipe is a must-try for any home cook looking to elevate their fried chicken game. All it takes is a few tips & tricks for foolproof results every time!
I am sure we can all agree that few dishes can rival the appeal and irresistible flavor of the mighty fried chicken. It’s golden hue, it’s moist interior, it’s indulgent crispy crunch- is there anything better? There is! Layering that crispy fried chicken on a soft potato style roll and slathering it with homemade buttermilk herb mayo- it’s life changing!
The secret ingredient to Ina Garten’s Fried Chicken Recipe
Buttermilk is the secret ingredient that sets good fried chicken apart great fried chicken. Not only does it impart a subtle tanginess to the meat, but it also works wonders as a tenderizing agent. By marinating the chicken in buttermilk overnight, or at least for a few hours, the acidity helps break down the proteins, resulting in incredibly tender and juicy meat. This step is how you achieve that perfect chicken texture that defines a truly exceptional fried chicken.
Achieving a flavorful, crispy coating
Ina’s recipe, like many others, calls for seasoning the flour for an added layer of before frying. Adding a simple seasoning of salt, pepper, garlic powder, and paprika adds the perfect amount of added flavor to this already delicious chicken.
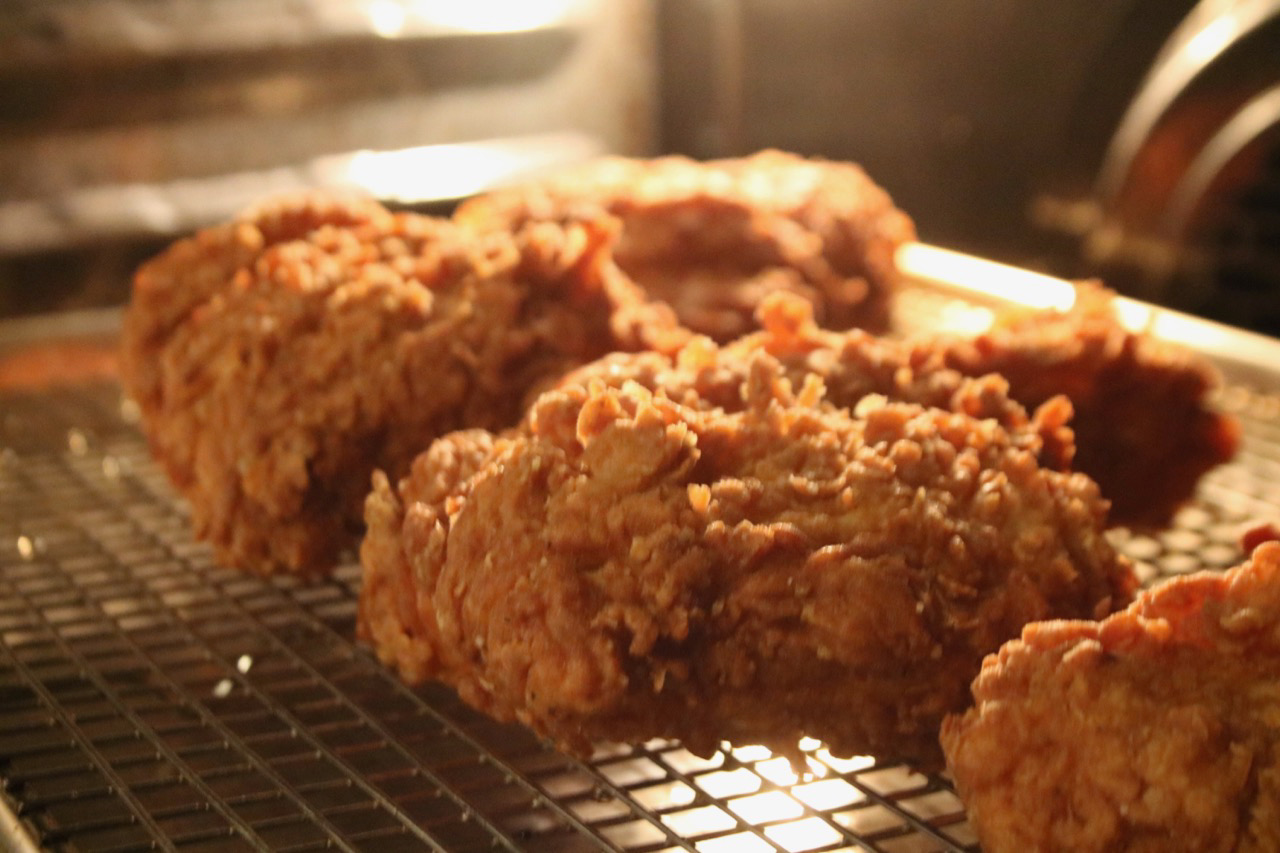
Perfect fried chicken comes down to temperature
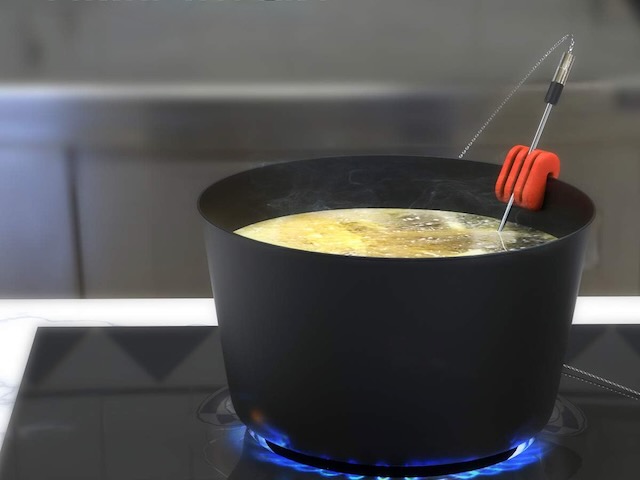
A requirement of all exceptional fried chicken is a crispy, golden-brown coating. Frying chicken may seem like a daunting task, but with the right tools and knowhow, you can perfect the art of frying at home. The oil’s temperature is the most important component of frying. It’s a delicate dance between heat and timing, but using a temperature probe like the Dot (featured below) in the oil, allows you to monitor and adjust the oil temperature throughout the frying process, making the daunting task of frying, accessible to even the most novice home cooks.
Secure your thermometer probe securely to the side of a pot or pan at any depth to monitor the temperature of oil, candy, yogurt, cheese, or any other liquid where temperature is important to maintain.
The Dot™ Probe Thermometer has changed the way I cook forever and I’m not ever looking back! Never again will I over or under cook a roast chicken, a roast beef, or even fried calamari. (Unless I run out of batteries!😂)
If you do choose to invest in a probe thermometer like the DOT, I HIGHLY recommend investing in the universal silicone probe holder featured here which allows you to control the perfect depth of the probe in the oil pot. I can’t imagine frying without it and its a great little gadget.
Fried Chicken is better when shared
One of the joys of making fried chicken is the opportunity to share it with loved ones. No matter the occasion, serving up a platter of crispy, golden chicken by itself or on an amazing sandwich, is sure to delight those you share it with.
Fried chicken is a testament to the power of simple, quality ingredients and time-honored cooking techniques. With its crispy coating, tenderized meat, and irresistible flavor, it’s no wonder this dish has become a beloved favorite in kitchens around the world. So, roll up your sleeves, gather your ingredients, and prepare to wow your crowd with Ina Garten’s Buttermilk Fried Chicken Sandwiches!
Ina Garten's Fried Chicken Sandwich is a must-try for any home cook looking to elevate their fried chicken game. With a few tips & tricks, this recipe is foolproof!
Prep Time45 minutesmins
Cook Time30 minutesmins
Course: dinner, lunch
Cuisine: American, southern
Keyword: fried chicken, southern
Servings: 6
Equipment
Probe or candy thermometer safe for use with hot oil
Large heavy duty pot such as a Dutch oven for frying
Ingredients
Fried Chicken
2cupsbuttermilkshaken
1shallotpeeled, halved lengthwise and thinly sliced crosswise
Kosher dill picklessuch as Claussen, thinly sliced, for serving
Potato Rolls
Buttermilk Herb Mayo
1cupgood mayonnaise
2tablespoonsbuttermilkshaken
1teaspoongood white wine vinegar
2tablespoonsthinly sliced scallionswhite and green parts
1tablespoonminced fresh parsley
1tablespoonminced fresh chives
¹/8 teaspoon minced fresh thyme leaves
Kosher salt and freshly ground black pepper
Instructions
Marinate the Chicken 8 – 24 Hours
In a large bowl, whisk together the buttermilk, shallot, garlic, jalapeño, 2 teaspoons kosher salt and 1 teaspoon black pepper. Place the chicken breasts between 2 pieces of parchment paper and, with a rolling pin or a meat mallet, pound them until they are evenly 1/2 inch thick. Slice each piece of chicken in half crosswise so you have 2 pieces approximately the same size. Place the chicken in the marinade, making sure each piece is well coated, cover with plastic wrap and refrigerate for at least 8 hours or up to (but not more than) 24 hours.
Make the Buttermilk Mayo
Whisk together the mayonnaise, buttermilk, vinegar, scallions, parsley, chives, thyme, ½ teaspoon salt, and ¼ teaspoon pepper in a medium bowl. Cover and refrigerate until ready to use.
Fry the chicken
When ready to cook the chicken, preheat the oven to 300˚. Set a wire rack on a sheet pan and place them in the oven.
In a large bowl, whisk together the flour, baking powder, paprika, cayenne pepper, celery salt, 1 tablespoon kosher salt and 1 1/2 teaspoons black pepper and set aside.
Pour oil into a medium (9-inch round by 4 1/2-inch high) Dutch oven, such as Le Creuset, until it is 2 inches deep. Clip on a candy thermometer and heat the oil over high heat until it reaches 350˚. Meanwhile, lift the chicken from the marinade, dredge it in the flour mixture, submerge it again in the marinade, then again in the flour mixture, lightly shaking off the excess. Transfer the chicken to a plate or sheet pan until ready to fry.
When the oil is 350˚, carefully lower 3 pieces only into the oil with tongs and adjust the heat to keep the oil at 350˚. Don’t crowd the chicken! Cook for 5 minutes, turning once to brown evenly. With an oversized wire slotted spoon or spider, transfer the chicken to the sheet pan in the oven to keep warm. Repeat with the remaining chicken. Sprinkle all the chicken with salt and keep warm for up to 15 minutes, until ready to serve.
Serving suggestions: Serve with coleslaw and buttermilk herb mayo or with pickles on a potato roll.
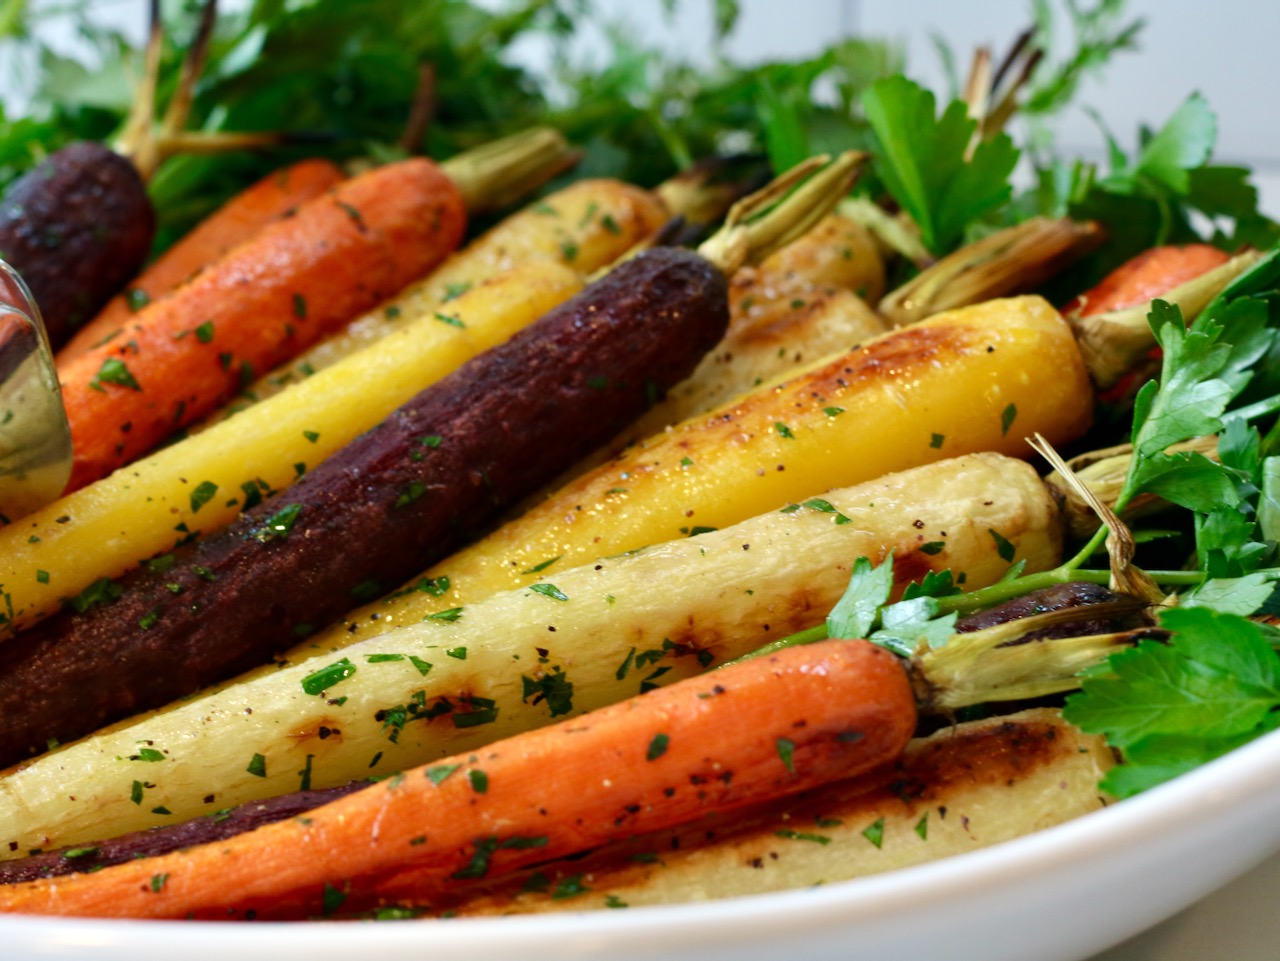
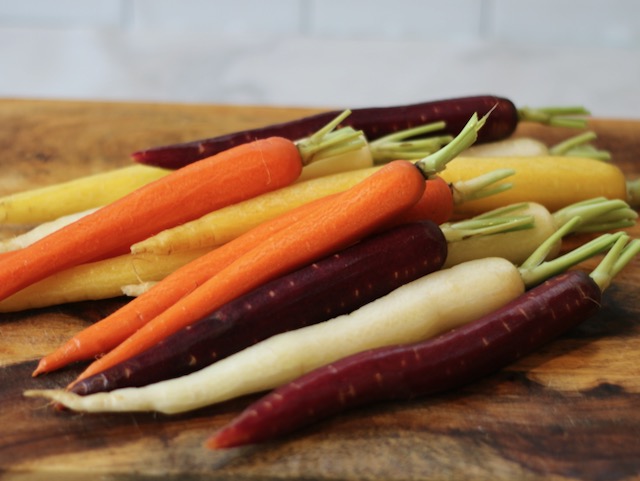
Few vegetables offer the visual appeal and flavor diversity quite like rainbow carrots. These vibrant root vegetables not only elevate the aesthetics of any table, but also pack a punch of sweet, earthy goodness.
Why you should embrace rainbow carrots
Unlike their traditional orange counterparts, rainbow carrots come in a stunning array of colors—red, purple, yellow, and white. Their vivid hues aren’t just for show; they indicate a diverse range of nutrients, each contributing its unique health benefits. From beta-carotene in orange carrots to anthocyanins in purple ones, these pigments offer antioxidants that support overall well-being.
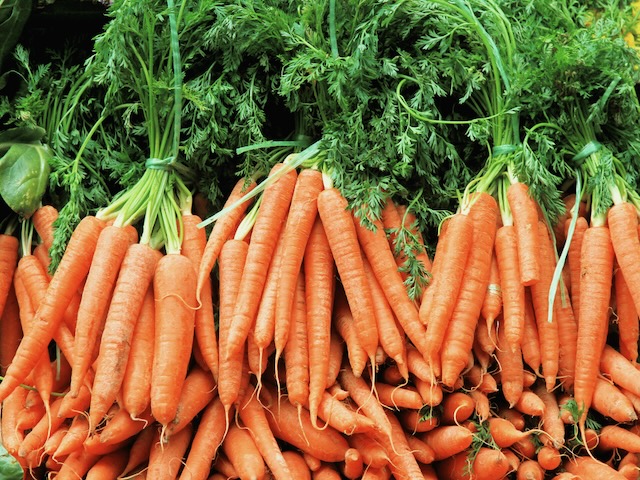
Look for carrots with their leafy greens still attached. This keeps their flavor fresh.
Roasted Carrots are simple, yet spectacular
One of the best ways to enjoy traditional orange or rainbow carrots is by simply roasting them. This cooking method enhances their natural sweetness while imparting a caramelized exterior and a tender interior. The process is remarkably simple, making it great side dish to make for even the most novice cooks. All you need is a baking sheet, some olive oil, a sprinkle of salt and pepper, and of course, a colorful assortment of rainbow carrots!
Get creative with roasted carrots
Roasted rainbow carrots are incredibly versatile, and while I prefer to keep it simple most of the time, these carrots do play well with other flavors allowing for creativity in the kitchen. For a classic touch, try tossing them with fresh herbs like thyme or rosemary before roasting. For a touch of added sweetness, drizzle them with honey and a dash of balsamic vinegar. For a full punch of herbaceous flavor, toss with melted butter and lots of chopped dill before serving.
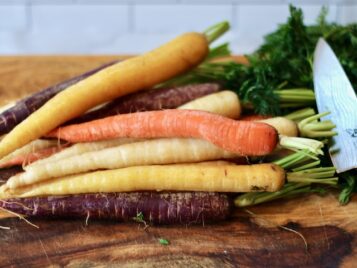
Roasted Rainbow carrots after being washed and peeled
Celebrate the Carrot
Whether you’re hosting a dinner party or preparing a weeknight meal for your family, these vibrant vegetables are sure to brighten your table and delight taste buds. So, embrace the rainbow, unleash your creativity, and savor the simple pleasure of roasted carrots!
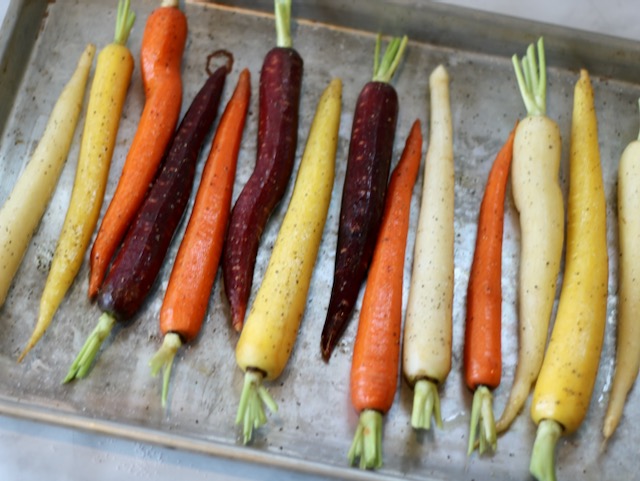
Rainbow carrots tossed with olive oil, salt & pepper are ready for roasting
Pro Tips:
You can use this same recipes for the more easily sourced all orange carrots.
If carrots are very large, slice down the middle lengthwise
If using small carrots, check on them more regularly to prevent them from overcooking
How to pick carrots
According to America’s Test Kitchen carrots with their green tops attached boast rich, true carrot flavor.
These vibrant root vegetables not only elevate the aesthetics of any dish but also pack a punch of sweet, earthy goodness. Roasting carrots enhances their natural sweetness while imparting a caramelized exterior and a tender interior. All you need is a baking sheet, some olive oil, a sprinkle of salt and pepper, and of course, a colorful assortment of rainbow carrots.
Prep Time5 minutesmins
Cook Time25 minutesmins
Course: Side Dish
Cuisine: American
Keyword: carrots, side dish, vegetables
Servings: 6
Ingredients
2lbsmedium sized rainbow carrots (if possible with the green leaves still attached)
2tbsolive oil
1 tspkosher salt
1/2tspfresh black pepper (more or less to taste)
1tbschopped parsley
Instructions
Preheat oven to 425°F and set grate to middle of the oven.
Remove the green stems, leaving 1 inch of stem on the top.
Wash and peel carrots. Cut any abnormally large carrots in half lengthwise to get all the carrots as close in size as possible. (Some variation here is okay!)
Toss the carrots with olive oil and season all sides with salt & pepper. Place on a baking sheet and roast 15 minutes.
Check for doneness, (you are looking for the carrots to be just tender when pierced with the tip of a knife- they will keep cooking once pulled from the oven.)
Flip the carrots and continue to roast for another 10-15 minutes removing any ones that are done as you go.
If you like your carrots with additional color, you can finish the carrots under the broiler for 1-2 minutes, but be sure not to burn!
Garnish with chopped parsley and serve warn or at room temperature.
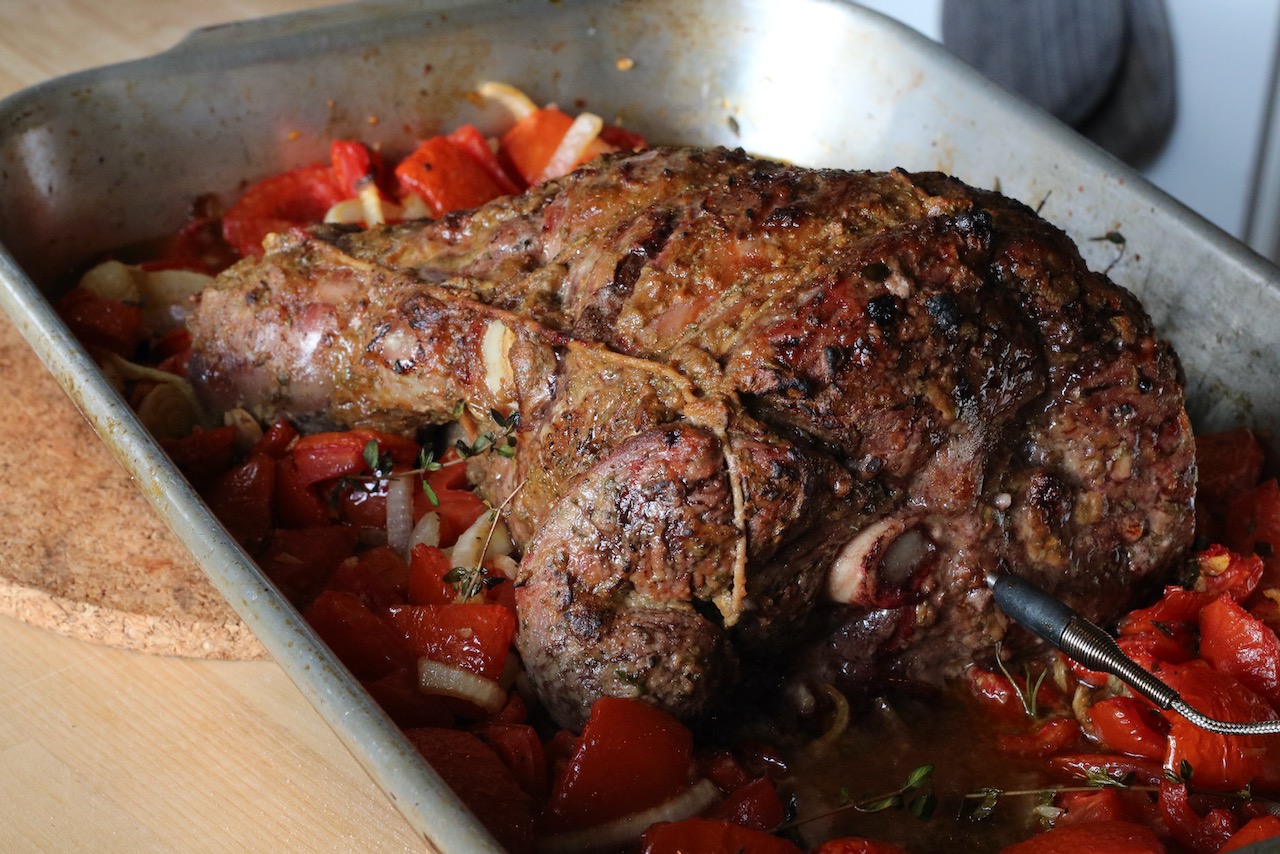
Whether served as the centerpiece of an elegant dinner party or as a cozy family meal, Ina Garten’s Lamb Provencal recipe is guaranteed to elevate any occasion with its exquisite taste and rustic charm.
Infused with the aromatic flavors of Provence, this Lamb Provencal recipe features a leg of lamb marinated in a fragrant blend of garlic, rosemary, thyme, and savory herbs. Slow-roasted to perfection, the lamb emerges from the oven with a golden crust and melt-in-your-mouth tenderness that’s sure to impress even the most discerning palates.
How to select a good cut of Lamb
As with most quality roasts, it all starts with sourcing a good cut of meat. When I am unsure about selecting the right cut or size, chatting honestly with my local butcher is the best way to go. Most butchers are more than happy to share their knowledge and talk about the various cuts of meat.
Thermoworks Dot®
Discover how to achieve perfect temperatures
The Dot™ Probe Thermometer has changed the way I cook forever and I’m not ever looking back! Never again will I over or under cook a roast chicken, a roast beef, or even fried calamari. (Unless I run out of batteries!😂)
Infused with the aromatic flavors of Provence, this succulent dish features a tender leg of lamb marinated in a fragrant blend of garlic, rosemary, thyme, and savory herbs. Slow-roasted to perfection, the lamb emerges from the oven with a golden crust and melt-in-your-mouth tenderness that's sure to impress even the most discerning palates.
Prep Time25 minutesmins
Cook Time2 hourshrs15 minutesmins
Course: Main Course
Cuisine: Mediterranean
Keyword: easter recipes, lamb
Servings: 6people
Author: Ina Garten
Ingredients
16- to 7-pound bone-in leg of lamb, trimmed and tied
1/2cupDijon mustard
3tablespoonschopped garlic9 cloves, divided
1tablespoonchopped fresh rosemary leaves
1tablespoonbalsamic vinegar
Kosher salt and freshly ground black pepper
3poundsripe red tomatoescored and 1-inch-diced
1/2cupgood olive oil
1/2cupgood honeydivided
1large Spanish onionsliced
4sprigs fresh thyme
2sprigs fresh rosemary plus branch of rosemary for garnish
Instructions
Preheat the oven to 450 degrees F.
Place the leg of lamb in a large roasting pan fat side up and pat it dry with paper towels. Combine the mustard, 1 tablespoon of the garlic, the rosemary, balsamic vinegar, 1 tablespoon salt, and 1/2 teaspoon pepper in a mini food processor and pulse until the garlic and rosemary are minced. Spread the mixture on the lamb.
Place the tomatoes, olive oil, 1/4 cup of the honey, the onion, the remaining 2 tablespoons garlic, 2 tablespoons salt, and 2 teaspoons pepper in a bowl and toss well. Pour the tomato mixture around the lamb and tuck in the thyme and rosemary sprigs. Drizzle the lamb with the remaining 1/4 cup of honey.
Roast for 20 minutes. Turn the heat down to 350 degrees F and roast for another 1 to 1 1/4 hours, until a meat thermometer registers 130 to 135 degrees F for medium-rare. Place the lamb on a cutting board, cover with aluminum foil, and allow to rest for 15 minutes. Discard the herb stems and return the tomatoes to the oven to keep warm. Slice the lamb, arrange on a platter, sprinkle with salt and pepper, and serve with the tomatoes and pan juices spooned on top. Garnish with a branch of rosemary.
Notes
Reprinted from Barefoot Contessa How Easy Is That?, Copyright 2010 by Ina Garten
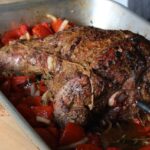
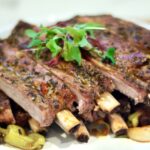
These pork ribs with vinegar peppers are not your average bbq ribs
Once upon a time there was a restaurant nearby us called Anthony’s Coal Fired Pizza. They had great coal fired wings and pizzas, but our absolute favorite thing was Anthony’s Coal Fired Italian Pork Ribs with Vinegar Peppers. We were obsessed! One day we took a drive to this treasured spot and they had closed! We later learned Anthony’s is actually a franchise restaurant and majority of the establishments are located elsewhere in the country. While this gave us hope we would one day have these crave-able ribs once again, I never stopped thinking about them.
Eventually and gratefully, I FINALLY came across a copy cat recipe that did not disappoint! These ribs came out perfect and were as close to how I remember as possible, sans cooking them in a coal fired pizza oven!
What is the difference between Baby Back Ribs & St. Louis Style Ribs?
Let’s get one thing straight- Baby Backs and St Louis Style Ribs are both mouth wateringly delicious when cooked properly. However, they do have some differences.
St. Louis style ribs, also known as “spare ribs”, are larger than baby backs and have both more meat and more fat, but are not always as tender as the popular Baby Backs.
Baby Backs have a noticeable curve in the bones, meat above and below the bone, and are wider on one side and narrower on the other. St. Louis ribs are straight and flat, have more meat in-between the bones rather than above and below it.
Baby Backs come from the loin area which is a more tender area of the pig, and are best known for the “fall off the bone” style bbq. St. Louis Ribs, on the other hand, have tougher meat that while still tender, are best used when you want to have a rib that offers some resistance to it that can hold up to a few independent bites and be able to make clean cuts through each bone without the meat tearing away from it.
How to remove the Rib Membrane
Flip the ribs upside down. Slide a knife between the meat and the thin membrane, which is not recommended to eat. Lift the knife to pull the membrane away from the meat. Use a paper towel to grab it and pull. If you can’t remove it in one pull do it in sections.
What Internal Temperature Should Ribs be cooked to?
The short answer is about 200°F. Then pull and let rest.
Temperature is important because like all meats, there is no “exact amount of time” to guarantee consistent results in any recipe. This is because all cuts of meat are different thickness, contain different fat levels, and even our ovens and grills all cook differently. This is why a meat thermometer is really necessary for ensure a perfect cook. For a very detailed, but easy to follow, lesson on learning how to tell when pork ribs are done, check out this AWESOME article by GrillSeeker.com. It does a great job explaining what visual cues to look for and explaining what does and what doesn’t work.
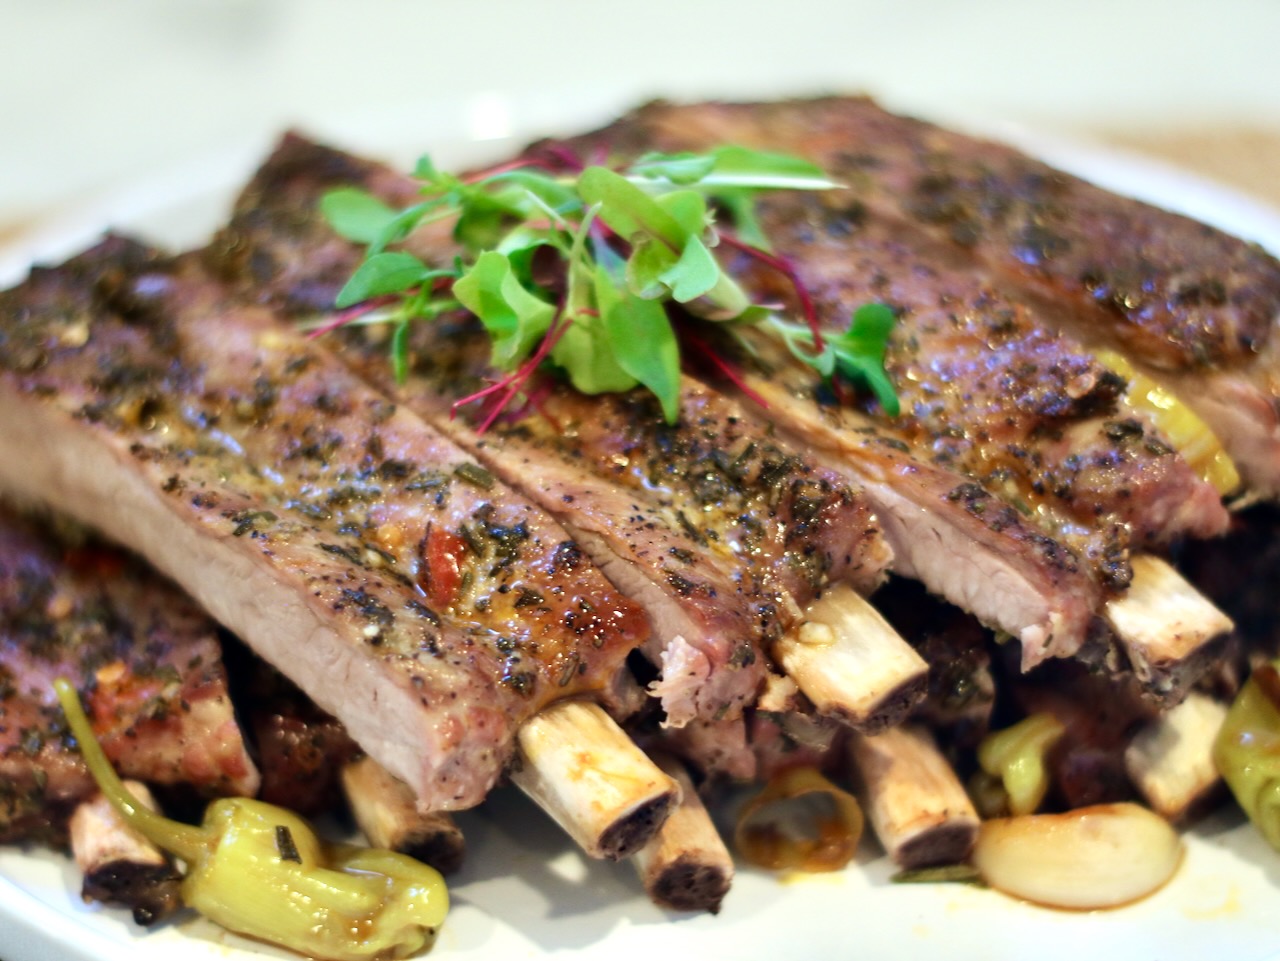
Fall off the Bone Baby Back Ribs
You will love these fall off the bone oven baked ribs! Simply season, cover & bake for about 3 hours. Smoother with barbecue sauce, pile high and serve.
Rustic, Italian inspired pork ribs are seasoned with a garlic and herb rub, roasted and charred in the oven, then finished with white wine and spicy vinegar pickled cherry peppers.
Prep Time10 minutesmins
Cook Time1 hourhr
Course: dinner
Cuisine: American, Italian
Keyword: Ribs
Servings: 2people
Ingredients
1Rack St Louis Style Ribs (Baby Backs work well here too)Trimmed and membrane removed
1Cuppickled, sliced, cherry peppers with the liquid (or Calabrian chili peppers)
In a small bowl, mix together the rub ingredients. Rub ribs on both sides with mixture. Place ribs in a shallow baking pan. (I have an old fashioned aluminum pan that is perfect for this.) Cover the ribs with the Rub Mixture. Cover the pan with foil and cook immediately or refrigerate until ready to cook- up to 24 hours.
Cook the Ribs
Pre-heat the oven to 350°F
Roast the covered ribs for 40 minutes. Test for tenderness. (They should be getting tender, but not falling off the bone.) Raise the temperature to 400 degrees, uncover the pan and roast for about 12 minutes or until the ribs are browned.
Cover the ribs with the cherry tomatoes & their juices and the white wine. (If using Calabrian chili peppers, use half the amount and brush the chopped peppers on the ribs with a silicone brush) Return the pan to the oven for 5 minutes.
When ribs are cool enough to handle, slice in single or double ribs and serve with a little liquid from the pan over each serving.
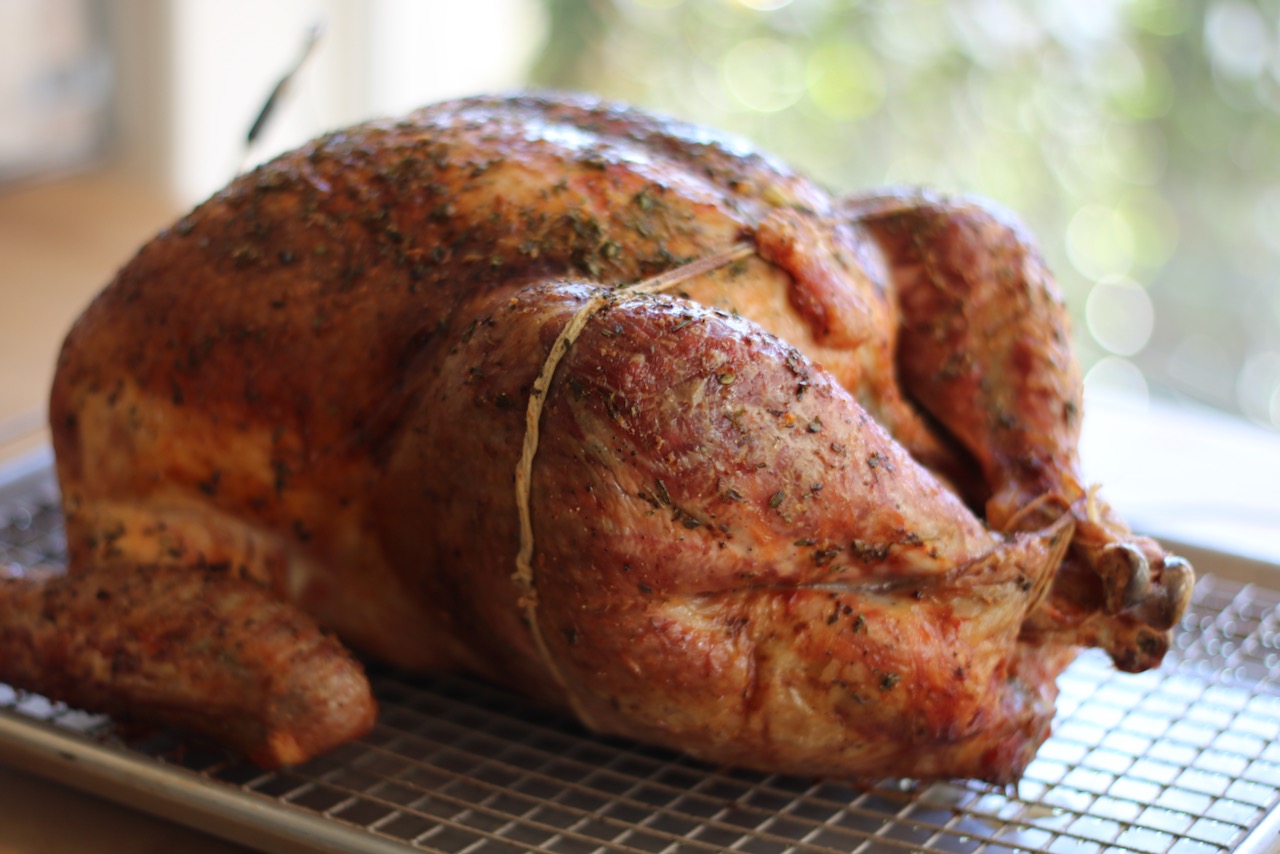
Roasting a turkey has one major conundrum- how to get the white meat to reach 165°F and the dark meat to reach 180°F at the exact same time?! This is a nearly impossible task for any notable chef, let alone a home cook who deals with this challenge only once a year. Here are some helpful tips on how to achieve a perfectly cooked turkey.
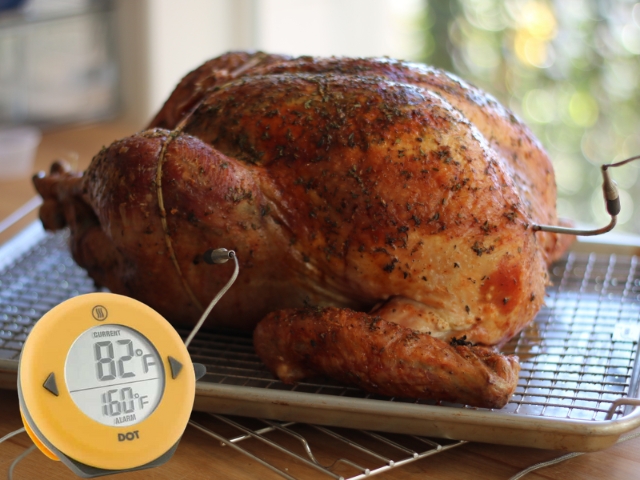
🦃 Use probe thermometers to monitor temp
Temperatures, not times, are the only way you can accurately cook any roast. So the first think we need is reliable probe thermometers to be able to monitor the temperatures of the bird at all times.
I use a ThermoWorks DOT (well, actually I use two, which allows me to monitor two probes at once- one for the dark meat (goal 180°F) and one for the white meat (goal 165°F). Learn More about buying a Dot.
🦃Use ice packs to chill the breasts
Monitoring is great, but it doesn’t solve the problem of how to achieve two very different temps at the exact same time. In order to achieve different temperature, we need to slow the cooking time of the white meat. To do this, remove the bird from the fridge up to 4 hours before roasting. Cover the breasts with ziplock bags filled with ice, held together with a clip.
Icing down the breasts allows the legs, thighs and wings to come up to room temperature while the breasts chill. This results in a cook time lag on the breast meat of about 20-30 degrees during roasting. (Using a tin foil shield on the breasts in addition also helps control and slow the cooking of the breasts.)
The chilled breast meat will allow you to pull the turkey out of the oven when the white meat probe hits 157°F and the dark meat probe registers around 173°F, bringing them as close as possible to their individual goal temperatures of 165°F and 180°F after rest time.
🦃Plan a rest time of two hours
Remember to plan for rest time of about TWO HOURS. Yup, I said it! TWO HOURS. Once removed from the oven, the temperature will continue to rise up to 10 additional degrees and I promise you, the bird will stay hot! It is super insulated, and the longer it rests, the better it will be!
🦃Use a sheet pan, not a traditional roasting pan.
Ditch the traditional roasting pan and opt for a sheet pan. A high sided roasting pan doesn’t allow hot air to reach the part of the turkey that needs hot air to reach it the most. Instead, use a V-shaped rack set inside a sheet pan which allows the thighs to be lifted and hot air to circulate around them, or a sheet pan with a raised grid which also allows air to move evenly around the roast. Otherwise, you will end up with an over browned top, and a slower cooked and uncrispy bottom.
If you are looking for an even more detailed guide of turkey dos and don’ts, especially in regards to temperature, check out this blog post from Thermoworks.
This slow cooker shredded turkey recipe starts with succulent turkey breast cooked to tender perfection. Seasoned generously with aromatic herbs then slow-cooked to achieve unparalleled tenderness, the turkey is then delicately shredded, revealing its moist and juicy interior.
Elegant, delicious, festive & unique. This turkey stuffed with classic stuffing & cranberry sauce and smothered in gravy is the best of a classic Thanksgiving dinner rolled into the very best bite. What’s better? It can be made in advance.
The combinations of herbs in this recipe create a really wonderful savory crust that is simply delicious! The best part is that anyone can make this turkey- it’s that easy!
Flatbread style pizza is layered with tart cranberry sauce, covered in shredded turkey, topped with savory stuffing then smothered with cheddar cheese and finished with gravy!
Perfectly crafted gravy is the crowning touch to your holiday feast with unparalleled warmth and depth of flavor. Explore how to make gravy ahead to clear your stovetop and get maximum flavor.
Light, fluffy mashed potatoes are everyone’s favorite side dish! With these tips for make ahead mashed potatoes, the cook can enjoy the mash as much as the guests.