There was a time when the kitchen felt like the center of everything in my life — music playing, food simmering, conversations unfolding naturally. Hosting came from abundance. From familiarity. From a life that had a predictable shape. I could do it with my eyes closed, and I loved cooking for other people.
It doesn’t come easily to me anymore. And I miss it terribly.
I still want to plan meals and think about menus and set a table that makes people feel welcome. The desire is there. But the execution isn’t. I can’t seem to bring it together. I can’t even remember the last time I hosted a dinner — I think it was August of 2024, for my friend Frank’s birthday. That night stands out because it may have been the last time before things really started to fall apart.
Divorce takes time in ways no one really prepares you for. Not just emotionally, but practically. The paperwork. Accounts being divided. Address changes. New email accounts. Credit cards. Cell phone plans. Insurance. Responsibilities that arrive all at once and don’t care how tired you are. Learning how to survive on a single salary after building an entire adult life around two.
It’s administrative and exhausting and constant. It hums in the background of everything. It’s relentless.
And all of that exists alongside the good things.
New people. New connections. Moments of genuine laughter. Small sparks of excitement I didn’t expect to feel again. I often feel suspended between who I was and who I’m becoming — not fully either, but carrying pieces of both.
I heard a song recently that stopped me in my tracks — Two Things Can Be True. It put words to something I’ve been living without knowing how to name.
I am overwhelmed by the realities of rebuilding a life, and still grateful for what’s growing. I am grieving what’s gone while feeling hope for what’s ahead. I miss the ease of my old identity while trusting that something meaningful may return in a different form.
Two things can be true.
Right now, I’m learning to let both truths sit at the same table.
I don’t have answers yet. I don’t have a new rhythm fully formed. What I do have is honesty about where I am — and permission to stop pretending I have energy for things I don’t.
People assume you’re grieving the breakup. And yes, of course you are. But the truth is bigger, harder to explain, and nearly impossible for people who haven’t lived it to understand.
When someone leaves after two decades, they don’t just take themselves. They take the traditions, the rhythm, the structure, the “us” that once made the season make sense.
You’re left standing in the middle of your home holding ornaments from a life that doesn’t exist anymore.
And no one talks about that part.
What do you do with the decorations?
This is the question that ambushes you — in a basement, in an attic, or a storage unit where the air smells like cardboard and endings.
You open a box and feel your stomach drop. Not because it’s filled with Christmas décor, but because it’s filled with your old identity.
Stockings you chose together. An ornament from your first year of marriage. A tree skirt you bought during a year when you still believed in forever.
You ask yourself: Do I throw these out? Do I keep them? Do I force myself to use them so it all feels “normal”? What even is normal now?
No answer feels right. And that’s the part no one talks about — how the smallest things become emotional landmines.
Family can feel “too familiar” to feel comfortable
Family is supposed to feel comforting. And mine really is loving and supportive in all the ways that matter.
But healing can make even familiar spaces feel unfamiliar. Sometimes being with the people who know you best brings up old versions of yourself — versions you can’t quite access anymore. It’s not about them at all. It’s about how much your life has shifted.
They remember the “before” you. You feel that version when you’re around them. And you miss the old you. But that person doesn’t exist anymore. And not by choice. The contrast can sting in ways that are hard to put into words.
None of that is their fault. Friends and Family care. They want to help. They show up.
It’s just that their traditions, their rhythms, their normal — all highlight how much your world has changed.
The grief isn’t about them. It’s about realizing you don’t feel like the same person anymore, even in the places that once felt most like home. But their traditions remind you of who you were before your world shifted in a single moment. And it feels really, really heavy.
And then there’s the new chapter
A new home. A new space. Someone else’s traditions already in motion.
It’s tender, beautiful, and strangely disorienting to build a sense of “yours” in a place that was fully “theirs” long before you arrived. You’re grateful to be welcomed into a warm, loving, established holiday rhythm — yet quietly aware that you’re still figuring out where your own pieces fit, and which ones you even want to keep.
All while carrying the truth that your name has been pulled off Christmas card lists, that you won’t be invited to chicstmas parties or celebration dinners with old friends, and that the Christmas Eve tradition you once treasured doens’t exisit for you anymore, because “he” will probably be there, so you can’t be. It’s all so confusing.
There’s no guidebook for how to blend your past, your grief, and someone else’s long-held traditions. I’m just trying to learn as I go.
So I’m not trying to reinvent anything this year
I’m not forcing myself to be festive. I’m not trying to create brand-new traditions overnight. I’m not pretending to be healed or wise or above it all.
I’m doing one small thing at a time. Whatever doesn’t hurt. Whatever feels honest.
Maybe I’ll light a Christmas candle. Maybe I’ll cook something comforting. Maybe I’ll simply admit, “This is still hard, and that’s okay.”
And maybe that’s enough for now
Not a lesson. Not advice. Just the truth of where I am.
I’m slowly rebuilding a life that feels like mine — and trusting that, in time, the holidays will begin to feel like mine again too.
For nearly two decades, Friendsgiving was my holiday. Some years it was an elegant dinner party, others it was an all-out rager—but no matter the form, it was always a celebration of food, friendship, and good times. I’d spend days (weeks) planning, cooking, and setting up the gratitude tree. And every year, without fail, my friends looked forward to one thing most: my Thanksgiving Pizza.
A flatbread layered with cranberry sauce, shredded turkey, stuffing, melted cheese, and a drizzle of gravy—the ultimate bite of Thanksgiving comfort. It started as a leftover experiment and became a tradition that outlasted many others.
I would often decorate my tree early, in time for Thanksgiving, with leaves, lights and custom cut outs with conversation starters and statements of gratitude.
This year, one year after my husband left to start a new life, I find myself reflecting on those memories with a complicated mix of joy and ache. I miss those days. The laughter, the fullness—both of heart and table. I am trying to make peace with the memories, but it’s harder than most can imagine. Sometimes I scroll through old photos and feel the warmth of those moments rise up—then just as quickly, a wave of sadness follows. My mind whispers, If it ended, did it even matter?
But deep down, I know it did. The joy was real. The laughter, the toasts, the music echoing through the kitchen—it all mattered. Even if that chapter closed, it was once full of love. I’m still learning to hold both truths at once: that something can be beautiful and still end; that gratitude and grief can share the same table.
So, as I move through this holiday season, I’m grateful for both the old and the new—the people who once filled my home, and the ones who will someday gather around my table again. One day, I’ll host another Friendsgiving, with new faces and fresh traditions. And when I do, I’ll proudly make that Thanksgiving Pizza again—because some traditions are worth keeping.
Until then, I wish you a holiday filled with love, laughter, and the kind of feast and merriment that makes memories worth savoring.
When tradition was too hard to face, I embraced a new culture.
Last year was the hardest Thanksgiving of my life. I was too fragile to be alone, yet too broken to join a holiday table. My world had just collapsed, and I could barely eat, let alone celebrate. My sister and cousin—two of the most wonderful humans in the world—didn’t leave my side. They each canceled their own plans with their families and significant others, choosing instead to sit with me during one of the darkest weeks of my life.
I can’t recall who suggested it, but one of them said we should do something completely different that year—no turkey, no stuffing, no reminders of what I’d lost. “Let’s go out for Greek,” they said, and that’s exactly what we did.
The idea felt strange at first, but I agreed because I couldn’t bear anything that resembled the life I once knew. The thought of other families gathered around their tables, laughing, sharing, celebrating—it was too much. My husband had already moved on with someone else long before he officially left. That week, he was with her. I knew it. And that truth lived like a weight in my chest I couldn’t breathe through.
When we arrived at the bustling Greek restaurant in upstate New York, we were welcomed joyfully to sit amongst the many others who, for whatever reasons of their own, were also not celebrating Thanksgiving in the traditional manner. There was something comforting about knowing I wasn’t the only one who needed a reason to be there and not somewhere else that evening. It smelled of lemon, garlic, and roasted tomatoes—warm, but not familiar.
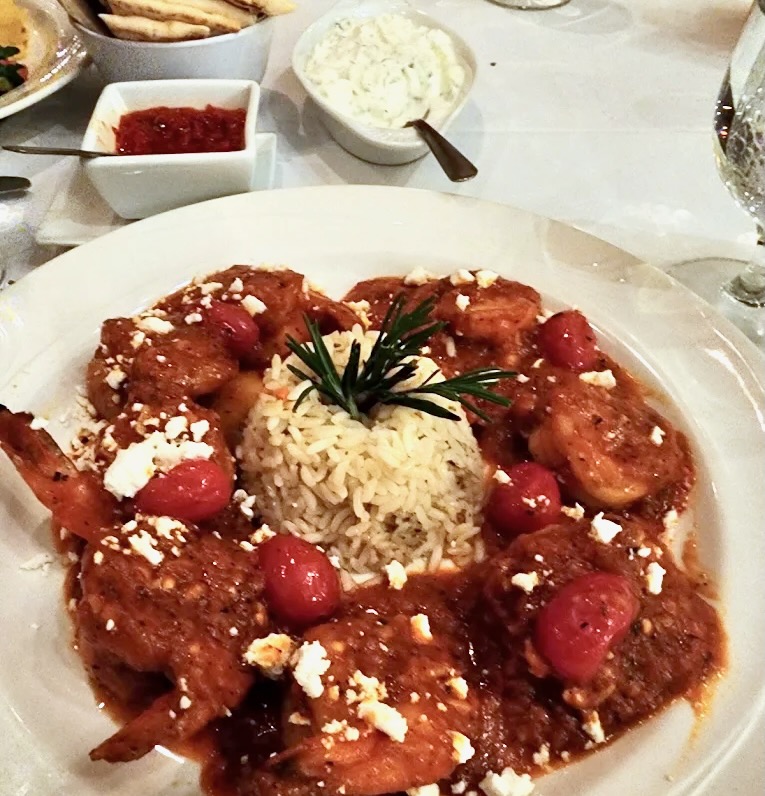
I sat there, quiet, unable to pretend I was having fun, but for the first time in days, I decided to try a real meal. I ordered shrimp baked with tomatoes and feta. The dish was rich with olive oil, garlic, and herbs—finished with briny melted feta that finished the dish. It was simple, but soulful. And it was as far away from a traditional Thanksgiving dinner as I could get. It was in that Greek restaurant, surrounded by two people who refused to let me face the world alone, I began to realize how different my life was about to become. It was both a humbling and overwhelming realization.
This is the very meal I ate that night- Greek shrimp with tomatoes and feta from Athos Restaurant in Albany, NY
That meal was the first thing that stayed down in days—and it would become one of the last full meals I ate for a long time to come. Dark days were ahead for me, and my relationship with food would reflect that.
As I reflect on the anniversary of that time in my life, I wanted to honor it by recreating the meal that marked the end of Thanksgiving as I once knew it—and the beginning of something unknown. It reminds me that comfort doesn’t always come from what’s familiar. Sometimes it’s found in the unexpected—new flavors, new traditions, new beginnings.
I’ve always believed that food tells our stories—especially the ones we don’t have words for. And for a long time, I couldn’t tell mine…
When my marriage ended unexpectedly, the kitchen—a place that once felt alive and creative—fell silent. Cooking had always been my love language, not just to others but also to myself. But when love itself felt lost, so did my connection to food. There were nights I tried to cook again. I’d plan something, gather the ingredients, and then abandon it halfway through. Other nights, I’d make a full meal… only to let it sit untouched on the counter until morning.
I wanted to want food again, but I just couldn’t.
I lost a lot of weight on this journey—not because I wanted to, but because food just made me sad. Every meal reminded me of a memory– then just as quickly, I’d be reminded that no new memories were being made around my dining room table that was once filled with feast and merriment. It was all too much.
Grief robs you of your appetite. It robs you of energy, taste, curiosity—sometimes even the will to nurture yourself.
Friends & Support
What I didn’t expect was how grief changes your social appetite too.
When you go from being in a couple to being single, something really hard happens. You stop getting invited to dinners and events and social occasions that you once were an integral part of. You get treated as if there is something wrong with you. And people treat you like you have something contagious that they don’t want to catch. I’m come to call it divorce disease. Then, there are the times you do get an invitation and you can’t tell if it’s pity, or if people still genuinely want you there. Your new single nature makes everyone uncomfortable– but no one more than the person who has show up newly alone and go home feeling embarrassed, uncomfortable and unsteady about it all. It’s one of the hardest things to overcome when you have to go through this. It’s all a mind game. And it all happens around a table.
So for a long time, I avoided those gatherings. The thought of clinking glasses and small talk around shared plates made me ache with discomfort. I would stress over the check coming and how to pay for my single, uneaten portion, when surrounded by couples—things I hadn’t had to consider in more than twenty years.
Then, slowly, small threads began to pull me back toward connection. A check-in from an old friend. A dinner invitation from a new one. A place saved for me at a holiday table. Each small kindness reminded me that I was still part of the world—and that I mattered.
It was during this time that one person—someone patient and kind —began to remind me what nourishment could feel like again. A dinner invitation that would, in time, change everything. But in that moment, the bravery came simply from me saying yes to sitting down and sharing a meal, and keeping it down. The courage to let someone in who cared enough to feed not just my body, but also my spirit.
Beginning to recognize and accept those quiet acts of care were the signs of the healing—proof that comfort isn’t just something we eat. It’s something we offer each other as humans.
Back to roots with comfort food.
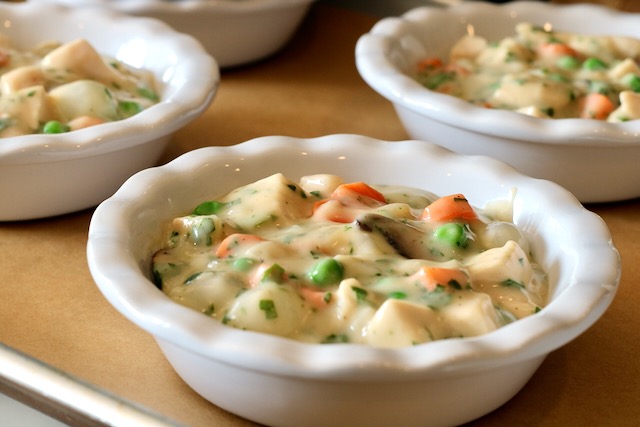
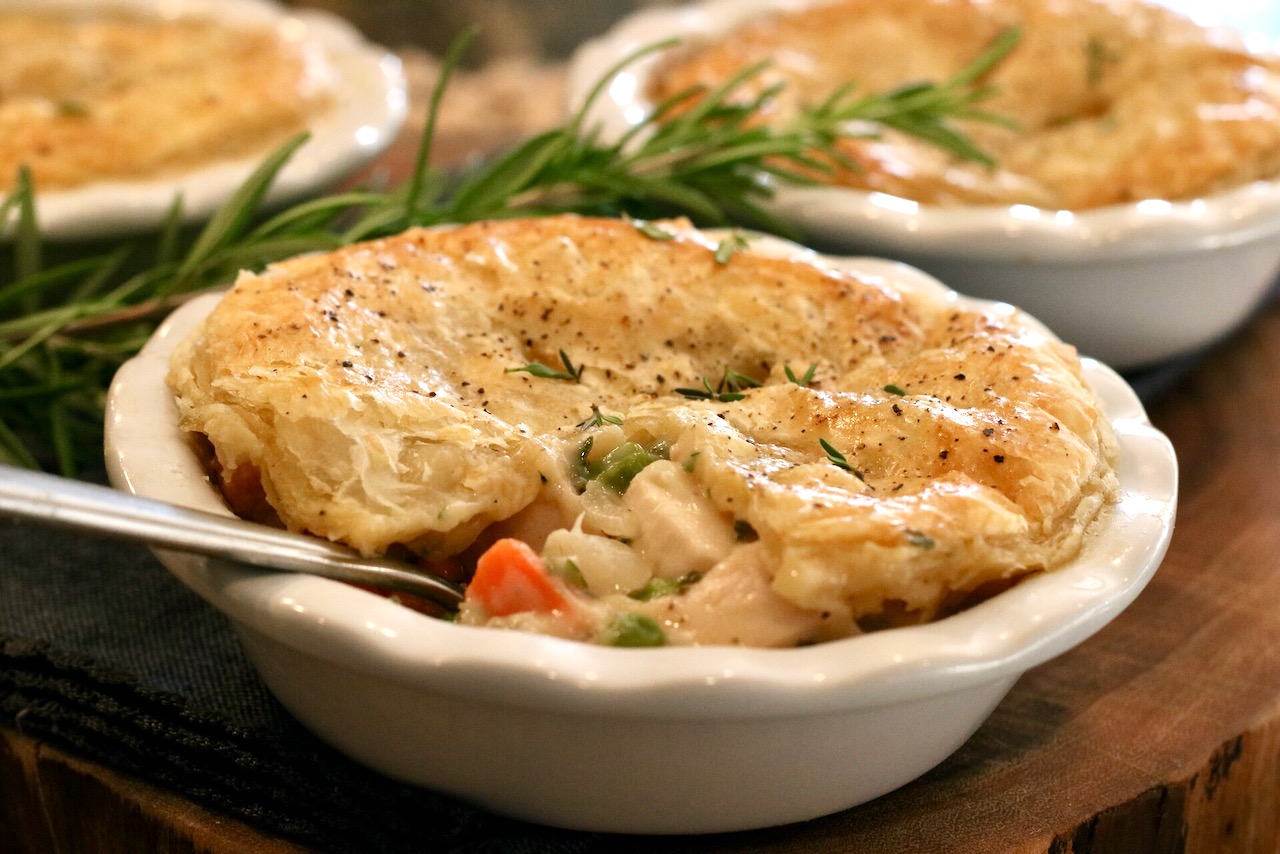
When I was a kid, chicken pot pie was my favorite dinner. Not the homemade kind—the ones that came frozen from the grocery store in a little foil tin. I didn’t wait by the oven or watch it brown; I just looked forward to it being ready to eat. I didn’t know it then, but chicken pot pie was my childhood comfort food.
Years later, when I started Feast & Merriment, one of the first recipes I shared was a homemade version of that childhood favorite. It even ended up published in Greenwich Lifestyle Magazine as a feature recipe. Back then, when it was published, food was my greatest joy—a way to show love, inspire connection, and make people feel cared for.
It’s funny how food can carry us home, even when “home” no longer looks the same. Maybe that’s why comfort food is called comfort food. It doesn’t just taste good—it reminds us that even after loss, there’s still warmth to be found.
So, as I relaunch Feast & Merriment 2.0, it only feels right to start where it all began—with the dish that started it all back in 2010.
No data was found
So here’s to nourishment in all its forms—the meals we share, the ones we abandon, and the ones that remind us, slowly and tenderly, that we’re still alive.
With love and gratitude, Chrissy 💛
What’s your ultimate comfort food? I’d like to know.
Is it something your mom made? Something you discovered later in life? Share your story in the comments below.
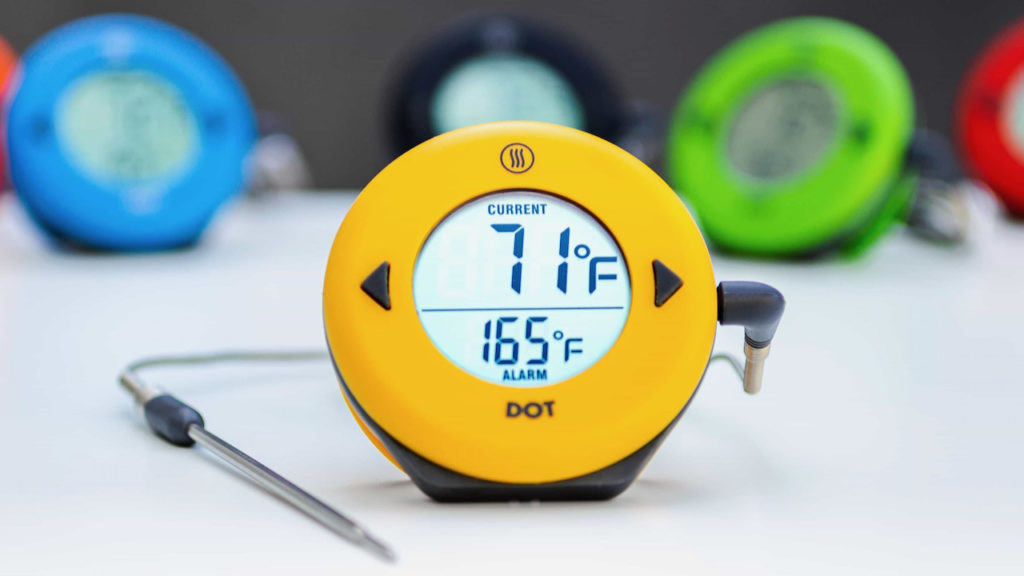
The Thermoworks Dot® is the best leave in probe thermometer for for meat, fish & oil.
What is the Thermoworks Dot®
Simply put, the The Thermoworks Dot® is the best leave in probe thermometer for for meat, fish & oil. is a device that a probe is connected to. The probe is oven safe and monitors the temperature of anything including roasts, single steaks, fish and even frying oil. Imagine never having to worry about over or under cooking a cut of meat? That’s what this article is all about.
The Thermoworks Dot® is provides accurate and constant temperature readings so you can achieve perfectly cooked meals every time. A must-have for any home cook.
The Dot ensures I cook any roast to perfection!
When I started cooking as a hobby, I didn’t fully appreciate the value of a good meat thermometer, especially a “leave in” probe version that monitors the temperature of the meat while it cooks. Like many beginner cooks, I cooked mostly by time tables, recipe instructions, look and feel, but that never worked out perfectly. As I grew as a cook, I recognized the stress involved with achieving perfectly cooked meats. Hobbies aren’t supposed to be stressful! The Thermoworks meat thermometers changed everything for me. It gave me the ability to produce perfectly cooked roasts, steaks and even master the temp of oil while frying! My skills and passion for cooking shot up to the next level.
Understanding the DOT’s value
Let’s stop for a minute and do some basic calculations. I want you to think about your favorite roast recipe to use that as your benchmark, and then consider the average amount of time you spend sourcing, purchasing and prepping that cut of meat. Do you have that time frame in your mind? Now calculate the average amount of money spent on this meat, along with all the necessary seasonings. Now ask yourself, is their value in protecting the money and the time you have just invested in this meal? What is it worth to you to perfect this dish? I am going to assume that if you are reading this, we both already know the answer. You would have to be crazy to choose the “fingers crossed” method to ensure a perfectly cooked medium rare filet of beef or a throughly cooked turkey.
Thermoworks Dot® is the best leave in probe thermometer for for meat, fish & oil. vs the others
My now addiction to Thermoworks thermometers started with (And a cut of beef tenderloin!)
I had tried over versions of in-oven thermometers over the years and frankly, they don’t even compare. I had purchased a less expensive version from Amazon, that despite its great reviews, was made of cheap plastic, smelled toxic and was complicated to use. I used it maybe twice and it found its way to the back of a drawer somewhere.
I have used my own range’s built in thermometer many times (which comes fairly standard these days, yet no one seems to know about it). The problem with the built-in range thermometer was that is was highly inaccurate, hard to test accuracy, and the probe was very thick in comparison to Thermoworks meat thermometer’s slender probes. (They even make a needle probe for small, delicate cuts of meat!)
Determined to find a way to cook meats to perfection, I did extensive research on kitchen thermometers. I learned that Thermoworks was, by far, the leader in the industry, was recommended by chefs I follow like Alton Brown and Ina Garten, and America’s test kitchen, which I subscribe to and trust. So I decided to invest in my first Thermoworks purchase. My biggest regret was waiting so long to purchase a Thermoworks meat thermometer because it wasn’t long before I realized it was of the best kitchen investments I had ever made.
Thermoworks themselves apart from their competitors not just because of their superior products, but also because of their exceptional resources available to users. They provide easy to follow instructions, online support, instructional videos, temperature suggestions, recipes, and so much more. It’s rare to find a company with so much dedication to ensuring a good product experience to their users.
“I don’t just have one, I have three.”
Roasting two pork tenderloins at once, I can see the exact temperature of each.
I started off with one Thermoworks Dot® and after using to make a beef tenderloin without the stress of overcooking it, I was hooked! I ordered two more. Having multiples is now important to me because cuts of steak are often different thicknesses, pork tenderloins are different sizes, and sometimes I roast two chicken. Additionally, I often cook for folks who prefer a medium-well beef to my preferred medium-rare, so having multiples allows me more control.
Gifts for foodies
Within one month of my first Dot®, I ordered three more as gifts, because I couldn’t imagine each of my family members not having one.
While my sister and cousin trusted me and jumped right on the bandwagon, my mom was the most reluctant to embrace her gifted DOT. She is a bit more “old school” and frankly, less in need of a thermometer because, well, she cooks everything until it dry as a bone before declaring it done. (Sorry, Mom!) But, eventually, she took the plunge. And I am thrilled to report that mom is now one of the DOT’s biggest fans and uses it all the time!
The Dot® has quite literally, improved my cooking life. Because of the Dot®, I know that when I invest in a cut of rib eye, a roast chicken, a pork rib roast, or a cut of beef tenderloin, it’s going to be cooked to perfection. The Thermoworks Dot® tells me the exact internal temperature throughout the cooking process, and alerts me when my target temp is reached.
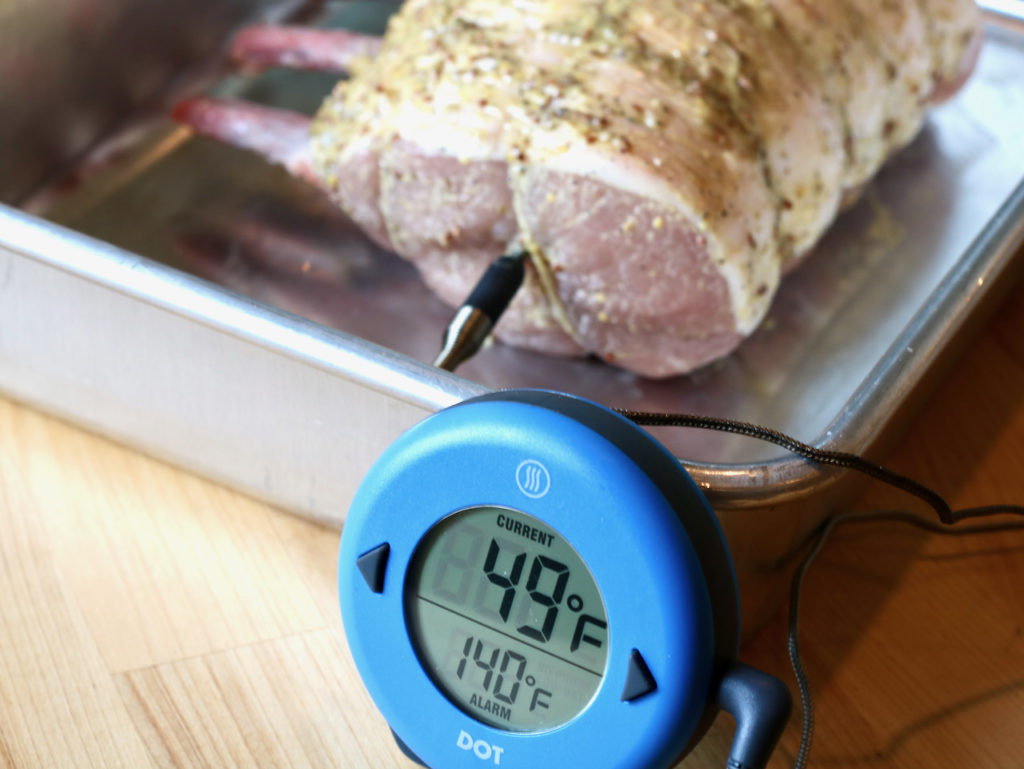
The Dot® is a simple to use in-oven thermometer. This means that you insert the probe into the center of the meat prior to putting it in the oven. You then set a target temperature using easy to use up and down buttons. Once set, the roast or steak goes in the oven. The Thermoworks meat thermometer digital display indicates the current internal temperature throughout the cooking process, which allows you to estimate time left until the meat is done, which means you can time your side dishes and the rest of your meal perfectly! Once the target temperature is reached, the meat thermometer will sound an alarm alerting you that your meat is done.
I cook pork roasts until 140° F and let it rest for at least 20 minutes, which brings the temperature up considerably, while also ensuring a juicy roast.
Cooking Tips
Always, always, always give your meat plenty of time to rest. Everyone underestimates the impact rest time has on the juiciness and tenderness of any meat. It will keep cooking for much longer than you think! Turkeys need at least 30 minutes of rest time.
Get to know your preferred temperatures. I like medium-rare beef so I set my DOT meat thermometer to 126°F degrees F. After rest time, it reaches about 130-132°F. I like bone in pork roast cooked medium to medium-well, so I set my DOT to 140°F and let it rest, which then reaches about 150+° F, depending on the cut.
Take time to check your thermometer’s accuracy using a properly made Ice Bath. (Instructions and resources come with all Thermoworks products. Their customer service and resources set Thermoworks apart from the rest.)
Change your batteries.
Thermoworks Products that I own, love and highly recommend:
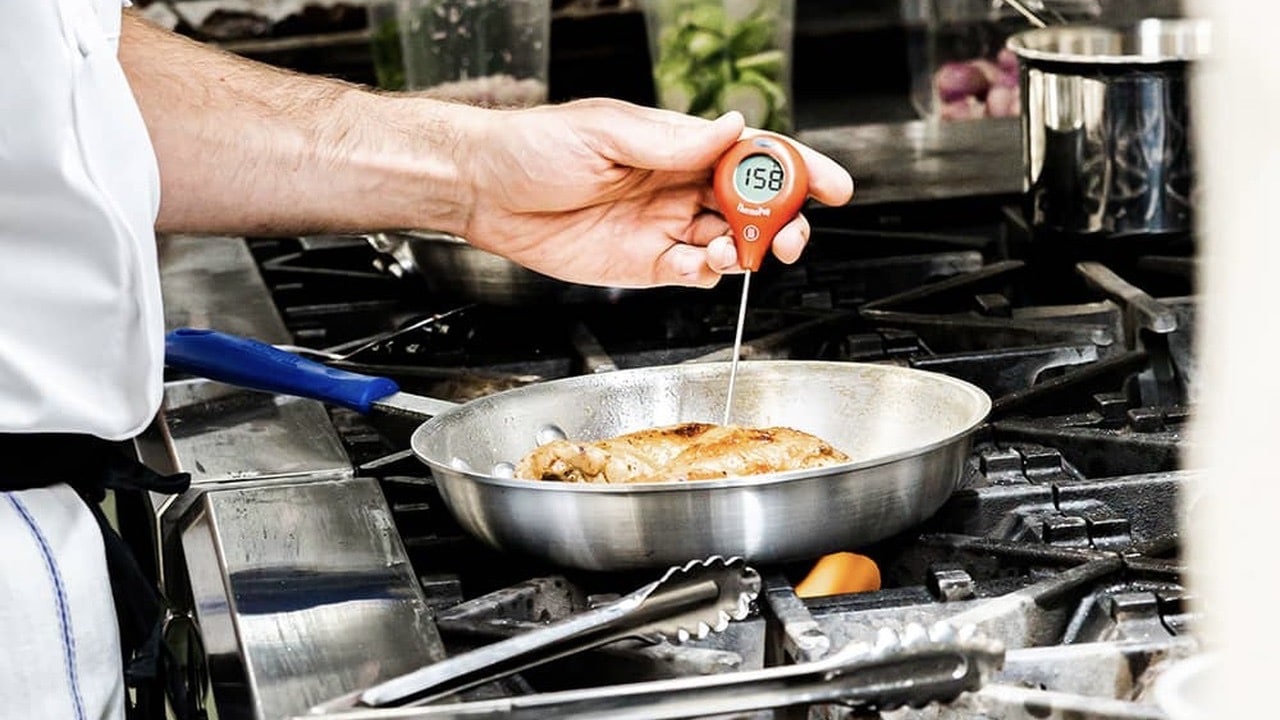
The Thermopop is a great tool for novice chefs who are just getting started with working with Thermometers, as well as the professional cook who simply wants a quick, reliable temperature reading. No bells and whistles, just the real dea
The Classic Thermapen takes readings in less than three seconds, is accurate to less than a degree, and is designed to last for a long time not come. It turns on by opening the probe, so there are no one and off buttons to worry about. It folds up for easy storage.
This is a french inspired "cheater's" version of an empanada. This recipe uses store bought puff pastry instead of a traditional home made pastry dough and is stuffed with a savory filling of diced hame, sautéed leeks, spinach and gruyere cheese. It's an excellent lunch or savory first course.
Prep Time30 minutesmins
Cooling Time5 minutesmins
Course: Appetizer, lunch
Cuisine: French, International, spanish
Keyword: puff pastry, tapas
Servings: 4people
Ingredients
3/4Tbsp.unsalted butter
3/4cupssmall-diced leeks,white and light green parts only
1/4cupcrème fraîche
2ouncessmoked hamsuch as Black Forest, cut into 1/4″ dice
2ouncesGruyère cheesegrated
1ounces1 cups baby spinach, coarsely chopped
1Tbsp.julienned basil leaves
1/4cupgrated Parmesan
3/4tsp.kosher salt
1/4tsp.ground black pepperplus more for sprinkling
1large egg
2Tbsp.milk
All-purpose flourfor rolling
1.5sheets frozen puff pastrydefrosted (1 package)
Fleur de sel or sea salt for sprinkling
Instructions
Preheat oven to 400°.
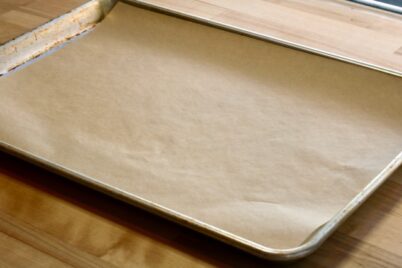
Line a sheet pan with parchment paper. Set aside.
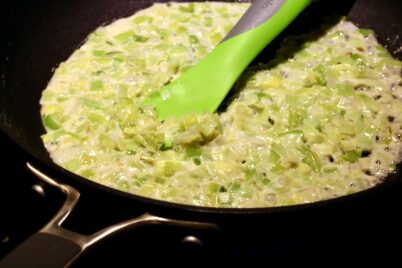
In a medium saute pan, melt butter over medium-low heat. Add leeks and sauté until tender but not browned, about 4 minutes. Stir in crème fraîche and simmer 1 minute. Set aside
In a medium bowl, mix ham and Gruyère. Add leek mixture, spinach, basil, Parmesan, salt, and black pepper. Mix and set aside.
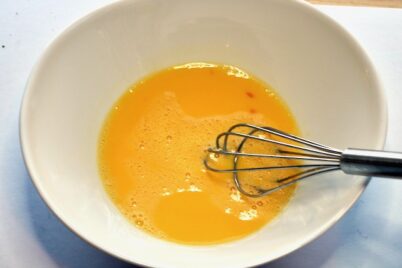
In a small bowl, whisk together egg and milk
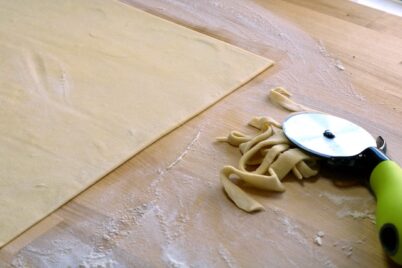
Sprinkle a cutting board with flour, roll out 1 sheet of the puff pastry to an 11" x 11" square, and cut into 4 equal squares. Trim the edges for clean sides. (Tip: Use a pizza cutter to cut the pastry dough.)
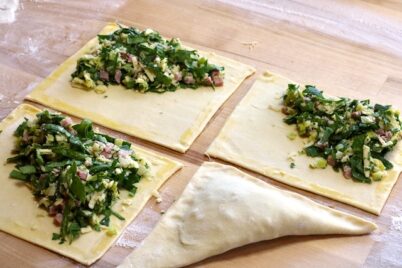
Brush edges of each square with egg wash. Place 1/3 cup of the ham and cheese filling in the center of each square. Fold each square diagonally to form a triangle, lining up edges of pastry.
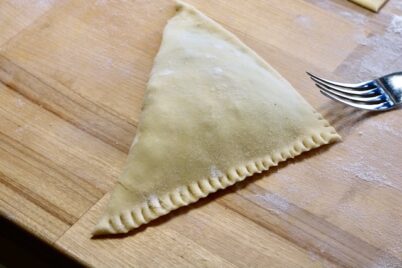
Press edges with tines of a fork to seal.
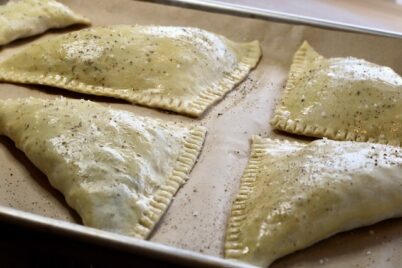
Place empanadas on prepared sheet pans and brush each with egg wash and sprinkle with fleur de sel and pepper.
Bake until puffed and golden brown, 20 to 25 minutes. Allow to cool 5 minutes before serving.
Notes
Make Ahead Pro Tips!
To make ahead and freeze, assemble completely but do not bake. Place assembled empanadas on the sheet pan in the freezer. When frozen, transfer empanadas to a resealable plastic bag or vacuum seal.
You don’t have to thaw before baking, but you might have to add a couple of minutes to the baking time.
To make ahead and refrigerate, assemble completely and refrigerate up to 2 days in advance of baking. Bake according to instructions.
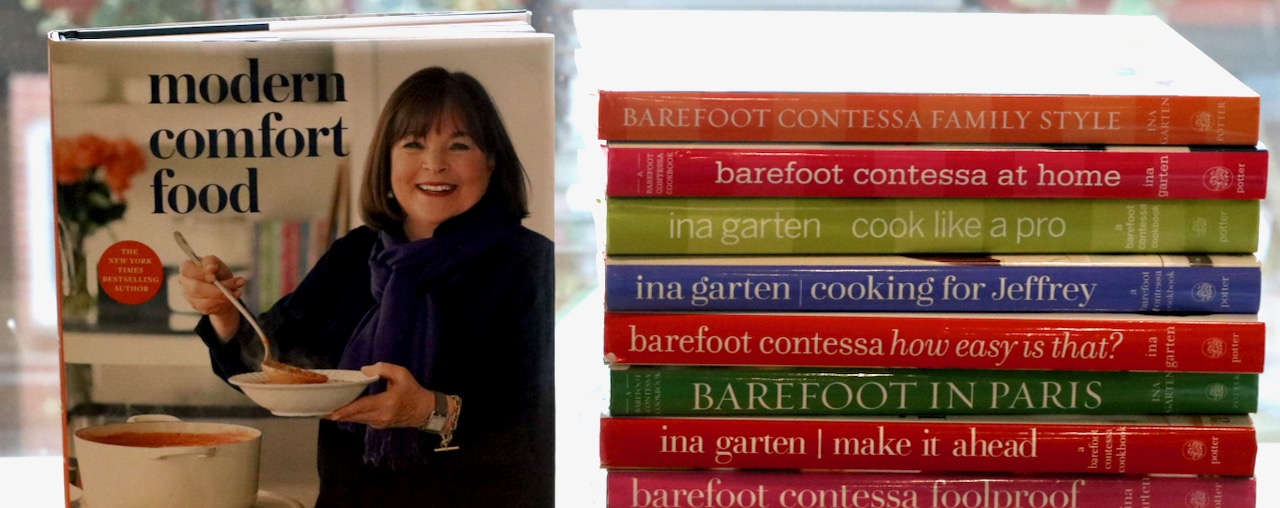
Anyone who knows me knows without questions that I am an Ina Garten fan. Correction- I am a mega fan. Not a day goes by that Ina isn’t on my mind. I ask myself constantly, “WWID?” She is my culinary soul mate. She just doesn’t know it it.
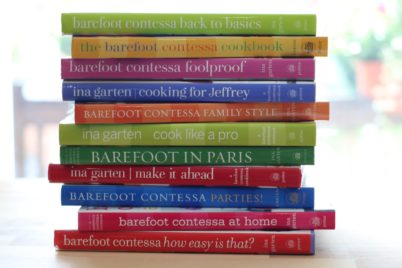
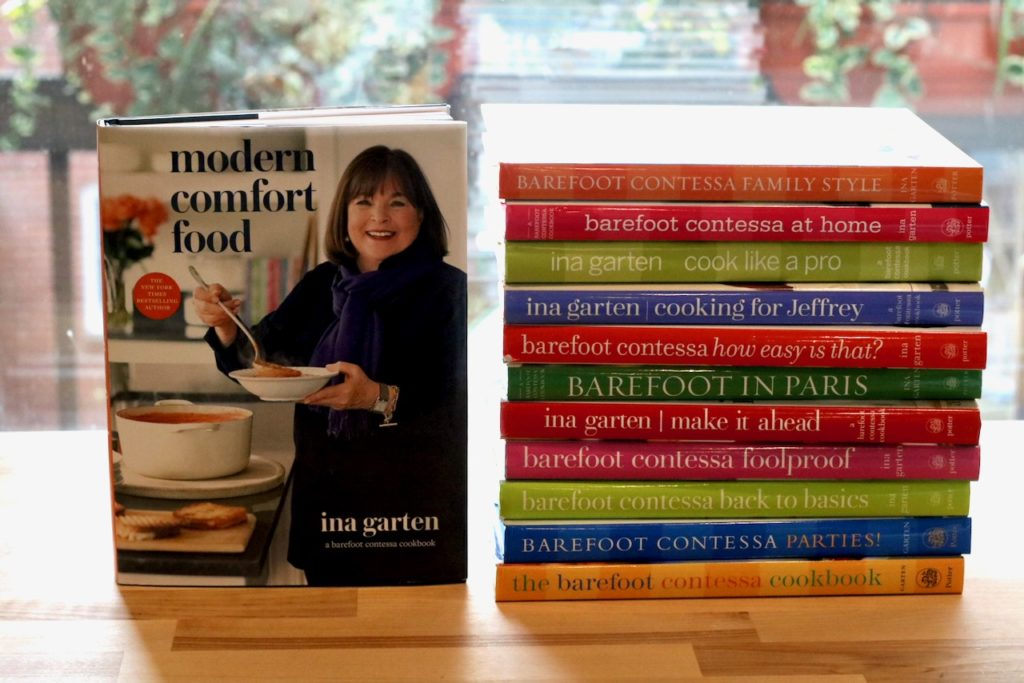
I own every single one of the Barefoot Contessa cookbooks and they are my prized possessions. I never get tired of flipping through them. Ever.
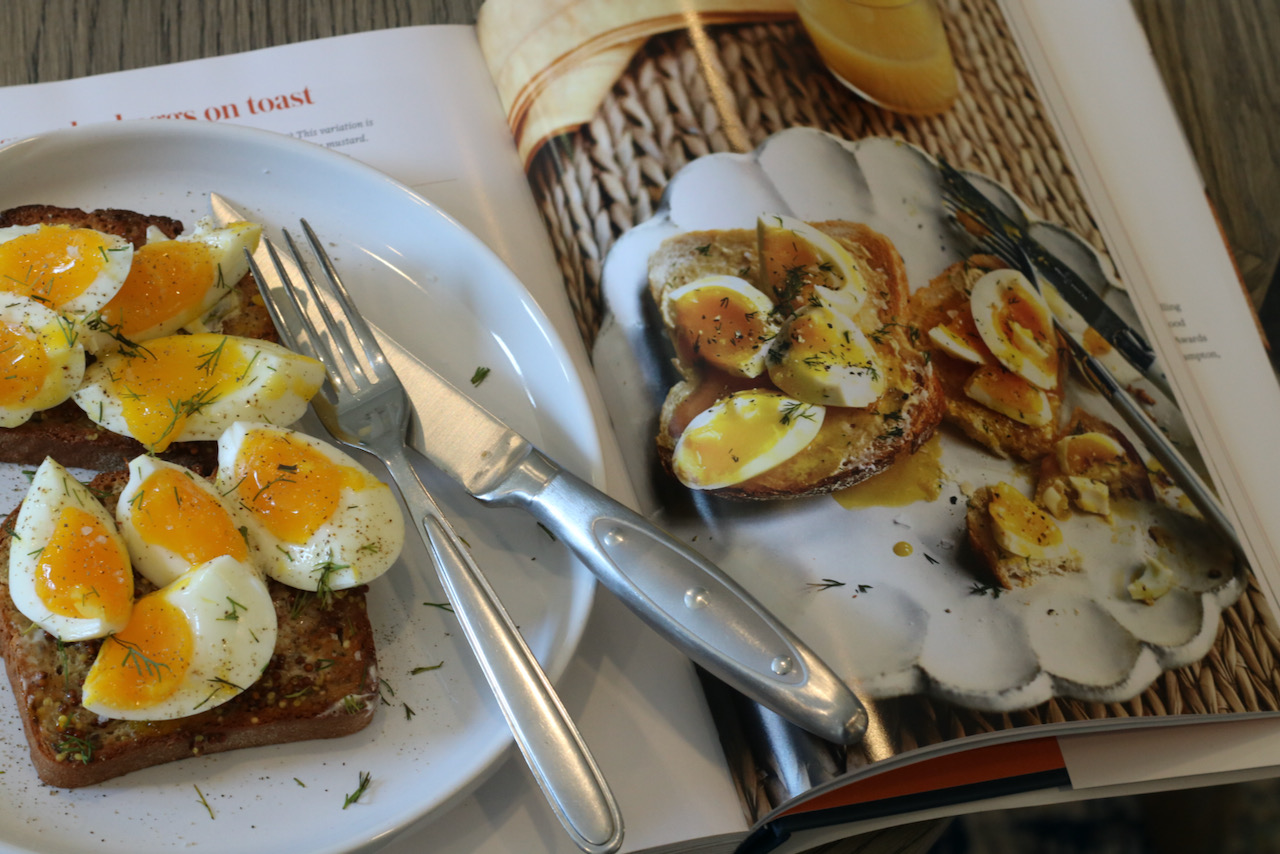
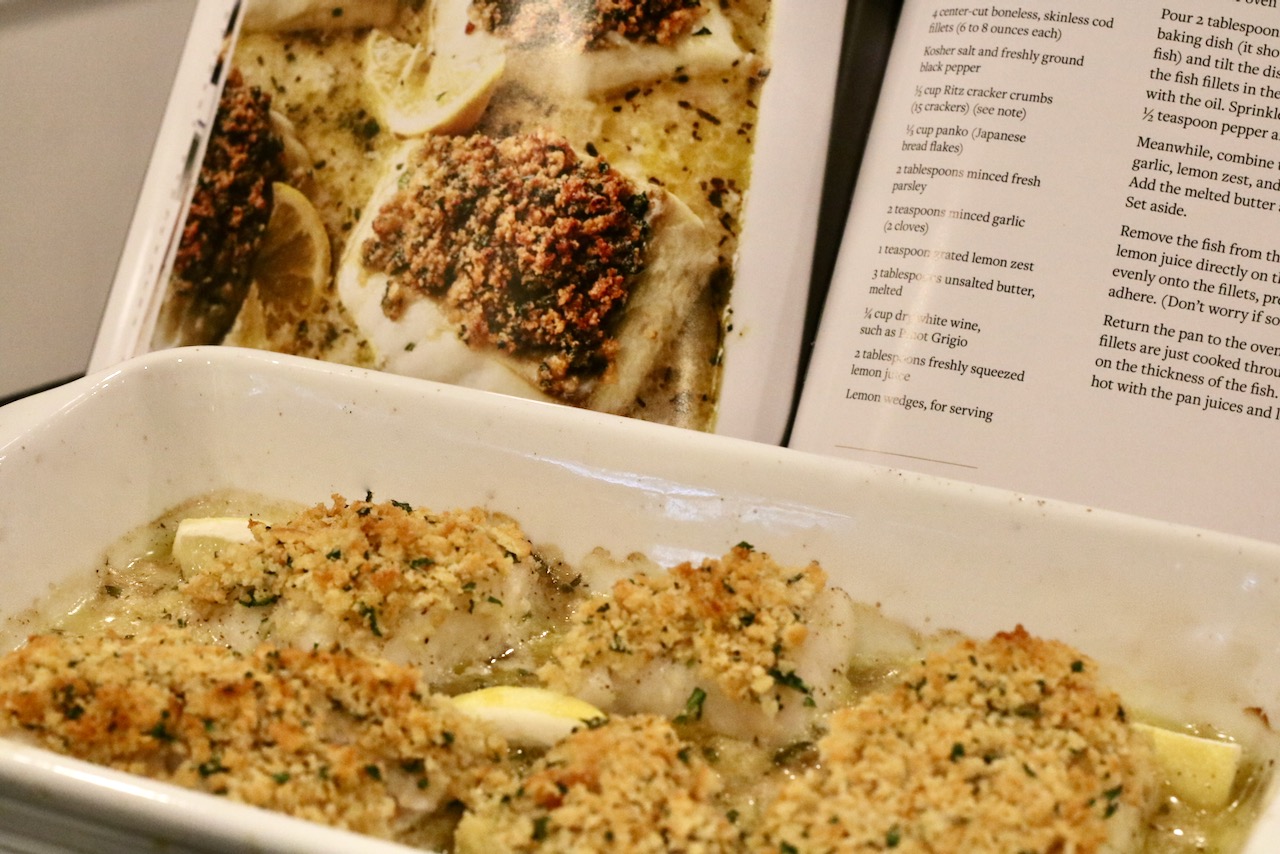
The reason why I am so loyal to Ina and her cookbooks is because they are reliable. Period. I have made countless recipes of hers. No, seriously, I mean actually countless. I tried to count and lost track. There are maybe one or two that didn’t come out as good as I had expected. But zero have actually disappointed me. Additionally, Ina’s cookbooks feature incredible pictures that don’t just inspire me, but they are real. When I follow her recipe it actually comes out looking just like the picture. See below are decide for yourself:
Ina Garten’s Modern Comfort Food Recipe pictures compared to mine.
So when her latest cookbook, Modern Comfort Food, was released in October 2020, I was one of the first to order it.
When it first arrived I was excited as ever! I couldn’t wait to sit down with a glass of wine and my stack of post-its, and go slowly, page by page, reading each recipe, the notes, and get inspired by the pictures.
I’ll be honest. My first time looking it over, I wasn’t so impressed! Looking back I’m not sure why. I thought I wouldn’t want to make too many of the featured recipes in Modern Comfort Food. Well, I was wrong because guess what happened next? I started cooking. And I couldn’t stop. And dare I say it, but it may be her best cookbook yet. It is a fantastic cookbook and I am obsessed.
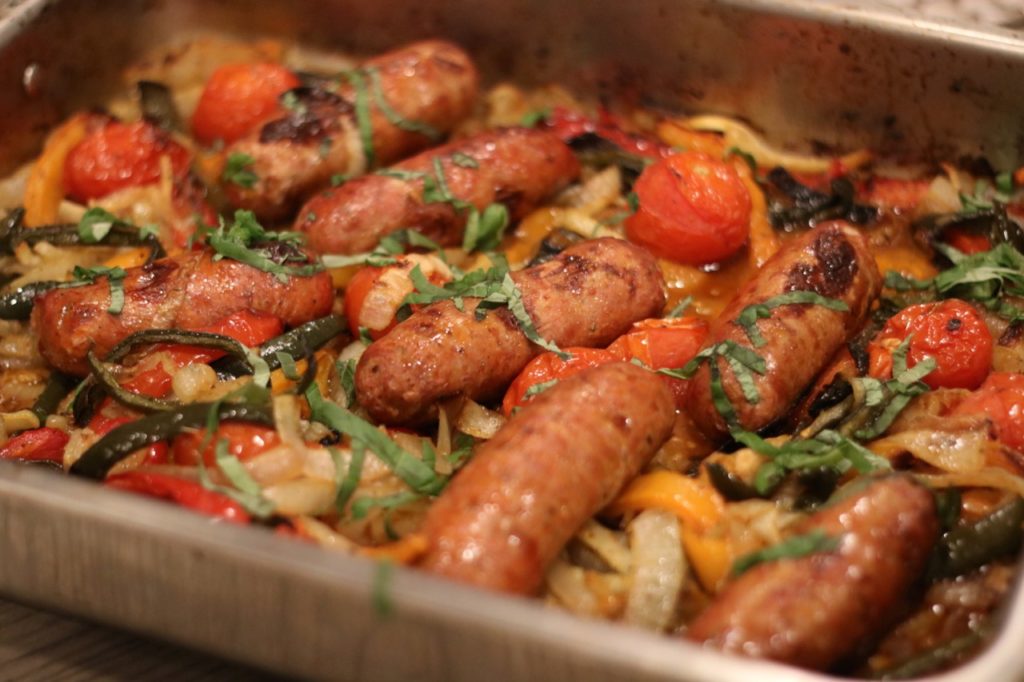
It started with the sausage & peppers. Which I have now made twice in two weeks. Then onto the Cauliflower with lemon and capers which is now my absolute favorite way to make cauliflower. Then, although I have made both before, a re-visit & rekindled love for Ina’s homemade caesar dressing & green salad vinaigrette.
Next came smashed eggs over toast, and the creme de le creme… the creamed spinach with baked eggs.
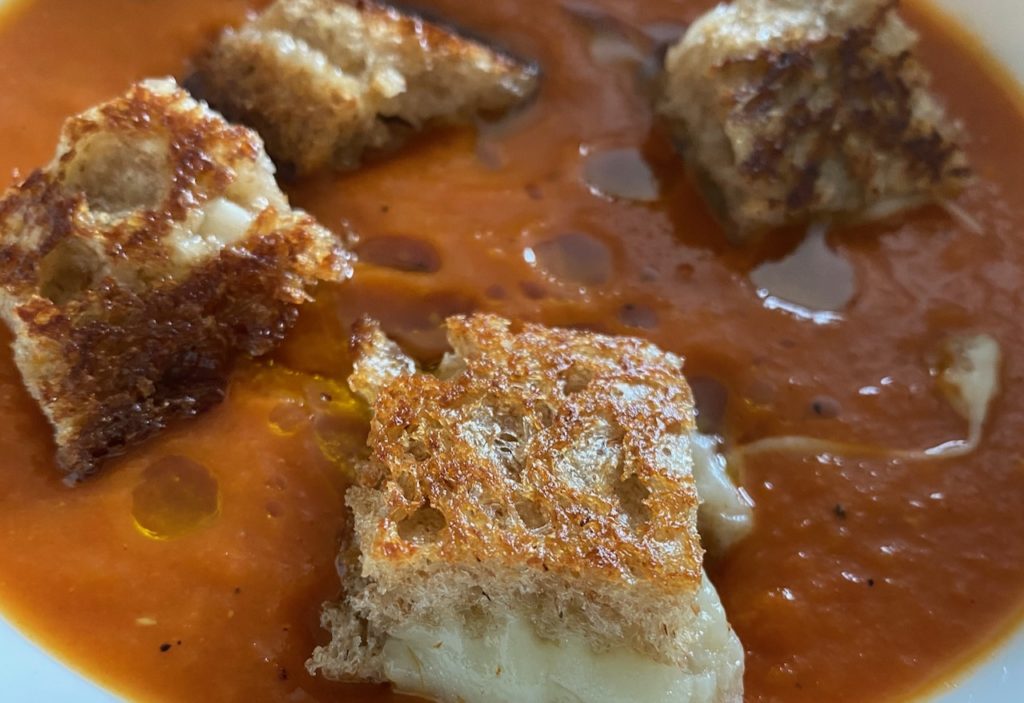
It didn’t stop there. I made the Baked Cod with garlic & ritz crumbs, ultimate tuna melts and creamy tomato soup.
The creamy tomato soup is incredible!
I kept cooking. I made the grilled oysters with lemon dill butter (I roasted them- Shhhh! Don’t tell Ina.) I made the fig & cheese toasts and the potato galettes with smoked salmon.
Every single recipe has impressed me. I don’t know how she does it. Ina Garten has a impeccable palate, a way of making seemingly difficult recipes approachable, and her recipes can be counted on.
Modern Comfort Food is the newest released cookbook by Ina Garten
In each of Ina’s cookbooks she offers tips, stories and recommended products. In Modern Comfort Food she included some of her favorite staple ingredients. And contrary to what some may think about her cooking being “too fancy”, the ingredients are actually quite basic and include things like DeCecco pasta, Goya chipotle peppers in Adobo sauce, and Hellman’s Mayo. She has done her homework, so it’s best just to trust her recommendations and buy what Ina does. I do!
I highly recommend this cookbook if you are looking for new inspiration, new skills and recipes you can really rely on. I have no doubt that within the next two months I will have made just about every recipe featured in the Modern Comfort Food Cookbook. I confidently give it 5 stars!
I’m off to the kitchen… Ina’s Penne Vodka is on the menu! (Recipe from the Foolproof Cookbook.)
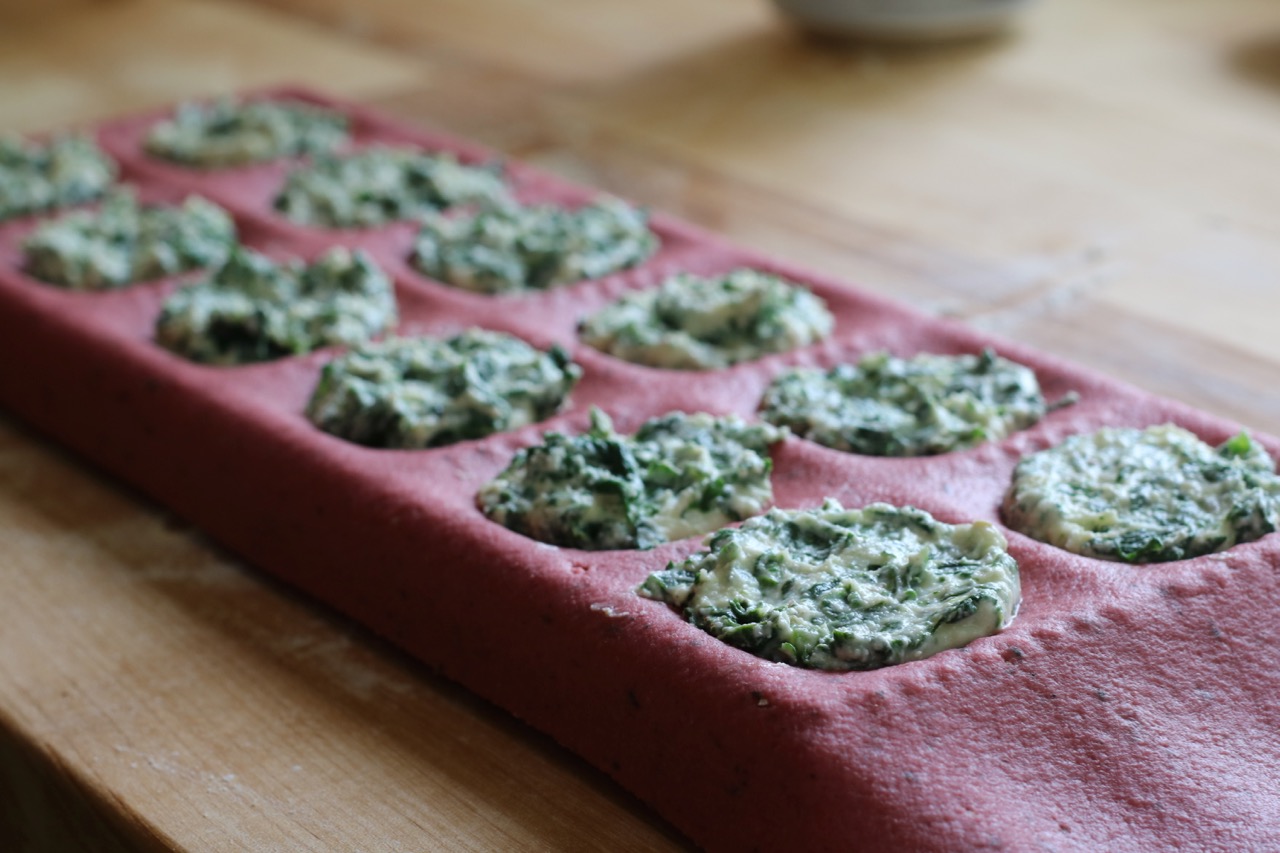
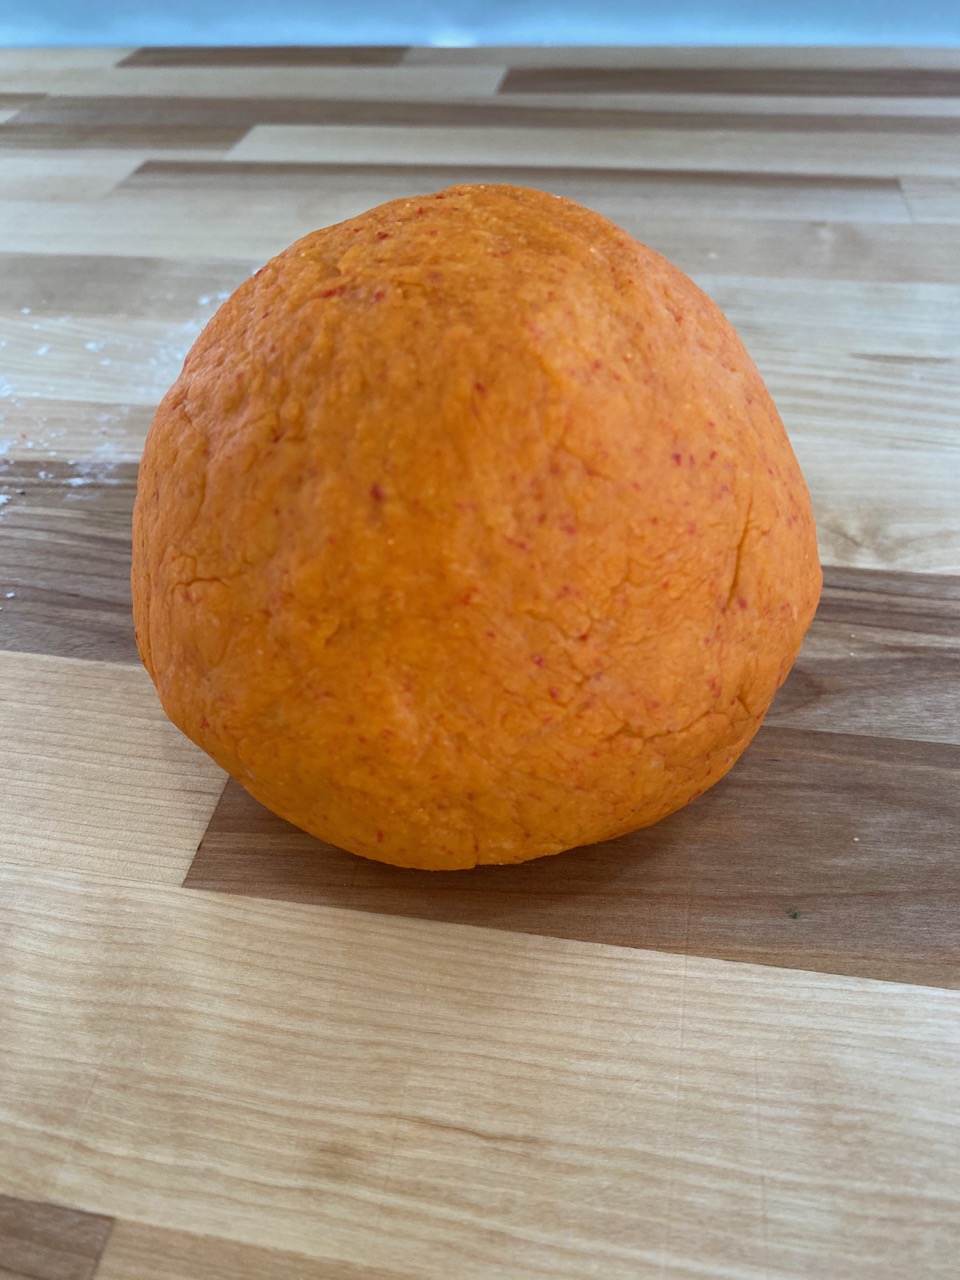
And many of you know, I make a lot of homemade pasta. For me, the process is very therapeutic and rewarding. However, even I sometimes get bored with plain pasta and thus, I began introducing vegetables to infuse color and flavor into my pasta dough. The two most popular flavors you will find in stores as well as in my kitchen are Spinach and Red pepper, but I have also made beets and pumpkin infused pasta dough. However, my favorite vegetable pasta of all is the roasted red pepper pasta. It has a subtle, smoky sweetness and a deep, rustic color that holds up really well to the boiling water. It’s a show piece of a pasta!
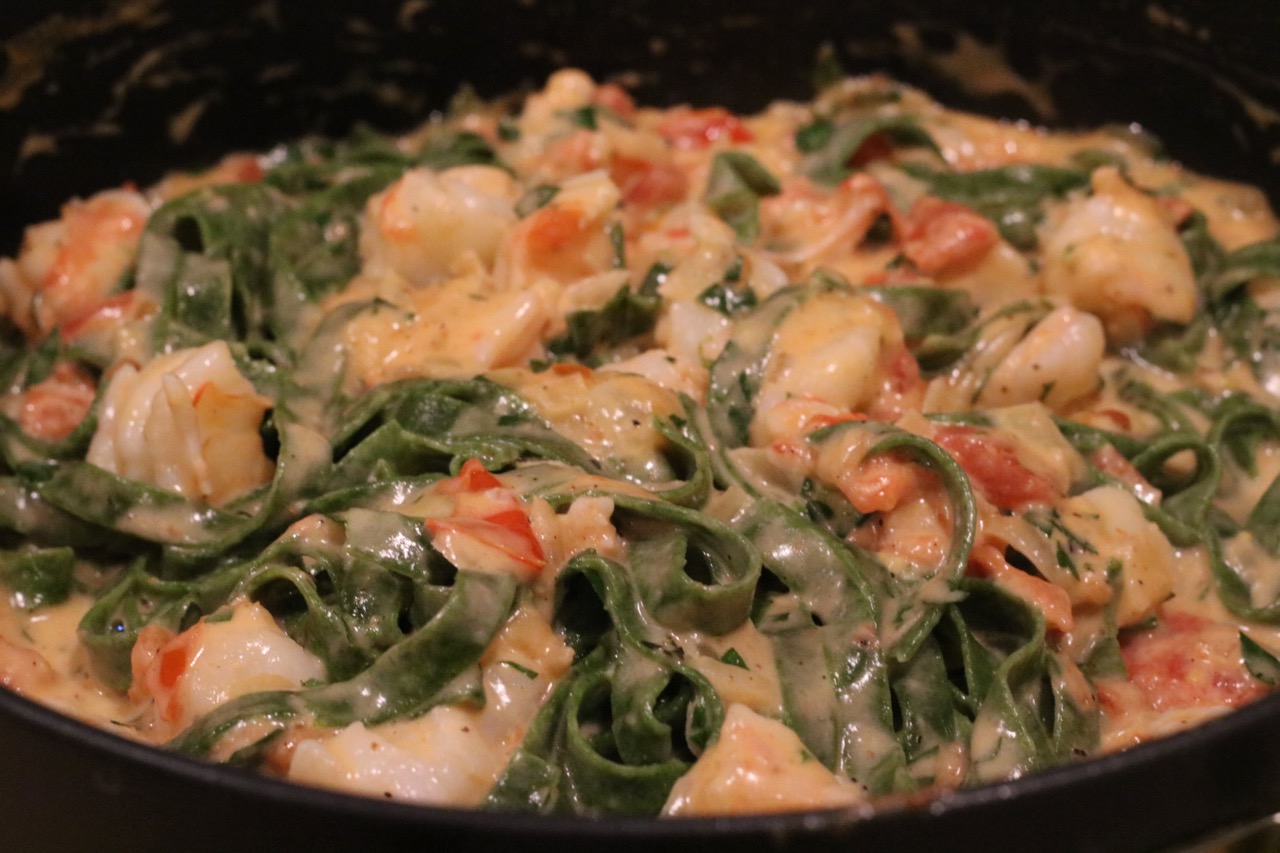
Roasted Red Pepper Ravioli with Spinach & Ricotta FillingSpinach Fettuccini with Shrimp and Tomato Cream SauceBeet Ravioli with Spinach & Goat Cheese Filling
How to Make Red Pepper Pasta Dough
When you make a basic pasta dough, the recipe is a pretty basic blend of flour and egg. When you work with vegetable puree, this introduced a new “wet” ingredient so we must reduce the amount of egg and in most cases, increase the amount of flour simply because the vegetable puree does absorb more flour than egg does. Learning and applying that knowledge to each batch of pasta is the real challenge and why I would always recommend you start with making ad perfecting a basic, but delicious, pasta dough before working with vegetable infused pasta, such as red pepper pasta dough. (The pasta learning never ends- each batch teaches us something new!)
The key is draining and drying the vegetables
If you don’t know what a nut milk bag is then you are missing out. While it’s purpose is to make milk from nuts, its essentially a bag that drains liquid, sort of like a reusable cheesecloth. Its a total game changer if you often work with frozen spinach, but also a ton of other vegetables that contain extra moisture needed to be removed. In the case of making red pepper pasta or spinach pasta, the vegetables must be drained entirely to the point of dry, which is no easy task. Unless of course, you have a nut milk bag.
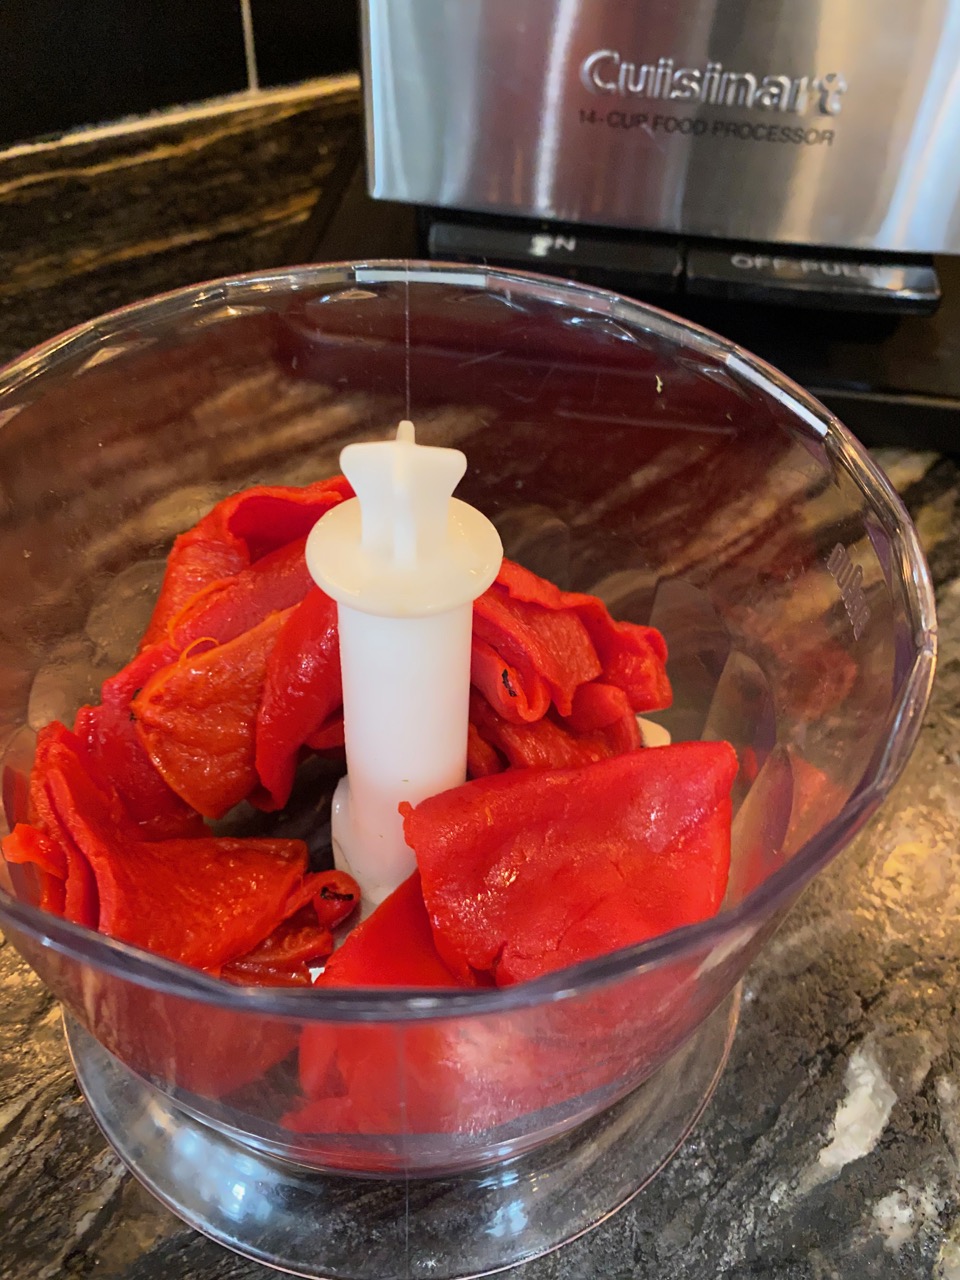
The first step to making red pepper pasta dough is to prepare the peppers. To do so, drain 1 jar of piquillo peppers on paper towels and then puree the peppers in a food processor until smooth. Then, use a nut milk bag to drain & squeeze out any excess liquid. Keep squeezing until all excess liquid has been removed. This will now be what you add to the flour to flavor and color the pasta dough.
Step 1: Blend drained peppers
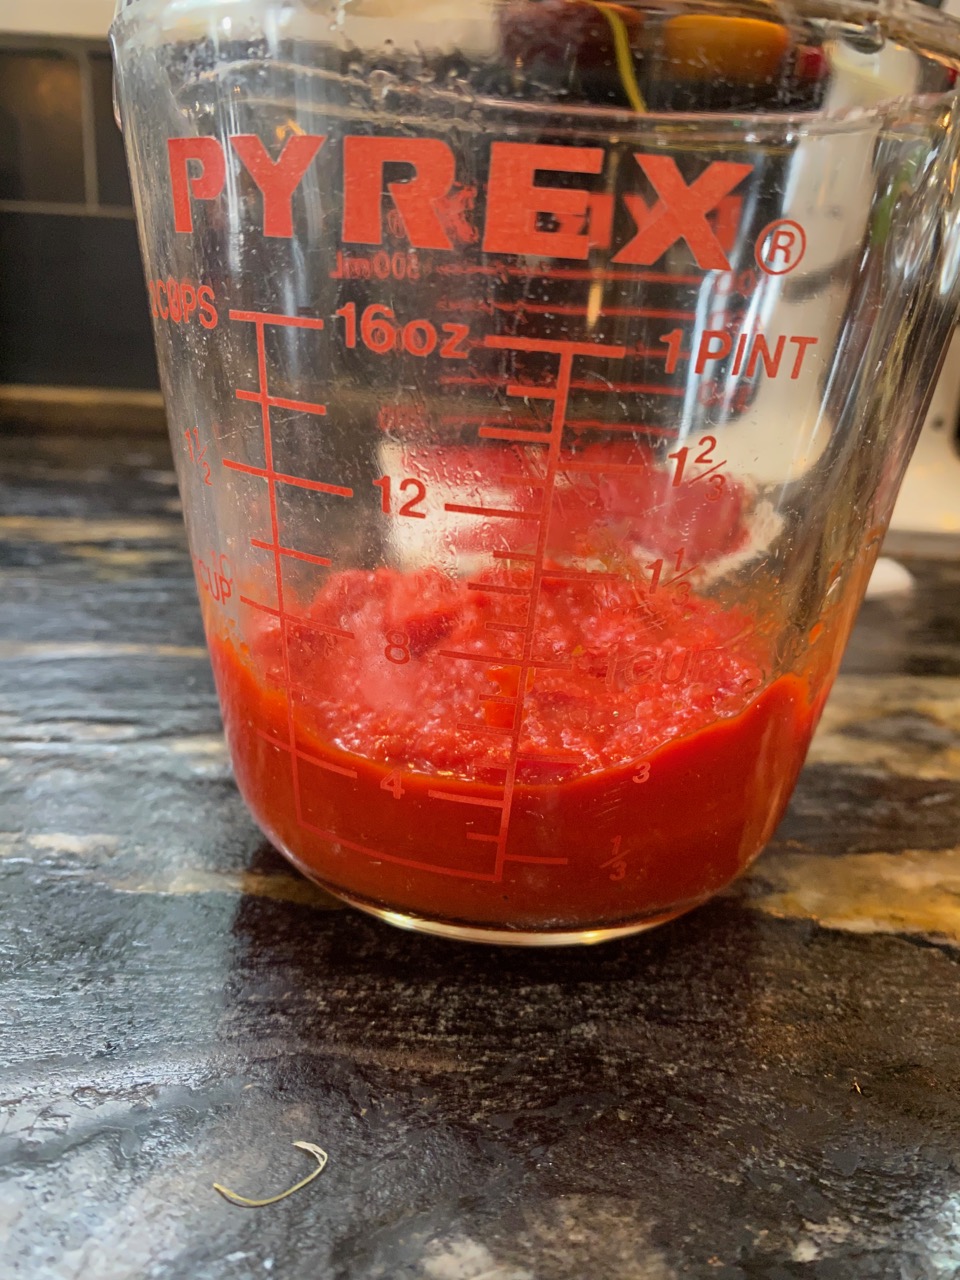
Step 2: Drain excess liquid until you have a pulp
Step 3: combine ingredients
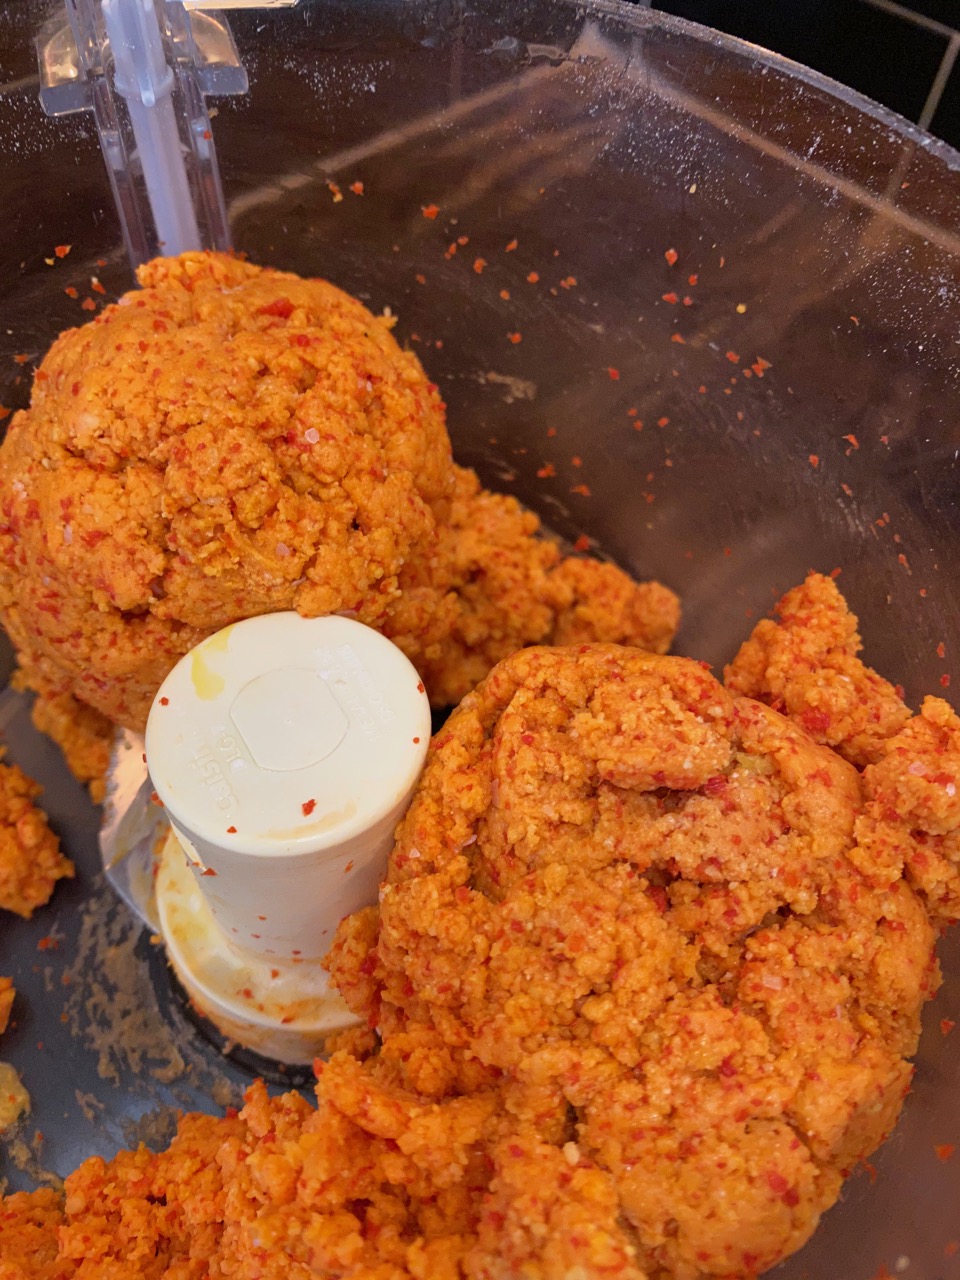
Step 4: Make Dough using pulse
Step 5: Wrap in plastic and set set aside
Step 6: Roll Pasta dough and cook to order!
Red Pepper Pasta Dough Recipe:
2 cups all purpose flour (225g)
.5 cup semolina (75g)
1/2 cup pureed peppers, drained of all excess liquid
1/2 tsp salt
1 egg
After mixing, added a dash more flour.
Like all pasta dough, once combined and rolled into a delightful ball of dough, wrap tightly in plastic and let it sit for a minimum of half hour or up to 24 hours in the fridge. I find that with this particular pasta, I like to let it rest in the fridge for at least a few hours to let the floors really marry – it makes a difference. Roll & cook as you would with standard pasta dough.
No data was found
Pro Tips for Making Infused Pastas
Vegetable infused pasta doughs, especially red pepper pasta dough, are typically a wetter dough then a basic flour dough, so you MUST flouring the dough in between rolling numbers to prevent sticking and ripping.
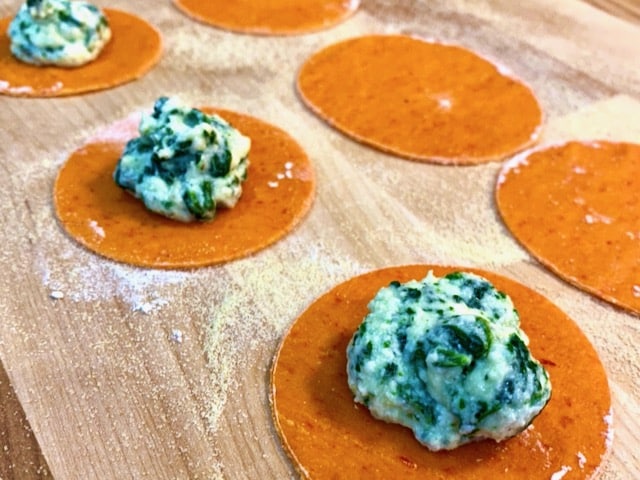
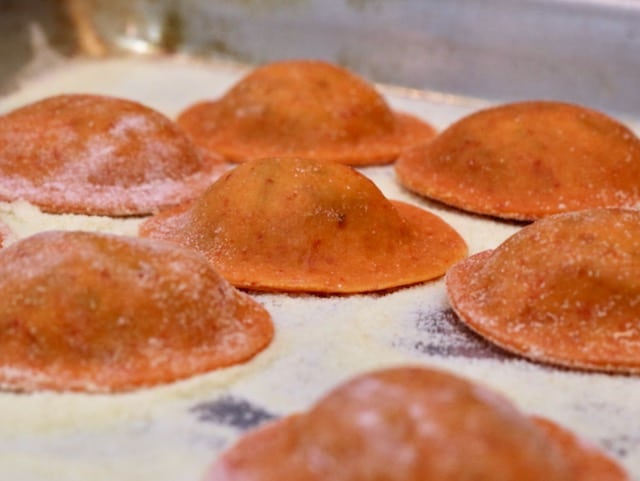
I started out making the Red pepper Raviolis in a jumbo ravioli tray, but the dough was too elastic and they sank too deep. That method went right out the window. The best ravioli option for this dough turned out to be using two round cookie cutters and forming the ravioli’s individually.
Stuffing roasted red pepper ravioli with ricotta and spinach fillingRoasted Red pepper Raviolis ready for cooking or freezingRoasted Red Pepper Ravioli with Spinach & Ricotta Filling
The Thermoworks ThermoPop is an excellent food thermometer for any chef, including the novice chef who is just getting started with working with meat thermometers, as well as the professional cook who simply wants a quick, reliable temperature reading. No bells and whistles, just the real deal. Or I should say, the real temp!
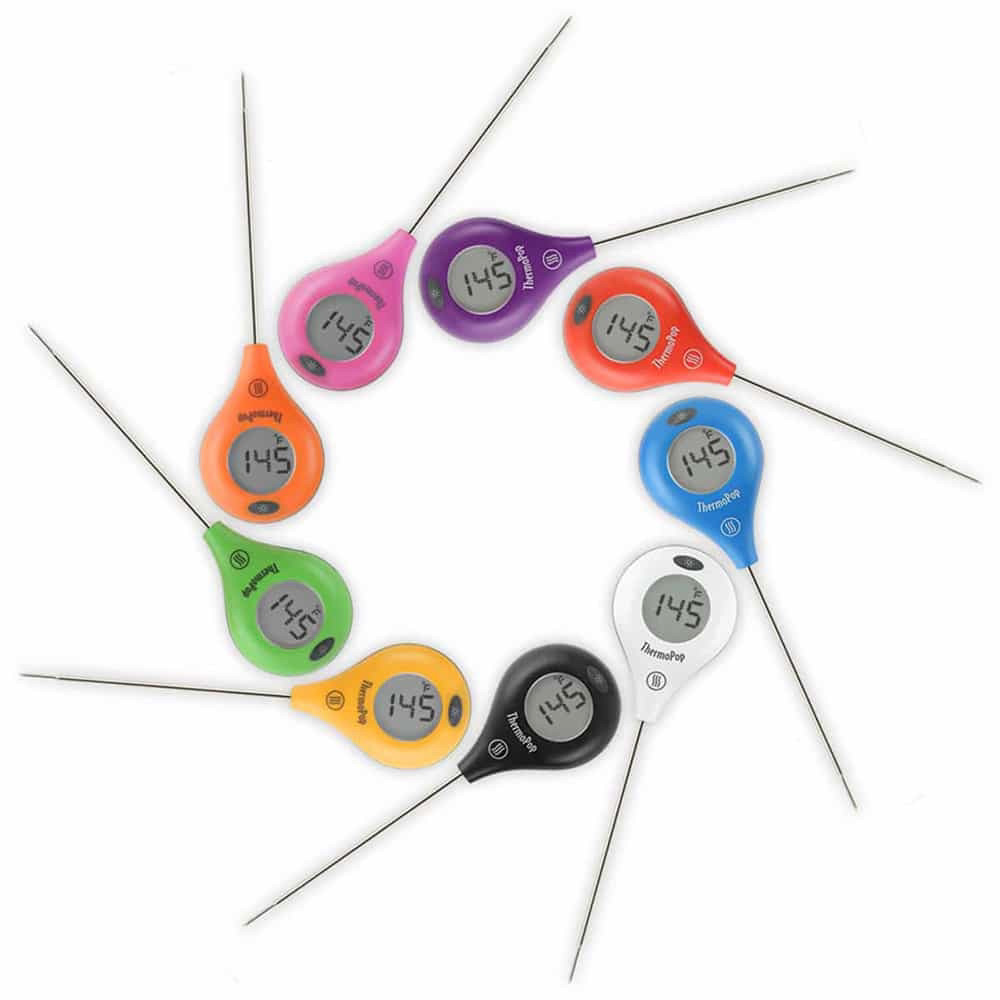
The ThermoPop features big digits and a backlight for dark conditions. The power button is easy to use, and the durable construction (made in the USA) is built to last. The ThermoPop comes in nine fun colors to brighten up your cooking experience! It measures a temperature range from -58 to 572°F (-50 to 300°C) and is switchable between °Celsius & °Fahrenheit.
Thermoworks ThermoPop Pricing
The real advantage of the ThermoPop over the other Thermoworks products is the price point. Recently reduced to just $21.00 (Was $35.00), it simply can’t be beat. And truth be told, I own the more expensive Classic Thermapen and I love it, but I use the ThermoPop more! It’s just convenient and the wide variety of bright colors make it fun to use!
As a home cook who enjoys encouraging and empowering others to learn to love cooking, I find the ThermoPop makes a great gift. It is affordable, non-intimidating and reliable.
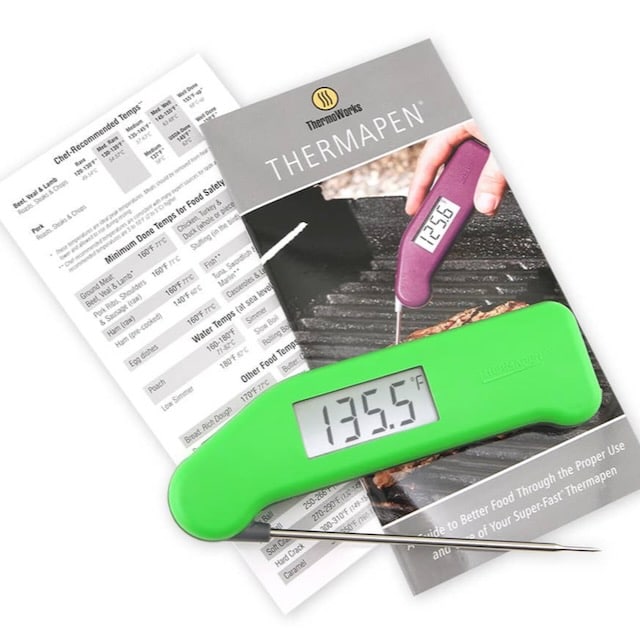
The Thermoworks Classic Super-Fast Thermapen is the leading digital thermometer on the market used by chefs everywhere!
The Classic Thermapen takes readings in less than three seconds, is accurate to less than a degree, and is designed to last for a long time to come. It turns on by opening the probe, so there are no one and off buttons to worry about, and it folds up for easy storage or travling. It’s large display makes it easy to read which reduces any reading errors.
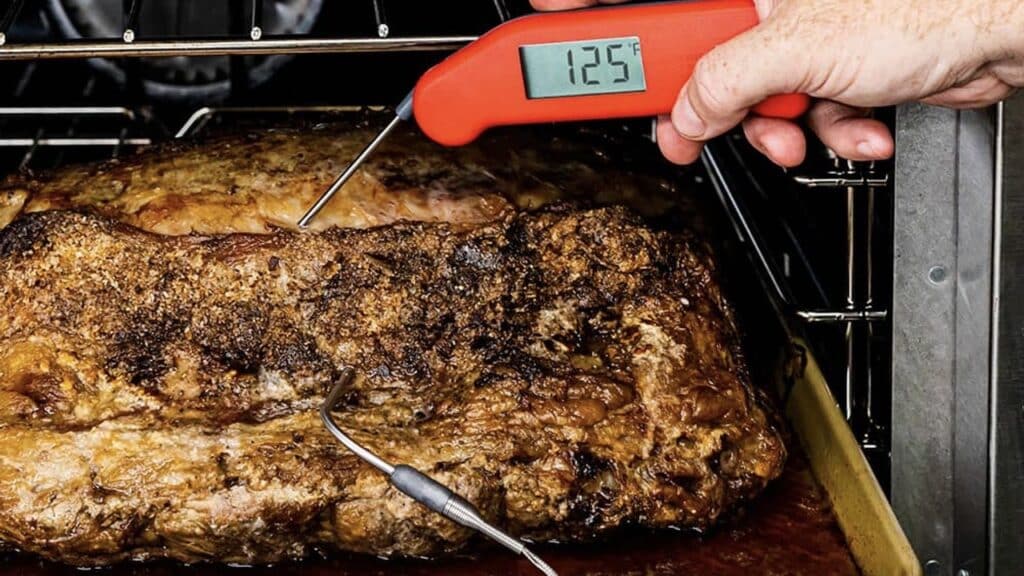
Remove the guesswork- take your beef’s temperature!
There Classic Thermapen comes in a a wide selection of colors, originally developed to meet the needs of people in the food industry who use color coding to prevent cross contamination by dedicating tools to specific food products. However, for us home cooks, it’s just fun to choose your favorite color! (Just be sure to clean your probes after use to keep your chicken juices off your beef!)
When you order a Thermoworks Classic Thermapen, you don’t just receive the food thermometer. Thermoworks also sends you a 20 page guidebook: “Using Your Thermapen: A Guide to Better Food Through the Proper Use and Care of Your Splash-Proof Thermapen”. This booklet contains everything you need to know about proper cooking temperatures, instructions for customizing and cleaning your Thermapen, diagrams and more. Its a fantastic resource!
The Thermopen on/off function works by opening and closing the probe. However, if you leave the probe open, it will auto-shut off in 10 minutes to preserve battery life. It has a temperature reading range of -58.0 to 572.0°F (-49.9 to 299.9°C) and accuracy readings within less than 1°. It also comes with a NIST-Traceable calibration certificate to ensure accuracy.
Use a Thermapen whenever you need accurate temperatures.
Knowing the internal temperature of a roast, a steak, fish, chicken and more ensures you are safely serving food as well as serving it at its optimal temperature for enjoyment. No one likes a well done steak, and if you do, you probably should just stop reading! But protein isn’t the only thing you can you the Thermapen for. Deep frying temperatures vary depending on what you are frying and getting that temp right is vital to your frying or candy making success.
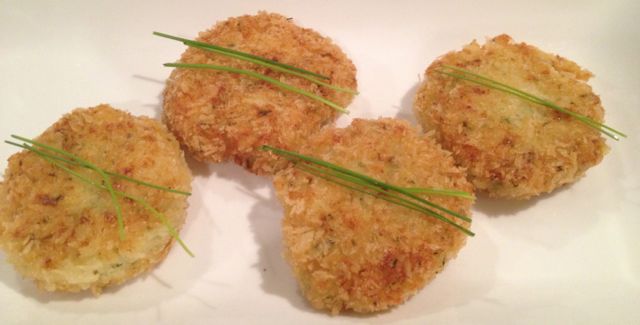
One of the great indulgences in life is Risotto. But how about risotto cakes? You take one of the most wonderful foods and you can fry it….Mmm Mmm Good.
Risotto cakes are really easy to make. Make your favorite risotto recipe and chill it, form small patties, coat in panko bread crumbs and fry.
I am a big fan of Ina Garten’s Chive Risotto cakes. The recipe is really easy and everyone will think it took you hours of slaving over the stove!


