How to make Lobster in advance
I have been eating Lobster since before I could walk. My uncle was a chef at a local seafood restaurant and when he wasn’t working, he was always making lobster and I wanted in! We’d race them on the floor and then dump them in pots. Very barbaric- I know! I do understand why people have an issue with this process, but I never seemed to have a problem with it- I just love Lobster. A lobster is my avatar picture, the necklace I wear, and what I read about in my “free time.” I find them fantastically fascinating.
So yes, I cook lobster more than the average person. But I still get frustrated by timing of cooking of the tails and the claws evenly…and ugh, the mess. So changes had to be made and it has greatly improved lobster night at our house. Now when I have lobster night, I put the effort in ahead of time so when it comes time to dinner, I can kick back and enjoy.
How I make lobster dinner:
- I preheat my oven to 350°F and line a sheet pan with parchment paper. I steam the lobsters until just cooked through, (about 8 minutes for a 1.5 pound lobster) and remove from the steamer.
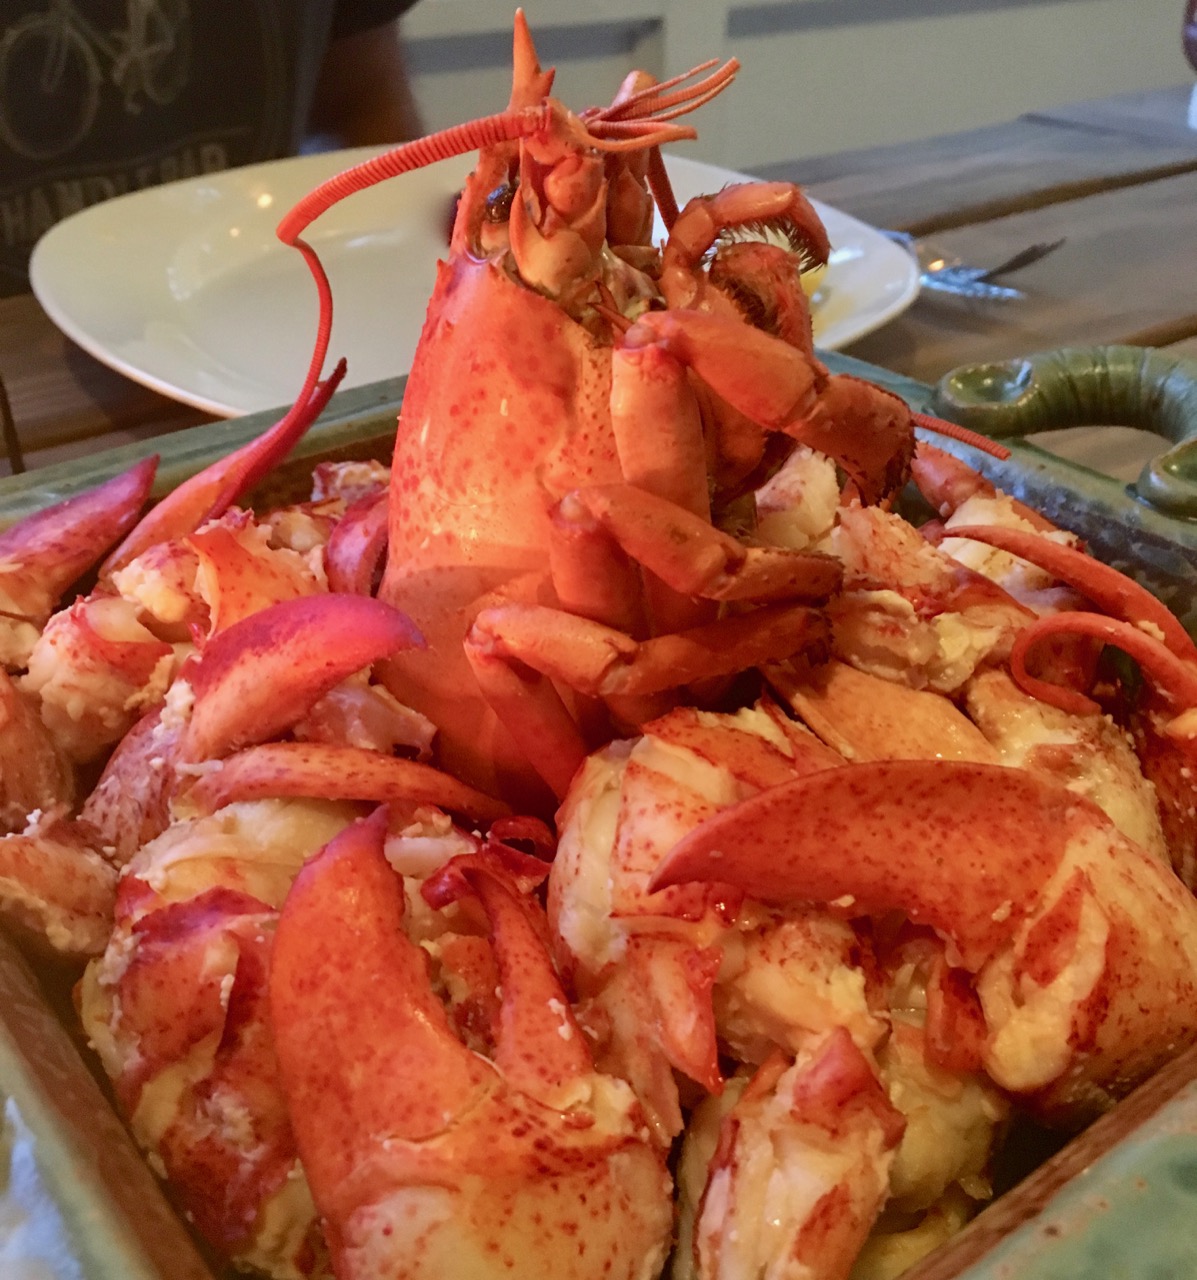
- When cool enough to handle, I break them down over the sink and clean them. (some tails are full of roe and it can get gross so it’s way better to do this over this sink with a garbage disposal.) I like to split the tails down the middle and brush some melted butter over them, because why not?
- I crack the claws which makes meat removal easy and it allows me to drain any excess liquid, and re-stuff back into claw shell.
- Once the lobster claws, legs & tails are broken down, drained and cleaned, I set everything aside and clean up.
- When we are ready to eat, I simply arrange the claws and legs and tails onto the baking sheet and into the oven they go for about 5 minutes to finish cooking if needed and to get hot. When all the meat is cooked though and hot (but not dried out), I plate the lobster pieces on one giant platter to share, family style. Serve melted butter & lemon on the side.
Why its worth the work:
With this approach of cooking, cleaning and shelling (partially or completely) in advance, the major mess gets made & cleaned up so all that is left to do is enjoy. With the hard work already done, you get to really savor the lobster meat in it’s purest form.
Additionally, you reduce the risk of someone cutting themselves on shells at the table, or lobster juice flying across your dining room. Make ahead lobster dinner means you get to simply kick back with a glass of buttery chardonnay and dig in. No bibs required.
How to remove lobster from the shell:
I like this video because Chef Ramsey does a good job of teaching how to extract the most amount of meat possible from a lobster shell and keeping the meat in tact. I recommend the watch.