Italian style chicken cutlets

chicken cutlets

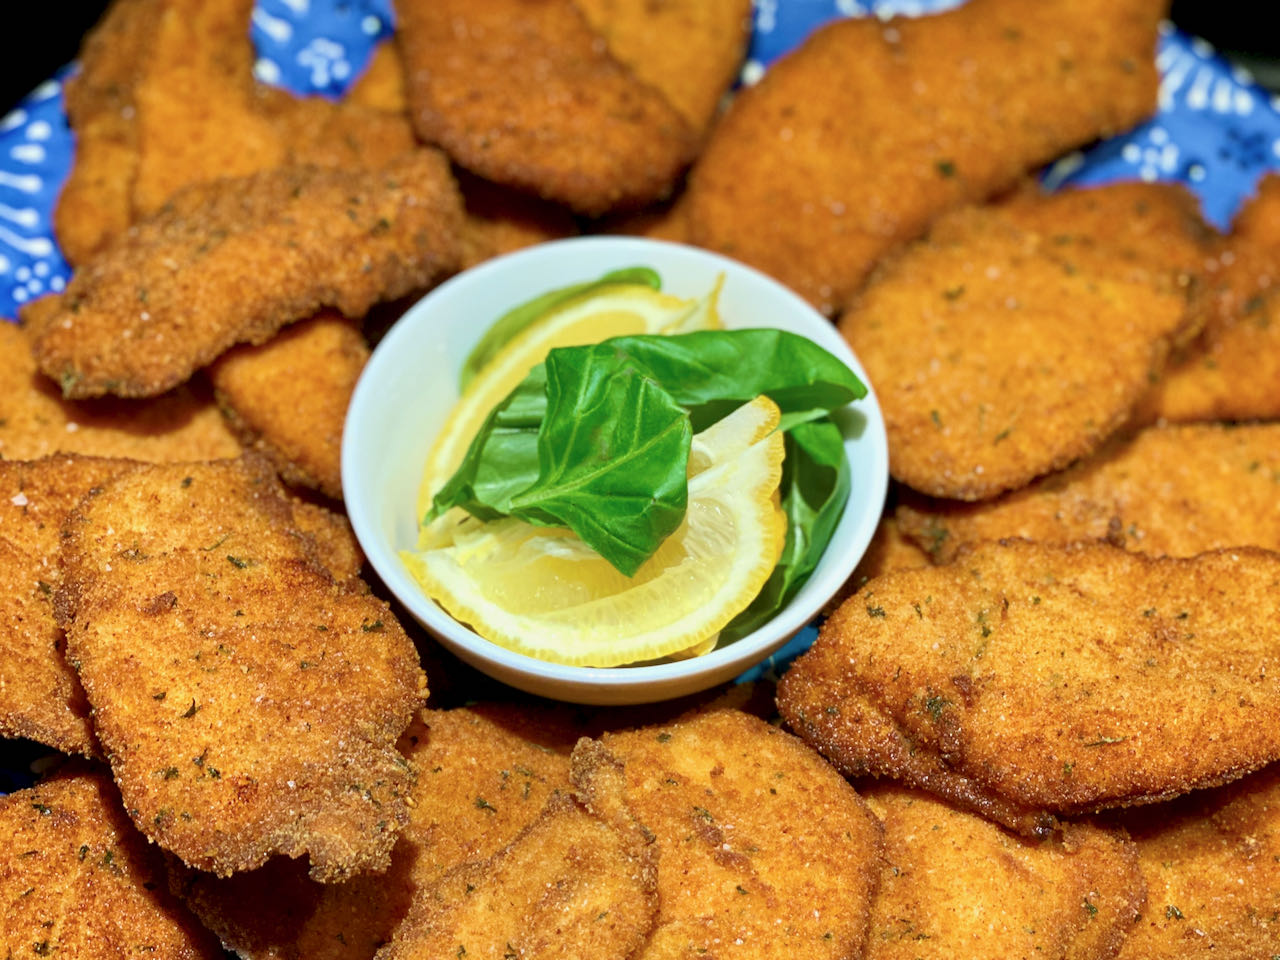
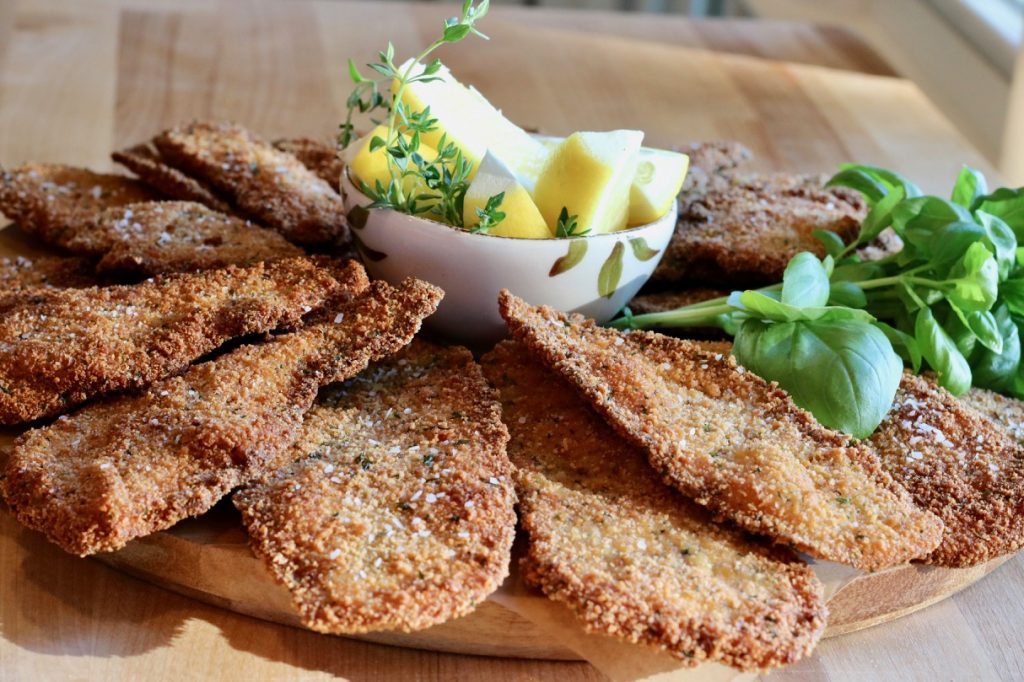
Do you know anyone who doesn’t love a good chicken cutlet? I’d bet the answer is no. Chicken cutlets, more formally known as chicken Milanese, are one of everyone’s favorite foods.

Chicken cutlets are definitely one of those foods where homemade is absolutely best. But why is homemade SO much better than what you get at the deli or even most restaurants? Well, because making great cutlets takes a lot of love, and a whole lot more patience. That’s not something restaurants can give you much of.

Recipes don’t make awesome chicken cutlets. People do.

There are countless recipes available for chicken cutlets, but I’ll let you in on a little secret- there is no exact recipe for chicken cutlets. Making chicken cutlets is not about following a recipe, it’s about following a process.

Chicken cutlets

The reason why I say you cannot follow an exact recipe is, first, in terms of measurements, it depends on how many cutlets you intend to make that dictate ingredient measurements.

Secondly, the thickness of the chicken impacts the cooking time and thickness varies greatly in stores and within farms. (Thin cutlets are the only acceptable way to go. If you disagree, just stop reading.)

Third, the kind of pan you use, and how hot your stove top cooks, and what kind of oil you use all also impacts cooking times.

And on and on and on… All the smallest variations play into a final product, which can vary greatly. But learn the process once, and you’ll be a cutlet master for life.

How to make Italian chicken cutlets

chicken cutlets frying
Frying in a dutch oven is the way to go
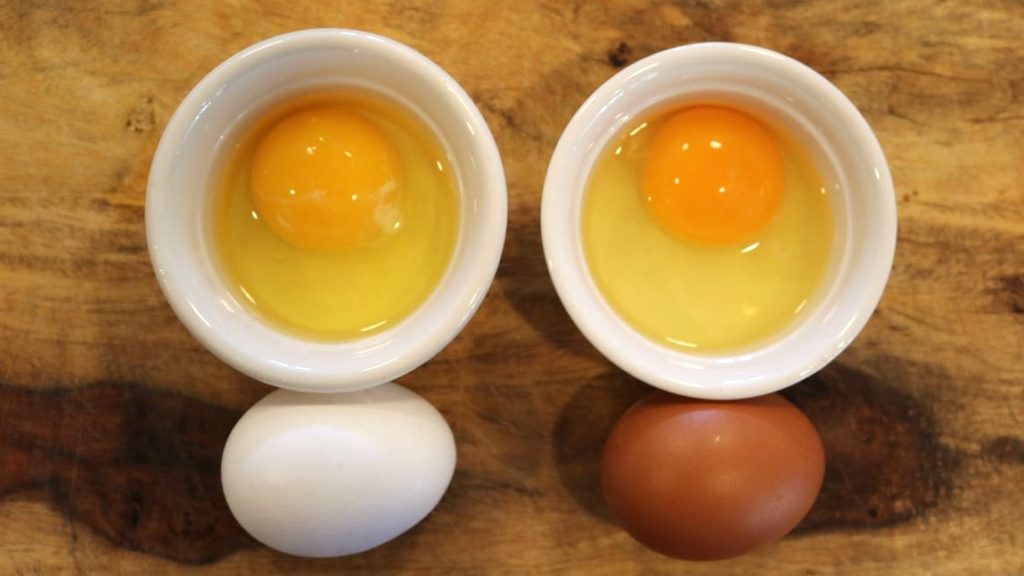
  1. Set up your breading station- Use 3 large bowls, one each of flour, beaten eggs & breadcrumbs. Set a sheet pan out to place chicken on. (I like to use a casserole dish for the breadcrumbs.)
  2. Pat dry the chicken
  3. Using one piece of chicken at a time, first dredge chicken in flour and shake off any excess. Then dip the floured cutlet in the egg batter. Gently lift the chicken out of the egg and let excess egg drip. Finally, coat the cutlet in breadcrumbs thoroughly. Move the breaded chicken cutlet on the sheet pan and repeat with remaining chicken.
  4. Let breaded chicken set in the refrigerator for about 2 hours. (This step is very important for crispy cutlets.)
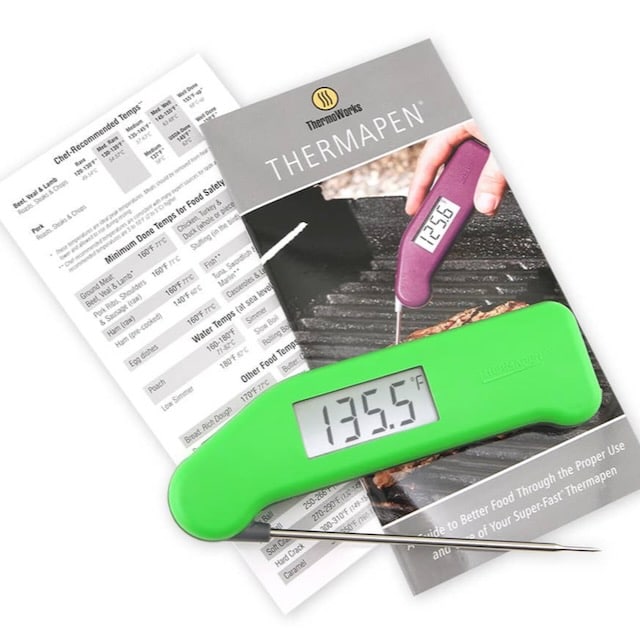
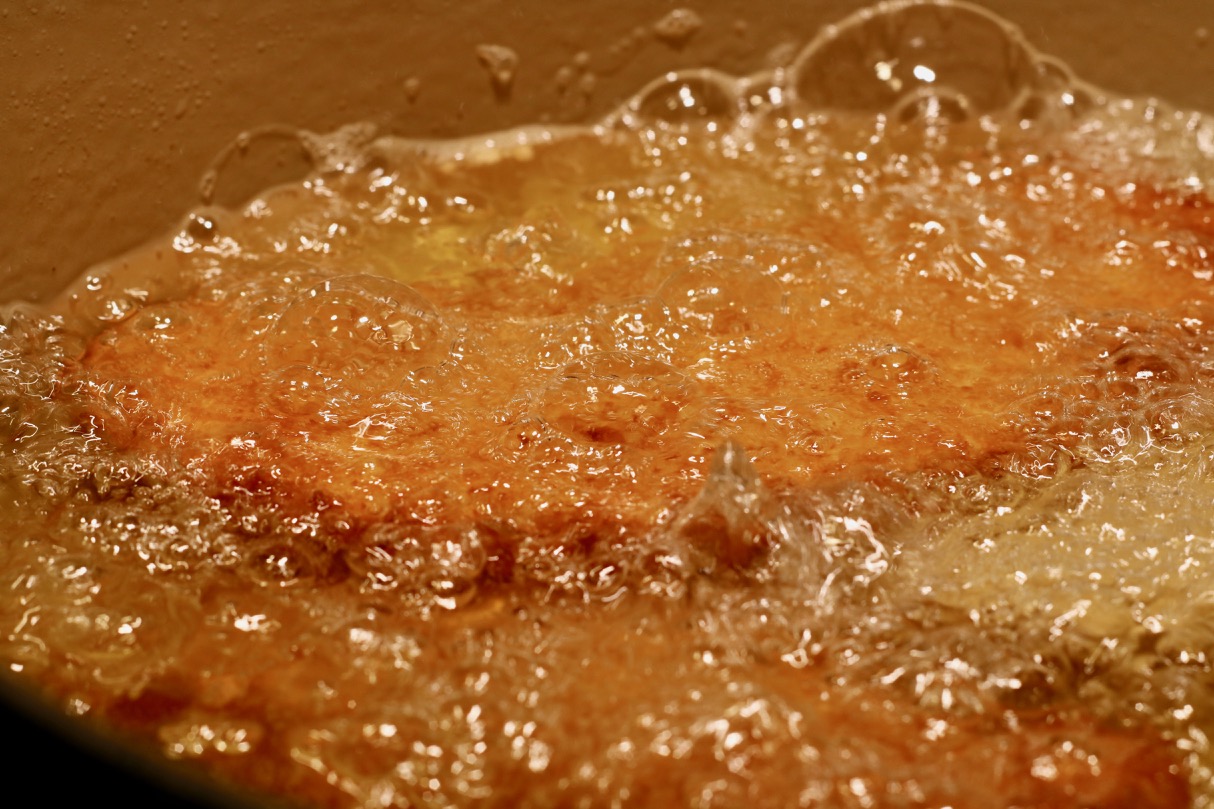
  5. When ready to fry, add 1.5-2 inches of canola or another high heat oil to a heavy dutch oven pot (such as Le Cruset) and heat the oil until 350 Degrees F. .Remember ALL stoves and burners are different so you will have to decide the right temperature to get there. (This is where a digital thermometer really is worth the investment.)
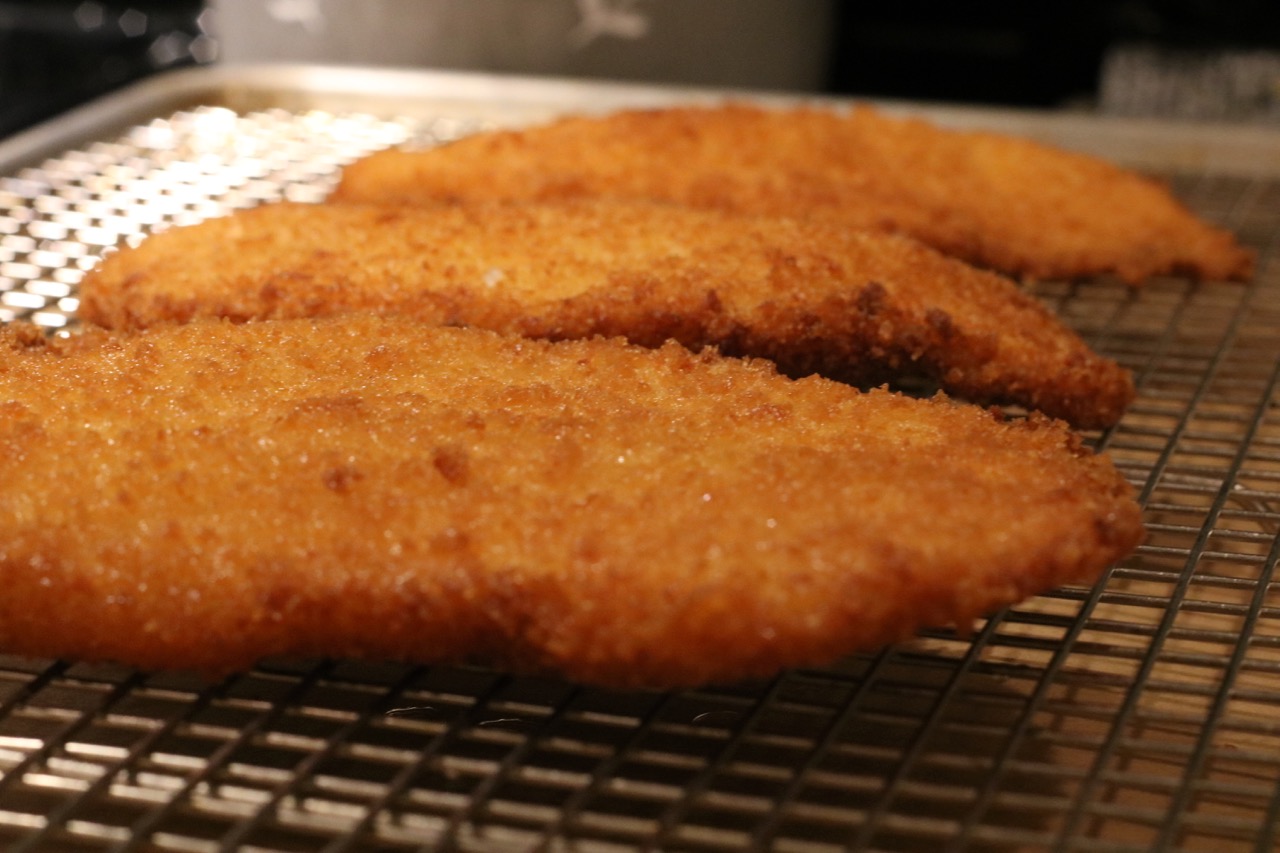
  6. Fry the cutlets 2-3 at a time, depending on the size of the cutlets and the size of your pan. You do NOT want to overcrowd the pan. Fry for about 2 minutes per side, until golden brown and crispy.
  7. Drain cutlets on a wire rack and sprinkle immediately with kosher salt.
  8. Serve immediately or at room temperature.

So… although exact measurements and other factors don’t really guarantee success on this recipe, there are a few things that you can do to ensure you get a fantastic result, every time. Read on.

Drain on a wire rack set on top of a baking sheet

Feaster’s tips for the best chicken cutlets

Chicken Cutlet Sandwich
Nothing beats a homemade Chicken Cutlet Sandwich smothered with Italian meats and cheeses!
  • Use the thinnest chicken breast possible.
  • Trim all fat and trim to shape. (Tip: save trimmed parts and freeze for stir fry.)
  • Season the flour with salt, black pepper, garlic powder and an optional pinch of cayenne.
  • Pat dry the chicken very well before flouring.
  • Use Italian seasoned bread crumbs. (I like 4-C brand)
  • Bread the chicken and place onto a sheet pan and refrigerate for about 2 hours before frying. This will help ensure the breadcrumbs stick to the chicken and don’t fall off while frying.
  • When frying, the oil needs to be hot! But the oil can’t be so hot that it’s smoking or the result will be burnt breadcrumbs and bitter tasting cutlets. Monitor and adjust the temperature at all times.
  • DO NOT leave your chicken unattended while frying! Never take your eyes off the frying pan. Monitor and adjust temperatures throughout the entire process.
  • Drain on a wire rack.

For best results, serve warm or at room temperature. Cold cutlets are pretty irresistible and especially good on a sandwich so make enough for leftovers!

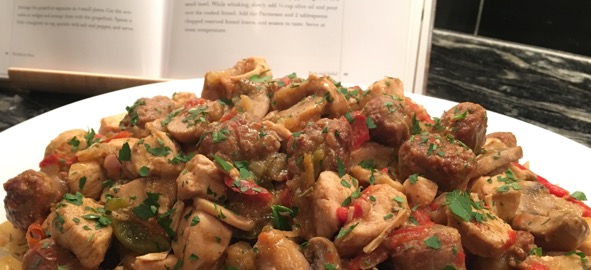
Some of my favorite combinations for chicken cutlets

There are so many ways to enjoy homemade chicken cutlets! Of course, fresh out of the fryer is certainly one of the best.

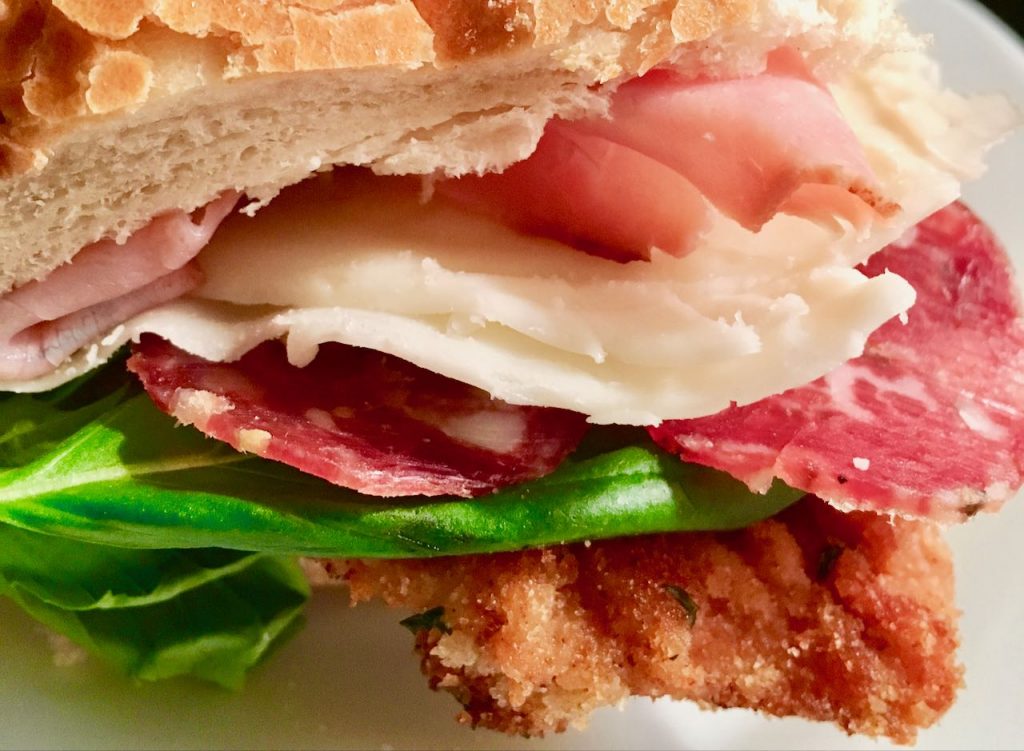
However, I also love a chicken cutlet sandwich on soft Italian bread, with fresh mozzarella and prosciutto with balsamic vinaigrette. (Or even better, chicken cutlet with broccoli rabe and mozzarella on a soft roll!)

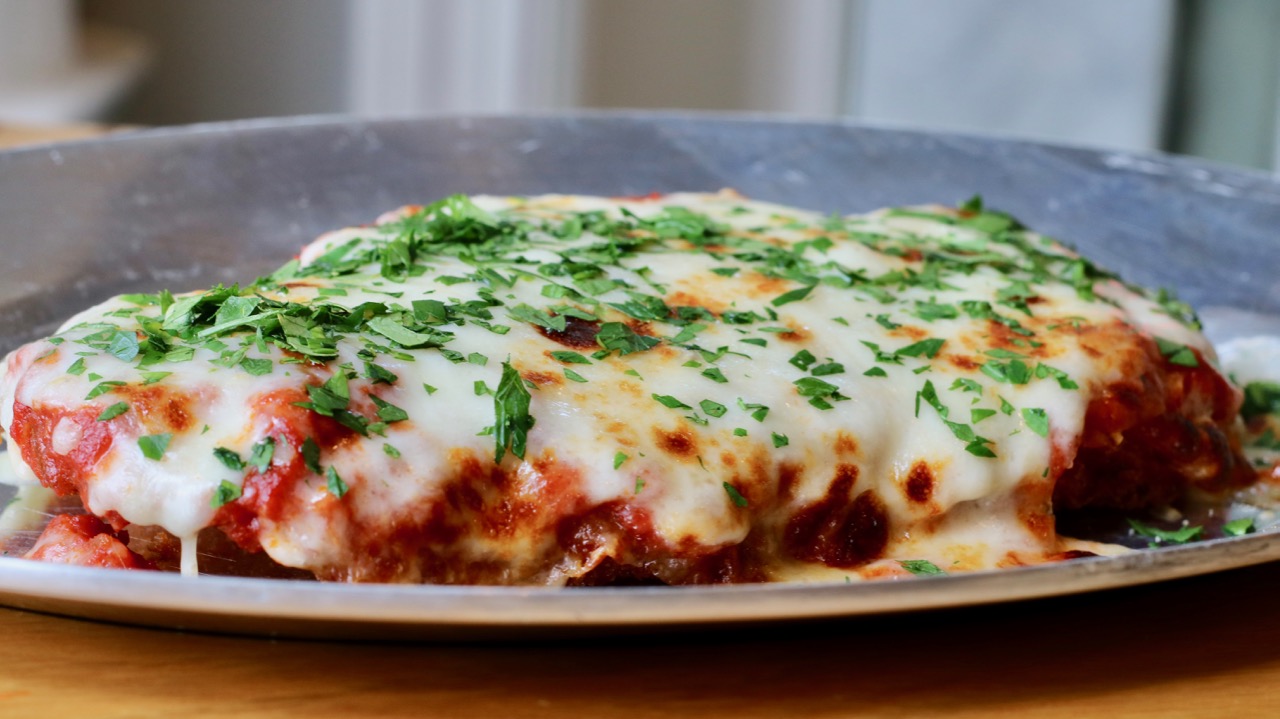
Ah- and then the most popular use of classic chicken cutlet of them all- the one, the only, Chicken Parmesan, which may be my favorite of them all.

chicken parmesan
Make the Best Chicken Parm

No matter how you decide to serve your chicken cutlets, they are guaranteed to be delicious if you follow the process of flour, egg, breadcrumb, fry and keep in mind my Feaster’s Tips!

Antipasti Platters

Fall Harvest Platter

Fabulous food boards!

 I love foods that encourage social eating. After all, that is what Feast & Merriment is all about!When I have company, no matter if it is one person or a large gathering, I make sure 3 things happen that help guests start relaxing right away.

  1. Music is playing in the background
  2. The wine is ready to pour
  3. A platter of deliciousness is ready to dig into.

If these three things happen, the night (or day) is sure to be off to a really great start!

How to make a great food board

A good food board features a variety of food groups, a range of colors and textures, and is intended to be shared easily. You want to be sure to select ingredients that can be served at room temperature. It’s an important dish to remember that quality ingredients make quality platters, so if making a board with a budget in mind, go for quality of items over a quantity of items. Choose foods that complement and also contrast each other. Use lots of color and pile things high. There is no limit to your culinary creativity when making an impressive, and delicious, food board.

Suggested Ingredients

  • Cheeses
  • Grapes
  • Figs
  • Dried Apricots
  • Olives
  • Cured Meats
  • Smoked Salmon
  • Chilled shrimp
  • Dijon Mustard
  • Cucumbers
  • Roasted or Fresh Peppers
  • Apple Slices
  • Roasted Garlic
  • Honey
  • Nuts
  • Baguette slices
  • Crackers
  • Grilled vegetables

Breakfast Casserole

Breakfast Casserole

AKA: Tater-Tot Breakfast Frittata

Breakfast casseroles are all the rage, and why not? They are incredibly easy to make, delicious, can be made in advance and a great way to use up leftover ingredients that you have on hand.  It’s always a hit for breakfast lovers of all ages.

Similar to a frittata, but not exactly, this egg dish has become popular for KETO dieters, meal preppers, commuters, parents, and your basic brunch host. (I’m sure I am leaving someone out!)  Just about everyone, of all ages, can find a variation of this breakfast casserole that they like.

Breakfast casserole is so easy, fun and completely customizable. Personally, I like to add in a layer of tater tots or hash browns because potatoes make me happy. However, they are optional. When I make this for my nieces or a group of friends, including the tater tots always earns me a few extra bonus points 🙂

The combinations of ingredients are endless- only your creativity will limit you! Here are some variations that I have made to hopefully inspire you to make your own!

  • Sausage, mushroom, onion and fontina cheese
  • Ham, mushroom and swiss cheese
  • Spinach, mushroom, onion and cheddar cheese
  • Broccoli, cheddar and onion
  • Bacon, peppers and scallions
  • Crab, Bacon & Cheddar

Feaster’s Tip

To cut clean portions, cook completely and cool completely  Remove casserole from dish and cut into squares and replace into casserole dish. This makes it easy to reheat whole or as individual slices. You can also wrap and refrigerate or freeze individual portions for breakfast on the go. 

Tater Tot Casserole

Prep Time10 minutes
Cook Time30 minutes
Total Time40 minutes
Course: Breakfast
Cuisine: American
Servings: 6 people

Ingredients

  • 3 cups Tater tots Cooked & cooled (don't over cook)
  • 1/2 -3/4 cup shredded cheese of choice
  • 5 breakfast sausage links- cooked and sliced or diced.
  • Half of a large white onion sliced and sautéed.
  • 8-9 large eggs- beaten
  • 1/2 cup heavy cream optional, but it helps it fluff.
  • 2 tablespoons chopped fresh parsley optional
  • salt & pepper

Instructions

  • Preheat the oven to 400 degrees. Grease an 8×8 pyrex dish.
  • Toss the cooked tater tots with a pinch of salt & pepper for seasoning. Spread them out in a single uniform layer out on the bottom of the dish and lightly press them with the back of a spatula.
  • Mix the heavy cream into the beaten eggs. Season well with Salt & pepper. Mix in half of the shredded cheese, the sausage & onions and pour mixture over the tater tots.
  • Top with the remaining cheese and parsley. Bake for approximately 30 minutes or until cooked through.

Tuna Stuffed Peppadew Peppers

Tuna Stuffed Pepperdews

Tuna for Tapas!

The definition of Tapas loosely translates to “small Spanish savory dishes, typically served with drinks at a bar.” My definition is more like “little bites of deliciousness inspired by the Mediterranean.’

Tapas are fantastic and the true essence of Feast and Merriment. They bring people together to share in bites of savory and salty over cocktails. This recipe for tuna stuffed peppadews is ridiculously easy and takes only 3 ingredients! Those 3 ingredients produce a bite that is equal parts sweet, spicy, salty and savory. The pepper dews are both sweet and spicy and they work tremendously well to balance the brininess of the tuna and tartness of the marinara sauce. I challenge you to find another recipe that packs as much flavor with so few ingredients.

I like to serve these with Manchego cheese, olives, and Macrona almonds. Perfect for movie night!

Tuna Stuffed Peppers

Prep Time10 minutes
Cook Time10 minutes
Total Time20 minutes
Course: Appetizer
Cuisine: Mediterranean

Ingredients

  • 12 peppadew peppers in brine
  • 1 jar of high quality tuna fish
  • 1 cup your favorite marinara sauce

Instructions

  • Preheat oven to 350 degrees F
  • Stuff each pepper with tuna fish and arrange on an oven proof dish so that peppers are snug enough to stand up. (Tip cut a tiny piece off the bottom of the pepper if it is having trouble standing to give it a flat surface) 
  • Top peppers with marinara sauce and bake for about 7-10 minutes or until heated through. 
  • Serve hot.

Asparagus & Goat Cheese Tart

Asparagus & Goat Cheese tart made with puff pastry

This easy & elegant recipe for Goat Cheese and Asparagus Tarts is one of my favorite uses for puff pastry. It is simple to make and the result is absolutely stunning.

This Asparagus & Goat Cheese puff pastry tart is a blend of simple, seasonal and sophisticated flavors. Leveraging the versatility of puff pastry, this dish effortlessly marries the spring essence of asparagus with the creamy tang of goat cheese, resulting in a savory dish that is as visually stunning as it is delicious!

Puff pastry tarts of all kinds are an elegant and impressive dish that don’t require much fuss. All you need are a few really tasty ingredients which require minimal effort while yielding maximum impact.

How to make a puff pastry tart

Whenever you work with puff pastry you need to the thaw the frozen pastry but keep it chilled. This means thawing it the refrigerator overnight for the best results. Once the puff pastry is thawed, it is ready for use. Do not take it out of the fridge until you are ready to work with it! This prevents the pastry from getting oily. In nutshell- keep it cold!

Meanwhile, get your ingredients ready. Sauté the onions until soft and translucent (this can be done up to 2 days in advance), chop fresh asparagus and crumble goat cheese. These savory elements are then arranged atop the puff pastry and baked for 20-25 minutes.

These tarts can be made in small, bite size versions or larger and served with a side salad for an entree. The results taste great, no matter the size. I often make these in bite size and serve as an hors d’oeuvre along with cocktails or served large with size salad as an elegant lunch or light dinner.

Other ways to use this Puff Pastry recipe

Mini puff pastry tart with tomato goat cheese

This recipe is an excellent platform for getting really creative with the flavors you like. Once you have the basics down and the onion mixture made, the opportunities are endless. I have made all kinds of tarts based on what I had on hand such as tomato and parmesan, mushroom and brie, and many more varieties. Asparagus and goat cheese is always a winner with my crew so it’s my “go-to” version, but don’t be scared to get creative and do your own thing here if you aren’t a fan of asparagus- just stick to the basics and your tarts will come out amazing!

Make Ahead

One of the best things about this recipe is its convenience. These tarts can be prepared completely tarts in advance. Simply prepare, place in fridge until ready to use, and bake to order.

Pro Tip!

When using puff pastry, make sure you defrost it in the refrigerator overnight. You need it to remain cold, but it cannot be frozen or it will crack when you start to work it. This means you need to plan one day ahead when you make this tarts, but planning is really the hardest part!

Two Ingredient Appetizer: Prosciutto wrapped Asparagus
Bite sized pieces of asparagus wrapped in prosciutto are an elegant and easy addition to any cocktail hour or dinner party for friends!
Simple Roasted Asparagus
Asparagus is the most quintessential of all spring vegetables and preparing it couldn’t be easier. Simply toss with olive oil, salt & pepper and bake for 12-15 minutes until tender.

Asparagus and Goat Cheese Tart

Puff pastry is thawed and topped with a savory mixture of sautéed onions, asparagus and goat cheese. These tarts can be made in advance.
Prep Time30 minutes
Cook Time25 minutes
Total Time55 minutes
Course: Appetizer, brunch, Main Course
Cuisine: American, Italian
Servings: 4

Ingredients

  • 1 package puff pastry 17.3 ounces/2 sheets puff pastry, defrosted
  • olive oil
  • 4 cups thinly sliced yellow onions 2 large onions
  • 3 large garlic cloves cut into thin slivers
  • Kosher salt and freshly ground black pepper
  • 3 tablespoons dry white wine
  • 2 teaspoons minced fresh thyme leaves
  • 4 tablespoons freshly grated Parmesan
  • 4 ounces garlic-and-herb goat cheese
  • 1 cup chopped, blanched asparagus
  • 12 large Basil leaves, julienned

Instructions

  • Unfold a sheet of puff pastry on a lightly floured surface and roll it lightly to an 11 by 11-inch square. Using a 6-inch round object as a guide, cut 2 circles from the sheet of puff pastry, discarding the scraps. Repeat with the second pastry sheet to make 4 circles in all. Place the pastry circles on 2 sheet pans lined with parchment paper and refrigerate until ready to use.
  • Preheat the oven to 425 degrees F.
  • Heat 3 tablespoons of olive oil in a large skillet over medium to low heat and add the onions and garlic. Saute for 15 to 20 minutes, stirring frequently, until the onions are limp and there is almost no moisture remaining in the skillet. Add 1/2 teaspoon salt, 1/4 teaspoon pepper, the wine, and thyme and continue to cook for another 10 minutes, until the onions are lightly browned. Remove from the heat.
  • Using a sharp paring knife, score a 1/4-inch-wide border around each pastry circle. Prick the pastry inside the score lines with the tines of a fork and sprinkle a tablespoon of grated Parmesan on each round, staying inside the scored border.
  • Place 1/4 of the onion mixture on each circle, again staying within the scored edge. Crumble 1 ounce of goat cheese on top of the onions. Scatter the Asparagus in the center of each tart. Sprinkle with basil, salt, and pepper. 
  • Bake for 20 to 25 minutes, until the pastry is golden brown. The bottom sheet pan may need an extra few minutes in the oven. Serve warm.

Easy Corned Beef Recipe

Cooked Corned Beef

Call me Corney, but I love this beef! A beloved tradition by many, corned beef on St. Patrick’s Day represents the spirit of this Irish celebration for all.

When it comes time to make this traditional meat, look no further for the best corned beef recipe. Its tender, flavorful slices are ever present at annual gatherings and hearty feasts during this festive time of year. I have been using this same reliable recipe for almost 2 decades and it’s perfect every time. My only mistake is never making enough!

Corned beef is just like turkey. Why? Because people only make it once a year! I don’t know why- it’s just the way it is. Is it hard to make? No. Is it delicious? Yes. And again, just like turkey, the only thing better than dinner itself, is the leftovers.

Cooked Corned Beef - corned beef recipe

What is corned beef?

The term “corned” basically means it is salted meat. Similar to a cured meat, like prosciutto. However where prosciutto is cured and dried, corned beef is cured but not dried, and still requires cooking.

As for the cut of beef, it is typically the brisket cut and often comes with the fat cap still attached.

How to buy corned beef

corned beef comparison

Not all corned beefs are created equal. Like many cured meats (bacon, sausage, etc.) most corned beefs are loaded with nitrates which are a known carcinogen. I do my best to avoid them, and you should too. It’s nitrates and their nasty comrades that give some corned beef its well known pink color, and also expands their shelf life to question amounts of time. (This also keeps the price down.) When you remove all that stuff, you end up with a less attractive, but more delicious, brown cut of beef. The choice is yours. I always opt for nitrate free when given the option.

What to serve with Corned Beef

Corned beef is really quite easy to make. It’s the fixings that bring it all together. I love a really good, spicy mustard and a side of cabbage. Or, you can make corned beef sandwiches, better known as rubens. There is something so craveable about thinly sliced corned beef smothered with melted Swiss cheese, covered in sauerkraut and mustard on Rye. Ohh… how I love a ruben. Thus, I always make double the amount of corned beef so we have plenty of leftovers!

Roasted Cabbage
This simple yet elegant side dish is a testament to the transformative power of roasting, turning ordinary ingredients into extraordinary culinary experiences.

With its hearty flavors and simple preparation, this corned beef recipe is a delicious way to celebrate St. Patrick’s Day. Whether you’re serving it with a traditional side of cabbage or sandwiching it between slices of bread for a delicious ruben sandwich, this corned beed recipe is sure to become a favorite in your household. So gather your loved ones, raise a toast to tradition, and enjoy the flavors of this timeless Irish dish. Sláinte!

From Tough to Tender

Because corned beef comes in so many different thicknesses, weights and shapes, it’s not always easy to know when it is done. While the average time in this recipe is about 3 hours, there are variables that can impact that. It’s pretty easy to check it with a fork over so often and gauge its level of tenderness, but if you really want a perfect cook, a quick spot check with Thermapen ONE will make sure you’ve hit the target temp of 190°F (88°C). Brisket is a thick, tough cut, so once your corned beef reaches this internal temp, it still needs time for the collagen to break down which will happen during resting from carry over time.

Thermoworks Thermapen One®
A new standard of accuracy for the discerning cook
The Thermapen® ONE was designed with speed and accuracy in mind. If you are a cook who values precision, this thermometerl will revolutionize your cooking experience.

Pro Tips:

  • To make corned beef ahead of time prepare the meat entirely, let it cool completely, wrap tightly and refrigerate for up to 3 days. When ready to serve, slice cold and place into an oven safe dish. Drizzle with reserved cooking liquid or low sodium chicken stock. Reheat at 350°F until heated through.
  • Corned beef shrinks considerably! You should figure on about a 3/4 to 1 pound a person when buying it.
  • Use a very sharp knife to slice and always slice ACROSS THE GRAIN!

Corned Beef

A beloved tradition by many, corned beef on St. Patrick's Day represents the spirit of this Irish celebration for all. Its tender, flavorful slices are ever present at annual gatherings and hearty feasts during this festive time of year.
Prep Time10 minutes
Cook Time3 hours 45 minutes
Total Time3 hours 55 minutes
Course: Main Course
Cuisine: Irish

Ingredients

  • One 3 lb. corned beef brisket in brine
  • 16 cups cold water
  • 2 bay leave
  • 6 all spice berries
  • 3 whole cloves
  • Mustard for serving
  • A Large Dutch Oven

Instructions

  • Preheat oven to 275°F. 
  • Rinse Corned Beef. Place beef in dutch oven, add all ingredients and bring to a boil on the stove top. Meanwhile, skim off any scum that rises to the surface. 
  • Cover and transfer to the oven for 3 hrs. It should be fork tender. If it does not want to split with a fork, let it cook longer. (If you have an instant read thermometer, the goal temp is 200°F + rest time)
  • If serving immediately, remove from liquid and set aside. Cover loosely with foil and let rest for about 20 minutes. If you are cooking in advance, remove from heat and let it come down in temperature in or out of the liquid, and then wrap tightly until ready for use.
  • Slice the meat ACROSS THE GRAIN into 1/4 inch slices. If you do not cut this meat across the grain, it will be chewy. To make sure you are slicing correctly, slice a piece and if you can break it apart easily, you are on the right track.
  • Serve with good quality spicy mustard

Notes

*corned beef shrinks considerably! You can figure on about a pound a person when buying it. Make extra for leftovers and make Ruben Sandwiches! 

Roasted Shrimp Cocktail

roasted shrimp cocktail

The Secret to Better Shrimp Cocktail? Roast It.

I make a lot of shrimp cocktail. Why? Because people go nuts for it. Every time I serve it—whether it’s a big party or a cozy dinner—it disappears. Fast. Shrimp cocktail is always the first thing gone. People just love it.

But here’s the thing: most shrimp cocktail out there is… sad. You know the kind I’m talking about. Cold, soggy, watery shrimp rings from the grocery store that taste like absolutely nothing. They hurt my soul a little.

Shrimp cocktail should be meaty, dry, and briny—full of natural flavor, even before you dip it into that zippy cocktail sauce. It should taste like the ocean, not like it came from the back of a freezer aisle.

It’s surprisingly easy to elevate shrimp cocktail from forgettable to unforgettable. You don’t need a complicated brine or a fancy setup—just good-quality shrimp and a hot oven.

Why Roasted Shrimp Cocktail?

I adore Alton Brown’s Shrimp Cocktail recipe. It’s rich, complex, and has great texture thanks to the brining step. But honestly? It’s a lot. The brine, the rinse, the drying—it’s better suited for small batches for an small gathering or special occasion.

For a crowd (or just a quicker prep), I always turn to Ina Garten’s Roasted Shrimp Cocktail, featured in both Back to Basics and Cook Like a Pro. It’s simple, foolproof, and wildly delicious.

Pro Tips:

  • Source good shrimp.
  • Don’t overcook the shrimp! Shrimp come in different sizes so 8 minutes is a guide. Adjust accordingly based on size and remove from oven when just cooked through.
  • Don’t underestimate the importance of a good cocktail sauce. Serve with extra horseradish on the side for those who like it spicy.
  • Garnish with chopped parsley or chives to add some color to the plate.

Explore More shrimp cocktail recipes!

Shrimp cocktail is an elegant yet simple appetizer that’s always a crowd-pleaser. Plus, it’s easy to prepare in advance, making it perfect for entertaining!
Fresh shrimp, tomato juice, hot sauce, cucumber, & avocado are combined with seasonings to deliver a refreshing and exciting shrimp appetizer. The perfect starter for a summer gathering.

Roasted Shrimp Cocktail

It’s surprisingly easy to elevate shrimp cocktail from forgettable to unforgettable. You don’t need a complicated brine or a fancy setup—just good-quality shrimp and a hot oven.
Prep Time10 minutes
Cook Time7 minutes
1 hour
Total Time17 minutes
Course: Appetizer
Cuisine: Seafood

Ingredients

  • 2 lbs 12 to 15-count shrimp
  • 1 tbs olive oil
  • 1/2 tsp kosher salt
  • 1/2 tsp fresh ground black pepper
  • 1 lemon
  • your favorite cocktail sauce

Instructions

  • Preheat the oven to 400 degrees F.
  • Peel and devein the shrimp, leaving the tails on. (Or take ’em off if you prefer!) 
  • Toss them in a bowl with the Olive Oil, Salt & Pepper. Spread them in a single layer on a sheet pan. 
  • Roast for about 8 minutes, flipping once, just until pink and firm and cooked through. Set aside to cool.
  • Serve with lemon wedges and your favorite cocktail sauce. 

Notes

These can be made up to a day in advance. Store in a glass, air tight container. 

Chicken with Forty Cloves

chicken with 40 cloves of garlic

Decadent and Delicious

We have a screened-in porch and after ten years, we finally gave it some much needed attention.  We worked hard at some serious DIY projects and together, we added a pallet wall to the porch, hung hammocks, and built our very own farmhouse style table.  We turned it into the porch we always wanted.

Finally, after months of hard work, it was time for Feast & Merriment with friends and neighbors. The inaugural dinner was one I gave great thought to.  I wanted to create the feeling of being on a farm in France, enjoying intensely flavorful comfort foods, and sipping delicious wines with friends. (Granted, I have yet to make it to the country side of France, but this is what I picture in my head. So I’ll just roll with it.) I finally decided that the star of the evening would be the French classic, Chicken with 40 cloves. 

chicken with 40 cloves on porch

The evening, and the chicken, were simply divine. I recommend this recipe for a special occasion served with a rich and buttery chardonnay.

chicken with 40 cloves of garlic

Tips for this recipe:

  • This is a wonderful recipe, but before you commit to it, you should know that it is an intermediate level recipe and a good amount of work to prepare. You need to commit to it and be sure to carve out enough time.
  • Double or triple the sauce. You won’t regret it.
  • Factor in extra clean up time for after searing off all the chicken- it splatters, takes longer than you think and not something you want to do with company in your kitchen. Once you get past that step, you’ll be on your way!  I recommend searing the chicken, setting it aside, cleaning up, re-grouping, and then you’ll be on your way.

Chicken with Forty Cloves

Prep Time1 hour
Cook Time45 minutes
Total Time1 hour 45 minutes
Course: Main Course
Cuisine: French

Ingredients

  • 3 whole heads garlic, about 40 cloves
  • 2 (3 1/2-pound) chickens, cut into eighths
  • kosher salt
  • freshly ground black pepper
  • 1 tablespoon unsalted butter
  • 2 tablespoons olive oil
  • 3 tablespoons Cognac, divided
  • 1.5 cups dry white wine
  • 1 tbs fresh thyme leaves
  • 2 tbs all-purpose flour
  • 2 tbs heavy cream

Instructions

  • Separate the cloves of garlic and drop them into a pot of boiling water for 60 seconds. Drain the garlic and peel. Set aside.
  • Dry the chicken with paper towels. Season liberally with salt and pepper on both sides.
  • Heat the butter and oil in a large pot or Dutch oven over medium-high heat. In batches, saute the chicken in the fat, skin side down first, until nicely browned, about 3 to 5 minutes on each side. Turn with tongs or a spatula; you don’t want to pierce the skin with a fork.
  • If the fat is burning, turn the heat down to medium. When a batch is done, transfer it to a plate and continue to saute all the chicken in batches. 
  • Remove the last chicken to the plate and add all of the garlic to the pot. Lower the heat and saute for 5 to 10 minutes, turning often, until evenly browned. 
  • Add 2 tablespoons of the Cognac and the wine, return to a boil, and scrape the brown bits from the bottom of the pan. 
  • Return the chicken to the pot with the juices and sprinkle with the thyme leaves. Cover and simmer over the lowest heat for about 30 minutes, until all the chicken is done.
  • Remove the chicken to a platter and cover with aluminum foil to keep warm.
  • In a small bowl, whisk together 1/2 cup of the sauce and the flour and then whisk it back into the sauce in the pot.
  • Raise the heat, add the remaining tablespoon of Cognac and the cream, and boil for 3 minutes. 
  • Add salt and pepper, to taste; it should be very flavorful
  • Pour the sauce and the garlic over the chicken and serve hot.

Notes

Be sure to serve the chicken with a nice, crusty bread to soak up any remaining sauce. Trust me, you will want to. 

Egg-cellent Experiments

Creamed Spinach Baked Eggs

We love a good bacon, egg & cheese sandwich at my house. But sometimes you really have to change it up, especially since we have been house bound for most of 2020 and going out for Sunday Brunch has pretty much been pulled off the table. So I’ve been working on sassing up Sunday breakfasts on my own table.

The purpose of this post is to share some of my experiments in the kitchen to get that creative culinary mind of yours going, and thinking of new ways to serve up eggs at your house.

I’ve tried making eggs so many ways over this past year in quarantine, and I have learned so much, that I want to share some of it with you.

What I have learned

I’ve learned that baked eggs are hard to make. The whites never set before the yolks are well over cooked. I tried different size baking dishes, about 8 different recipes, I tried different locations in the oven and of course different temperatures. None of it worked. I became determined and realized the best way to control the doneness of baked eggs is to separate the whites from the yolks and add the yolks only after the whites start to set.


I’ve learned the exact timing of boiling eggs to get perfectly jammy yolks and well cooked whites. (Add the eggs to cold water and bring the water to a boil. When the water starts to boil, start a timer for 3 minutes. Remove the eggs and let rest for a minute or two until cool enough to handle. Perfectly jammy eggs. Every time.)

I have learned that a good hash is equally rustic and impressive. Hash is simply seasoned potatoes of any variety mixed with whatever vegetables you have on hand, seasoned with whatever you want to season it with, and it always seems to go great with eggs.

I’ve learned that the only thing better than a Bacon, Egg & Cheese sandwich is a mini Bacon, Egg & Cheese sandwich.


I’ve learned that breakfast Crostinis are an awesome addition to any Sunday morning! Especially if you have some leftover steak. (Learn the basics on how to make crostini here.)

I’ve learned that Hollandaise Sauce is not that hard to make. Now, I’m making Eggs Benedict whenever I get the chance.

I learned that you can use a pre-made flatbread and make a breakfast pizza. Next time I’ll use a béchamel sauce on it too.

I learned that I really do love a creamy, custardy quiche. Who can resist it?


Tips on Buying Eggs

Eggs are really not where you want to pinch your pennies. Mass produced, generic supermarket eggs come from chicken warehouses that are seriously repulsive if you care to do the research. The nutritional composition of low quality eggs is…well, low. The chickens are fed poor quality, soy supplemented, feed. They are given a variety of antibiotics to stop the spread of the high amount of diseases caused from the chickens being forced to live in incredibly crowded quarters. They are given hormones to help them produce more eggs. All of the antibiotics and hormones and lack of ability to move naturally or lay eggs naturally, gets passed on to us, the eaters.

Don’t be fooled by terms like “natural” and “free-range.” Free Range often refers to the ability for the chicken to move. That could mean they can move 5 inches. It can mean they have access to a single exit and entrance of the chicken coop for 5000 birds. It’s not a quality indicator.

Instead, look for eggs that indicate how much free range space is given. Good eggs will also indicate if the eggs are soy free, if the chickens are pasture raised. And look for vegetarian fed diets.

Utility Eggs vs Farm Eggs

The chicken’s diet is a direct indicator of the color of the yolk. Typically, the healthier the chicken and the healthier the diet, the more intensely yellow the yolk will be.

In the image below, left is a basic utility egg. On the right is a farm egg. Note the intensity of color of the yolk in the farm egg and the clarity of the whites compared to the basic egg.

My preferred Eggs

I have a few local farms and farmers markets near me so I usually buy my eggs there. However, sometimes I need to buy them from the grocery store. When I do, my preferred brand is Oliver’s Organic Eggs. They are pastured raised, vegetarian fed, soy free, give no hormones, antibiotics and do not liven cages. They are provided over 70 ft of pasture per hen. I’m a fan.

Aweee Shucks!

For the love and learning of shellfish

We love shellfish around here. All of it- any kind, prepared any way. But we really love fresh shucked oysters and clams. We’ve been working on mastering the art of shucking- and let me tell you, it ain’t easy! We are finally making strides in this department this picture certainly proves that!

Oyster Resources and Recommendations:

Check out Oysterology.com  It’s an incredible resource and their database is unbelievable.

Learn more about the history of Oysters

Oysters played a big role in history. This books talks specifically their presence in New York City many years ago. Get your read on- The Big Oyster

The best Oysters in Westchester.

Saltaire Oyster Bar in Port Chester, NY. Hands down- the best oysters around. Be sure to make a reservation first – the secret is out.

Best Oysters are best for beginners.

Typically West Coast Oysters are what I recommend. They tend to be smaller and less briny.

Roasted Oyster Recipe

Roasted Oysters in Tray
Print Recipe
5 from 2 votes

Roasted Oysters

These baked oysters are succulent and rich and oh so delicious! 
Prep Time35 minutes
Cook Time10 minutes
Total Time45 minutes
Course: Appetizer
Cuisine: Seafood
Keyword: oysters

Ingredients

  • 1 stick butter
  • 1/4 cup finely chopped fresh parsley (and/or any combination of basil, tarragon or chives)
  • 1/8 cup minced celery with leaves (optional, but recommend!)
  • 2 tablespoons finely minced shallots
  • 1 1/2 teaspoons grated lemon zest
  • 1 tablespoon finely minced garlic
  • Kosher salt and freshly ground pepper
  • 3 ounces gruyere cheese (or similar nutty cheese)
  • Sprinkle of breadcrumbs- optional
  • 12-24 fresh oysters (in the shell)

Instructions

  • If you have a oyster roasting pan now is the time to use that! If you don’t, prepare a baking sheet with a roasting grate to support the oysters, or make a bed of dried rice or rock salt to nestle the oysters into on the sheet pan to keep them supported so they do not spill their liquor or the butter sauce you will add.
  • Preheat the oven to 425 degrees F. 
  • Open the oysters with an oyster knife. (if you don’t know how to safely do this, don’t make this recipe!)  
  • Meanwhile, melt together the butter, herbs, shallots, lemon zest, garlic and a dash of salt and pepper. (Feel free to add a dash of white wine) Be careful not to burn the butter sauce but cook it enough to cook down the shallots and garlic. 
  • Once all oysters are in place on your roasting tray, add a heaping teaspoon of the melted butter mixture on top of each oyster. Top with about a teaspoon of shredded cheese followed by a pinch of breadcrumbs, if using. 
  • Roast the oysters until the the oysters are just cooked through and the cheese is melted and turning golden brown. (About 8 to 10 minutes) Serve immediately.

Notes

If your cheese is not browning or you really want a nice dark brown color, Put the oysters on broil for the last 2 minutes.  

Chicken Scarpariello

Chicken Scarpariello

Chicken Scarpariello is a classic Italian dish, often served family style. It is made with Chicken, hot or sweet Italian Sausage,  bell peppers, onions, potatoes and hot cherry peppers. It is a great dish for feeding a crowd- if you can handle the heat!

This recipe takes some time at the stove so plan accordingly. I also don’t feel right not telling you that there is a significant splatter effect that takes place while searing the sausage. However, once all these ingredients are put together in the pot, the flavors come together for a spicy, sweet, savory dish. You can find Chicken Scarpariello at many Italian restaurants, but this recipe is so much better than what you would get out.

The Recipe

Chicken Scarpariello

This chicken recipe is savory and spicy and fit for a crowd! 
Prep Time40 minutes
Cook Time1 hour
Total Time1 hour 20 minutes
Course: Main Course
Cuisine: Italian

Ingredients

  • 1/4 cup olive oil
  • 1.5 lbs chicken cut into small serving pieces
  • .5 lb Italian sausage cut in 1-inch pieces (sweet or hot or both)
  • 1 small red bell pepper julienned
  • 2 garlic cloves minced and crushed
  • 3 hot cherry peppers sliced (bottled in vinegar)
  • 1 onion sliced
  • 1⁄2 1/2 teaspoon salt
  • 1⁄8 tsp fresh ground black pepper
  • 1 tbsp fresh rosemary leaves crushed
  • .5 cup chicken broth canned or fresh
  • 1/4 cup dry white wine such as Pinot Grigio
  • 1 tbsp all-purpose flour
  • 1 tsp fresh lemon juice
  • 1 potatoes peeled and diced into 1 inch cubes or similar
  • 1 lb fresh mushrooms sliced (optional)

Instructions

  • In a deep skillet or dutch oven, heat oil. Add chicken and sausage in batches; brown on all sides. removing pieces to a plate as they brown. (be careful of the splatters.) 
  • Drain oil leaving 2 tablespoons of the drippings in the pan. Over medium heat, add the mushrooms, red bell peppers, sliced cherry peppers, onion, potatoes, and garlic; saute until tender.
  • Return chicken and sausage to skillet. Add salt, black pepper, the rosemary , the broth, the wine, and lemon juice. 
  • Bring to a boil; lower heat and simmer, covered, until chicken is tender, about 25 minutes.
  • Remove chicken and sausage from skillet; arrange on a warm serving platter.
  • Skim excess fat from mixture. In a small glass cup, mix flour (or cornstarch) with 1/4 cup water until blended. Stir into liquid in skillet. Bring to a boil while stirring constantly for about 1 minute, or until mixture thickens.
  • Add meat back into sauce or spoon sauce over chicken and sausage, garnish with fresh chopped parsley and serve with crusty bread.

Notes

Use sweet sauce and reduce the hot peppers to control the spice level, keeping in mind that the recipe is intended to be a spicy dish. (Not recommended for people who like mild foods.)

The Perfect Pizzelle

Italian pizzelle cookie

Pizzelles are a traditional Italian treat, best described as a ‘waffle cookie.’ They are super thin, crispy and insanely addicting! When you are cooking them, they produce the same smell that leaves your mouth watering when you smell the Belgium waffles cooking on the side of a ski slope. (If you’ve never experienced that smell, trust me when I tell you that there is no better smell!)

But what is it? A pizzelle is basically a waffle cone. (And who doesn’t love a waffle cone?) The ingredients are mixed together to become a batter and then cooked on a special waffle iron. When they come off the iron, they are pliable and can either let them set as a cookie, or they can be formed and left to set into the shape of a cone. They can also be rolled and used as for making cannolis.

My absolute favorite cookie to make (and eat!) are Classic Italian Pizzelle Cookies!

I grew up eating pizzelles and I will grow old eating pizzelles. But I don’t just love eating this classic cookie, I love making them too.

Unfortunately, you did need special equipment to make pizzelle cookies.  They make a variety of waffle irons to choose from including non-stick and light-weight options. Personally, I am old school and my pizzelle iron is heavy-duty, cast aluminum version and very similar to the one that I remember my great-grandma using. I believe somethings just shouldn’t change and this is one of them. If you ever decide to invest in a pizzelle iron, you will be able to enjoy making these traditional Italian cookies for family, friends, neighbors and more for many years to come. It’s one kitchen appliance that I really enjoy owning and I think you will too!

This is the pizzelle iron I own and recommend:

If you are a traditionalist in the kitchen and interested in buying a Pizzelle maker, I included a link to the one I own. I purchased it from Amazon many years ago and have used it countless times.  I can recommend this product with confidence to anyone looking to purchase one for themselves, or as a gift for the cook in their life. 🙂

Feaster’s Tip:

Use a pancake batter dispenser for the pizzelle batter. It works like a dream and makes the process of dolloping the batter onto the iron much faster and more consistent.

Classic Italian Pizzelle

Prep Time5 minutes
Cook Time1 hour
Total Time1 hour 5 minutes
Course: Dessert

Ingredients

  • 3 large eggs
  • 3/4 cup sugar
  • 3/8 tsp kosher salt
  • 1 tsp real vanilla extract (or anise if preferred)
  • 1 3/4 cups all-purpose flour
  • 2 tsp baking powder
  • 8 tbsp melted butter

Instructions

  • Beat the eggs, sugar, salt, and vanilla until well combined and smooth. (about 4  minutes on kitchen aid low setting)
  • Stir in the flour and baking powder, mixing until smooth.
  • Stir in the melted butter and mix until smooth.
  • Heat your pizzelle iron and lightly grease with vegetable or canola oil. 
  • Add about a tablespoon of batter to the center of the pizzelle iron and press for about 45 seconds or until golden brown. 
  • Carefully remove the pizzelle and place on to a cooling rack. 
  •  Once cooled, dust with confectioner’s sugar. 

Notes

Once cookies are cooled completely, they can be stored in an air tight container for at least one week.