Buffalo Shrimp Recipe

Buffalo shrimp on Plate

Let’s consider Buffalo Wings vs Buffalo Shrimp. Buffalo Wings are without question one of the most popular “bar foods” in American restaurants. The unique aroma awakes your taste buds and I personally find it hard to resist. I bet that if wings are on a menu, someone at your table is ordering them. And if someone else doesn’t, you probably will. Despite the messy fingers, the inconsistencies in sauces and crispiness, and even size, they are simply hard to resist.

For me, it’s not about the chicken wing itself, its about the Buffalo sauce. I simply crave it. With Buffalo sauce being so popular, now we see a wide variety of “wings” on menus including Boneless Buffalo wings, Buffalo Cauliflower bites, Buffalo Tofu and my all time favorite, Buffalo Shrimp.

When I travel down south to visit family and friends I find Buffalo shrimp on many pub menus. But where I live in NY, I can’t seem to find them anywhere! So, what was a girl to do when the craving struck? Get cooking! I am sure glad I started making my own because they are in a a league of their own.

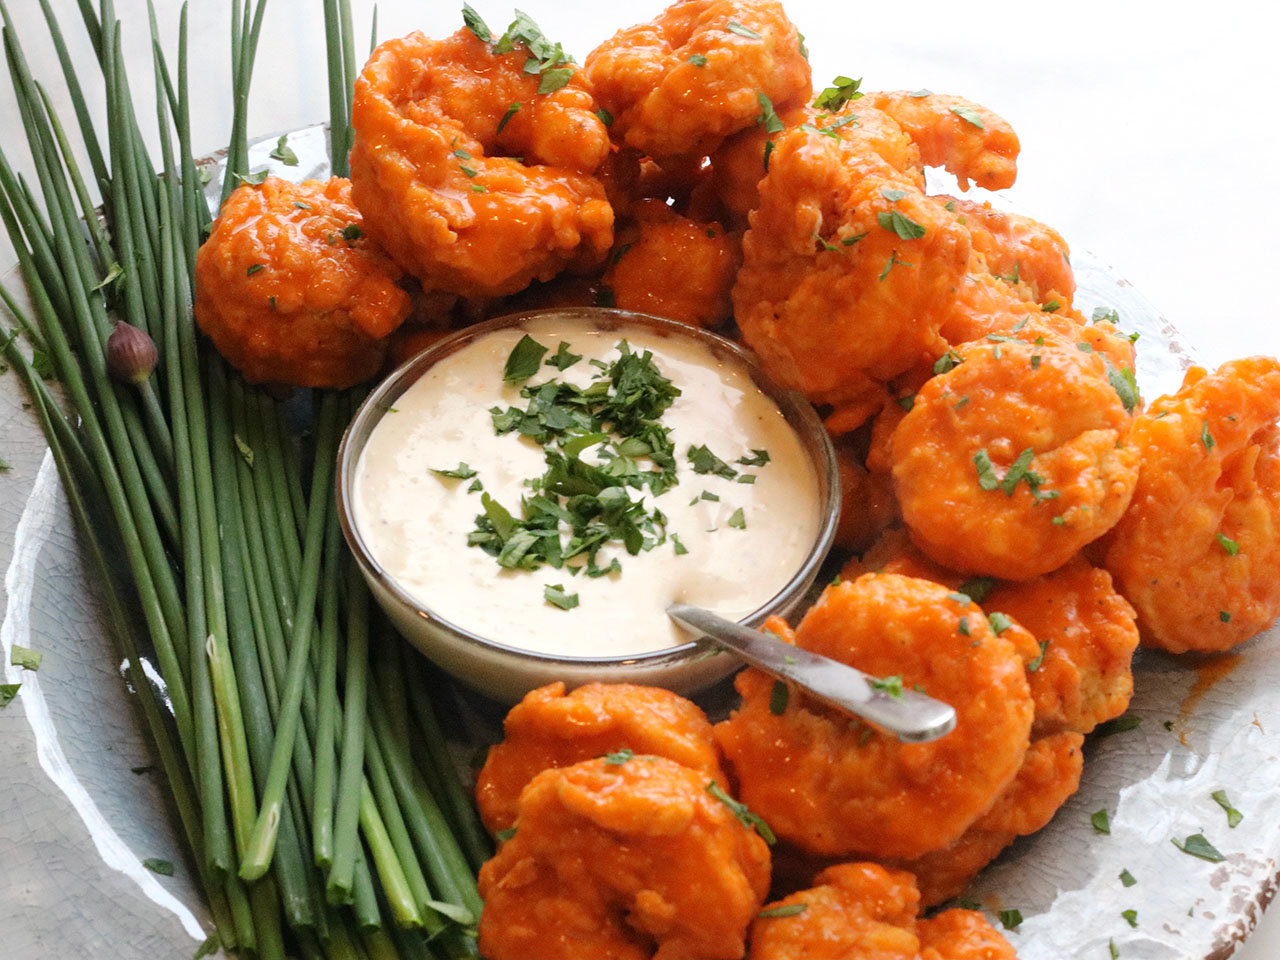
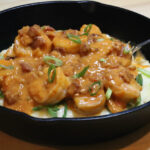
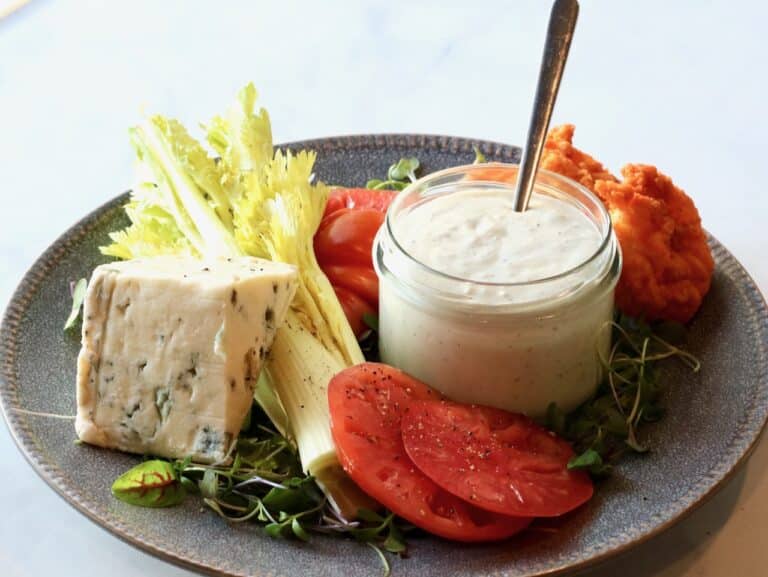
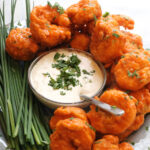
After trying a few approaches, I finally came up with what I think is the best Buffalo Shrimp recipe. They are spicy, bold & briny. They are coated in a batter that is made with seasoned flour and the result is a crispy shell, similar to classic fried chicken. Tossed with your favorite wing sauce and served with blue cheese dip, these Buffalo Shrimp are better than any restaurant. You won’t even want to share.

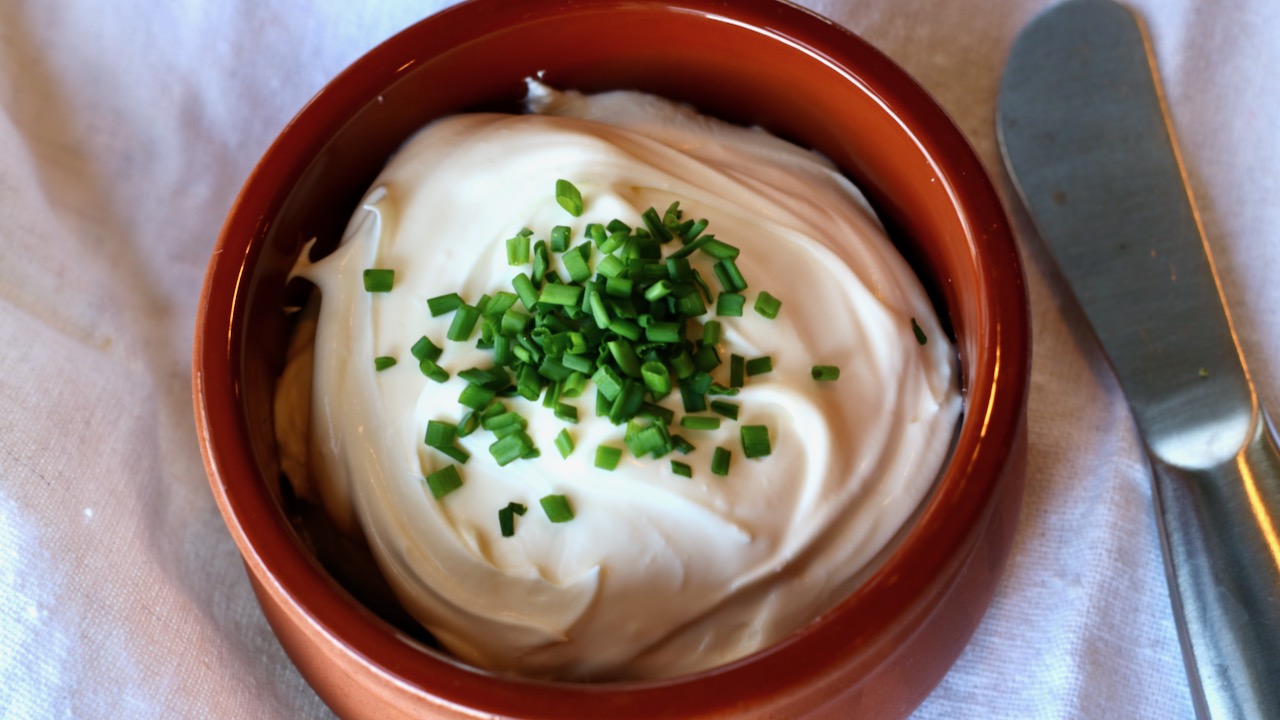
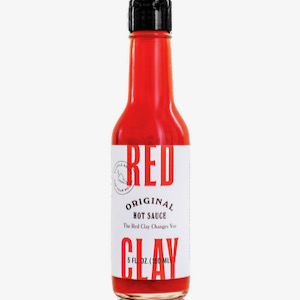
The sauce you choose is going to have a major impact on the end result so make sure you choose a sauce you really like. I’m partial to Franks Red Hot Wing Sauce and a Homemade Blue Cheese Dressing.

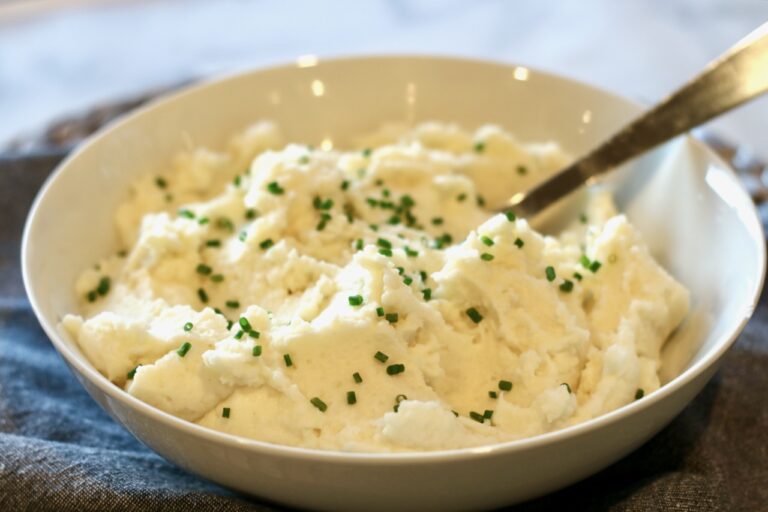
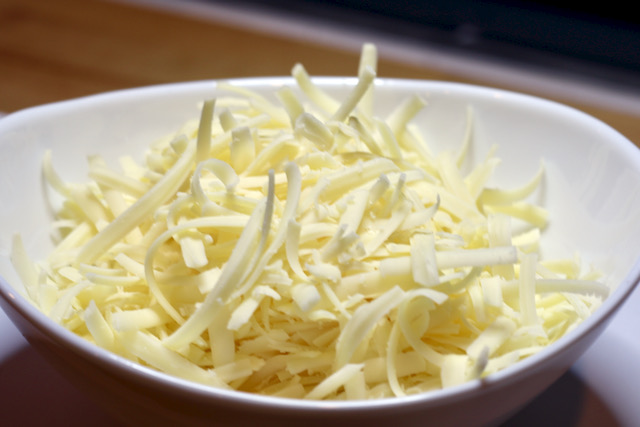
Homemade Blue Cheese Dressing is SO easy and one thousand times better than anything from a store. Simply toss a few ingredients into a food processor and you are done. It’s as easy as that and makes a substantial difference.

Blue Cheese Dressing
This homemade creamy blue cheese dressing is perfect over a salad, heirloom tomatoes, or for dipping wings, shrimp or veggies. You will never buy store bought again!

How to buy Shrimp

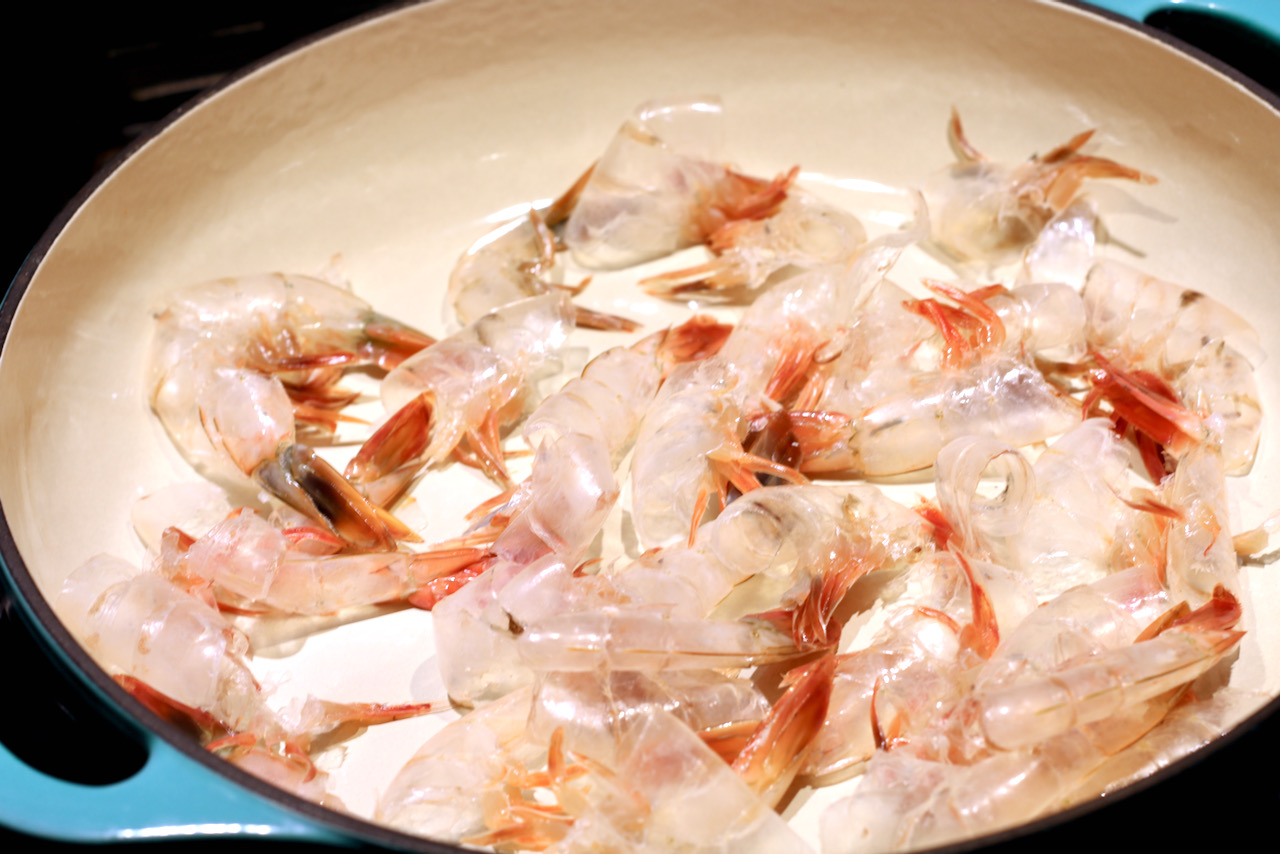
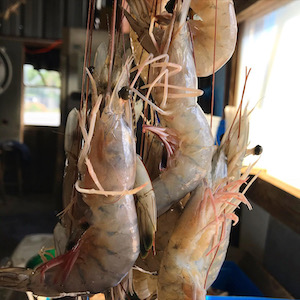
If you know me, you know I am an advocate of fresh, well sourced seafood. Shrimp is no exception. The market is polluted with farm raised, frozen shrimp that are loaded with antibiotics and preservatives. Frozen or Fresh, from a standard grocery store, your shrimp is likely it is to have been treated with chemicals, particularly sodium tripolyphosphate and sodium bisulfite. Sometimes we have no choice. But when you can source and afford fresh, wild caught, from a reliable seafood market, you should.

Learning about how to buy fresh seafood is important. if you are interested in learning more, check out this article from Serious Eats – A Comprehensive Guide to Buying Better Shrimp.

Shrimp come in an abundance of sizes. Many seafood counters will sell them by “medium, large and jumbo” but those terms can change from store to store. The best way to purchase them is by their “U” count. This represents the “approximate” number of pieces per pound. So you may see shrimp sold as “26/30” which typically refers to XL size and means there are about 26-30 per pound. Medium Shrimp are often called “41/50” meaning they are smaller and contain between 41-50 per pound. For this recipe, you can use any size you like, but I prefer a meaty bite so I go for the 16/20 size.

Pro Tip:

  • Make a double batch because everyone loves them!

Buffalo Shrimp Recipe

Say goodbye to Buffalo Wings and hello to their superior Cousin- Buffalo Shrimp! They are Spicy, Savory, Briny & Crispy. If you are a shrimp lover, these are simply irresistible. Serve with Homemade Blue Cheese dip and really blow their taste buds away!
Prep Time10 minutes
Cook Time5 minutes
Course: Appetizer
Cuisine: American
Keyword: buffalo shrimp
Servings: 4
Calories: 98kcal

Ingredients

  • 2 cups all-purpose flour
  • 2 eggs – beaten
  • 1 tablespoon garlic powder
  • 1 tablespoon ground cayenne pepper
  • 1 teaspoon onion powder
  • 1 teaspoon freshly ground black pepper
  • 1 pound fresh XL shrimp or 16/20 size peeled and deveined.
  • 4 cups oil for frying

Instructions

  • In a large resealable plastic bag, combine the flour, garlic powder, ground cayenne pepper, onion powder, and ground black pepper. Seal the bag and shake a few times to combine the ingredients well.
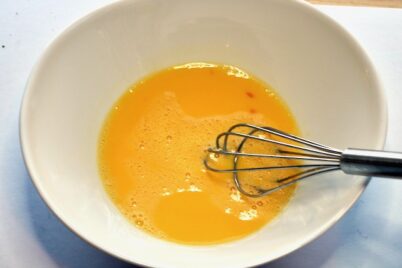
  • Beat the eggs well in a medium sized bowl. Add all the shrimp to the egg mixture and coat very well.
  • Place a colander over a bowl to catch the residual egg mixture. Drain the shrimp in the colander and save the excess egg mixture- you will use it again. Add all the shrimp to the flour bag and shake well to coat the shrimp with flour batter.
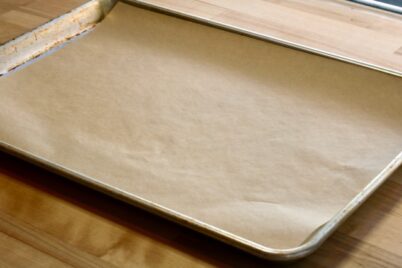
  • One by one, place the coated shrimp on a sheet pan and place in the refrigerator for 15 to 20 minutes. Save remaining flour mixture in the bag.
  • Meanwhile, heat the canola or vegetable oil to 375 F. (Make sure to monitor oil temp.)
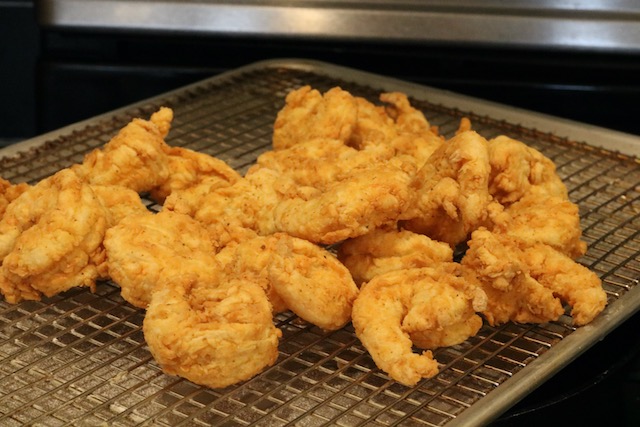
  • Remove shrimp from refrigerator and repeat the process of egg batter and flour mixture. (The egg & flour batter does not need to be as perfect this time around- It’s just to ensure full coverage.)
  • Carefully place the shrimp in hot oil and fry until pink, about 3 minutes. Drain onto a sheet pan lined with a raised rack and then coat with buffalo sauce.
  • Serve with blue cheese dressing.

Pork Roast with Green Peppercorns

Pork roast with Green Peppercorn Sauce

Pork roasts can be intimidating to cook. The meat itself is lean and if not cooked properly, it’s dry and flavorless. However, all you need to ease that fear are the right tools, quality ingredients, and a good pork roast recipe. If you take the time to gather everything in advance, it makes cooking this stunning roast absolutely foolproof.

This Roasted Pork recipe comes straight from the pages of Ina Garten’s renowned Barefoot In Paris cookbook. The oven does most of the work in this recipe, effortlessly transforming a simple cut of pork into a richly flavorful roast. The delectable sauce, crafted with ease towards the end, adds a final touch of elegance, resulting in a dish that is as visually stunning as it is palate-pleasing. Prepare to elevate the humble pork to extraordinary heights!

3 things make this pork roast stand out above the rest.

1. A good cut of pork, frenched and tied. (This is a good opportunity to visit your butcher.)

Raw Pork roast, Frenched and Tied

2. A Leave in Oven Thermometer, like the Thermoworks Dot, to ensure the perfect temperature.

Pork roast with a In oven thermometer set to 140
Use a probe thermometer to ensure perfect cooking temperature.
Learn Why

3. Green Peppercorns in brine, pre-ordered online, because they are impossible to find anywhere.

Green peppercorns in Bowl

The brined peppercorns are very different from a regular peppercorn. Whole black peppercorns that you are more familiar with, tend to jump up and bite your pallet, which we expect in certain meals like Steak Au Poive. Instead, these brined peppercorns are soft, and almost melt into the sauce, similar to a caper, but without the intense salt flavor.

What makes this pork roast recipe magical is it’s decadent sauce. The sauce is started like a traditional gravy using drippings, flour and stock. Then, to enhance the flavors, two styles of mustards and a unique style of peppercorn are added, taking the sauce to a whole new level.

The final sauce is rich with an impressive depth of flavor, which pairs nicely with the otherwise simple and lean pork roast.

This Pork Roast recipe is an excellent holiday meal, special occasion dinner, or a Sunday roast for the whole family. I highly recommend serving it with Make Ahead Mashed Potatoes and a good bottle of Burgundy.

Make Ahead Mashed Potatoes
Light, fluffy mashed potatoes are everyone’s favorite side dish! With these tips for make ahead mashed potatoes, the cook can enjoy the mash as much as the guests.
Thermoworks Dot®
Discover how to achieve perfect temperatures
The Dot™ Probe Thermometer has changed the way I cook forever and I’m not ever looking back! Never again will I over or under cook a roast chicken, a roast beef, or even fried calamari. (Unless I run out of batteries!😂)

Pork Rib Roast with Green Peppercorns

This Pork Roast recipe takes some advance planning to ensure you have the necessary ingredients and tools. Once you have what you need, this Pork Roast makes for an excellent holiday meal, special occasion dinner, or a Sunday roast for the whole family. Serve with Mashed Potatoes and a good bottle of Burgundy for the perfect meal.
Course: dinner
Cuisine: American, French
Keyword: pork, roast

Equipment

  • 1 Leave in temperature probe - Such as Thermoworks Dot

Ingredients

  • 1 pork loin- bone in, Frenched and tied. (Original recipe is 5 pounds or 10 bones, but you can half the cut of meat and keep all the measurements the same)
  • 2 tbsp good olive oil
  • 4 tsp Dijon mustard- divided
  • 4 tsp whole-grain mustard- divided
  • 1 tsp ground fennel seed
  • Kosher salt
  • Freshly ground black pepper
  • 3 tbsp all-purpose flour
  • 1 cup good white wine
  • 3 cups Chicken Stock- preferably homemade or good quality prepared broth
  • 1/4 cup green peppercorns in brine- drained. (Hard to find. Best to order online.)

Instructions

  • Preheat the oven to 400°F. Allow the pork to stand at room temperature for 30 minutes.
  • Place the pork, fat side up, in a roasting pan just large enough to hold it comfortably.
    Raw Pork roast, Frenched and Tied
  • In a small bowl, whisk together the olive oil, 2 teaspoons of each mustard, the fennel seed, 2 teaspoons salt, and 1/2 teaspoon black pepper.
    Spices and oil in a bowl
  • Rub the mixture on top of the pork.
    Basing a pork roast with a mustard mixture
  • Use an internal temperature probe, such as Thermoworks Dot, and set to 140°F.
    Pork roast with a In oven thermometer set to 140
  • Roast for 1 to 1 1/4 hours, until the internal temperature reaches 140°F.
    Pork Roast
  • Remove from the oven, transfer to a cutting board, and cover tightly with aluminum foil for 20 minutes.
    Pork Roast wrapped in foil
  • For the sauce, remove all but 1/4 cup of fat from the roasting pan. If there isn’t 1/4 cup, add enough butter to the pan to make 1/4 cup total.
    Pork Drippings in pan to start gravy sauce
  • Over medium heat, whisk the flour into the fat in the pan and cook for 1 minute.
    Flour added to Pot
  • Add the wine and scrape up all the brown bits from the bottom of the pan.
  • Add the chicken stock, the remaining 2 teaspoons of each mustard, the green peppercorns, 2 teaspoons salt, and 1/2 teaspoon black pepper. Bring to a boil, then lower the heat to a simmer for 5 to 10 minutes, until the sauce is reduced and slightly thickened.
    Sauce for pork roast in pan
  • Remove the strings from the roast pork, slice between the bones, and serve warm with the hot sauce.
    Pork Roast

Notes

Green Peppercorns in Brine can be incredibly difficult to source. Its easiest and least frustrating to order them online. (No substitute would be successful here.) I order them from Amazon

Smoked Salmon Blini

smoked salmon blini appetizer

Smoked Salmon Blini is quite likely one of the most popular smoked salmon appetizers. It’s timeless preparation of this popular fish is tough to compete with or improve and there is a good reason why- It’s the perfect bite.

In order to achieve the most decadent bite, the salmon must be paper thin for it to melt in your mouth. Nothing else will do. Where do you get salmon sliced this thin? Unfortunately, you cannot but this kind of sliced salmon in a package from the grocery store. You need to source it from a smoke house, a fish monger, or sometimes a gourmet market. I am fortunate enough to live in an area where fish markets are aplenty.

I prefer to twirl the salmon into rosettes ahead of time for easy and quick assembly!

Hand slicing smoked salmon, which truly is an art form, is the proper and traditional way to carve slices of this delicate fish. I am always amazed when I watch a skilled professional at this task. So while not always easy for everyone to access hand carved smoked salmon, it is the only way to make this Blini delicate enough to melt in your mouth and balance all the flavors.

Smoked Salmon Blini

Smoked Salmon is not the only ingredient that deserves some time and consideration. The Blini, or the mini pancake, is the base of this bite so it needs to be both strong enough to hold the toppings, while soft enough to complement the delicateness of the salmon. While I have tried to make my own Blini, I have found its not really worth the time or effort if you can source them pre-made.

I really like the Crème fraîche from Vermont Creamery.

The remaining essential ingredient is the Crème Fraîche. Crème Fraîche, to put it simply, is a thicker, more mild version of sour cream. It’s become much easier to find in grocery stores, and is incredibly versatile. Over the years, it’s become a staple ingredient in my fridge. When it comes to this Blini, I mix it with chopped chives before assembling.

My Local Recommendations for Ingredients:

Smoked Salmon

  • Greenwich, CT: The Lobster Bin (Hand sliced to the point of transparency. My favorite.)
  • Westchester, NY: Mt Kisco Seafood (They have a terrible website, but properly hand sliced smoked salmon)

Pre-made Blinis

  • Westchester, NY: June & Ho – Rye
  • Greenwich, CT: Citarella Market

Smoked Salmon Blini Appetizer

A timeless traditional canape – Bite size pancakes topped with Crème fraîche & smoked salmon garnished with chives & lemon zest
Prep Time10 minutes
Course: Appetizer
Cuisine: American, French
Keyword: salmon

Ingredients

  • Smoked Salmon (sliced paper thin) (Plan on 1/2 ounce per blini)
  • package of Belini pancakes (or make your own)
  • Crème fraîche (About 1 tbs per blini)
  • Chopped scallions (amount to taste)
  • Zest of 1 Lemon
  • Minced hard boiled egg yolk
  • Thinly sliced baby gerkins (patted dry)
  • Micro greens for garnish (optional)

Instructions

  • Heat the Blini pancakes according to package instructions, if necessary.
    Let cool.
  • While Blini are cooking, mix desired amount of finely chopped chives into Crème fraîche and set aside.
  • Once Blini are cooled down, add about a tablespoon of Crème fraîche.
  • Zest a lemon over the dollop of Crème fraîche.
  • Next, add a rosette or "pile" of smoked salmon. About 1/2 ounce each.
  • Then, sprinkle the chopped egg yolk on the salmon.
  • Finally, carefully place approximately 3 pieces of sliced gerkin on the salmon. (You can substitute capers for gerkins if desired.)
  • Garnish with microgreens.

Ham & Leek Empanadas

Cooked Ham & Leek Empanada

Ham & Leek Empanadas

This is a french inspired "cheater's" version of an empanada. This recipe uses store bought puff pastry instead of a traditional home made pastry dough and is stuffed with a savory filling of diced hame, sautéed leeks, spinach and gruyere cheese. It's an excellent lunch or savory first course.
Prep Time30 minutes
Cooling Time5 minutes
Course: Appetizer, lunch
Cuisine: French, International, spanish
Keyword: puff pastry, tapas
Servings: 4 people

Ingredients

  • 3/4 Tbsp. unsalted butter
  • 3/4 cups small-diced leeks, white and light green parts only
  • 1/4 cup crème fraîche
  • 2 ounces smoked ham such as Black Forest, cut into 1/4″ dice
  • 2 ounces Gruyère cheese grated
  • 1 ounces 1 cups baby spinach, coarsely chopped
  • 1 Tbsp. julienned basil leaves
  • 1/4 cup grated Parmesan
  • 3/4 tsp. kosher salt
  • 1/4 tsp. ground black pepper plus more for sprinkling
  • 1 large egg
  • 2 Tbsp. milk
  • All-purpose flour for rolling
  • 1.5 sheets frozen puff pastry defrosted (1 package)
  • Fleur de sel or sea salt for sprinkling

Instructions

  • Preheat oven to 400°.  
  • Line a sheet pan with parchment paper. Set aside.
    Sheet pan lined with parchment
  • In a medium saute pan, melt butter over medium-low heat. Add leeks and sauté until tender but not browned, about 4 minutes. Stir in crème fraîche and simmer 1 minute. Set aside
    Leeks and butter cooking in pan
  • In a medium bowl, mix ham and Gruyère. Add leek mixture, spinach, basil, Parmesan, salt, and black pepper. Mix and set aside. 
    Ham & Leek Empanada Filling in a bowl
  • In a small bowl, whisk together egg and milk
    Whisking eggs
  • Sprinkle a cutting board with flour, roll out 1 sheet of the puff pastry to an 11" x 11" square, and cut into 4 equal squares. Trim the edges for clean sides. (Tip: Use a pizza cutter to cut the pastry dough.)
    Making Ham & Leek Empanada
  • Brush edges of each square with egg wash. Place 1/3 cup of the ham and cheese filling in the center of each square. Fold each square diagonally to form a triangle, lining up edges of pastry. 
    Ham & Leek Empanada
  • Press edges with tines of a fork to seal. 
    Ham & Leek Empanada
  • Place empanadas on prepared sheet pans and brush each with egg wash and sprinkle with fleur de sel and pepper. 
    4 raw Ham & Leek Empanadas
  • Bake until puffed and golden brown, 20 to 25 minutes. Allow to cool 5 minutes before serving.
    Ham & Leek Empanada with side salad

Notes

Make Ahead Pro Tips!

  • To make ahead and freeze, assemble completely but do not bake.  Place assembled empanadas on the sheet pan in the freezer.  When frozen, transfer empanadas to a resealable plastic bag or vacuum seal.
    You don’t have to thaw before baking, but you might have to add a couple of minutes to the baking time.
     
  • To make ahead and refrigerate, assemble completely and refrigerate up to 2 days in advance of baking. Bake according to instructions. 
 

Two Ingredient Appetizer: Prosciutto wrapped Asparagus

Asparagus Appetizer with Prosciutto

This 2 ingredient Prosciutto wrapped asparagus is nothing more than bite size spears of blanched asparagus that are wrapped with paper thin prosciutto. It’s elegant and a crowd pleaser!

Every host is always looking for elegant bite size appetizers, or finger foods, that can be served cold or at room temperature. Trust me, there aren’t too many out there that are easy to master, but this is one of them.

Why this recipe works:

  • Elegant
  • Bite Size
  • No cutlery required
  • 2 Ingredients
  • Salty, Savory, Colorful
  • Served at Room Temperature
Cutting asparagus for Prosciutto wrapped asparagusAppetizer

There is a very small down side to making theses, and anyone who often makes bite size finger foods probably knows exactly what I am going to say! Bite size = time.

While these bites of delicious asparagus are simple, you do need to set aside the appropriate amount of time to blanch, slice, dry, and roll. Again, simple (very simple) steps, but appropriate time is required, none the less.

However, they can be made a few hours ahead of time, and they travel well. These mini Asparagus Prosciutto bundles make for a nice hors d’oeuvre to being to a friends house, or to serve to your own guests.

How to buy Asparagus

Look for asparagus stalks that are firm, able to stand up straight, and with a smooth texture. Avoid stalks that appear limp or wilted. The tips of asparagus should be closed and compact, free from spreading , softness or appear mushy. Asparagus are considered a spring vegetable in the northeast, but readily found year round in most food stores.

Asparagus is Nutrient Rich

Asparagus contains a great deal of healthy minerals and vitamins and very few calories making it a popular choice for many. if you are interested in learning more about the health benefits of Asparagus check out this article by Healthline.

Fun Asparagus Fact

Asparagus is one of the only perennial vegetables. This means you plant it once and it comes back every year on its own, just like perennial flowers. They require very low maintenance and a great thing to grow in your backyard!

Simple Roasted Asparagus
Asparagus is the most quintessential of all spring vegetables and preparing it couldn’t be easier. Simply toss with olive oil, salt & pepper and bake for 12-15 minutes until tender.

Crustless Quiche Lorraine

crustless quiche Lorraine

Oh how I love a Quiche Lorraine. I find it hard to resist ordering quiche when out to breakfast or at a patisserie. It’s rich custard and classic savory fillings pull me in every single time. Because of my weakness for it, I have had as many bad Quiche Lorraines as I have good! The number one offender of bad quiche is too much crust and not enough filling. So when I make quiche at home, I skip the crust completely focusing in on all the good stuff!

Crustless quiche Lorraine

Crustless Quiche is Gluten Free (GF), KETO approved, A great Make-ahead recipe, freezer friendly, and delicious!

Crustless quiches do not sacrifice flavor- just the carbs, gluten and calories.

Skipping the crust is probably considered a punishable crime in France. Typically, I would never remove a main ingredient or stray so far from a traditional, iconic recipe. But I am often feeding people who have gluten allergies and I try to skip the carbs when I can. (Ok, not as often as I should skip the carbs, but I do sometimes!) So this, or any crustless quiche, is a great option. When made with good eggs and great fillings, it is simply delicious enough that you do not miss the crust. At all.

Better yet, quiche can be enjoyed at any time of day. It’s a wonderful way to start the day but also makes a lovely lunch or dinner served alongside a simple salad.

Crustless quiches are my “go-to” move for overnight company or when I know I have busy weeks because of how easy they are to make ahead of time. I often make one, refrigerate half and freeze the other half- sometimes whole and sometimes in individual slices.

How to make Crustless Quiche

Step 1: Grease a pie plate and add diced ham (or other filling of choice)

Step 2: Add next layer of shredded cheese

Step 3: Slowly pour in seasoned egg mixture

Optional Step: About half way through cooking, I like to cover the edges with this handy silicone ring that is used to keep pie crusts from burning. I got this one from King Arthur Baking but they are available from multiple retailers. (You can also use tin foil for a DIY solution.)

Final Step: When finished cooking, set quiche out on a cooling rack for 15 – 20 minutes before serving. If not serving immediately, it can take over an hour to cool.

The history of Quiche Lorraine is actually rather interesting. It is widely known as a French dish however its origin is from the German Kingdom of Lothringen (modern-day Lorraine), during the 1500s. Lothringen was unique because of its geographical location between both France and Germany, with each country laying claims to the region at different points in history.  It’s popularity has continued to grow right up to modern day. If you are interesting in learning more about the history of Quiche Lorraine, check out this article by NationalDay.com that discusses the history, showcases a timeline and explains how to celebrate National Quiche Lorraine day on May 23!

Looking for a vegetarian option? Try Crustless Broccoli & Cheddar Quiche

Crustless Quiche Recipe
This savoy quiche is loaded with broccoli florets and cheese and flavor! It’s a fantastic make ahead breakfast for company, or for yourself to slice into pieces and enjoy throughout the work week.

Crustless Quiche Lorraine

This savory quiche is loaded with Ham and Swiss Cheese but skips the carbs and calories in the crust.
Prep Time10 minutes
Cook Time1 hour
cooling15 minutes
Course: Breakfast, brunch
Cuisine: American, French
Keyword: eggs, eggs, breakfast, cassarole, gluten free, keto
Servings: 6 people

Equipment

  • 1 9" pie plate

Ingredients

  • 1 tablespoon unsalted butter
  • 1.5 cups diced ham (1/4 inch dice)
  • 8 large eggs
  • 1.25 cups heavy cream
  • Pinch ground nutmeg
  • 1/8 teaspoon cayenne pepper
  • 1/2 cup shredded Jarslburg cheese (Swiss or gruyere will also do, or even a cheddar if preferred)
  • Butter to grease pie plate

Instructions

  • Preheat the oven to 325°F degrees and set an oven rack in the middle position. Fill a casserole dish half way with water and place on the bottom rack of the oven. (This will help the quiche stay moist and resist major cracking- Just like a cheesecake!)
  • Grease a 9-inch deep dish pie plate with butter.
  • In a large bowl, whisk the eggs with the cream, nutmeg, 3/4 tsp salt, and cayenne pepper. (Or give a quick pulse using an immersion blender.)
  • Spread the dice ham evenly over the bottom of the prepared pie plate.
    Diced Ham in a pie pan for Crustless quiche Lorraine
  • Sprinkle the cheese over top of the ham.
    How to make crustless quiche Lorraine
  • Slowly and evenly, pour the egg mixture over the cheese.
    Pouring egg mixture into a pie dish to make quiche Lorraine
  • Bake for about an hour, or until the custard is set and the top is golden brown. Let cool for at least 15 minutes, then slice into wedges and serve.
    Crustless quiche Lorraine
  • Or, let the quiche cool completely on a cooling rack, and then refrigerate to reheat individual slices at a later date, or to freeze. (Will stay refrigerated 3-4 days. Or wrap tightly or vacuum seal and freeze ups to 3 months.)

Notes

Make ahead and let cool completely (which takes longer than you think!) and refrigerate.  If frozen, defrost 1-2 days before reheating slowly in the fridge. Reheat at 325°F until the internal temperature reaches 300°F. If heating only one slice, the air fryer setting of reheat works well at 275°F for “about” 8 minutes (every fryer is different).

Crustless Quiche Recipe

crustless quiche with broccoli & cheese

This crustless quiche recipe is delicious. Any combination of flavors can be made, but this version is loaded with broccoli, and shredded cheddar cheese and baked in a rich egg custard. It’s baked slow and low for a perfect consistency.

I believe that quiche is one of the only meals that is both rich and light at the same time, making it a perfect meal at any time of day- not just breakfast. I often serve it for lunch alongside a salad or with a rustic roll.

By skipping the crust you are ditching the carbs, gluten, and extra calories, but not any of the flavor.

This is a general base recipe that I found from a great blog, Once upon a chef, and once you have this reliable base, you can get creative and make any kind of crustless quiche you want! I have made all sorts of combinations using this same recipe including Ham and Swiss, Mushroom & Cheese, Zucchini Flowers and Basil, Onion and Peppers- The options are endless.

Crustless Quiche Lorraine
It’s a twist on one of my favorite classic dishes. Rich custard and classic savory fillings without the carbs! Perfect for company or a simple meal, any time of day.

This crustless quiche has a lot going for it besides flavor. It’s Gluten free, KETO approved and can be made ahead of time. I make quiche up to 3 days in advance and store in the fridge, or can be frozen.

How to make a crustless quiche

Step 1: Grease a 9″ pie plate and add broccoli (or other filling of choice)

Step 2: Smother the broccoli in shredded cheddar cheese

Step 3: Slowly & evenly, pour in seasoned egg mixture

Step 4: Bake for one hour. Set quiche out on a cooling rack for 15 – 20 minutes before serving. If not serving immediately, it can take over an hour to cool.

Baked crustless quiche with broccoli & cheese
Print Recipe
5 from 1 vote

Crustless Broccoli Quiche

This quiche is loaded with savory fillings but skips the crust. Trust me, you won't miss it!
Prep Time15 minutes
Cook Time1 hour
cooling15 minutes
Course: Breakfast, brunch
Cuisine: American, French
Keyword: eggs, eggs, breakfast, cassarole, gluten free, keto, vegetarian
Servings: 6 people

Equipment

  • 1 9" pie plate

Ingredients

  • 1 tablespoon unsalted butter
  • 3 cups broccoli florets cut into 1-inch pieces
  • 8 large eggs
  • 1.25 cups heavy cream
  • Pinch ground nutmeg
  • 1/8 teaspoon cayenne pepper
  • 1/2 cup shredded Cheddar
  • Kosher salt
  • Butter to grease pie plate

Instructions

  • Preheat the oven to 325°F degrees and set an oven rack in the middle position. Fill a casserole dish half way with water and place on the bottom rack of the oven. (This will help the quiche stay moist and resist major cracking- Just like a cheesecake!)
  • Grease a 9-inch deep dish pie plate with butter.
  • Steam broccoli for just 1 minute, (the broccoli should be firm but bright green.) It is important not to overcook the broccoli because it will finish cooking in the quiche. Set aside.
  • In a large bowl, whisk the eggs with the cream, nutmeg, 3/4 tsp salt, and cayenne pepper. (Or give a quick pulse using an immersion blender.)
  • Spread the broccoli evenly over the bottom of the prepared pie plate.
    steamed broccoli florets in a pie dish for crustless quiche
  • Sprinkle the cheese over top of the broccoli.
    Broccoli layered with cheese in a pie dish for crustless quiche
  • Pour the egg mixture over the cheese.
    broccoli quiche ready to go into oven for crustless quiche
  • Bake for about an hour, or until the custard is set and the top is golden brown. Let cool for at least 15 minutes, then slice into wedges and serve.
    crustless quiche with broccoli & cheese
  • Or, let the quiche cool completely on a cooling rack, and then refrigerate to reheat individual slices at a later date, or to freeze. (Will stay refrigerated 3-4 days. Or wrap tightly or vacuum seal and freeze ups to 3 months.)

Notes

I mostly make foods that can be prepared in advance and this recipe is no exception. I always make this recipe entirely at least the day before serving, and more often than not, I freeze at least half or all of it for a later date. If frozen, defrost 1-2 days before reheating. Reheat until the internal temperature reaches 300°F. 
 

Shrimp & Grits

Shrimp & Grits served in Cast Iron Pan

A Southern Comfort Classic

Spicy shrimp & salty bacon are simmered in a thick tomato and shrimp stock and served over creamy cheddar grits. The combination of fresh shrimp tossed with bacon in a spicy tomato sauce served over creamy grits is good for the soul. Shrimp & grits is a staple of coastal south cuisine and for good reason- it’s delicious.

I have always been intimidated by cooking grits, let alone shrimp & grits! However, after escaping the northeast for an extended winter break in South Carolina, my love and appreciation for this traditional southern comfort food grew really deep. During this time, I tasted several varieties of this popular low country dish, and what I discovered was that no two versions were the same.

Diced thick cut bacon
Shrimp Shells roasting in pan to make stock

I had versions loaded with shrimp, ham and sausage, I had a version where you created your own combination such as shrimp + scallops and I had versions with shrimp & whole cherry tomatoes. Some grits were made with cheese, others were made with spices and some were just plain and boring. Realizing there was so much variation and little consistency, I became even more intimidated by trying to create this dish in my own kitchen.

Marsh Hen Mill Grits are the gold star standard for grits and grains in SC!

But, having brought back to NY some very special stone ground grits from Marsh Hen Mill in South Carolina, I couldn’t put this challenge off any longer. After deciding on my approach, I got to work. All I can tell you is that I have regrets. Loads & loads of regret. I regret waiting so long to learn to make this dish.

Then, I did something somewhat controversial making the grits- I used my slow cooker. After a great deal of research, recipe reading, reviews and videos, I decided to give this method a try. After all, I didn’t have an hour to stand at the stove and stir. It worked so well that I don’t think I’ll spend another second considering making grits any other way.

Here is what I discovered while on this Shrimp & Grits journey.

  • Keep it simple
  • Ingredients matter.
  • 3) Ina usually has the answer

The complete recipe from Ina Garten’s “Cook like a Pro” cookbook calls for quick cooking grits. This is not authentic and I wanted the real deal. After all, I had Marsh Hen stone ground grits which are the gold standard of grits in the low country. So I let Ina lead the way on the shrimp knowing I could trust her to nail the flavor. But I turned to America’s Test Kitchen (ATK) for the grits.

The results were stunning. I was truly shocked by the amount of flavor in the shrimp & sauce, and the grits turned out to be silky smooth, while simultaneously delivering a gentle Al dente texture. Everything was seasoned perfectly and it brought me right back to one of my favorite spots- sitting on the dock just outside Charlston, watching the sunset, the fresh scent of the shrimp boats from the day’s catch in the air. When a meal can bring you back to a favorite place, it’s a special thing. This recipe is now in full rotation here at Casa de Collins and whenever I want to go back down south, this is the meal I make to take me there.

Inspired by Charleston, South Carolina

If you are ever in the Charleston area, here are some local ingredients and shops that helped inspire this dish and made their way into my pantry.

Pantry Items

Fresh Caught Local Shrimp

Favorite Shrimp & Grits dish in Charleston, SC

Shrimp & Grits served in Cast Iron Pan
Print Recipe
5 from 1 vote

Shrimp & Grits

Spicy shrimp & salty bacon are simmered in a tomato & shrimp stock, thickened into a sauce and served over creamy cheddar grits.
Course: Main Course
Cuisine: American, southern
Keyword: comfort food, seafood, southern
Servings: 3 people

Equipment

  • Slow Cooker

Ingredients

Slow Cooker Cheesy Grits

  • 3 cups water, plus extra as needed
  • 1 cup whole milk
  • 1 cup old-fashioned grits
  • Salt and pepper
  • 8 ounces sharp cheddar cheese (2 cups shredded – Cabot extra sharp recommended- always grate your own for better melting)
  • 4 tbsp butter (room temperature)
  • 4 scallions (sliced thin) *optional
  • ½ tsp hot sauce

Shrimp

  • 3 tbsp butter
  • 1- 1.5 pounds 20 count shrimp – peeled, deveined & shells reserved
  • 1.5 tbsp tomato paste
  • 3 slices thick cut bacon cut into 1/2 inch pieces (Tip! cut very cold bacon long way into 4’s and then dice by slicing the other way) put aside in fridge until ready to use.
  • 1 tsp minced garlic
  • 2 tbsp all-purpose flour
  • 1 tbsp lemon juice
  • 1/2 tsp Sriracha tobacco or your favorite style hot pepper sauce
  • 2 scallions white & green parts, thinly sliced diagonally

Instructions

Make the Grits

  • Lightly coat slow cooker with vegetable, canola, sunflower or similar type of oil. Combine water, milk, grits, and 1 teaspoon salt together in the slow cooker. Stir or whisk to combine.
  • Cover and cook until grits are tender, 3 to 4 hours on low or 2 to 3 hours on high.
  • Tip! While the grits are cooking, you should prep the ingredients to finish the grits and make the shrimp so you are ready to cook & assemble as soon as the grits are done.
  • Stir grits occasionally and add more water 1/4 cup at a time if grits look to be drying out.
  • Grits are done when they are silky smooth, but still have a small amount of bite to them when tasted.
  • Once the grits are done, set the slower to the "keep warm setting" and start making the shrimp.
  • Right before serving, stir in cheddar, butter, scallions, and hot sauce into grits until combined. Season with salt and pepper to taste. Serve. (According to the experts at America's Test Kitchen, the grits can be held on the warm setting for up to 2 hours, but I have not tried this. I would be concerned that they would over cook. But it's a good tip should you need to hold them.)

Make the Shrimp

  • In a large sauté pan (I use a Calphalon non stick sauté pan with a lid) over medium heat, melt 1 TBSP of butter. Add the shrimp shells and cook for 5-7 minutes, stirring occasionally to toast the shells. (You are making the stock)
  • Add the tomato paste and stir it with the shells, cook for 30 seconds.
  • Add 2.75 cups of water, pinch of kosher salt, and bring to a boil.
  • Lower the heat, cover, & simmer for 5 minutes.
  • Set aside to cool slightly and then drain through a sieve and pour the liquid into a glass measuring cup until you have 1.5 cups of stock and set aside. (If you don’t have enough liquid just add more water until you have 1.5 cups.) Discard shells.
  • Wipe out the sauce pan with paper towel and add the bacon & cook over medium heat for about 5 minutes, or until crisp but not burnt. Stir in the shrimp, 1 teaspoon kosher salt, 1/2 tsp pepper and the garlic. Cook for 2 minutes. Transfer to a plate & set aside.
  • Melt 1 tbs of butter in a pan and whisk in the flour, whisking constantly to break up any lumps while cooking for one minute.
  • Whisk in the stock (again breaking up lumps) and bring to a boil. Reduce the heat to a simmer for 5 minutes, until thickened.
  • Return shrimp & bacon to the pan, cover, & cook for 3 minutes, until the shrimp are just heated through.
  • Turn off the burner and move the pan off the heat. Stir in the lemon juice, hot sauce and then vigorously stir in 1 tablespoon of cold butter. (Cold butter helps emulsify the sauce. Soft butter makes the sauce oily.) Taste for seasoning.
  • To serve, place a generous portion of the grits in the bottom of each shallow bowl, spoon the shrimp & sauce on top, garnish with scallions & serve.

Notes

Note: You will have leftover grits with this recipe, but I welcome leftover cheesy grits! 

Thermoworks DOT Probe thermometer

Thermoworks Dot Meat Thermometer

The best leave in probe thermometer for for meat, fish & oil.

What is the Thermoworks DOT?

Simply put, the Thermoworks DOT is a device that a probe is connected to. The probe is oven safe and monitors the temperature of anything including roasts, single steaks, fish and even frying oil. Imagine never having to worry about over or under cooking a cut of meat? That’s what this article is all about.

The DOT provides accurate and constant temperature readings so you can achieve perfectly cooked meals every time. A must-have for any home cook.

Pork Rib Roast with Thermoworks Dot Meat Thermometer
The Dot ensures I cook any roast to perfection!

When I started cooking as a hobby, I didn’t fully appreciate the value of a good meat thermometer, especially a “leave in” probe version that monitors the temperature of the meat while it cooks. Like many beginner cooks, I cooked mostly by time tables, recipe instructions, look and feel, but that never worked out perfectly. As I grew as a cook, I recognized the stress involved with achieving perfectly cooked meats. Hobbies aren’t supposed to be stressful! The Thermoworks meat thermometer changed everything for me. It gave me the ability to produce perfectly cooked roasts, steaks and even master the temp of oil while frying! My skills and passion for cooking shot up to the next level.

Understanding the DOT’s value

Let’s stop for a minute and do some basic calculations. I want you to think about your favorite roast recipe to use that as your benchmark, and then consider the average amount of time you spend sourcing, purchasing and prepping that cut of meat. Do you have that time frame in your mind? Now calculate the average amount of money spent on this meat, along with all the necessary seasonings. Now ask yourself, is their value in protecting the money and the time you have just invested in this meal? What is it worth to you to perfect this dish? I am going to assume that if you are reading this, we both already know the answer. You would have to be crazy to choose the “fingers crossed” method to ensure a perfectly cooked medium rare filet of beef or a throughly cooked turkey.

Thermoworks DOT vs the others

Thermoworks Dot Meat Thermometer Feature

My now addiction to Thermoworks thermometers started with the DOT. (And a cut of beef tenderloin!)

I had tried over versions of in-oven thermometers over the years and frankly, they don’t even compare. I had purchased a less expensive version from Amazon, that despite its great reviews, was made of cheap plastic, smelled toxic and was complicated to use. I used it maybe twice and it found its way to the back of a drawer somewhere.

I have used my own range’s built in thermometer many times (which comes fairly standard these days, yet no one seems to know about it). The problem with the built-in range thermometer was that is was highly inaccurate, hard to test accuracy, and the probe was very thick in comparison to Thermoworks meat thermometer’s slender probes. (They even make a needle probe for small, delicate cuts of meat!)

Determined to find a way to cook meats to perfection, I did extensive research on kitchen thermometers. I learned that Thermoworks was, by far, the leader in the industry, was recommended by chefs I follow like Alton Brown and Ina Garten, and America’s test kitchen, which I subscribe to and trust. So I decided to invest in my first Thermoworks purchase. My biggest regret was waiting so long to purchase a Thermoworks meat thermometer because it wasn’t long before I realized it was of the best kitchen investments I had ever made.

Thermoworks themselves apart from their competitors not just because of their superior products, but also because of their exceptional resources available to users. They provide easy to follow instructions, online support, instructional videos, temperature suggestions, recipes, and so much more. It’s rare to find a company with so much dedication to ensuring a good product experience to their users.

I don’t just have one, I have three.”

Thermoworks Dot Meat Thermometers in action
Roasting two pork tenderloins at once, I can see the exact temperature of each.

I started off with one Dot and after using to make a beef tenderloin without the stress of overcooking it, I was hooked! I ordered two more. Having multiples is now important to me because cuts of steak are often different thicknesses, pork tenderloins are different sizes, and sometimes I roast two chicken. Additionally, I often cook for folks who prefer a medium-well beef to my preferred medium-rare, so having multiples allows me more control.

Gifts for foodies

Within one month of my first DOT, I ordered three more as gifts, because I couldn’t imagine each of my family members not having one.

While my sister and cousin trusted me and jumped right on the bandwagon, my mom was the most reluctant to embrace her gifted DOT. She is a bit more “old school” and frankly, less in need of a thermometer because, well, she cooks everything until it dry as a bone before declaring it done. (Sorry, Mom!) But, eventually, she took the plunge. And I am thrilled to report that mom is now one of the DOT’s biggest fans and uses it all the time!

The DOT has quite literally, improved my cooking life. Because of the DOT, I know that when I invest in a cut of rib eye, a roast chicken, a pork rib roast, or a cut of beef tenderloin, it’s going to be cooked to perfection. The DOT tells me the exact internal temperature throughout the cooking process, and alerts me when my target temp is reached.

Thermoworks DOT Meat thermometer

Become a better cook.

How it works

The DOT is a simple to use in-oven thermometer. This means that you insert the probe into the center of the meat prior to putting it in the oven. You then set a target temperature using easy to use up and down buttons. Once set, the roast or steak goes in the oven. The Thermoworks meat thermometer digital display indicates the current internal temperature throughout the cooking process, which allows you to estimate time left until the meat is done, which means you can time your side dishes and the rest of your meal perfectly! Once the target temperature is reached, the meat thermometer will sound an alarm alerting you that your meat is done.

Pork Rib Roast with Thermoworks Dot Meat Thermometer
I cook pork roasts until 140° F and let it rest for at least 20 minutes, which brings the temperature up considerably, while also ensuring a juicy roast.

Cooking Tips

  • Always, always, always give your meat plenty of time to rest. Everyone underestimates the impact rest time has on the juiciness and tenderness of any meat. It will keep cooking for much longer than you think! Turkeys need at least 30 minutes of rest time.
  • Get to know your preferred temperatures. I like medium-rare beef so I set my DOT meat thermometer to 126°F degrees F. After rest time, it reaches about 130-132°F. I like bone in pork roast cooked medium to medium-well, so I set my DOT to 140°F and let it rest, which then reaches about 150+° F, depending on the cut.
  • Take time to check your thermometer’s accuracy using a properly made Ice Bath. (Instructions and resources come with all Thermoworks products. Their customer service and resources set Thermoworks apart from the rest.)
  • Change your batteries.

Thermoworks Products that I own, love and highly recommend:


The Thermopop is a great tool for novice chefs who are just getting started with working with Thermometers, as well as the professional cook who simply wants a quick, reliable temperature reading. No bells and whistles, just the real dea
The Classic Thermapen takes readings in less than three seconds, is accurate to less than a degree, and is designed to last for a long time not come. It turns on by opening the probe, so there are no one and off buttons to worry about. It folds up for easy storage.
The DOT provides accurate temperature readings so you can achieve perfectly cooked meals every time. A must-have for any home cook.

Seared Tuna with Tomatoes & Capers

Grilled tuna with tomatoes & capers on platter

This seared tuna recipe is seasonal, savory & sophisticated.

Many people are scared to make tuna at home but shouldn’t be. Tuna is deceivingly simple to make, and only takes minutes to produce a stunning meal. The hardest part is buying the ingredients.

Seared tuna steaks are easily cooked on a grill or very hot pan. In this recipe, tuna steaks are seared and then topped with a seasonal summer salad of tomatoes, basil, capers and scallions. It’s light, savory and a total show stopper.

Eating with the season

This recipe is made with ingredients that are in season at the same time that the tuna are running here in the northeast. When you cook with ingredients that are in season at the same time, the result is always a harmonious dish and this recipe is no exception. The crisp, acidic tomatoes and sweet basil are combined with briny capers and bring the tuna’s beautiful flavor to life.

Chopped tomatoes with capers and basil in a bowl

How to Buy Tuna

Sourcing high quality, fresh tuna can be a challenge, especially for those who don’t live near the coast. It is readily available in the northeast in the summer months, which means I only get to cook it a few weeks out of the year. However, in the southern costal states, tuna is often accessible year round.

raw yellowtail tuna
Fresh catch Yellowfin Tuna

Look for seafood that is properly iced and refrigerated.  It should have a firm texture and rich, red color. Ask how old it is before buying. It should be less than 3 days. Don’t buy tuna that is dull, matte or greyish-brown.

Types of Tuna

Big Eye Tuna is the best of the best. It’s very hard to come by, but if you get the opportunity to source it, don’t think twice. Next up, Yellowfin & Ahi, which are similar to one another and more readily available than Big Eye. All will melt in your mouth when cooked properly, which means a seared crust on the outside, and raw center.

Buyer Beware

Most tuna we see at the grocery stores, and even at sushi restaurants, is not very high grade, and more often than not, totally void of flavor. In fact, I rarely order tuna out unless I am at a very high-end sushi restaurant, which is not too often!

Beware that most supermarket seafood in general is very low quality and often farmed. Farmed seafood is full of antibiotics, bathed in chemicals before frozen, and the industry is ripe with questionable practices that are causing significantly damage to the ocean environment and ecosystem. Buyers should beware of the term “sustainable” because it’s a fluff word that is used to lure the consumer in and fool them into thinking they are buying something that is helping the ocean world, but in more cases than not, it refers to fish farms and they are doing significant damage to the waters, the fish stocks, and our bodies.

How to cook tuna steaks

seared tuna steak on grill

Seared tuna steaks need hot, quick heat to scorch the exterior of the tuna while retaining a rare center once sliced into. This can be done on a very hot grill or in a heavy duty pan, such as cast iron.

grilled tuna steak

I look for, or request, 1.5″ – 2″ center cuts of tuna. To achieve. Rare center, If it’s 1.5″ thick, I will sear for 1 min per side. If it’s 2″ thick, I cook it for 1.5 – 2 minutes per side. You need to use a little judgement and adjust based on your desired temp.

Planet Tuna

If you want to learn more about tuna, there is a cool website called “Planet Tuna” that is dedicated to the “world of tuna” which is rather fascinating. Sadly, tuna is very over fished, especially in Asia. We need to do our part to fish it responsibly and support local fisherman whenever possible.

Grilled tuna on platter with tomatoes & capers
Print Recipe
5 from 2 votes

Seared Tuna with Tomatoes & Capers

Tuna steaks are grilled or pan seared then topped with with delicious tomatoes, capers and fresh basil for an easy, but impressive dish!
Prep Time10 minutes
Cuisine: Mediterranean, Seafood
Servings: 2 people

Ingredients

  • 1 lb high quality Tuna steak (recommended 1.5" thick)
  • 1 cup diced plum tomatoes (sliced longways, seeds and core removed, 1/4" dice)
  • 2 tbs thinly sliced scallions
  • 1.5 – 2 tbs capers- rinsed and patted dry.
  • 3/4 tsp minced garlic
  • 3/4 tsp kosher salt, or to taste (plus extra for seasoning steaks)
  • 1/2 tsp ground black pepper, or to taste (plus extra for seasoning steaks)
  • 1 tbs champagne vinegar
  • 3 tbs evtra virgin olive oil
  • 1/2 cup basil

Instructions

  • Preheat your grill as hot as it goes. Mine is 600 degrees F and it works great. Make sure your grates are clean.
  • Prep and portion the ingredients, except for the basil.
    chopped tomatoes, scallions, garlic and capers on a plate
  • Combine the tomatoes, garlic, scallion, capers, 1 tsp salt, 1/2 tsp black pepper, 3 tablespoons EVOO & 1 tablespoon champagne vinegar. Mix gently and set aside. (Do not mix in the basil. Keep the basil set aside.)
    tomatoes & capers in bowl
  • Drizzle tuna steak with olive oil
    olive oil being put on tuna steak
  • Season the steaks with salt & fresh ground pepper
    raw tuna steak with salt and pepper
  • Rub the sides and add more seasoning if necessary to ensure all sides are coated
    Salt and pepper going onto tuna steak
  • When the steak is well seasoned, place it on the hot grill for 1 minute for rare tuna steaks.
    seared tuna steak on grill
  • Armed with tongs and a good spatula so you are prepared, flip the tuna and cook for 1 minute more.
    Tuna steak on grill
  • Remove from grill and let the tuna rest for a minute or two while you finish the salad.
    grilled tuna steak
  • Julienne the basil and and mix it into the tomato & caper mixture.
    Chopped tomatoes with capers and basil in a bowl
  • Slice the tuna across the grain.
    sliced rare grilled tuna
  • Plate the tuna slices and top with the tomato & caper salad.
    Grilled tuna on platter with tomatoes & capers

The Best Grilled Chicken

Grilled chicken on a platter

This greek inspired grilled chicken recipe is foolproof!

I really enjoy a good piece of grilled chicken, but I’m always so disappointed in the results! So often they come out bland and dry. And then I stumbled on a really great recipe by “Once Upon A Chef.” After making it more times than I can count, I am declaring it the best Grilled Chicken recipe! It’s simple, delicious, and reliable- exactly what grilled chicken should be.

The chicken is marinated in a ziplock bag with ingredients most of us usually have on hand. These ingredients are:

  • Extra Virgin Olive Oil (Avocado Oil would work well here too)
  • Dried Oregano
  • Dried Thyme
  • Lemon Zest
  • Minced Garlic
  • Kosher Salt & Pepper (Kosher salt is the preferred cooking salt of professional chefs.)
Grilled Chicken

Why this recipe works

This recipe works because the lemon zest brings a complexity and brightness that balances out the savory herbs. We use lemon zest in place of lemon juice here because lemon juice in a marinade makes it tough, and begins to cure it, turning it white. By using lemon zest, we get the citrus notes, but not the curing.

Grilled Chicken is a Crowd Pleaser

This grilled chicken can be served hot, room temperature or cold. This makes it an excellent option for meal prep for sandwiches, salads or by itself simply reheated. It can be prepared in bulk and once cooked, can be reheated with sides of vegetables or topped with a slice of prosciutto or ham and melted cheese, or a dollop of pesto or your favorite sauce. It really is the most versatile protein and a great way to get started if you are new to meal prepping.

Serve it with Sauce!

I am partial to Greek inspired Grilled Chicken served with a delicious Tzatziki sauce, but other popular side sauces could be barbecue sauce, honey mustard, lemon, Chimichurri, Pesto, garlic sauce… if you name it, it probably will go well with grilled chicken.

Lamb chops are seasoned with fresh garlic, salt and classic herbs then grilled to perfection.
Tzatziki is an incredibly versatile dip that compliments vegetables, meats, sandwiches & more. It’s thick & creamy yet low in calories, good for Keto diets and anyone who is Gluten Free.

Pro Tips!

  • 4 hours of marinating will do the trick, but overnight is best.
  • The grill needs to be HOT and clean!
  • Take out the chicken about 20 minutes before grilling. The oil will harden in the fridge and needs to relax before grilling. Remove the chicken from the marinade and discard the excess oil and marinade left in the bag.

The recipe below features the exact ingredients as the original recipe, but I broke the steps down so they are easier to follow.

Grilled Chicken

To make the best grilled chicken, simply toss the chicken cutlets with Extra Virgin Olive Oil & Herbs. Marinate for a few hours and grill.
Prep Time10 minutes
Cook Time8 minutes
Course: Main Course
Cuisine: American
Keyword: chicken, grilled
Servings: 4 people

Equipment

  • Grill

Ingredients

  • 1-3/4 lbs boneless skinless chicken breasts

Marinade

  • 6 tbsp extra virgin olive oil
  • 4 large garlic cloves minced
  • 1 tsp dried thyme
  • 1/2 tsp dried oregano
  • 1-1/4 tsp kosher salt (Diamond brand recommended)
  • 1/2 tsp freshly ground black pepper
  • 1 lemon, zested

Instructions

Prepare the Chicken

  • Working one at a time, remove the tenderloin from each breast. Then, work to get each chicken piece to 1/2 inch thick by slicing and/or pounding by placing the chicken in a 1-gallon zip-lock bag or between two sheets of plastic wrap.

Make the Marinade

  • Mix all of the ingredients except for the chicken together in a 1-gallon zip-lock bag. Add the chicken breasts to the bag and gently massage the marinade into the meat, ensuring all the chicken is coated. Once coated, make sure as much air as possible is out of the bag. Seal the bag and place on a plate in the fridge. Marinate for at least 4 hours, but preferably overnight.

Cook the Chicken

  • Remove the chicken from the fridge about 30 minutes prior to cooking to relax the marinade. Preheat the grill to high heat (about 600 degrees F.) Make sure grates are clean. (Optional – oil grates. I don’t find this necessary, but some people like to.)
  • Remove chicken from bag and place on a plate for easier transfer to grill. Place the chicken breasts on the grill and cook, covered, for about 3 minutes on one side and about 2 minutes on the other side. Do not touch the chicken until ready to flip. Do not overcook. Remove the chicken from the grill and let rest for about 2 minutes. Transfer the chicken to a platter and serve.

Notes

Recommended serving with Tzatziki sauce
tzatziki sauce in a bowl with pita chips

Grilled Lamb Chops

Grilled Lamb Chops with Tzatziki Sauce

Grilled Lamb Chops are easy and delicious

Grilled lamb chops are easy enough to make for a weeknight dinner or refined enough for a special occasion or company.

How to Grill Lamb Chops

Lamb chops are very tasty on their own so you don’t need to do much to them other than season them and make sure to cook them correctly. They are best when seasoned simply, Mediterranean style, with some fresh garlic and herbs. When it comes to cooking, all there is to do is fire up the grill, cook them a few minutes on each side, and serve. That’s all there is to it.

How to buy Lamb Chops

Only one thing separates good lamb chops from great ones and that is sourcing lamb chops that are the same size! Lamb chops are not hard to find, but they are hard to find ones that are the same thickness. Sadly, skilled butchers have become increasingly hard to find, and many of the workers who are responsible for slicing and packaging meat products are not thinking about us cooks, who need even cuts to ensure even cooking temperatures.

Because of this, I prefer to get the lamb chops from the butcher counter where you can explain to the butcher, or the service person at the meat counter, that you are looking for 6 lamb chops, (or however many you are purchasing) and need them to all be as close in size and thickness as possible for your recipe. Typically, the butcher is more than happy to either let me select my own, or kind enough to select them for, or with, me.


Take the Mint Jelly Poll!

I’m curious if anyone else grow up eating lamb chops served with mint jelly that resembled green Jello? I loved the stuff! I also thought it was the one and only way to eat lamb.

Did you remember mint jelly and lamb?

Throwback to my childhood…on a plate!

photo courtesy of Saucy Girls Kitchen
Tzatziki Recipe
Tzatziki is an incredibly versatile dip that compliments vegetables, meats, sandwiches & more. It’s thick & creamy yet low in calories, good for Keto diets and anyone who is Gluten Free.

Grilled Lamp Chops

Lamb chops are seasoned with fresh garlic, salt and classic herbs then grilled to perfection.
Prep Time10 minutes
Cook Time10 minutes
Course: Main Course
Cuisine: Greek, Mediterranean
Servings: 2 people

Equipment

  • Grill

Ingredients

  • 6 equal size lamb chops, about 1 inch thick, excess fat trimmed away
  • 6 tbsp extra virgin olive oil
  • 4 large garlic cloves minced
  • 1 tsp dried thyme
  • 1/2 tsp dried oregano
  • 1-1/4 tsp kosher salt (Diamond brand recommended)
  • 1/2 tsp freshly ground black pepper
  • 1 lemon zested

Instructions

Make the Marinade

  • Mix all of the ingredients except for the lamb together in a 1-gallon zip-lock bag.
  • Add the lamb chops to the bag and gently massage the marinade into the meat, ensuring all the chops are coated. Once coated, make sure as much air as possible is out of the bag. Seal the bag and place on a plate in the fridge. Marinate for at least 4 hours, but preferably overnight.

Cook the Lamb Chops

  • Remove the lamb from the fridge at least 30 minutes prior to cooking to relax the marinade. Preheat the grill to high heat (about 600 degrees F.) Make sure grates are clean. (Optional – oil grates. I don’t find this necessary, but some people like to.)
  • Remove the lamb chops from marinade and place on a plate for easier transfer to grill. Place the chops on the grill and cook, covered, for about 2.5 minutes on one side and about 2 minutes on the other side for just over medium-rare until 130-132 degrees F. (You will need to use some judgement on how long to cook for based on the thickness of the chops you are using and your temperature preferance.) Do not touch the chops until ready to flip. Remove the lamb from the grill and let rest for about 3-4 minutes. Transfer the lamb to a platter and serve.

Notes

Recommended serving with Tzatziki sauce