Penne Alla Vodka

Penne vodka

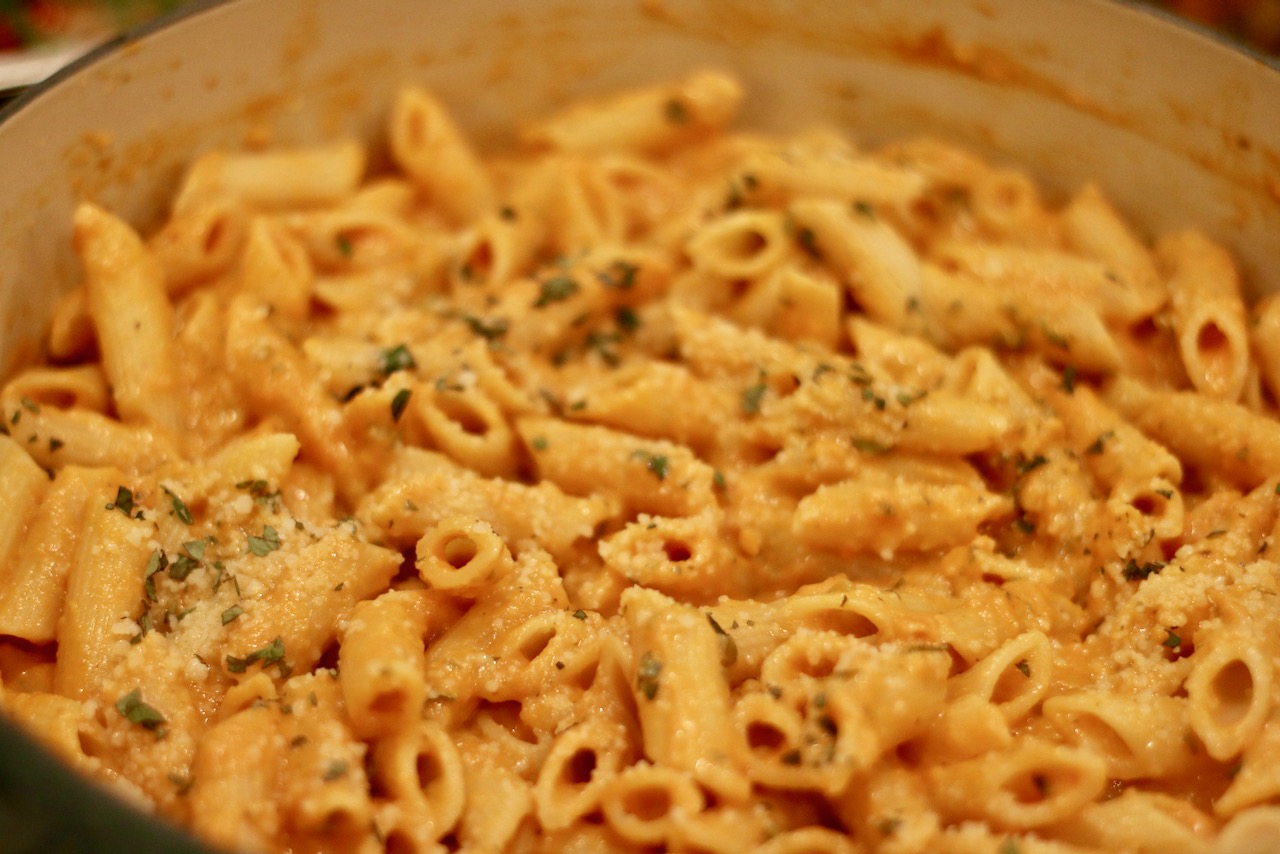
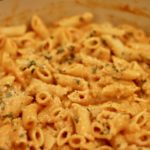
Welcome to Penne Perfection.

Simply put, this is the best Penne alla Vodka recipe I have ever tried. It is creamy, luscious, bursting with flavor and just a pinch spicy. It’s extremely craveable, it’s addicting, and you will eat too much. You will also be thanked profusely by your friends, family, guests or whomever you are cooking for. And you will be asked to make it again. Trust me on this- look no further. This is penne perfection.

Penne alla vodka recipe

Good Vs. Bad

Too often our experience with this Italian-American pasta dish is at a party, where it was made hours earlier by a catering deli or pizzeria, and served out of a steam tray. It often is made way too early or reheated and then we see the cream “break” which means it gets oily. Occasionally it will be made with flour or a roux to help resist the breaking and keep it thick- this isn’t the right thing to do. Sometimes Penne all Vodka will include sautéed onions and/or prosciutto, and even peas. Then there are the versions that don’t even get made with vodka- a main ingredient! This recipe is not that. This is the “real” recipe for Penne alla Vodka and it will ruin the catering version for you for the rest of days!

The Secret to the Sauce

The secret to this recipe is roasting the sauce in the oven for over an hour to develop deep flavors for the sauce base. This is a very different approach than most sauces which are made only on the stovetop. However, once you do it you will understand that the roasting makes a significant difference in the depth of flavor.

Helpful Tips:

  • This recipe can be made in advance by 1-2 days, up until the last step where you reheat slowly and add the cream and parmesan cheese. It can also be made and frozen up until the last steps as well.
  • This recipe doubles well.
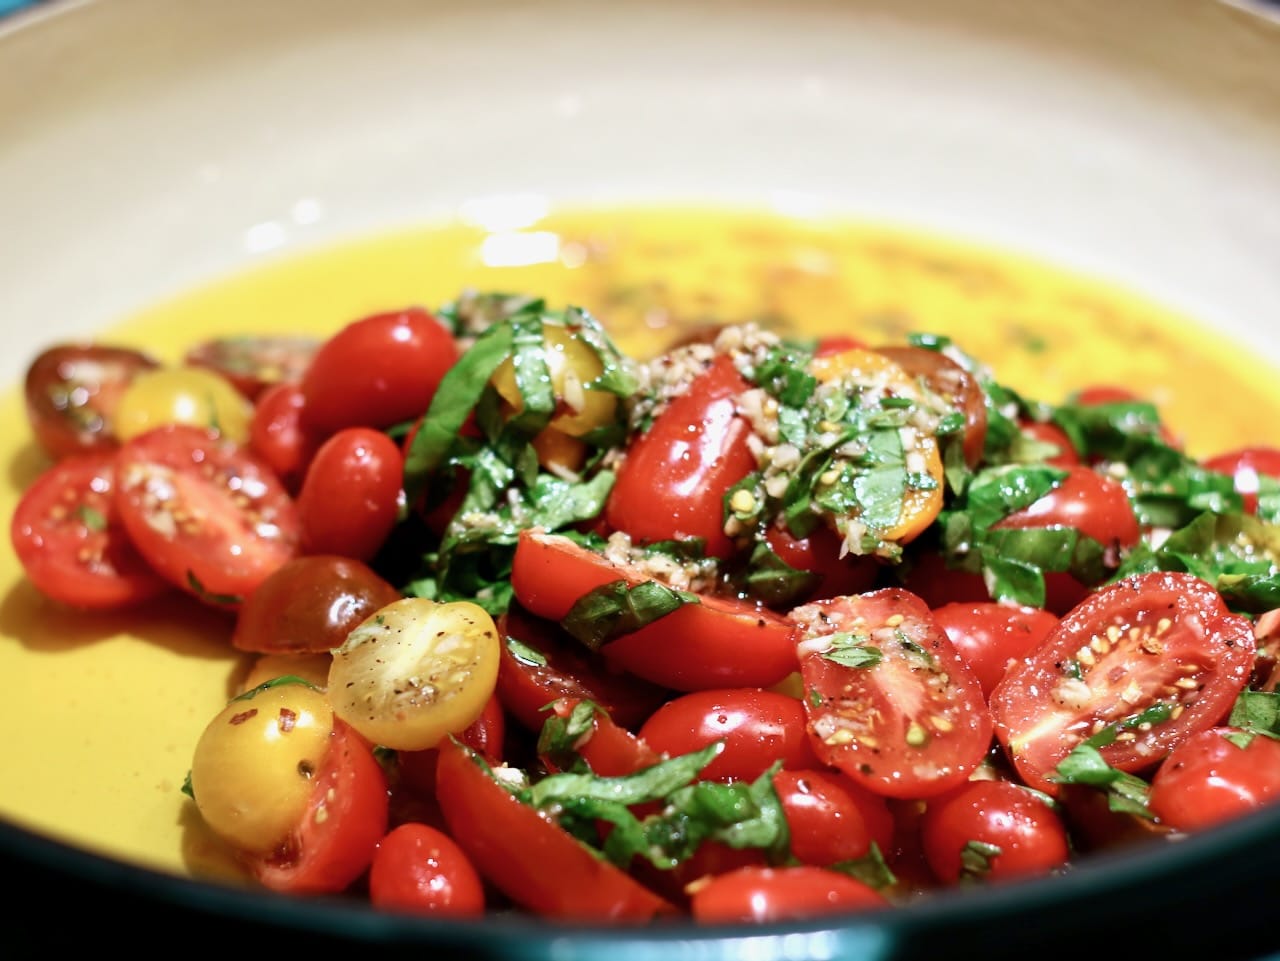
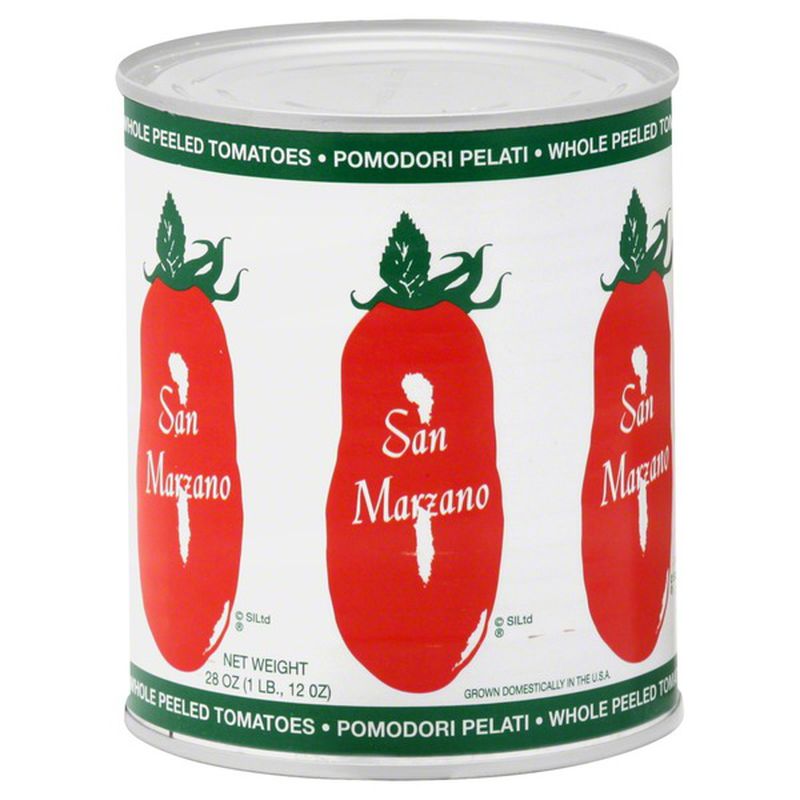
  • This recipe is about the tomatoes, so don’t skimp on quality when choosing your canned tomatoes. Buy San Marzano if possible.

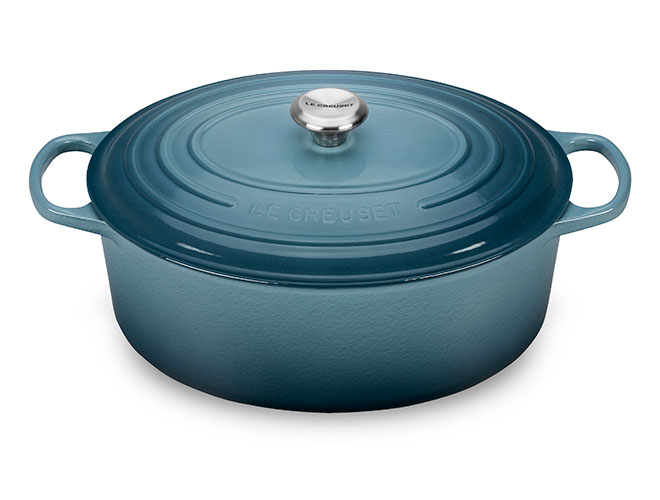
Recommended Ingredients & Equipment:

San Marzano canned tomatoes for Penne Vodka
San Marzano tomatoes are my favorite canned tomatoes. Packaging can vary.
le creuset enameled cast iron dutch oven
I use an enameled cast iron dutch oven to make this recipe

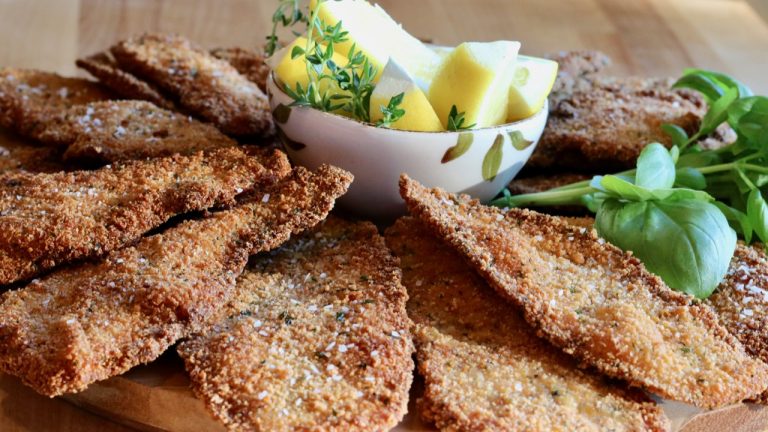
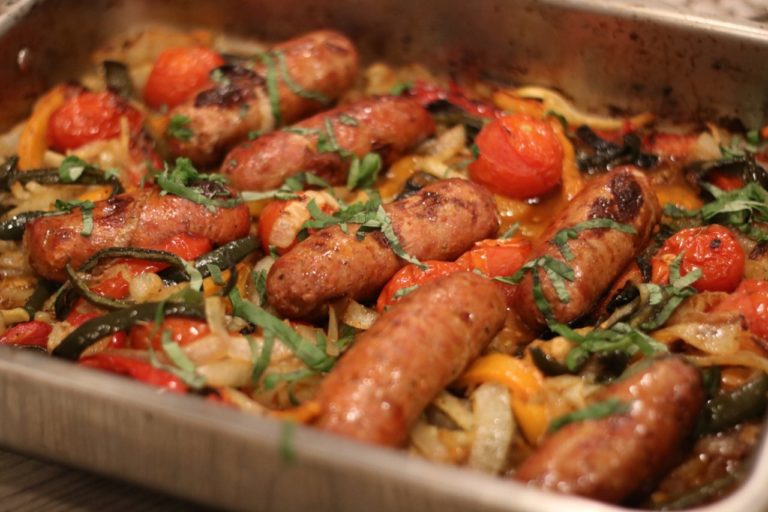
I like to serve Penne Alla Vodka with Roasted Sausage & Peppers. It’s a fabulous combination!

Roasted Sausage and Peppers Recipe
The combination of sausage, peppers and onions is a winning flavor explosion. These independently simple ingredients blend together and the results are simply delicious. Perfect for feeding a crowd too!
Penne vodka
Print Recipe
5 from 2 votes

Penne Vodka

Creamy, lucious & a bit of kick!
Servings: 4
Author: Inspired by Ina Garten

Ingredients

  • 1/4 cup good olive oil
  • 1 medium Spanish onion chopped
  • 3 cloves of garlic diced
  • 1/2 teaspoon crushed red pepper flakes
  • 1 1/2 teaspoons dried oregano
  • 1 cup vodka
  • 2 28-ounce cans peeled plum tomatoes
  • Kosher salt
  • Freshly ground black pepper
  • 3/4 pound penne pasta
  • 4 tablespoons fresh oregano
  • 3/4 to 1 cup heavy cream
  • Grated Parmesan cheese

Instructions

  • Preheat oven to 375 degrees F.
  • Pierce the tomatoes over the sink, one by one, to let the water and seeds release from the tomatoes. This doesn’t have to be perfect. Add them to a bowl and set aside. When all the tomatoes are in a bowl, crush them with your hands. Again, this does not have to be perfect because they will eventually be processed in a blender. Reserve 1 cup of puree from the can of tomatoes.
  • Once the tomatoes are prepared, Heat the olive oil in a large oven proof saute pan over medium heat, add the onions and garlic and cook for about 10 minutes until translucent. Add the red pepper flakes and dried oregano and cook for 1 minute more. Add the vodka and continue cooking until the mixture is reduced by half.
  • Add the tomatoes & puree to the pan, add 2 teaspoons kosher salt and a pinch of black pepper. Stir to combine. Cover the pan with a tight fitting lid and place it in the oven for 1 1/2 hours. Remove the pan from the oven and let cool for 15 minutes.
  • Place the tomato mixture in a blender and puree in batches until the sauce is a smooth consistency. Return to the pan.
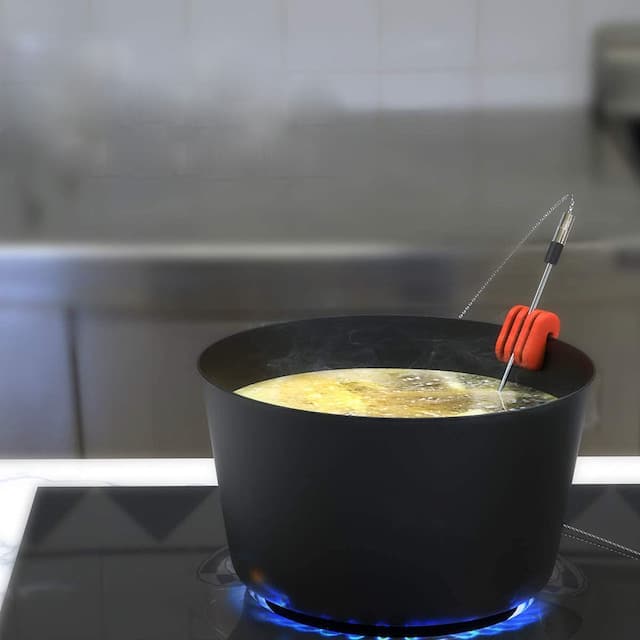
  • At this point you can set the sauce aside until ready to use, or use right away. When you are ready to serve, bring a large pot of salted water to a boil and cook the pasta al dente. Drain and set aside.
  • Meanwhile, reheat the sauce, add 2 tablespoons fresh oregano and enough heavy cream to make the sauce a creamy consistency.
  • Add salt and pepper, to taste, and simmer for 10 minutes. Toss the pasta into the sauce and cook for 2 minutes more. Stir in 1/2 cup Parmesan.
  • Serve with an additional sprinkle of Parmesan and a sprinkle of fresh oregano on each plate.

Notes

This sauce double wells. Sauce can be made in advance & frozen until the point where you add the cream and parmesan. 

The Best Chicken Parmesan Recipe

chicken parmesan

I tried Bon Appétit’s “Best Chicken Parmesan recipe” and here’s what happened.

Who doesn’t love Chicken Parmesan? Seriously. I’ve personally never met anyone. It is, by far, one of my absolute favorite foods. I love a crunchy cutlet smothered in a delicious, slightly sweet sauce and oozing all over with mozzarella cheese. Life is just that much better when I am eating a good chicken parm. However, since no restaurant seems to be able to make Chicken Parmesan very well, I have to make it myself.

I have been making chicken parmesan for as long as I can remember. It was certainly one of my first ever “go-to” meals and I made it on rotation. Turns out, for the past 20 or so years, I have been doing it all wrong. As it turns out, there’s a better recipe out there than mine and I cannot deny that- the truth in the taste!

Proper parmesan needs to be homemade, and made with love. There is no other option.

Shallow Fry

Italian Style Chicken Cutlets

The “old way” of doing things. (Italian breadcrumbs in a shallow fry)

Deep Fry

panko fried breadcrumbs on a gridded sheet pan

The “new” way of doing things (Panko breadcrumbs in a controlled deep fry)

How it all started:

This revelation all started when I listened to a podcast from Bon Appétit’s test kitchen about The Best Chicken Parm. (Yep, I listen to podcasts about food. The obsession is real.) It’s from their “BA’s Best” series. They basically tested every possible variation including different thicknesses (down to the quarter inch), all varieties of breadcrumbs, a variety of seasonings in the dredging station, different frying oils and depths, a wide variety of sauces including style and thickness, cheese variations and finally, how best to cook the final dish to bring it all together. It was seriously intense!

The series of tests resulted in a recipe that pretty much goes against everything I stand for (or stood for) in my approach to chicken parm. This was incredibly disturbing and equally intriguing. So I literally went to the store to gather all the ingredients and the next day, I followed the Bon Appétit recipe exactly. I was skeptical the entire time. It all felt so wrong!

The Old Chicken Parm

chicken parmesan

Looking back, my original version was too thin and a little bland and was just missing something.

The New Chicken Parm

chicken parmesan

I think the results of the “New” Chicken parm speak for themselves! It’s parm perfection.

First Impressions

After spending the day making this recipe, my reaction to my first bite was something like “THIS. IS. F#@*ING AMAZING. HOW? How can this be so good? I couldn’t stop eating. I was pulled in by the depth of flavor and textures and it just kept pulling me back in for more.

Bon Appétit has done it. They found chicken parm perfection. It’s a totally different recipe and technique than I have prided myself on for 20+ years. But now, I’m part of the parm revolution.

Why it is the best

A few key things separate this parm from the rest of the pack.

  1. The number one difference is marinating the chicken in EVOO, lemon juice, garlic and salt before dredging in flour, egg and breadcrumbs. I would have never thought to marinate the chicken and then dredge it directly into the flour before this recipe. Never. But it makes all the difference.
  2. Cutlet thickness. I have always, always believed in the thinest cutlet possible. But using a cutlet 1/3 inch thick results in a much juicier cutlet. This is one area where I’m not totally sold yet. But it was damn juicy!
  3. Next, they call for panko and I’ve always been an advocate for classic Italian seasoned breadcrumbs. The panko really did create an incredible crunch that held up to the sauce. It felt wrong doing it, and frankly, is a lot more work to get the panko to adhere evenly, but it was worth it.
  4. Finally, the next significant difference was the frying. I’ve always believed in a shallow pan fry for my cutlets. Bon Appetite on the other hand, went with the deep fry approach using enough oil in a dutch oven to ensure the cutlets floated, and didn’t make contact with the bottom of the pot, which prevents uneven browning. The result was a perfectly even golden brown crust.
How to fry chicken cutlets

Frying in a dutch oven is the only way to go

This recipe is a little bit of work. But the good news is you can do several steps in advance, such as make the sauce 1-2 days before & grate cheese the day before. And you can even bread the cutlets a few hours in advance- they need to sit for at least an hour after breading anyway, so it’s better to do it few hours earlier, clean up the mess and then all you need to do is fry and assemble when its time to eat. My advise is to read the entire recipe & break it down into manageable steps for yourself so it’s not an all day affair. Once the idea of breaking it down into steps “clicks” then it’s really not a big deal at all.

Feaster’s Tip:

In the original recipe, you are instructed to butterfly the chicken and pound it producing one very large piece of chicken. I think it makes it way too big and much harder to work with. It’s the one step in the recipe I really do not agree with. I did butterfly one to try it, but I decided to stick to halving the cutlets lengthwise, producing two equal breasts and then pounding them to 1/3 inch thick. I found it not only easier to work with, but more enjoyable to eat.

Pro Tips:

Using an oil thermometer

I am a mega fan of probe thermometers and in this case, using a probe thermometer to monitor and maintain the oil while frying the cutlets is really helpful, and will allow you to produce absolutely perfect cutlets. I use the Thermoworks Dot with a probe that is secured to the side of the pot with this handy gadget. I never fry ANYTHING without it!

chicken parmesan
Print Recipe
5 from 3 votes

The Best Chicken Parm

Course: Main Course
Cuisine: Italian
Servings: 4 people

Ingredients

Tomato Sauce

  • 1/3 cup cup extra-virgin olive oil
  • 1 medium onion, finely chopped
  • 8 garlic cloves, crushed
  • 2 Tbsp double-concentrated tomato paste
  • 1/2 – 3/4 tsp tsp. crushed red pepper flakes
  • 2 28-oz. cans tomato purée
  • 2 tsp Diamond Crystal or 1¼ tsp. kosher salt
  • 1 tsp sugar

Chicken

  • 6 skinless boneless chicken breasts (about 3 lb. total)
  • 5 garlic cloves finely grated
  • cup fresh lemon juice
  • ¼ cup extra-virgin olive oil
  • tsp. Diamond Crystal or 1 tsp. Morton kosher salt plus more
  • 4 large eggs
  • 1 Tbsp. garlic powder
  • 1 Tbsp. onion powder
  • 4 cups panko Japanese breadcrumbs
  • 2 cups all-purpose flour
  • 12 oz. low-moisture mozzarella (Recommended is Polly-o and be sure to shred it yourself!)
  • 8 oz. grated Parmesan
  • canola oil for frying; 3–4 cups
  • 2 Tbsp. finely chopped parsley

Instructions

Make the Sauce (The sauce can be made up to 2 days in advance.)

  • Heat oil in a large Dutch oven or other heavy pot over medium. Add onion and cook, stirring often, until softened but not browned, about 10 minutes. (You should lower the temperature if the onions start to brown faster than becoming translucent.)
  • Once the onions are soft, add the garlic and sauté for one minute.
  • Add tomato paste and red pepper flakes and cook, stirring, until paste is slightly darkened in color (it should start to fry in the oil), about 1 minute.
  • Add tomato purée, salt, and sugar, and bring to a simmer. Partially cover pot with a lid (to avoid splattering), reduce heat so sauce is at a very low simmer, and cook, stirring occasionally, until slightly thickened, 40–50 minutes.

Prep the chicken

  • Place each chicken breast between 2 sheets of wax paper or plastic wrap. Pound the chicken until ⅓” thick. (Break out a ruler!)
  • Combine garlic, lemon juice, and olive oil in a large baking dish. Season chicken cutlets all over with salt (about ¾ tsp. Diamond Crystal or ½ tsp. Morton kosher salt per cutlet). Add to marinade and turn to coat. Let marinate 20-40 minutes. (The lemon juice will turn the flesh opaque, but that’s nothing to worry about.)

Set up Dredging Station & prep the cheese

  • Grate the mozzarella on the large holes of a box grater into a medium bowl; add Parmesan and toss to combine. (do not use pre-shredded cheese. It contains ingredients that keep it from sticking together, but also prevent gooey melting.) Place in refrigerator until ready to use. This can be done one day in advance.
  • Whisk eggs, garlic powder, onion powder, ½ tsp. Diamond Crystal or Morton kosher salt, and 2 Tbsp. water in a large shallow bowl (cake pans or pie plates work great).
  • Place panko in another large shallow bowl. (if the panko flakes are large, crush them a bit with a meat mallet or bottom of pan). Add flour to a third bowl.

Bread the chicken

  • Remove the chicken from the marinade and pat dry on paper towel. Working with 1 cutlet at a time, dredge cutlets in flour, knocking off excess. Then dip into egg wash, letting excess drip back into bowl. Dredge in panko, pressing firmly to adhere, ensuring no bare spots remain. Gently shake off excess and place cutlets on a rimmed baking sheet. Chill at least 30 minutes and up to 8 hours.

Fry the Cutlets

  • Set a wire rack inside a second large rimmed baking sheet and set aside near your frying station.
  • Pour canola oil into a large high-sided heavy pot, such as a dutch oven, to come about 2” up the sides. Heat over medium until an instant-read thermometer registers 400°F. Working in batches to avoid crowding the pan and returning oil to 400°F after each batch, very carefully lower cutlets into skillet with tongs and cook until deep golden brown, about 2 minutes per side. (you will need to adjust the temperature throughout the process. If you see the breadcrumbs burning or getting too dark, the temperature should be lowered.) Transfer cutlets to prepared rack; season with a sprinkle of salt.

Assemble, Broil & Serve

  • Heat broiler. Arrange cutlets side by side on a sheet pan. (Do not use parchment paper because they are going under the broiler.) Generously spoon some sauce over each cutlet (you want to mostly cover them but allow some corners and edges to remain uncovered).
  • Cover cutlets with cheese mixture (again, leaving some of those crispy edges uncovered). Broil until cheese is melted, bubbling, and browned in spots, about 4 minutes. Remove chicken from broiler. Let cool slightly and sprinkle with parsley.
  • Serve with extra sauce on the side.

Notes

This recipe can take some time, especially if you are not overly experienced making fried chicken cutlets. You can do the following to make it in steps over 2 days, which I highly recommend. 
  1. Make the sauce up to 2 days in advance. 
  2. Shred the cheese 1 day in advance
  3. Clean and pound the chicken 1 day in advance. 
Italian style chicken cutlets
There are a few simple things that you can do to ensure you get a fantastic chicken cutlet every time!

Spaghetti with Tomatoes & Basil

Spaghetti with tomatoes & basil

Simply Summer.

This is an all-star of a recipe and one of my absolute favorites, especially in the summer months. It highlights the best of the summer garden- fresh cherry tomatoes & fragrant basil. What tastes more like summer than that?!

It’s a dish that has the ability to transport me to somewhere in Italy in the summertime. (Where? I don’t know- but it’s my daydream- feel free to share in my imaginary trip!) It’s fresh, vibrant and surprisingly light. Serve with a glass of crisp, white wine and you too, will be transported to the land of delicious simplicity.

Get Creative!

Using a medley of yellow & red cherry tomatoes not only creates a new flavor profile, but also creates a colorful presentation!

spaghetti with tomatoes

I use my own homemade spaghetti, which is very thin and light, but if you aren’t up for making your own pasta dough, just use your favorite store bought angel hair or capellini.

spaghetti
Homemade spaghetti
How to Make Homemade Pasta
Making homemade pasta is equal parts science and soul. I can’t teach the soul part, but I can teach you a thing or two!

Fresh Spaghetti with Tomatoes & Basil

Spaghetti with Tomatoes & Basil is a summer pasta dish that is sure to please everyone. Fresh cherry tomatoes are sautéed with garlic and herbs and tossed with lots of good olive oil served over spaghetti. Serve with a good piece of rustic bread!
Prep Time5 minutes
Cook Time5 minutes
Cuisine: Italian
Keyword: pasta

Ingredients

  • 2 pints cherry tomatoes halved
  • Good olive oil
  • 2 tablespoons minced garlic 6 cloves
  • 18 large basil leaves julienned, plus extra for serving
  • ½ teaspoon crushed red pepper flakes
  • Kosher salt
  • ½ teaspoon freshly ground black pepper
  • 1/2 pound angel hair pasta capellini, or fresh spaghetti
  • 1 cups freshly grated Parmesan cheese plus extra for serving

Instructions

  • Combine the cherry tomatoes, ½ cup olive oil, garlic, basil leaves, red pepper flakes, 1 teaspoon salt, and the pepper in a large bowl. Cover with plastic wrap, and set aside at room temperature for about 4 hours.
  • Just before you’re ready to serve, bring a large pot of water with 2 tablespoons salt to a boil.
  • Heat the the tomato mixture in a large (12-inch) saute pan and cook on medium-low and cook for about 3 minutes minutes, tossing occasionally, until the tomatoes begin to soften but don’t break up. You just want to heat through.
  • Time this with when you add your pasta to the boiling water which also only takes 2-3 minutes according to package instructions. Drain the pasta well (I prefer to pull with tongs rather than dump into a colander, reserving the pasta water.
  • Add the pasta to the bowl with the cherry tomatoes. Add the cheese and some extra fresh basil leaves and toss well. Serve with extra cheese on each serving.

Notes

*If the pasta is dry, add a dash of pasta water to loosen up and make more of a sauce. You can also add a dash of more of olive oil if necessary. (Every pasta is a different. You need to use a little judgement.) 

Fettuccine with Truffle Butter and Mushrooms

Fettuccine with Truffle Butter

The definition of decadence

This is the one. The one dish that brings me the greatest joy to make and to eat. It’s rich, decadent, and has the ability to silence every diner at the table. I want to assure you, while I still have your attention, that you do not need to make your own pasta for this. You can substitute with fresh pasta from any market that sells fresh pasta, or use Cipriani Brand which is dried, but outstanding in dried pasta quality. (Nope- I do not get paid to make that pitch…it’s just what I recommend!)

No dish in the world requires more love to be put into it than homemade pasta. Not because it’s hard, because it’s not. But some culinary force out there just seems to know if you are making it while full of anxiety or anger, or if you are sharing love with the eggs and flour. It’s a mystery but it’s the truth. No love = no pasta.  Thus, it is because of the love the pasta demands, that the reward is so great. Now, toss that labor of love with some truffle butter, cream and chives and you’ll find yourself wondering how you ever lived without it!

Fettuccini with Lobster & truffle butter
Fettuccini with Lobster & Mushrooms in a Truffle Butter Cream Sauce

If you are up for making some pasta, check out this post for How to make pasta dough. Again, you can simply buy some fresh fettuccini and skip the homemade part for this recipe and get right down to some damn delicious pasta!

How to Make Homemade Pasta
Making homemade pasta is equal parts science and soul. I can’t teach the soul part, but I can teach you a thing or two!

Regardless if you decide to make your own fettuccini or buy it, this dish is going to blow you away. It’s decedent, delightful & delicious. A real show stopper and perfect for any occasion that commands a creamy, truffled pasta! (That’s every night, right?)

I’ll let you in on a secret. It’s my favorite dish to make when I am alone! A good bottle of wine, a movie and this pasta dish. Every girl deserves a night of total, unabated indulgence, and this is mine! Feast and Merriment for one please!

Feasters Tip

The delicate noodles can be tricky to work with so be sure to have a big enough sauce pan that provides enough room for you to gently incorporate the pasta with the other ingredients. I successfully double the recipe but I do not recommend doing more than a double batch.

Fettuccine with White Truffle Butter and Mushrooms

This silky and rich pasta is the definition of decadence 
Prep Time5 minutes
Cook Time15 minutes
Total Time20 minutes
Course: Appetizer
Cuisine: Italian
Keyword: pasta
Author: Ina Garten

Ingredients

  • Kosher salt and freshly ground black pepper
  • 2 tablespoons unsalted butter
  • 1 tablespoon good olive oil
  • 12 ounces cremini mushrooms stems removed, caps sliced 1/4-inch thick
  • 1/2 cup heavy cream
  • 3 ounces white truffle butter
  • 8 ounces fresh fettuccine
  • 3 tablespoons chopped fresh chives plus extra for garnish
  • 1/4 cup freshly grated Parmesan plus extra for garnish

Instructions

  • Add 1 tablespoon of salt to a large pot of water and bring it to a boil.
  • Meanwhile, melt the butter and olive oil in a large (12-inch) saute pan over medium-high heat. Add the mushrooms and saute for 5 to 10 minutes, tossing often, until the mushrooms are cooked and the liquid has evaporated. 
  • Transfer the mushrooms to a bowl and rinse out the pan. (pat mushrooms dry if necessary.
  • Pour the cream into the saute pan and heat it over medium heat until it simmers. Add the truffle butter, 1 teaspoon salt and 1/2 teaspoon pepper, lower the heat to very low and swirl the butter until it melts. Keep warm over very low heat.
  • Meanwhile, add the pasta to the boiling water and cook for 2 minutes, or according to package instructions. Drain the pasta in a colander and add it to the truffle cream. Add the chives and mushrooms and very gently toss well with tongs. Gently stir in the Parmesan. Serve immediately garnished with extra chives and Parmesan.

Italian Pasta Salad

italian pasta salad with salami and arugula

This is not your traditional pasta salad. It’s way better.

I grew up with the classic Italian pasta salad being served at every party. You know the one…tri-color pasta tossed with cubes of salami, red & green peppers, black olives (the kind in the can), provolone and everything is covered in bottled Italian dressing. I have eaten this pasta salad enough in my day that I am more than happy to never eat it again, and haven’t considered making it in years, but I recently came across a recipe that made me fall back in love with Italian pasta salad and it’s SO much better!

I came across this recipe while watching an episode of America’s Test Kitchen where they discussed the common problems with traditional pasta salad such as soggy vegetables, tasteless dressings, texture inconsistency, lack of creativity, and uneven distribution of ingredients. The ingredients, while similar to the more common Italian pasta salad described above, are much more robust and elevated. They referred to the ingredients in this salad as “antipasti inspired” and I love that!

The dressing is made extra virgin olive oil that is infused with garlic and anchovy and blended with spicy pepperoncini peppers & salty capers. It’s delicious! It is all then tossed with antipasti inspired ingredients like olives, sundried tomatoes, mozzarella and salami.

A note on anchovies. I know I probably just turned a lot of people off from this recipe with that scary word “anchovy,” but you have no idea how often anchovies are used in restaurant cooking, dressings and condiments and you don’t even know it. In the case of this pasta salad, they melt into the oil and you won’t even know they are there but you will notice the depth of umami that the anchovy brings to the party. I don’t understand these people who hate on anchovies without even trying them (you are missing a world of flavor!), but if you are one of them, go ahead and leave them out.

Feaster’s Tip:

I agree with America’s Test kitchen’s recommendation on selecting salami. We both prefer a small, individually packaged, dry Italian-style salami. However if it is unavailable, you can ask the deli counter for thick cuts of Genoa salami and then cube it. But the quality is of cold cut style salami is not as good as individual packaged sausage style salamis.

Italian Pasta Salad

This is the perfect Italian pasta salad inspired by antipasti favorites like sweet sun-dried tomatoes, salty olives, spicy pepperoncini peppers, salami and fresh mozzarella tossed together with peppery arugula and savory basil!
Prep Time30 minutes
Cook Time10 minutes
Course: Side Dish
Cuisine: Italian
Servings: 8 people (side dish)
Author: Adapted from America’s Test Kitchen

Equipment

  • Food processor

Ingredients

  • 1 pound fusilli
  • Salt and pepper
  • 3/4 cup extra-virgin olive oil
  • 3-5 garlic cloves minced (depends on your tolerance for garlic.)
  • 5-6 anchovy fillets rinsed, patted dry, and minced
  • ¼ teaspoon red pepper flakes
  • 1 cup pepperoncini stemmed, plus 2 tablespoons brine
  • 3 tablespoons capers rinsed
  • 2 ounces 2 cups baby arugula
  • 1 cup chopped fresh basil
  • ½ cup oil-packed sun-dried tomatoes sliced thin
  • ½ cup pitted kalamata olives quartered
  • 8 ounces salami cut into ⅜-inch dice
  • 16 ounces fresh mozzarella cheese cut into ⅜-inch dice and patted dry

Instructions

  • Slice half of pepperoncini into thin rings and set aside.
  • Bring 4 quarts water to boil in large pot. Add pasta and 1 tablespoon salt and cook, stirring often, until pasta is tender. Drain pasta and rinse under cold water until chilled. Drain well and transfer to large bowl.
  • Meanwhile, combine oil, garlic, anchovies, and pepper flakes in a small sauce pan over a gentle heat just until bubbling. Remove from heat. DO NOT OVERCOOK. Set aside. (The purpose of this is just to infuse the oil with flavor and melt the anchovies.)
  • Transfer the whole pepperoncini to food processor. Add capers and pulse until finely chopped, 8 to 10 pulses, scraping down sides of bowl as needed. Add pepperoncini brine and warm oil mixture and process until combined, about 20 seconds.
  • Add dressing to pasta and toss to combine. Add tomatoes, olives, salami, mozzarella, and pepperoncini rings and toss well. Season with salt and pepper to taste. Right before serving, toss with arugula & basil.

Notes

Make ahead – Salad can be refrigerated for up to 3 days but do not add the basil or arugula. Let the salad come to room temperature and then toss the arugula and basil right before serving.

Grilled Shrimp

Grilled Shrimp

Grilled shrimp is known for its simplicity and succulent flavor, making it a favorite for casual gatherings around the grill.

The joy of peel & eats

Fun fact about me – I love Key West, Florida! I really enjoy traveling, but there is also something comforting and relaxing about returning to a place that you get to know & for us that place is Key West. What does this have to do with grilled shrimp? Well, one of my absolute favorite things to do when I am in Key West is to saddle up on a bar stool at the Conch Republic at the A&B Marina and sit for hours with pile after pile of Peel & Eat shrimp. I find Peel & Eats therapeutic! I can sit there all day just peeling, eating & drinking!

How to make Grilled Shrimp

To prepare a standout grilled shrimp dish, you have to begin with high-quality ingredients. Opt for fresh shrimp, preferably wild-caught, as their superior taste and texture will shine through. Begin by deveining the shrimp, leaving the shells on and the tails intact. This can be done up to one day in advance. When ready to cook, pre-heat the grill to medium-high. Meanwhile, toss the shrimp in EVOO, salt & pepper. Grill the shrimp for approximately 2-3 minutes per side, or until they turn pink and opaque. Do not to overcook, as shrimp can become rubbery if left on the grill for too long.

No Grill? No Problem.

If you don’t have access to a grill, you can still make this dish. Simply toss the shrimp with the shells on with the EVOO, salt & pepper and place in a single layer on a sheet tray. Broil on one side at 450°F for 2 minutes and flip shrimp and broil for another 1-2 minutes depending on the side of the shrimp. Done!

Get Creative

I prefer to keep it simple and let the flavor of the shrimp shine through. However, Grilled shrimp takes to lots of different flavors very well so its a great base to get creative! You can add a pinch of thyme, rosemary, old bay, or paprika, bbq seasoning or other spices- it’s all up to personal taste. The flavor combinations are endless- simply mix the herbs or spices to the olive oil mixture.

Dipping Sauce

To complete the dish it should be served with a zesty, vibrant dipping sauce. Of course we all know the classic cocktail sauce, but there are actually several great alternatives. A seafood remoulade is a wonderful alternative and goes exceptionally well with the char flavor, as does a garlic aioli and my favorite accoutrement- chimichurri.

Chimichurri Sauce
Originating from Argentina, this vibrant green sauce has been making waves across the globe with its bold, herbaceous flavor profile and zesty kick. A perfect accompaniment for grilled meats, vegetables and a wide array of seafoods.

Simply grilled. Simply Delicious.

Sometimes simplicity is the best route in cooking and this is one of those dishes that reminds you of just that. Selecting high-quality ingredients and making a simple marinade is all that is needed to impress you guests.

Grilled Peel & Eat Shrimp

Marinate the shrimp in a mixture of olive oil, salt & pepper then grill over medium – high heat until they achieve a perfect char.
Prep Time10 minutes
Cook Time6 minutes
Course: Appetizer, tapas
Cuisine: International
Keyword: gluten free, keto, seafood, shellfish, shrimp
Servings: 3 people

Ingredients

  • 16 Good quality jumbo shrimp deveined in shell, raw
  • 1/2 cup extra virgin olive oil
  • Kosher salt and black pepper
  • 2 lemons halved

Instructions

  • Preheat grill over high heat.
  • Butterfly shrimp by slicing almost through lengthwise, but leave shell on shrimp. (This will keep the shrimp tender while grilling.)
  • Brush shrimps with oil, season with salt and pepper.
  • Grill shrimp for 2 minutes on each side, until shells are hot pink and shrimp is opaque. (They will continue to cook off the grill so do not over cook!)
  • Place lemons on the grill, cut side down, for the last minute. The heat will release the juice from the lemons. To serve, squeeze grilled lemon wedges over shrimp.
  • Serve alone, with cocktail sauce, remoulade, or chimichurri sauce.
  • Peel and eat!

Summer Corn Salad

corn & basil salad

The ultimate summer side dish

Nothing tastes or looks more like summer in a bowl than this corn salad recipe! In one, simple side dish, the best of local summer produce is represented – bright yellow corn, seasonally ripe red tomatoes, and vivid green basil leaves. It can be served alongside anything from barbecue ribs to hamburgers or even fish- it’s a winning recipe. And better yet, it can be made ahead of time.

Corn salad is a “Go-to” recipe

Corn salad is one of my “go-to” side dishes, not only when I am hosting a summer gathering, but also when I am invited to attend somewhere and don’t want to show up empty handed. I call it a “go-to” dish because it checks all the boxes I am looking for in a great recipe- it tastes great, looks beautiful and can be made in advance. As a bonus, it doubles well, can served at room temperature, making this the ultimate summer side dish.

Corn & Basil Salad
Few things represent summer more than fresh corn and basil

Recipe Summary

  • Blanch the corn then slice off the cob.
  • Toss with sliced grape tomatoes
  • Make a vinaigrette with apple cider vinegar, olive oil, salt & pepper
  • Mix in vinaigrette and julienned basil leaves
corn salad featured in a magazine

I was honored when this recipe was chosen to be featured in Greenwich Lifestyle magazine!

Make it ahead

  1. Cook, prep & refrigerate the corn.
  2. In a separate container, make the dressing, omitting the basil, and refrigerate.
  3. About a half hour before serving the corn salad, dress the corn, being careful not to overdress (you will likely have extra dressing).
  4. Right before serving, add the basil so it stays crisp and retains its color. Serve!

How to buy Corn on the Cob

When buying corn on the cob, look for the freshest cobs possible. Look for the husk to be bright green and wrapped tightly again the corn. Cobs should feel heavy for their size which indicates it was picked recently and is fresh. The older a cob is, the lighter it will feel because it has lost all its moisture.

Avoid cobs with dry and dull husks, a slimy or mushy texture, discolored or missing kernels.

How to store Corn

You should use the corn as soon as possible after buying it. If you need to store it, keep the corn in their husks to prevent them from drying out. Store them loosely in plastic bags in the refrigerator and use as soon as you can.

Helpful recipe tips:

  • Use fresh corn on the cob
  • Corn does not take as long as you think to cook. 3-5 minutes, at most, will do the trick.
  • This dish is meant to be rustic so don’t worry if the kernels come off the cob in different sizes or independently.
  • Lay out a clean tea towel and slice the corn onto it. This catches all the flying kernels and makes it easy to transfer the corn into a bowl.
  • This recipe double well

Corn & Basil Salad

Corn and grape tomatoes are tossed with an apple cider vinaigrette and finished with lots of fresh basil – the perfect summer side dish. 
Prep Time15 minutes
Cook Time5 minutes
Total Time20 minutes
Course: Side Dish
Cuisine: American
Servings: 5

Ingredients

  • 5 ears of corn shucked clean
  • 3 tablespoons apple cider vinegar
  • 3 tablespoons olive oil
  • 1 teaspoon kosher salt
  • 1/2 teaspoon black pepper
  • 1/2 cup julienned fresh basil leaves
  • 1 cup halved grape tomatoes (optional)

Instructions

  • In a large pot of boiling salted water, cook the corn for 3 minutes until the starchiness is just gone. Drain and immerse it in ice water to stop the cooking and to set the color. When the corn is cool, cut the kernels off the cob, cutting close to the cob.
  • Mix together in small bowl vinegar, olive oil, salt, and pepper.
  • Gently combine kernels (and tomatoes, if using) with the vinaigrette.
  • Just before serving, toss in the fresh basil. Taste for seasonings and serve cold or at room temperature.

Crab Cakes

crab cake

Featured in Greenwich Lifestyle magazine

Summer never tasted so good!

Few things are better than dining al fresco in the summer months with friends, enjoying some fresh seafood and a glass of crisp white wine (or two!) At your next summer soiree consider serving delicious homemade crab cakes and a seasonal corn & basil salad.

Crab Cakes on sheet pan
These crab cakes are pure crab and guaranteed to satisfy!

Stand out crab cakes, like most delectable dishes, come down to the ingredients that are in them. Store bought crab cakes use an abundance of fillers like celery, onion, red & yellow peppers, hearty amounts of breadcrumbs, and in many cases, contain several types of preservatives. They are also often made with back fin meat, which although more cost effective, has a more minced texture and a stronger sea flavor than lump or jumbo lump.

When making your own crab cakes you get to control what goes into them, and the results are superior to any pre-made options. So leave the vegetables like the onions, celery & peppers out, and save them for the side dish. Seasoning should elevate the delicate crab flavor and not disguise or commandeer the dish. And most important of all, use fresh, good quality crab meat. This approach will guarantee a delighted table of guests and you’ll be the star of the summer hosts!

You want a good crab cakes? Use good crab. It’s just that simple.

Crab Cake Benedict
My absolute favorite bunch is homemade Crab Cakes Benedict and a glass of champagne!

Fortunately, in the Greenwich and surrounding New England area, we are able to source fresh crab fairly easily. You can find it in all the local fish shops or specialty markets.

You’ll want to ask for lump or jumbo lump – the choice is yours. Jumbo lump will produce cakes with large pieces of crab and more texture, whereas lump will provide a more even consistency throughout. It’s all a matter of personal preference.

Tips:

  • To make this recipe gluten free, substitute Ritz crackers for gluten free butter crackers.
  • Crab cakes are versatile- serve them sandwich style, as an entree, make crab cake eggs Benedict, or make them mini for appetizer bites!
  • Use a circular cookie cutter and pack your crab inside the ring, and then lift the ring carefully for a perfectly shaped cake.

Crab cakes

This crab cake recipe is all about the crab and none of fillers. Be sure to use fresh crab to best results! 
Prep Time10 minutes
Cook Time6 minutes
Total Time26 minutes
Cuisine: Seafood

Ingredients

  • 1 large egg
  • 2 heaping tablespoons mayonnaise
  • 1 teaspoon Dijon mustard
  • 1 teaspoon Worcestershire sauce
  • 1 teaspoon hot sauce
  • Few drops of fresh lemon juice not to exceed 1/4 teaspoon
  • 1 teaspoon Old Bay Seasoning
  • 1/4 teaspoon kosher salt
  • 1/8 teaspoon fresh ground black pepper
  • 1/2 cup crushed Ritz crackers
  • 2 tablespoons chopped fresh parsley
  • 1 pound fresh crabmeat (drained, patted dry an picked over for shells or cartilage)
  • Non-stick cooking spray

Instructions

  • In a medium bowl, combine the egg, mayonnaise, mustard, Worcestershire, Tabasco, lemon juice, Old Bay, salt and pepper. Mix so that all the ingredients are well-incorporated.
  • Add the cracker crumbs and parsley and mix well.
  • Gently fold in crabmeat until just combined (try not to break up lumps of crabmeat too much).
  • Using slightly wet hands, shape mixture into patties or use a round cookie cutter to pack and shape.
  • Put the crab cakes on a baking sheet lined with parchment as they're shaped. Cover loosely with foil and refrigerate for 1 hour before cooking.
  • Set oven on broil at 450. Spray a baking sheet with non stick spray and use a spatula to place crab cakes on tray and place in oven on medium height rack.
  • Cook for about 5 minutes or until golden brown. (Keep an eye on them- every broiler cooks differently. If they are burning rather than browning, move them down to a lower rack.)
  • Serve with lemon and tartar sauce, or seafood remoulade.

Introduction to Red Pepper Pasta Dough (and other flavored pastas)

And many of you know, I make a lot of homemade pasta. For me, the process is very therapeutic and rewarding. However, even I sometimes get bored with plain pasta and thus, I began introducing vegetables to infuse color and flavor into my pasta dough. The two most popular flavors you will find in stores as well as in my kitchen are Spinach and Red pepper, but I have also made beets and pumpkin infused pasta dough. However, my favorite vegetable pasta of all is the roasted red pepper pasta. It has a subtle, smoky sweetness and a deep, rustic color that holds up really well to the boiling water. It’s a show piece of a pasta!

How to Make Red Pepper Pasta Dough

When you make a basic pasta dough, the recipe is a pretty basic blend of flour and egg. When you work with vegetable puree, this introduced a new “wet” ingredient so we must reduce the amount of egg and in most cases, increase the amount of flour simply because the vegetable puree does absorb more flour than egg does. Learning and applying that knowledge to each batch of pasta is the real challenge and why I would always recommend you start with making ad perfecting a basic, but delicious, pasta dough before working with vegetable infused pasta, such as red pepper pasta dough. (The pasta learning never ends- each batch teaches us something new!)

The key is draining and drying the vegetables

If you don’t know what a nut milk bag is then you are missing out. While it’s purpose is to make milk from nuts, its essentially a bag that drains liquid, sort of like a reusable cheesecloth. Its a total game changer if you often work with frozen spinach, but also a ton of other vegetables that contain extra moisture needed to be removed. In the case of making red pepper pasta or spinach pasta, the vegetables must be drained entirely to the point of dry, which is no easy task. Unless of course, you have a nut milk bag.

The first step to making red pepper pasta dough is to prepare the peppers. To do so, drain 1 jar of piquillo peppers on paper towels and then puree the peppers in a food processor until smooth. Then, use a nut milk bag to drain & squeeze out any excess liquid. Keep squeezing until all excess liquid has been removed. This will now be what you add to the flour to flavor and color the pasta dough.

Step 1: Blend drained peppers
Red pepper puree in a measuring cup
Step 2: Drain excess liquid until you have a pulp
Flour in a food processor with red pepper puree
Step 3: combine ingredients
blended dough ad pepper puree into pasta dough ball
Step 4: Make Dough using pulse
ball of red pepper infused pasta dough
Step 5: Wrap in plastic and set set aside
Step 6: Roll Pasta dough and cook to order!

Red Pepper Pasta Dough Recipe:

  • 2 cups all purpose flour (225g)
  • .5 cup semolina (75g)
  • 1/2 cup pureed peppers, drained of all excess liquid
  • 1/2 tsp salt
  • 1 egg
  • After mixing, added a dash more flour. 

Like all pasta dough, once combined and rolled into a delightful ball of dough, wrap tightly in plastic and let it sit for a minimum of half hour or up to 24 hours in the fridge. I find that with this particular pasta, I like to let it rest in the fridge for at least a few hours to let the floors really marry – it makes a difference. Roll & cook as you would with standard pasta dough.

How to Make Homemade Pasta
Making homemade pasta is equal parts science and soul. I can’t teach the soul part, but I can teach you a thing or two!

Pro Tips for Making Infused Pastas

  • Vegetable infused pasta doughs, especially red pepper pasta dough, are typically a wetter dough then a basic flour dough, so you MUST flouring the dough in between rolling numbers to prevent sticking and ripping. 
  • I started out making the Red pepper Raviolis in a jumbo ravioli tray, but the dough was too elastic and they sank too deep. That method went right out the window. The best ravioli option for this dough turned out to be using two round cookie cutters and forming the ravioli’s individually.

Basil Parmesan Sauce

basil-parmsan-sauce

Sauces are so important to any dish from the humble lunch sandwich to the most gourmet of meals. Often overlooked by home cooks because they can be intimidating, sauce is vital and what pulls a meal together. Like shoes to an outfit- it serves an important functional role as well as pulling everything together. Sauce should never, ever be overlooked.

This became one of my favorite condiments/ sauces because it is packed with fresh flavor, can be made in advance, and it’s extremely versatile. I use it on everything from classic turkey sandwiches to elegant beef tenderloin. It’s a perfect condiment to keep around and I am always finding new ways to use it. You can’t say that about too many other sauces.

basil mayo in jar

This sauce is really nothing more than a flavor infused fresh mayonnaise. I changed the name from mayonnaise to sauce after serving it with beef tenderloin (as I always do) after I discovered that not everyone was down with the idea of mayo and meat. So I started presenting it as Beef Tenderloin with Basil & Parmesan “aioli” and guess what happened? Everyone tried it and loved it. Funny how people have what they “like” and don’t like” already made up in their minds before trying things.

The original recipe is from Ina Garten but I have tweaked the recipe over time to get it just right. Here are some tips I picked up along the way:

  • This is sauce is best made in advance so the flavors have time to marry together.  
  • While Ina uses vegetable oil, I prefer using sunflower oil. I found it lightens up the oily flavor and texture noticeably.
  • Mason jars are the perfect way to store this sauce.
  • When serving with beef, I like to take the chill off the sauce before serving.

Basil Parmesan Sauce

Prep Time10 minutes
Course: sauce

Ingredients

  • 2 large egg yolks at room temperature (organic free range eggs are recommended)
  • 3 tablespoon freshly squeezed lemon juice
  • 1/2 teaspoon minced garlic
  • 1 tablespoon dijon mustard
  • 1 tablespoon kosher salt
  • 1 teaspoon freshly ground black pepper
  • 1 cup sunflower oil (canola oil works well here too.)
  • 1/2 cup good olive oil
  • 1/2 cup chopped and packed fresh basil leaves
  • 1/2 cup fresh grated parmesan cheese

Instructions

  • Place the egg yolks, lemon juice, parmesan, mustard, garlic, basil, salt and pepper in the bowl of a food processor fitted with the steel blade and process until smooth. (About 20 seconds.)
  • Combine the 2 oils in a measuring cup. With the processor running, slowly pour the oils into the bowl through the feed tube and process until emulsified.
  • Taste for seasoning. (It is a sauce, so it should have ia good amount of seasoning.)
  • Store the sauce in the refrigerator for at least 3 days. A mason jar works well.

As always, I always suggest caution in consuming raw and lightly-cooked eggs due to the risk of Salmonella or other food-borne illness. To reduce this risk, it is recommended you use only fresh, properly-refrigerated, clean, grade A or AA eggs with intact shells, and avoid contact between the yolks or whites and the shell. For recipes that call for eggs that are raw or undercooked when the dish is served use shell eggs that have been treated to destroy Salmonella, by pasteurization or another approved method.

Chicken Enchilada Recipe

Enchiladas

This chicken enchilada recipe requires two main parts to be made before assembling. 1) The Enchilada Sauce recipe and 2) the Slow Cooker Salsa Chicken recipe. Don’t get scared- they are both the two easiest recipes on this website! When they come together the result is Mexican inspired comfort food that is easy, approachable and can even be made in advance. Chicken enchiladas are a fabulous meal to serve for a fun night with friends, a birthday celebration or just when you a craving a warm and delicious comfort food.

First, let’s talk sauce

Simply put, enchiladas are only as good as the enchilada sauce that smothers them. And since I love chicken enchiladas, I had no choice but to find a great recipe for enchilada sauce. So that’s what I set out to do. I tested countless recipes and compared homemade versions to pre-made versions. I tried it all until I was satisfied with what is now declare the best enchilada sauce recipe. That’s the recipe you’ll find here.

Now, how ’bout that filling?

Enchiladas
MEXICAN SHREDDED SALSA CHICKEN IS MADE IN THE SLOW COOKER WITH ONLY 3 INGREDIENTS!

Enchilada’s can be made with just cheese, beans, pork filling, etc etc etc. I make them two ways- one version is insanely laborious and it only makes an appearance once- twice a year. Whereas the version I call “Easy Enchiladas” is on regular rotation around here. To make Easy Enchiladas I use my 3 ingredient slow cooker salsa chicken as the filling. (It doesn’t get easier than that recipe!) Once you have the chicken filling ready to go and the sauce made, it’s time to assemble.

Time to roll.

  1. Use a basting brush to create a layer of enchilada sauce on a baking sheet
  2. Roll the shredded chicken into store bought tortillas and position side by side. (I like to buy tortillas that are a corn / flour blend. If I can’t find those, I use pure corn tortillas which are both authentic and gluten free.)
  3. Top with enchilada sauce, smother with cheese. Bake at 375 until cheese is melted and enchiladas are heated through.
  4. Serve with sour cream, sliced jalapeños and your favorite hot sauce.

Pro Tips:

Enchiladas can be made in entirely in advance up until baking time. They are are one of my favorite dishes to prepare and bring over to a friend’s house with a pitcher of margaritas!

Enchiladas
Print Recipe
5 from 2 votes

Enchilada Sauce

Prep Time3 minutes
Cook Time7 minutes
Course: sauce
Cuisine: Mexican
Servings: 2 Cups

Ingredients

  • 3 tablespoons extra virgin olive oil
  • 3 tablespoons flour
  • 1 tablespoon ground chili powder
  • 1 teaspoon ground cumin
  • ½ teaspoon garlic powder
  • ¼ teaspoon dried oregano
  • ¼ teaspoon salt – to taste
  • Pinch of cinnamon
  • 2 tablespoons tomato paste
  • 2 cups chicken broth (can use vegetable broth too!)
  • 1 teaspoon apple cider vinegar
  • Freshly ground black pepper – to taste

Instructions

  • Combine all the dry ingredients into a small bowl and set aside.
  • Measure out tomato paste and broth.
  • Heat a medium-sized sauce pan over medium heat and warm the oil until it’s it’s hot enough that a light sprinkle of the flour/spice mixture sizzles on contact. (Never leave your oil or it will overheat!)
  • Once ready, whisk in the dry ingredients to the oil and cook until fragrant and slightly deepened in color, about 1 minute.
  • Whisk the tomato paste. Then slowly pour in the broth while whisking constantly to remove any lumps.
  • Raise heat to medium-high and bring the mixture to a simmer, then reduce heat as necessary to maintain a gentle simmer.
  • Cook, whisking often, for about 5 to 7 minutes, until the sauce has thickened slightly and a spoon encounters some resistance as you stir it. (The sauce will thicken some more as it cools.)
  • Remove from heat, then whisk in the vinegar and season to taste with freshly ground black pepper. Add salt to taste.

Notes

Enchilada sauce will keep well in the refrigerator for up to 5 days. Or, freeze it for up to 3 months. Let it cool to room temperature before transferring to refrigerator or freezer. 

Gourmet Red Wine Onion Burger

red wine onion burger with fries and a pickle on a wooden board

This Feast & Merriment Recipe was featured in Greenwich Lifestyle magazine!

Few men (and women!) can resist a good all beef burger! However, there is a big difference between a good burger and great burger. A great burger is well seasoned, juicy, and oozing with flavors that elevate the beef rather than disguising it. There is no argument that beef pairs very well with onions and red wine, which is exactly what this recipe uses to take this burger to a whole new level!

The secret ingredient to this blissful burger is an onion jam that is caramelized with a hearty red wine, red pepper chili flakes, fresh thyme, salt & pepper. The onions are cooked on low and quite slow, which creates an almost jam like consistency, perfect for spreading on a burger. These onions are savory, sweet, salty & spicy which is a winning combination on beef.

To make this burger, there are three steps. First, you must make the onions, which can be made up to three days in advance. Next, once the onions are ready, it’s time to cook and assemble the burger. The final step to this burger is to pair with a good bottle of red wine, kick back and enjoy!

Step 1: make the onion jam

The red wine onion jam is delicious! It can be used not only on a burger but really good on grilled chicken or on a gourmet grilled cheese! The onion jam can be made at least 3 days in advance or frozen up to about 3 months. It is a little time consuming to slowly reduce the onions so making it ahead is always a plus.

Ingredients

  • 2 large red onions, sliced 1/4 inch
  • 3 tbsp extra virgin olive oil
  • 1 cup hearty red wine, such as cabernet.
  • 3 thyme sprigs
  • 1.5 tbsp brown sugar
  • 1/2 tsp red pepper chili flakes
  • 1/2 tsp kosher salt
  • 1/2 tsp fresh ground black pepper

This recipe yields about 1 cup of onion jam.

Directions

Heat a heavy bottom dutch oven or a skillet pan over medium heat. Add the olive oil. Add the onions and stir to coat for about 3 minutes. Set the heat to low and stir occasionally for about 30-35 minutes. (Be sure to adjust the heat up or down as needed. The onions should not brown, they should slowly “melt.”)

Once the onions are soft and the white parts have become translucent, Add the red wine, salt, pepper, red chili flakes and sugar. Stir to combine. Raise heat to medium-high heat and bring the mixture to a boil. Gently boil for about 3-5 minutes until all the liquid has evaporated. Taste for seasoning. The onions should be tender, sweet & spicy.

Step 2: Make the burger

Ingredients

  • All beef burger patty(s)
  • Brioche buns
  • Aged cheddar cheese – thickly cut
  • Arugula
  • Dijon mustard
  • Kosher salt & fresh ground pepper
  • Onion jam

Directions

Season fresh beef burgers with kosher salt & fresh ground pepper on both sides. Grill to a medium rare temperature (or desired doneness). Melt a generous amount of aged, sharp cheddar cheese on top. Remove burgers from the grill to a sheet pan and tent with foil. Let the burgers rest for 3-5 minutes. (Don’t skip this step!) Meanwhile, heat the onion mixture & lightly grill burger buns.

To assemble, coat the bottom of buns with a tablespoon of dijon mustard. Top with a handful of arugula, then the burger with the melted cheese, then a generous portion of the caramelized onions. Serve with your favorite bottle of red wine!