Fleisher’s is a craft butcher shop and it only takes one visit for you to know that you are getting the absolute top quality meats.
Unlike other butcher shops and counters, Fleishers actually butchers the animals out in the open for a completely transparent experience. This is important for a few reasons. For one, it means they are proud of their product and two, confident in their craft. This approach also provides us, the public, with a good reminder that you should not take the luxury of meat for granted and that we are eating a once alive and healthy animal. This is easy to forget when meat is so often packaged up neatly in a package with the butchering hidden from us.
Fleishers sells only the best, locally sourced, grass fed beef and other responsibly sourced meat products.
Recommended for
Top quality meats: Grass fed beef, veal, pasture raised chicken, heritage breed pork and more.
House made cold cuts: In high demand and not always available, their ham, roast beef and Canadian bacon is perfection.
Bones for broth: With a goal for no waster, bones are available from in house butchering and can be used to make the absolute best homemade broth.
Butchering classes: Those interested can sign up for butchering classes
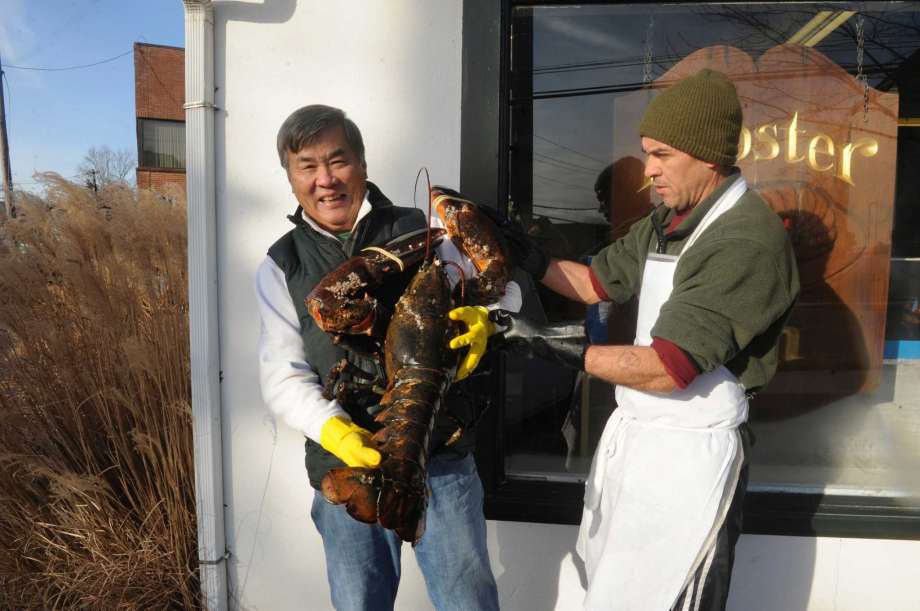
Costal, north east living means an abundance of quality fish markets to choose from, making selecting a favorite a tough task. The Lobster Bin in Greenwich CT is my go-to market for fresh fish and lobster. They are close by to our house and take great care in providing the neighborhood with top quality fish. Located on Railroad Avenue in Greenwich CT, The Lobster Bin competes with a lot of quality competition including nearby Bonton Seafood and Citeralla Market as well as the popular Fjord Fisheries just a few miles north. But the Lobster Bin is a reliable shop whose fish is well presented, fresh and top quality. I highly recommend the Lobster Bin.
Recommended for:
Live Lobsters: They don’t get better than this!
Fresh Fish: The fish from Lobster Bin is always fresh- you’ll want more than you need!
The classic Thanksgiving dinner – turkey, cranberry sauce & stuffing. Things we all know too well. However, I have never been overly excited by these things on their own. Between that fact, and my lifelong belief that every bite should be the best bite, I started a journey for the creating the best Thanksgiving bite many years ago.
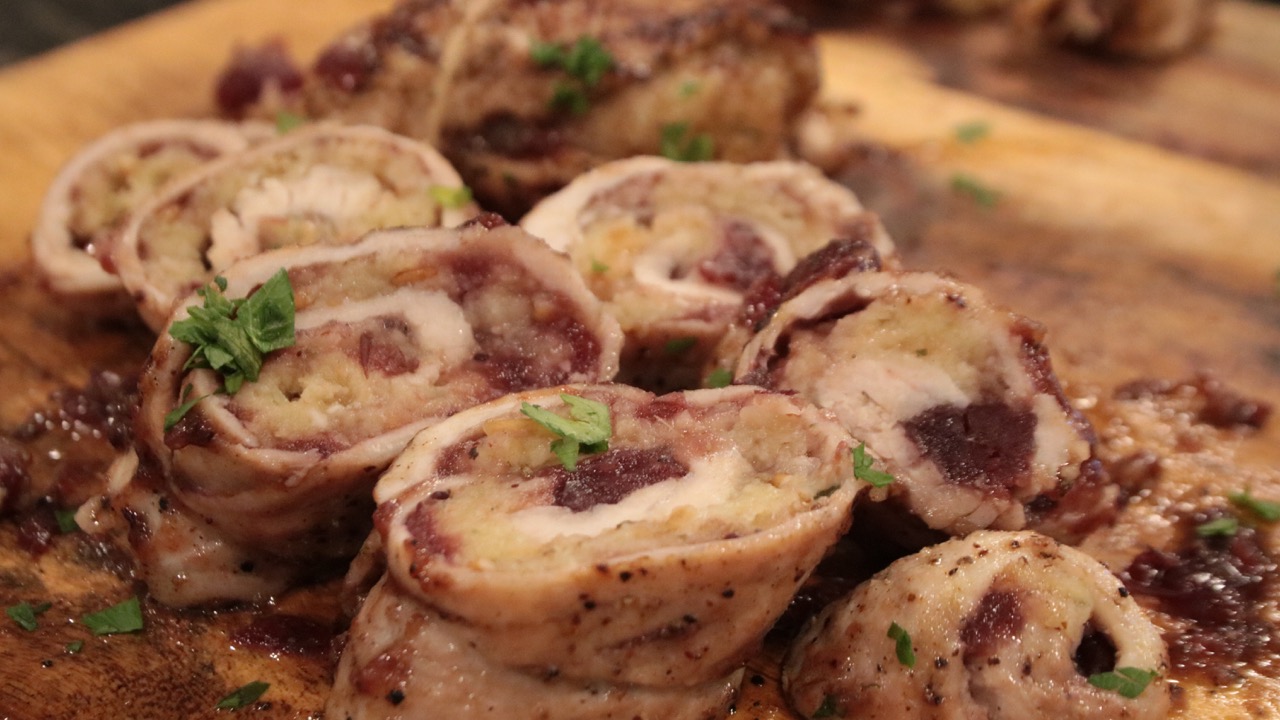
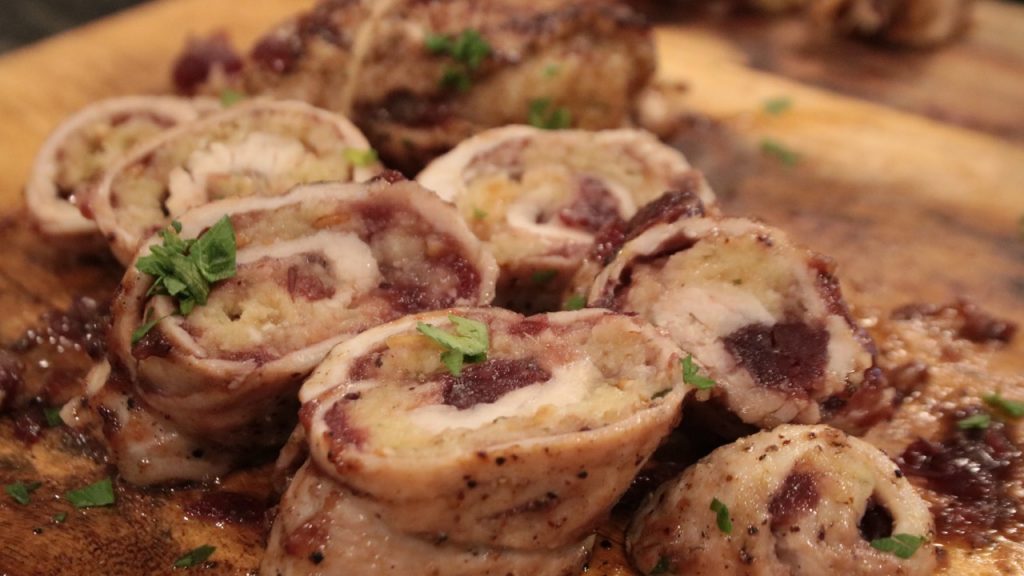
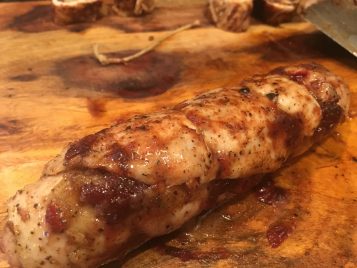
Turkey Scallopini stuffed with classic stuffing & cranberry sauce is the best of Thanksgiving dinner rolled into a single bite, literally!
My first version of recreating Thanksgiving dinner into a single, delicious, perfect bite was making a ravioli stuffed with well seasoned turkey and cranberry sauce served in a light cream sauce. Super delicious. But a ton of work. (Still, I do love that recipe!)
The next year, I moved on to what we started referring to as “Turkini’s.” Turkini’s are everything you want in your thanksgiving bite piled high on a crostini. They are soooo good! I toast slices of baguette, slather them with cranberry sauce, layer on turkey, followed by stuffing and smother with gravy. As single bite of thanksgiving deliciousness. The problem here is that Turkini’s are really an appetizer. You put them on a platter and pass them around. They also get cold pretty quickly. However, they are a serious crowd pleaser.
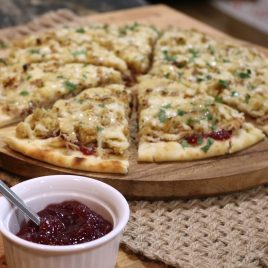
Watch the video on how to make this pizza!
Ahhh and then for two years in a row, the mother of them all- Thanksgiving pizza. Huge hit! HUGE! I thought I had it. Don’t get me wrong, I am never going to stop making Thanksgiving pizza because if I did, my friends would disown me. For realz. It is by far, the most talked about amongst them. And why wouldn’t it be? It’s the best of Thanksgiving dinner on a pizza! The problem here is similar to my Turkini issue- it’s an appetizer, or a party food. Which is great because we often host Black Friday parties. It’s perfect for serving around the fire pit or a late night surprise, but not for a dinner.
I could not stop thinking about how much everyone loves these bites of delight that I have made over the years, but how no one ever talks about the dinner itself. I’m sorry but there is no such thing as a memorable roasted turkey, a platter of stuffing and a bowl of cranberry sauce. I want a WOW factor on my Thanksgiving table! I just couldn’t stop thinking about it. Then it came to me.
I decided to try something. I had the idea to stuff turkey scallopini (fancy name for cutlets pounded very thin) with a buttery stuffing, cranberry sauce and a bit of parmesan cheese, roll, tie, cook and smother with gravy.
I tested out several different versions (all of which were delicious).
The Test Kitchen
In my first attempt, I included provolone cheese, whole berry cranberry sauce, rolled long side in, and cooked only by pan searing in cast iron. Version one had very good taste, but the cheese oozes and if cooking multiple portions, the oozing cheese could create too much burn in the pan- not sure it’s worth it.
In this round, I also wasn’t sure about the whole berries, which are great but makes spreading and rolling inconsistent. I also decided I had way too much stuffing and by rolling lengthwise, only one fit in pan comfortably and didn’t produce the spiral I was looking for. More work to be done.
In version 2, I omitted the provolone and choose to use a sprinkle of parmesan cheese. (I think it helps add a bit of fat from the inside to help keep the turkey tasting delicious.) I also opted to try a jellied cranberry sauce with no whole berries thinking it would make rolling the turkeys easier. I decided to try baking this round and while this is significantly easier than pan searing for a crowd, they just didn’t produce that gorgeous browning that searing gives you. I also decided that whole berries cranberry sauce is a an absolute must. Without them, the cranberry gets lost and absorbs too easily into the stuffing. It must be whole berried sauce. Which lead me to Version 3.
In version 3, I went back to the whole berries and decided to again bake the turkey. However, I added another step and this was to reverse sear the turkey in a cast iron pan in a butter and cranberry reduction, to finish the dish. This not only added the golden color of deliciousness that I was looking for, but also an additional level of flavor. This was the winner. It came out absolutely perfect!
In version 4, what I was looking to test was how far in advance I could prepare this dish. So I used up the rest of my ingredients and made about 6 portions. I wrapped each one in plastic wrap and into the fridge they went. The next day, I let the tray sit out to take the chill off just for a short while. (Cooking ice cold meat makes it seize up so always take the chill off before cooking.) Then into the oven they went, then reverse seared in the pan. The result was just as good, if not better than when made to order. This was very important to me because I like to always prepare as much of the meal as I can in advance. After all, no one wants to watch you work with raw turkey!
This dish will forever change Turkey dinner.
I have to admit, I considered not even sharing this one! But it’s just too darn good not to. I hope you enjoy it as much as my family & friends do. Cheers!
Tips & Suggestions:
I made this a complete entree when served with shredded brussel sprouts and my make ahead mashed potatoes. It was a perfect meal.
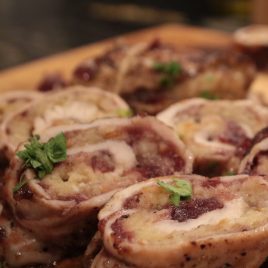
I have also served this dish as an hors d’oeuvre using a toothpick through each piece. My friends went nuts! In appetizer form, it was named “turkey sushi” and we haven’t stopped talking about it since!
Turkey scallopini stuffed and rolled with classic stuffing and cranberry sauce.
Prep Time1 dayd30 minutesmins
Cook Time15 minutesmins
Course: entree
Cuisine: American
Keyword: stuffed turkey, thanksgiving, turkey
Ingredients
Turkey cutletspounded thin
Your favorite premade, cooked stuffing (I like Whole Foods chicken stuffing)
Whole Berry Cranberry sauce
Grated Parmesan cheese
Butter
Brown Gravy
Instructions
Preheat oven to 350 degree F.
Pound turkey cutlets between two pieces of plastic wrap until very thin
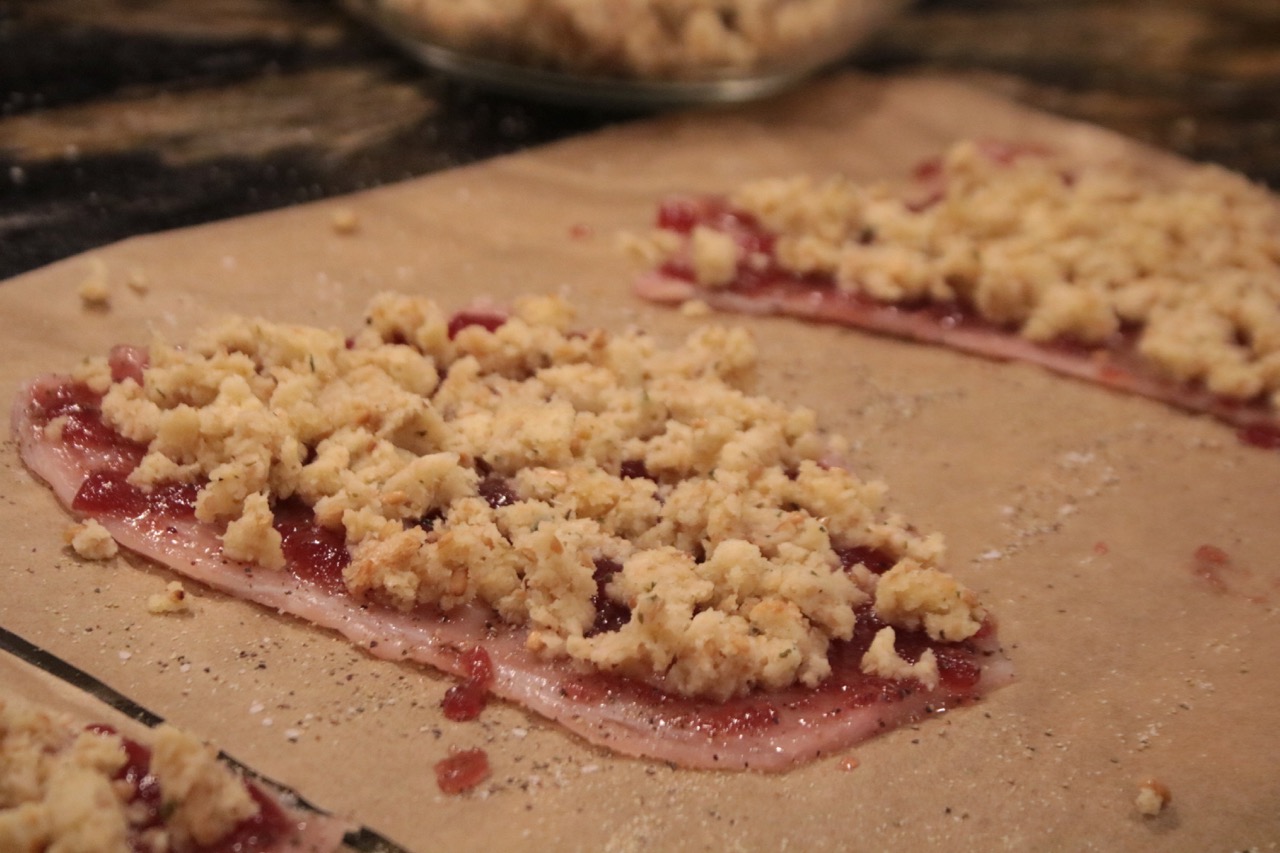
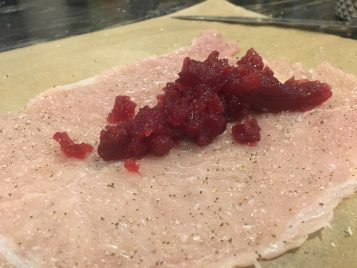
Season cutlet swith salt, pepper and spread on an even layer of cranberry sauce.
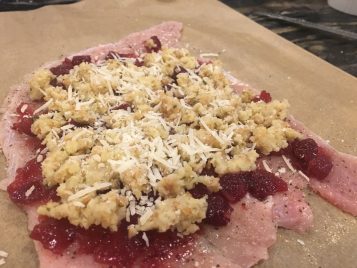
Using a spoon and your fingers add and level out stuffing. Sprinkle with parmesan, if using.
From the short side, roll tightly. If filling comes out, just let it go. It happens! Use butchers twine to tie in multiple locations. Season with salt and pepper. Brunch on a bit of cranberry sauce.
Bake for 8-10 minutes.
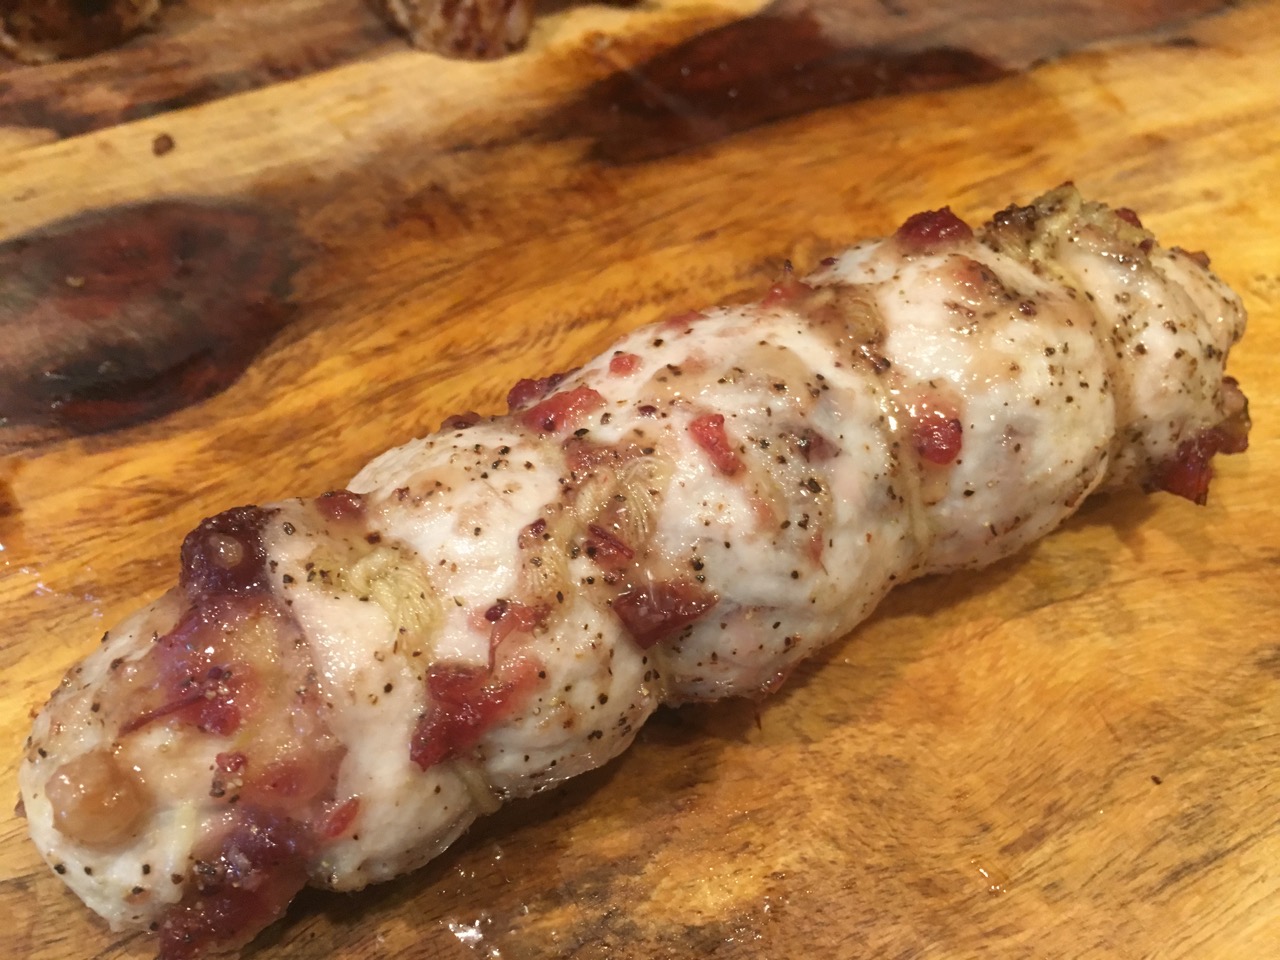
Remove from oven. Melt about 2 tablespoons of butter with 2-3 tablepsoons of cranberry sauce in a cast iron pan. When sizzling, add turkey rolls. Sear on each side for about 1-2 minutes each side so they glaze and brown.
Let rest for no less than 5 minutes. Remove strings, slice on a slight with a very sharp knife and artfully plate. Smother with gravy or serve gravy on the side.
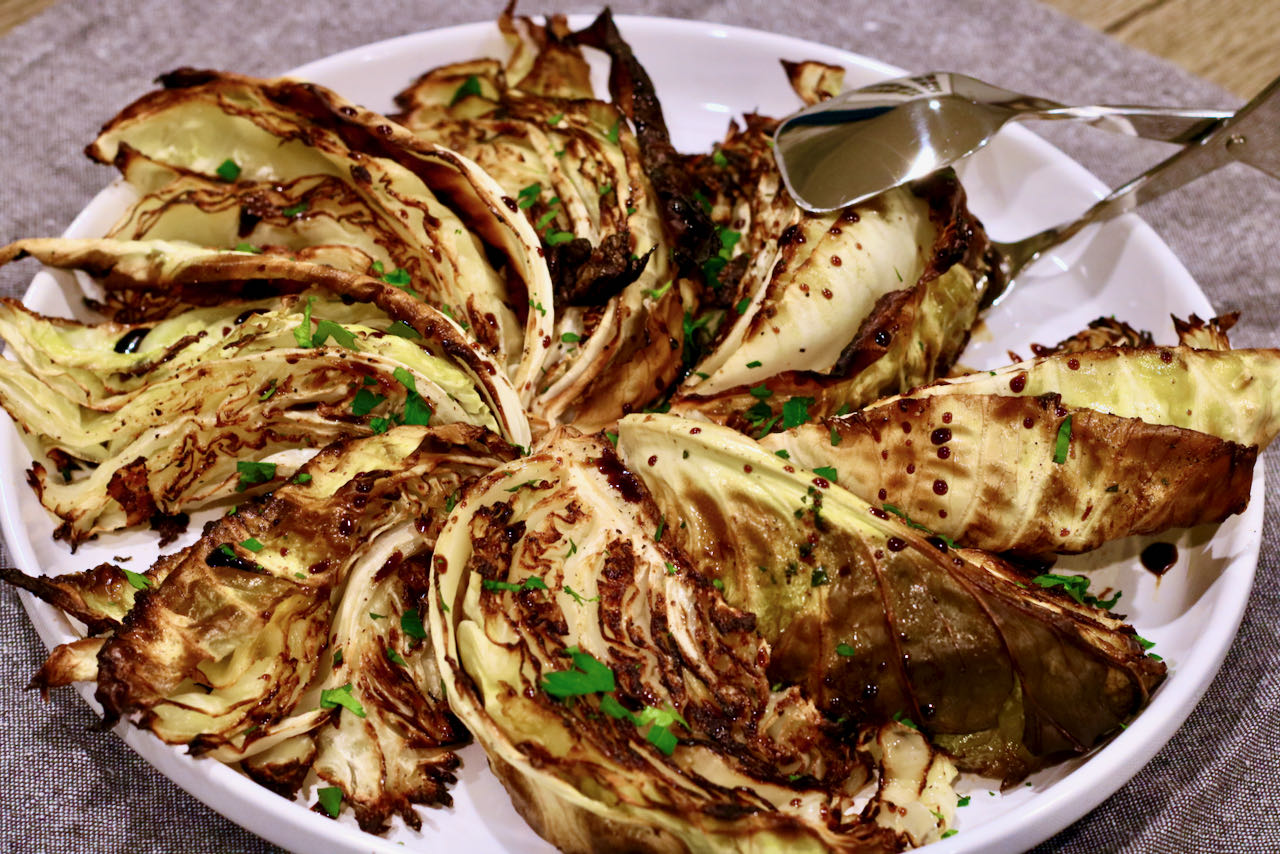
This simple yet elegant roasted cabbage recipe is a testament to the transformative power of roasting.
Traditionally, cabbage recipes were thought of as simply boiled, or sometimes sautéed with a dab of butter. As a result, cabbage hasn’t always had the best reputation as a side dish and I can understand why. Roasting cabbage, on the other hand, elevates the cabbage’s natural sweetness and texture.
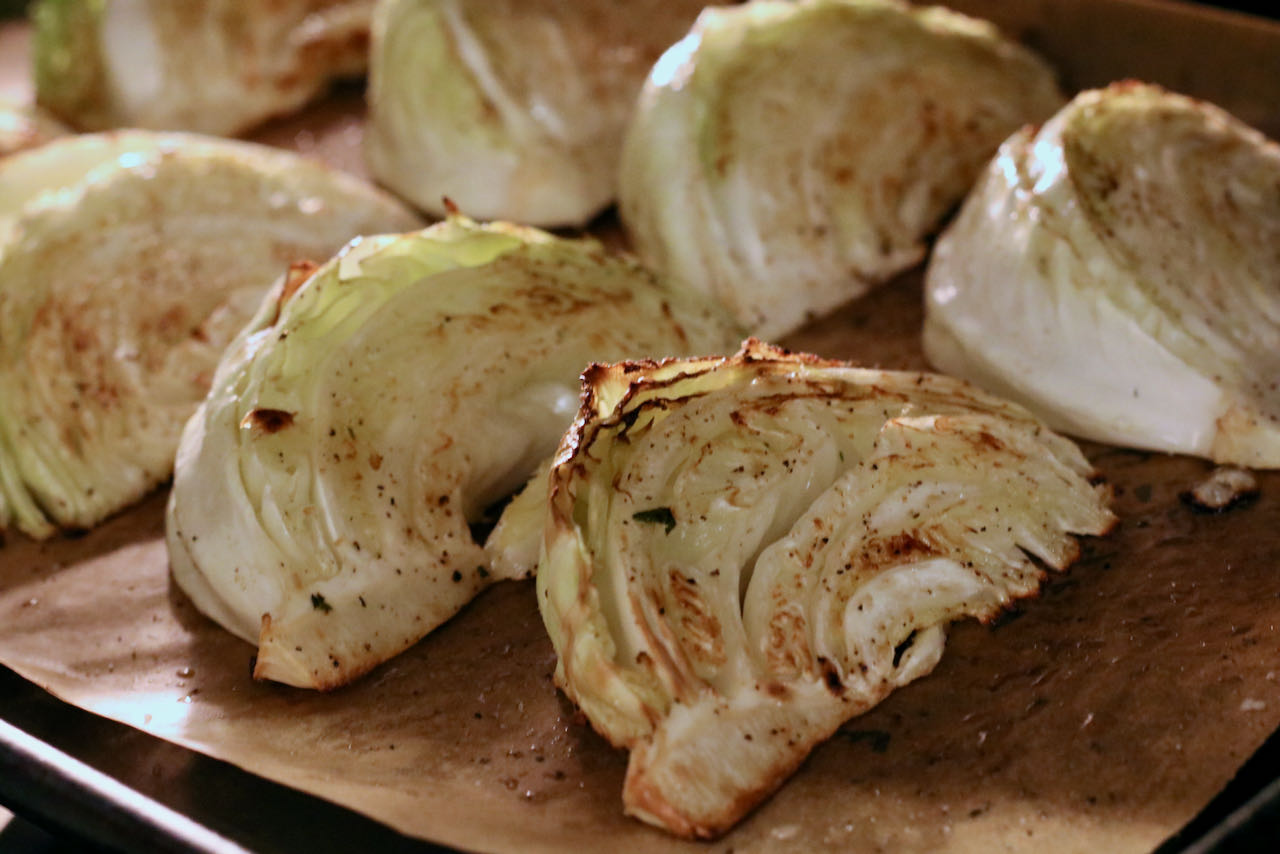
In this side dish recipe, tender cabbage wedges are roasted in the oven until they’re caramelized and irresistibly golden brown on the edges. It can end right there if you would like it to, but I recommend you keep going! A delicate drizzle of balsamic reduction as a finishing touch adds a burst of tangy sweetness and the result is an elevated side dish that doesn’t taste anything like the boring and bland cabbage of your childhood!
Roasted Cabbage Recipe in 3 Easy Steps
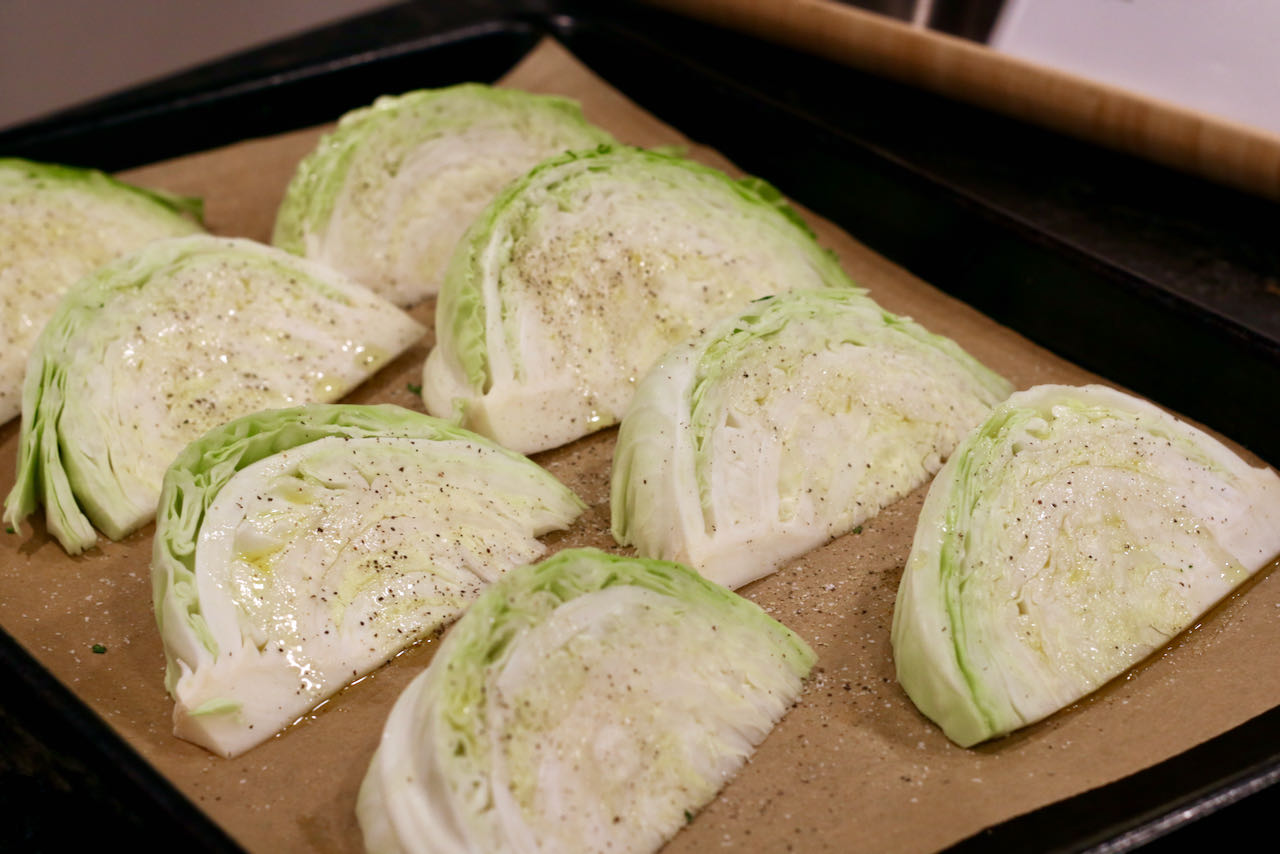
1. Arrange cabbage wedges on a sheet pan and drizzle with EVOO and season with salt & pepper.
2. Roast at 450° F for about 10 minuets.
3. Arrange on a platter, drizzle with Balsamic glaze and garnish with fresh parsley.
Fun facts about cabbage:
Cabbage is a Cruciferous vegetable which is one of the best type of vegetables you can eat. They are rich in vitamins & minerals, and high in fiber.
Cabbage contains the powerful antioxidants of choline, beta-carotene, lutein, and zeaxanthin as well as the flavonoids kaempferol, quercetin, and apigenin.
Cabbage is known to be associated with improved health, weightless and beautiful skin.
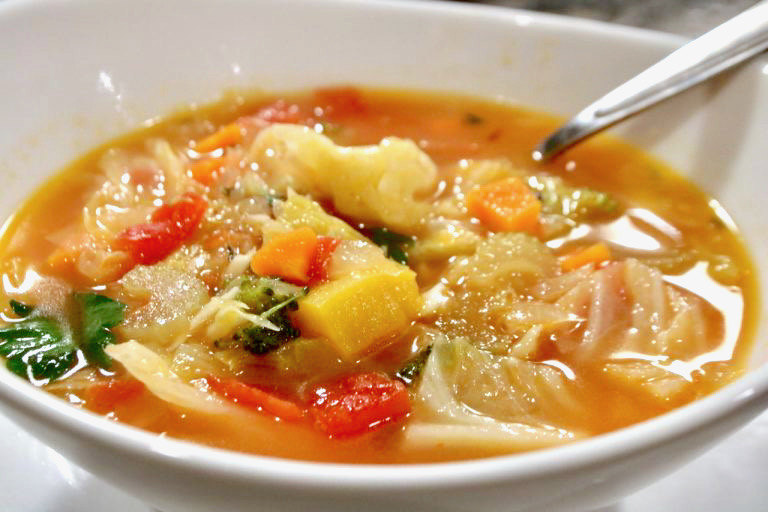
Healing Cabbage Soup
With just a handful of ingredients, it’s easy to prepare and requires minimal effort. Yet the resulting dish is nothing short of magical—a hearty and flavorful soup that’s as soothing to the soul as it is nourishing to the body. The results can be felt almost immediately.
Cabbage is readily available most of the year, but technically “in season” during fall and spring. Summer crops are harvested in late Autumn. Winter cabbage crops are harvested in Spring. This is why we see cabbage side dishes featured alongside other fall vegetables such as carrots, brussel sprouts, squashes & parsnips . We see it make a seasonal appearance again in Spring, right in time for St. Patrick’s day recipes.
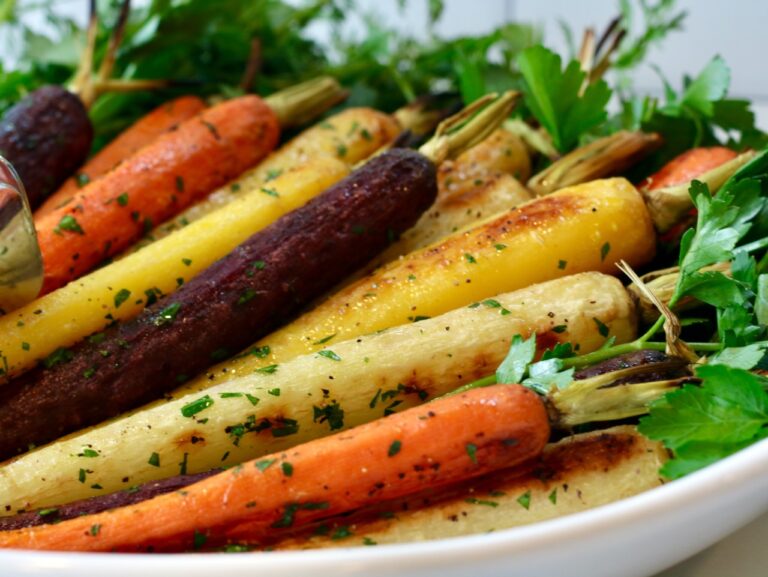
More Roasted Vegetables
I roast a great deal of vegetables using this same technique. They are healthy, easy, beautiful, and roasted vegetable leftovers of any kind are perfect tossed into a salad or into a frittata.
Rainbow Roasted Carrots
Few vegetables offer the visual appeal quite like rainbow carrots. These vibrant root vegetables not only elevate the aesthetics of any table, but also pack a punch of sweet, earthy goodness. And they are very easy to make!
Gordon Ramsay’s scrambled eggs recipe is the best and only recipe you’ll ever need.
We all grew up eating some version of scrambled eggs. Some made with milk, some with butter, some over cooked, some under cooked. No matter how you grew up eating scrambled eggs, we were ALL wrong about the “right” way to make them.
As it turns outs, the only way to make scrambled eggs is the Gordon way. Chef Gordon Ramsay, that is. They are simply the best scrambled eggs you will ever eat.
The process of making scrambled eggs
You are probably thinking, “What could HE possibly do to scrambled eggs that could make them THAT much better?” Trust me, I thought that too. Until I watched the video (below), read some reviews, and broke out my sauce pan and spatula. About 6 minutes later, I was speechless, and breakfast life hasn’t been the same since.
How to make Gordon Ramsay’s scrambled eggs
This video shows exactly how Chef Ramsay makes the most delicious scrambled eggs. In just a few minutes you will learn how to change the way you cook eggs forever and for the better!
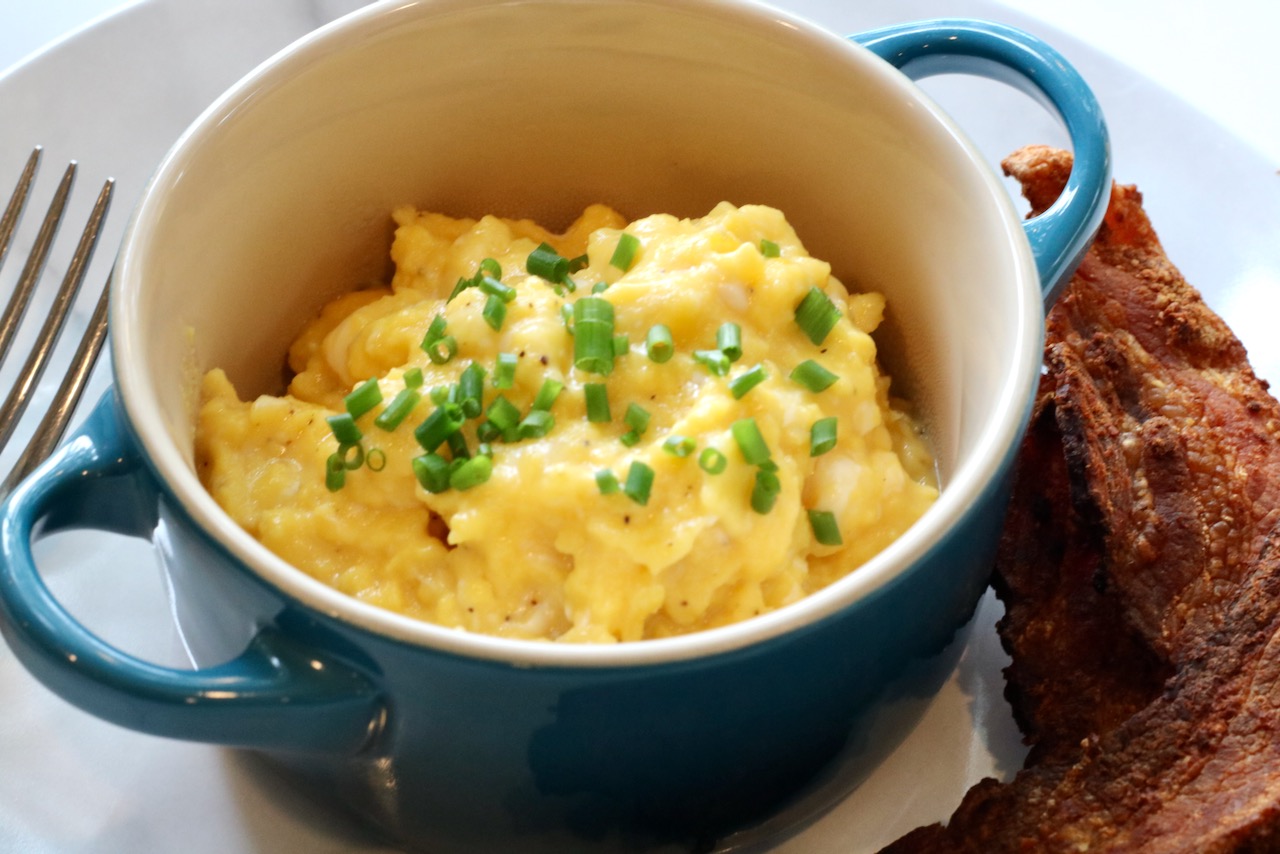
This recipe does not require any special ingredients or equipment, it’s just about the process of cooking the eggs that is different. The approach is simply to crack the eggs into a non-stick sauce pan, add in a few pats of cold butter, turn on the heat and begin to stir constantly and vigorously, on and off the heat. The result of this technique is creamy, soft, silky scrambled eggs. You won’t believe the difference.
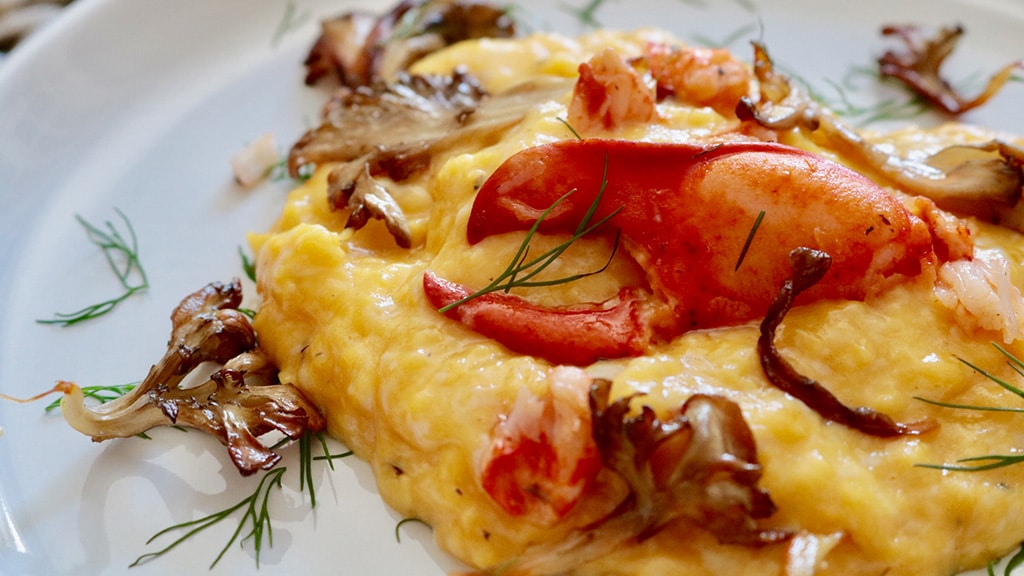
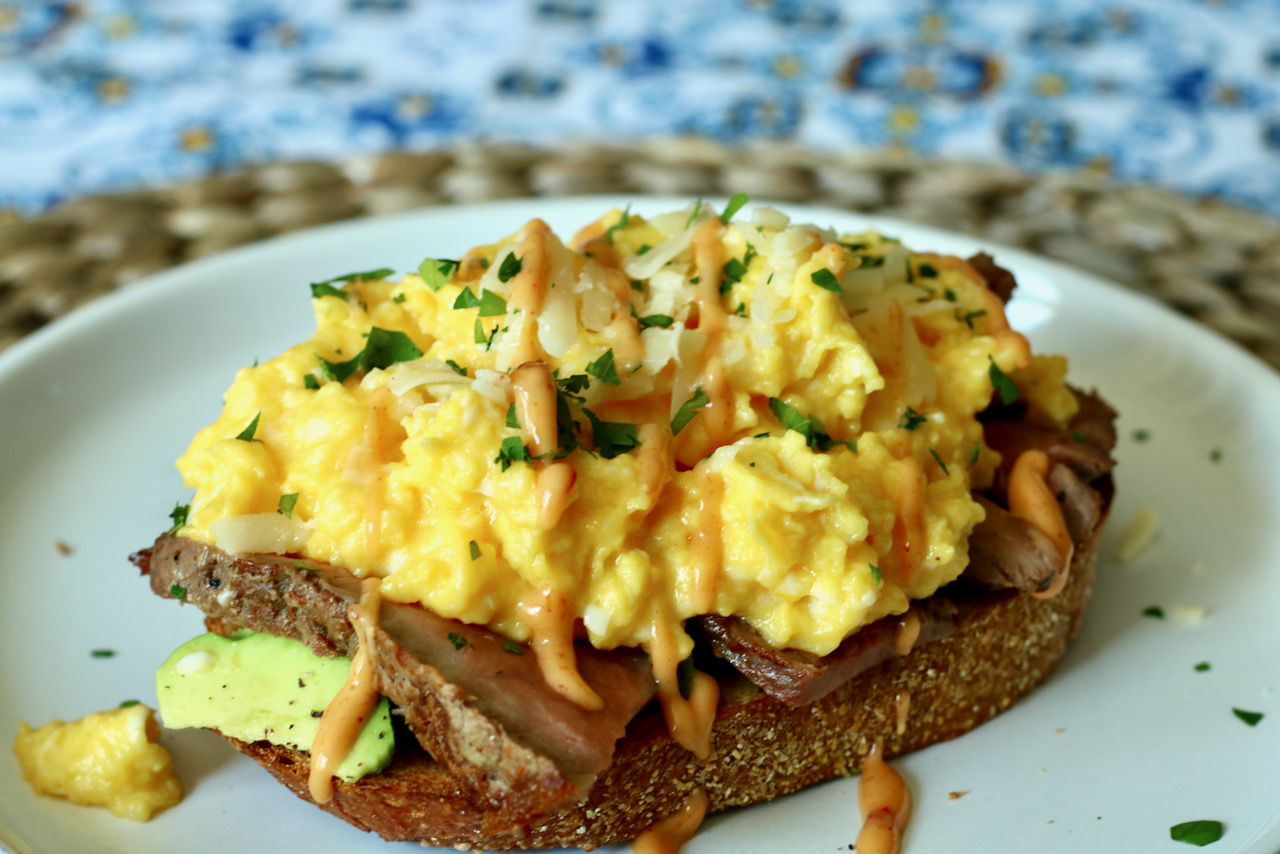
Elevated Scrambled Eggs
The basic recipe is plenty good enough as it. But why not take things up a notch? Once you get the technique down, there is no stopping where your creativity can take this dish. I have prepared them with fresh tomatoes and mushrooms, lobster and chives, smoked salmon with dill, and more. The question is, where will your creativity with ingredients take you?
The approach used to make the ultimate scrambled eggs us to simply crack the eggs into a non-stick sauce pan, add in some butter, turn on the heat and begin to stir constantly and vigorously. The result of this technique is the best creamy, soft, silky scrambled eggs.
Prep Time1 minutemin
Cook Time6 minutesmins
Course: Breakfast, brunch
Cuisine: American, French
Keyword: eggs
Servings: 3
Author: By: Gordon Ramsay
Ingredients
6Cold, organic free range eggsthe fresher the better
Crack 6 cold eggs into a non stick, small saucepan.
Add the butter.
Turn the heat on to med – high.
Stir continuously with a rubber spatula—don't whisk—making sure to scrape the bottom of the pan.
After 30 seconds, take the pan off the heat. Keep stirring. After about 10 seconds, put back on the heat. Repeat for about 3 minutes. (Adjust heat if they are cooking too fast.)
Off the heat, season the eggs lightly with salt & pepper. Stir in 1 tsp of crème fraîche
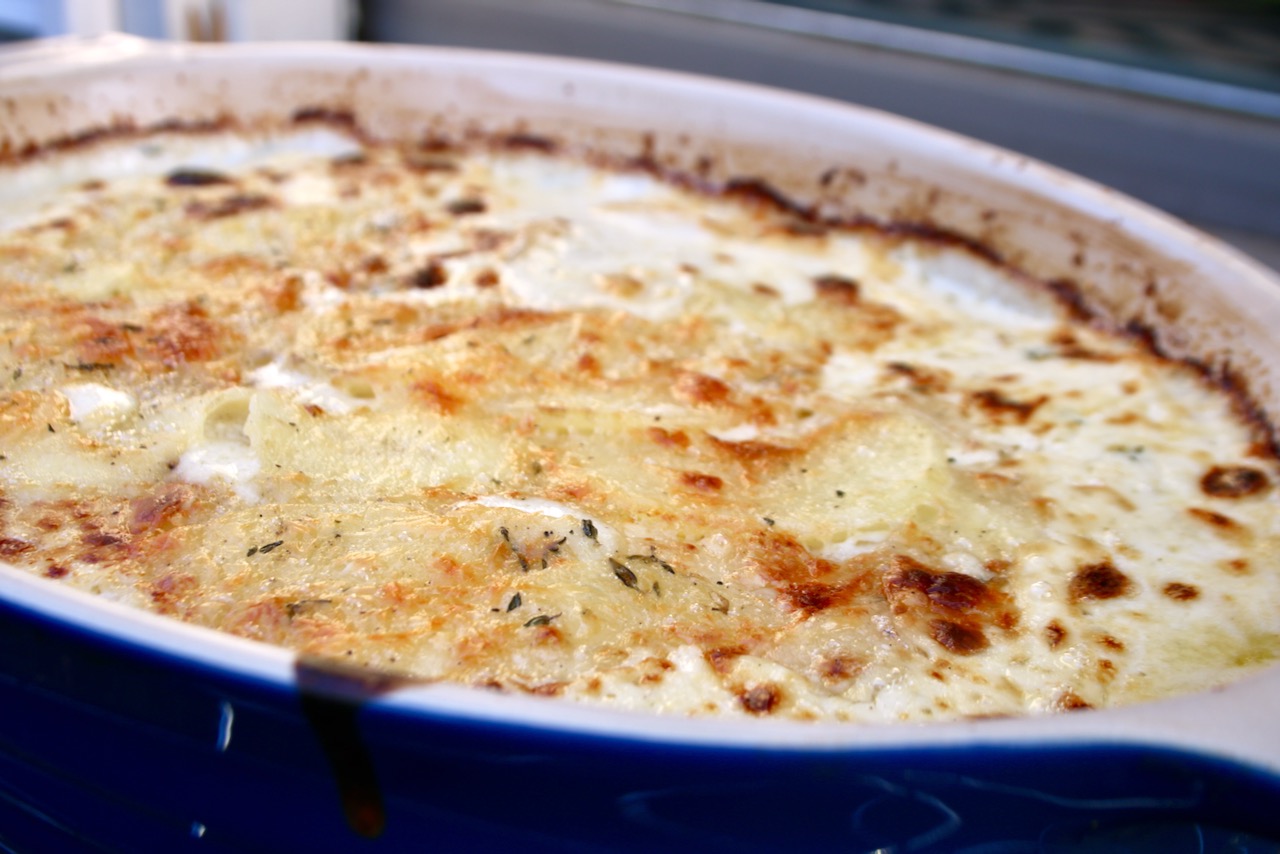
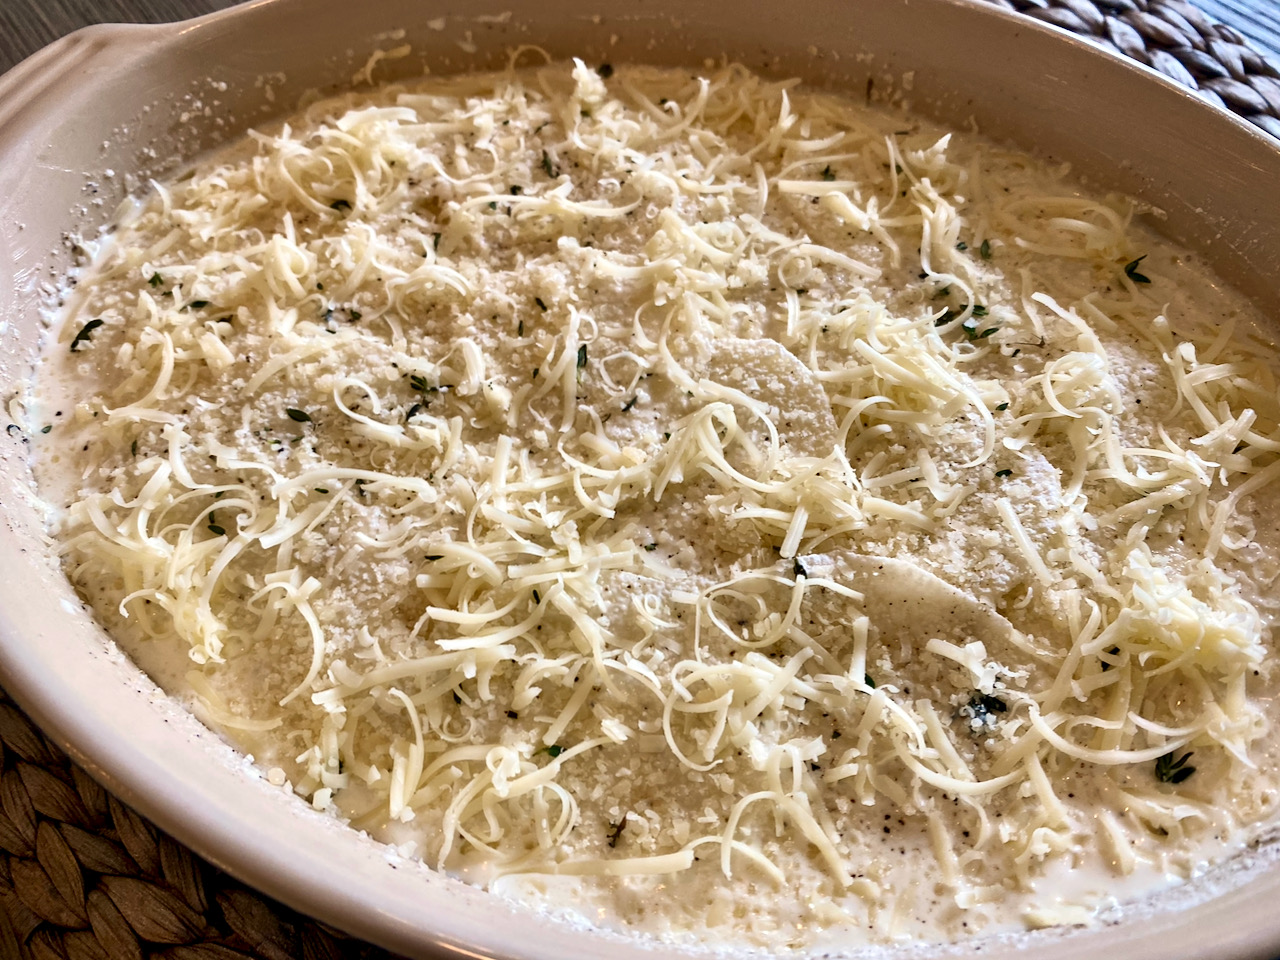
Thinly sliced potatoes layered with a cream and cheese sauce- scalloped potato au gratin is a classic comfort food that will never fail to delight.
When I was growing up, I loved scalloped potatoes au gratin. They came from a box and sort of “glowed” orange. glowed orange! As a kid I certainly didn’t care that they were made of dehydrated potatoes and powdered cheese and a bunch of other ingredients no one can pronounce. (I still see those boxed potatoes in the market to this day and I am always still a little tempted to buy them, but I can’t bring myself to do it when the real version is just so much better!
Thinly sliced potatoes layered with rich cream, shredded cheeses and seasoning.
What are scalloped potatoes au gratin?
Simply put, scalloped potatoes au gratin is a classic dish consisting of thinly sliced potatoes layered with a creamy sauce, often including cheese, and baked until the potatoes are perfectly tender throughout and the top is golden brown and bubbly. Scalloped potatoes au gratin are often served on special occasions to accompany a tender beef roast, a holiday ham or a rack of lamb. It’s always everyone’s favorite side dish!
Finding the right recipe
The perfect potato au gratin is one where the layers are cooked perfect through from top to bottom, is creamy and rich, but holds together. Over the years, I have tested countless recipes and failed many, many attempts! There were attempts that came out watery, versions that were inedibly undercooked, or potatoes cooked perfectly, but lacking flavor. The worst of all, the version that resulted in a dish of mushy potatoes sitting in broken cream. As frustrated as I was, I persevered on my quest for the perfect scalloped potatoes au gratin recipe. It was worth all the effort, trials and tribulations to demystify the challenges of this finicky dish so I can share them with you.
Fully assembled & ready to bake
Why this recipe works
The potato. The type of potato matters very much. You must choose fresh, russet potatoes. Every other style potatoes turned to mush.
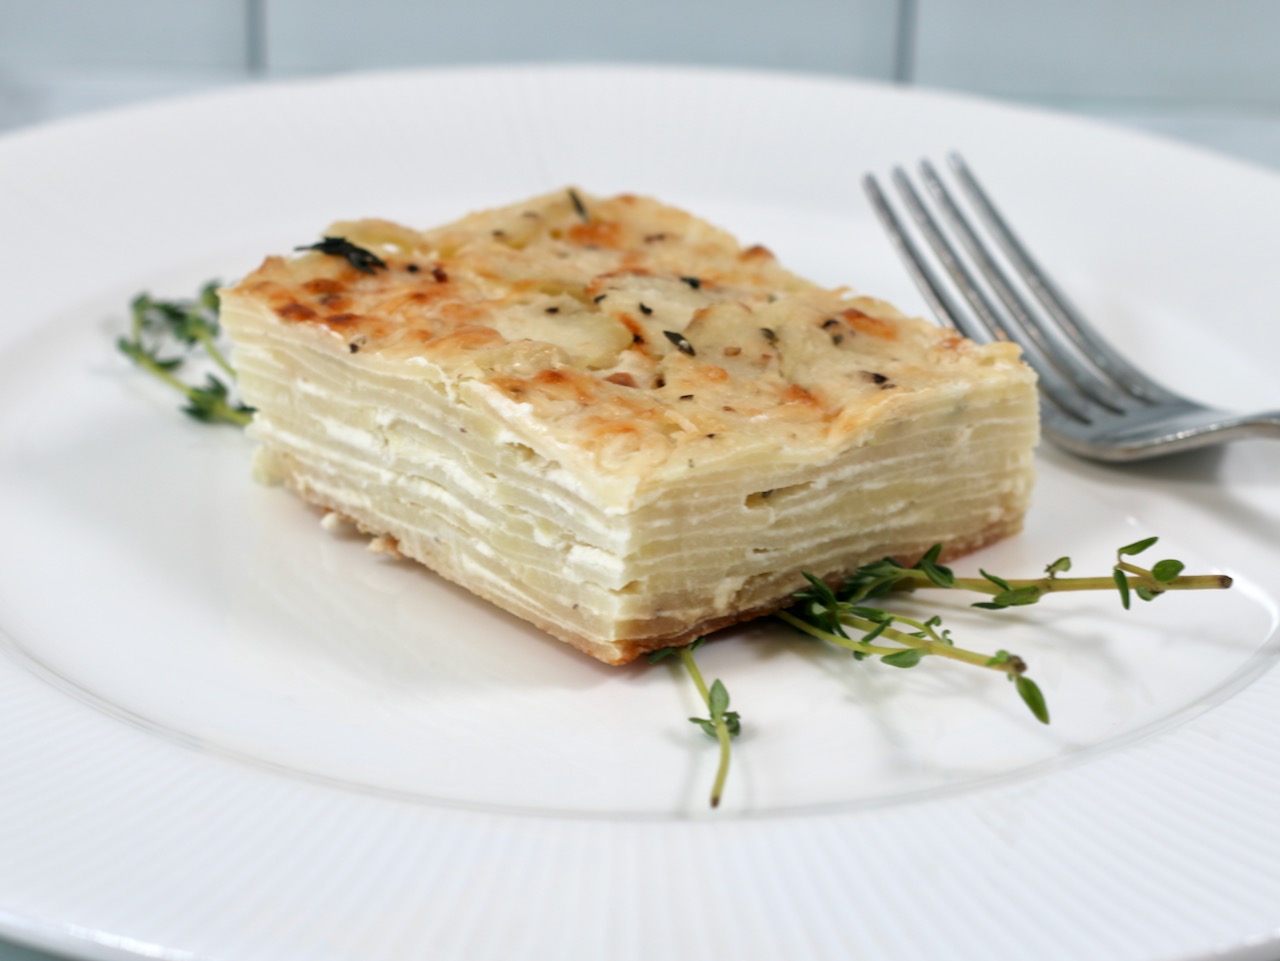
Technique. After much testing, the perfect thickness of potatoes is exactly 1/8″. This is the perfect job for a mandolin.
Seasoning. Many recipes call for simply cream & potatoes, but it’s not enough to excite the palate. This dish responds really well to a touch of thyme so infusing the cream with thyme and garlic before mixing it into the potatoes elevates the flavor of the cream sauce to an other worldly level.
Ingredients. Cheese. Scalloped potatoe traditionalists may say cheese does not belong here. However these are “Au Gratin” ” style which includes cheese. In this recipe, a small amount of cheddar and parmesan are used to introduce a nuttiness and creaminess that you can’t achieve with cream alone. You don’t need much, but you need it.
Cooking. Covering the dish for part of the cooking time allows the potatoes to braise in the cream without drying out the top layer or burning it. This is the only successful way to get the potatoes cooked throughout evenly.
Resting. This is a very important step. This is a dish that needs a solid rest time of 10-15 minutes to let the dish set and cool, so you can enjoy it at its height of texture & flavor.
With layers of tender potatoes enveloped in a velvety cheese sauce, Scalloped Potatoes Au Gratin is a classic comfort food that never fails to delight.
Course: Side Dish
Cuisine: French
Keyword: potato
Ingredients
2cupsheavy cream
3bay leaves
2sprigs fresh thymeplus more to finish
2garlic cloveschopped
1/2teaspoonfreshly grated nutmeg
kosher salt and freshly ground black pepper
unsalted butter
2poundsrusset potatoespeeled and cut into 1/8-inch-thick slices
1/2cupshredded sharp cheddar cheese
1/2cupgrated Parmesanplus more for topping
Instructions
Preheat the oven to 400 degrees F.
In a saucepan, heat up the cream gently with the bay leaves, thyme, garlic, nutmeg and some salt and pepper.
While the cream is heating, butter a casserole dish.
Use a slotted spoon to remove the bay leaves and thyme from the cream.
Coat the bottom of the dish with a small amount of cream. Pour the remaining heated cream into a large bowl with the potato slices. Mix gently to coat the potatoes. Then select an approach for assembling.
Option 1: Rustic approach. Sprinkle the Parmesan & Cheddar over the potatoes. Season with a dash of salt and pepper. Mix to gently incorporate. Spoon the potatoes into the prepared dish. Level out the potatoes for uniform cooking time. Pour the remaining cream at the bottom of the bowl over the top. Top with more Parmesan and fresh thyme leaves. Cover the dish with aluminum foil, but poke holes in the foil for the steam to escape. Bake for about 40 minutes or until potatoes are tender.
Option 2: Controlled approach. Create a base layer of potatoes slightly overlapping in the prepared casserole dish. Season lightly with salt & pepper. Sprinkle lightly with Parmesan & Cheddar cheese. (Do not cover potatoes completely with cheese or it will be oily! Just a gentle sprinkle of cheese on each layer will do.) Spoon a bit of cream over potatoes using your judgement on portioning for each layer. Repeat (about 4 layers?) layering potatoes, seasoning, cheeses and cream, ending with pouring any remaining cream over the top. Top with more Parmesan and fresh thyme leaves. Cover the dish with aluminum foil, but poke holes in the foil for the steam to escape. Bake for about 40 minutes or until potatoes are tender.
Notes
This can be made in one casserole dish or in individual gratin dishes.
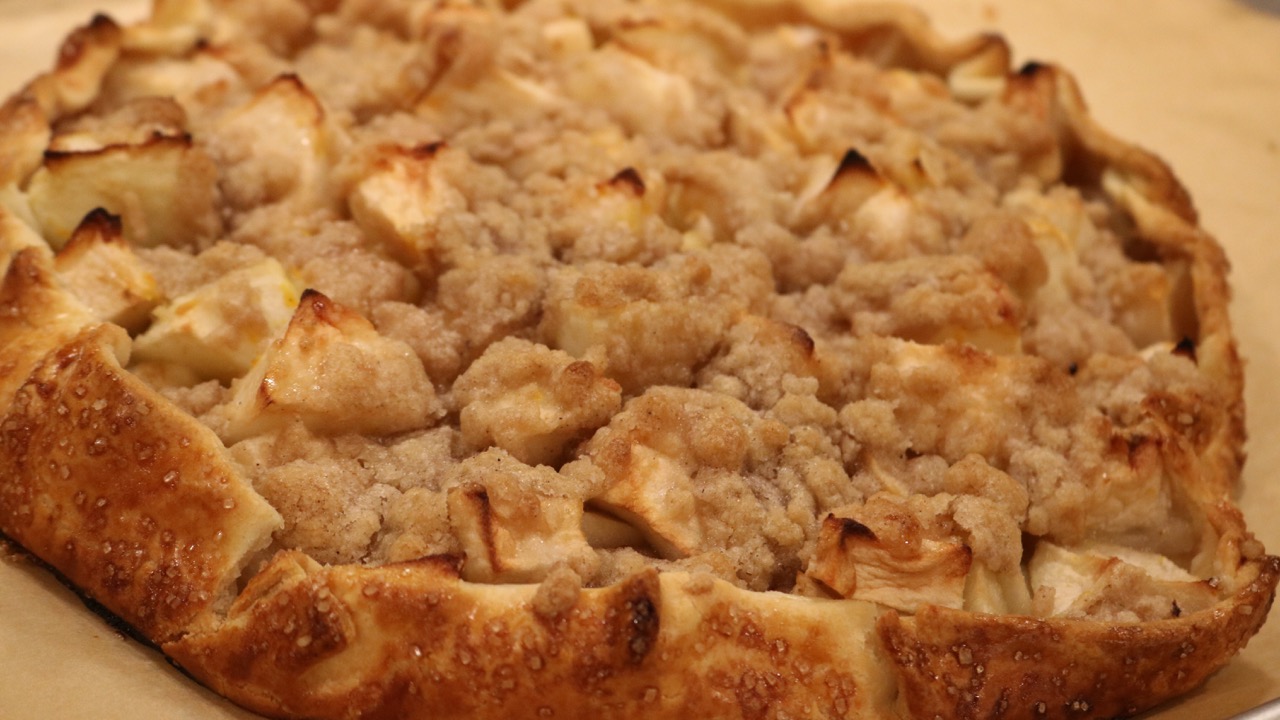
Ina Garten’s Apple Crostata is a delightful and approachable dessert that captures the essence of fall in every bite. With its flaky crust and perfectly spiced apple filling, this recipe is sure to become a favorite for autumn gatherings or a cozy night in. Enjoy the simple pleasures of the season with this charming and delicious treat that will have everyone asking for seconds.
Apple pie is undeniably the most popular and most delicious of all American pie desserts. However, this Apple Crostata has replaced Apple Pie in my kitchen. It is so much easier to make and loaded with wonderful, soul warming flavors. My favorite thing about this dish is the slow roasted flavor of the apples. Because the it’s an open faced pie, the fruit is exposed to the warm, oven air and the apples roast rather than steam like they would in an enclosed pie. The result is just amazing!
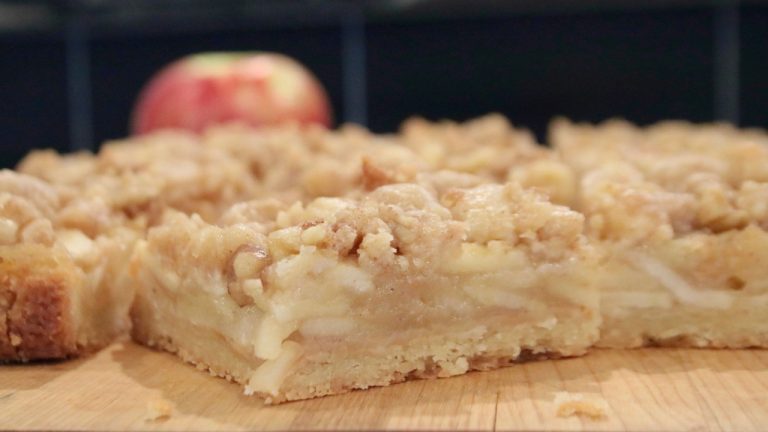
Apple Pie Bars
This incredible dessert recipe is possibly my favorite of all time. The layers of savory, salty, tart, and sweet guarantee a truly exceptional apple dessert.
In the original recipe, Ina Garten makes her own pie crust as many people do. However, the truth is, I’m not much of a baker and rarely have the extra time to make a crust. So I typically use a good quality store bought pie crust, like Immaculate Pie Co which I buy in the refrigerated section at Whole Foods, which we all know isn’t as good as homemade, but it’s better than not making pie at all!
Ina Garten's Apple Crostata is a delightful and approachable dessert that captures the essence of fall in every bite. With its flaky crust and perfectly spiced apple filling, this recipe is sure to become a favorite for autumn gatherings or a cozy night in. Enjoy the simple pleasures of the season with this charming and delicious treat that will have everyone asking for seconds.
Prep Time15 minutesmins
Cook Time25 minutesmins
Course: Dessert
Servings: 6
Ingredients
1store bought pie crust Recommended: Immaculate Pie Crust
1 1/2lbspounds McIntosh, Macoun, or Empire apples (3 large)
1/4tspteaspoon grated orange zest
1/4cupflour
1/4cupgranulated or superfine sugar
1/4tspkosher salt
1/4tspground cinnamon
1/81/4ground allspice
4tbsp(1/2 stick) cold unsalted butter, diced
Instructions
Preheat the oven to 450 degrees F.
Flour a rolling pin and roll the pastry into an 11-inch circle on a lightly floured surface. Transfer it to a baking sheet. (It doesn't need to be perfect!)
For the filling, peel, core, and cut the apples into 8ths. Cut each wedge into 3 chunks. Toss the chunks with the orange zest. Cover the tart dough with the apple chunks leaving a 1 1/2-inch border.
Combine the flour, sugar, salt, cinnamon, and allspice in the bowl of a food processor fitted with a steel blade. Add the butter and pulse until the mixture is crumbly. Pour into a bowl and rub it with your fingers until it starts holding together. Sprinkle evenly on the apples. Gently fold the border over the apples to enclose the dough, pleating it to make a circle.
Bake the crostata for 20 to 25 minutes, until the crust is golden and the apples are tender. Allow to cool. Serve warm or at room temperature.
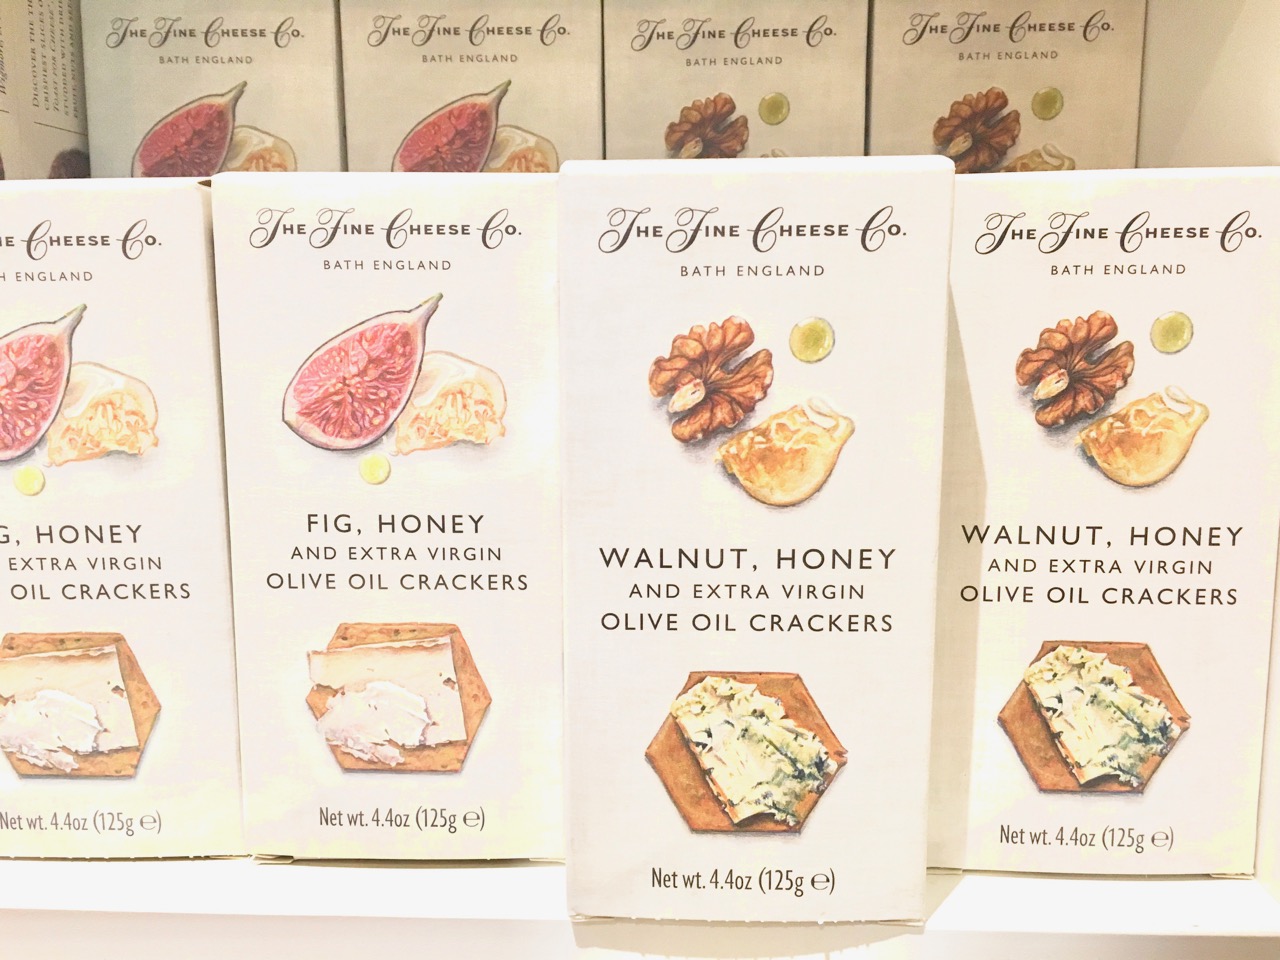
These Walnut, Honey & Olive Oil Crackers by The Fine Cheese Co from Bath, England are one of the best foodie discoveries I have ever made. There are simply perfect with some of my favorite soft cheeses, such as my most beloved Harbison Cheese from Jasper Hill Farm and Vermont Creamery’s Coupole. The crackers are perfect for holding up to the creamy consistencies of these wonderful cheeses and their rich, buttery flavors. These crackers have taken my cheese tastings to a whole new level and my palate is so grateful for it!
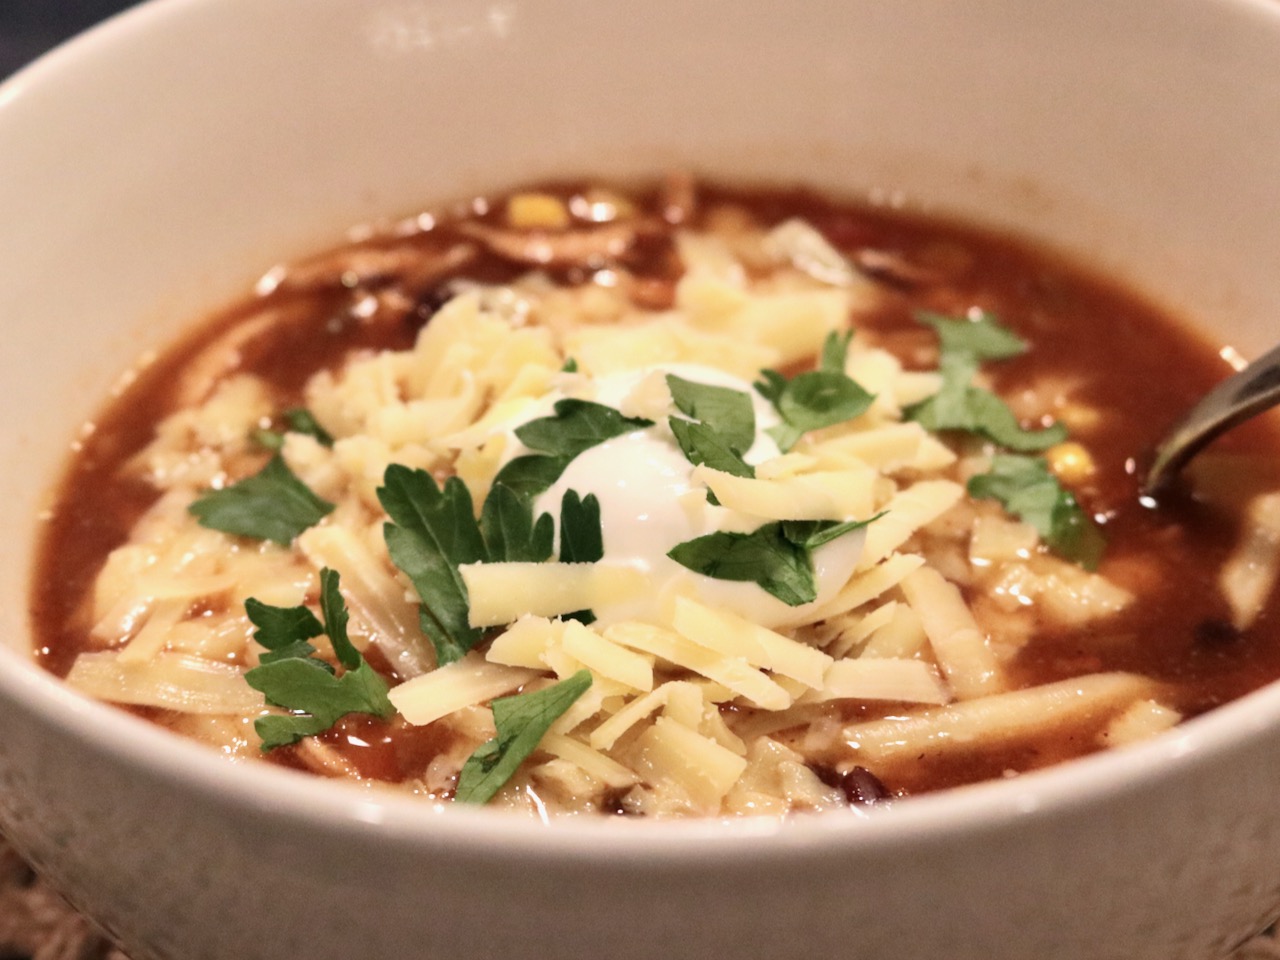
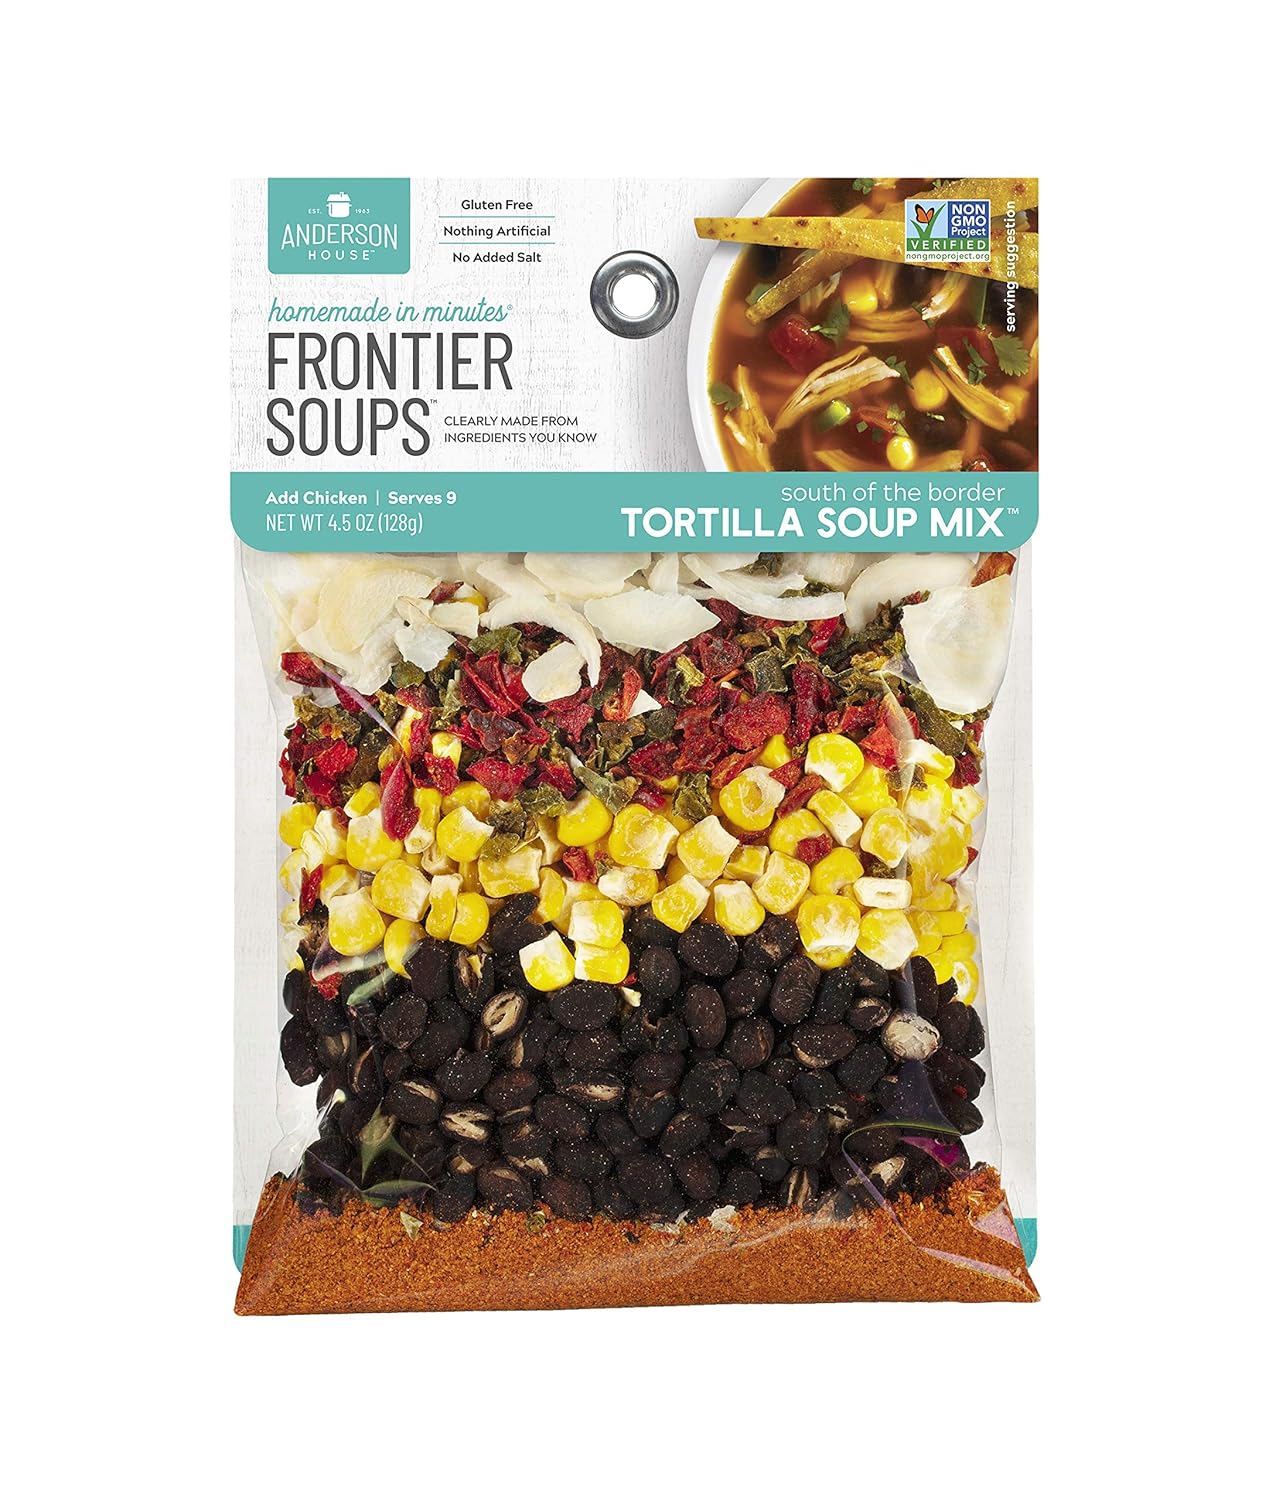
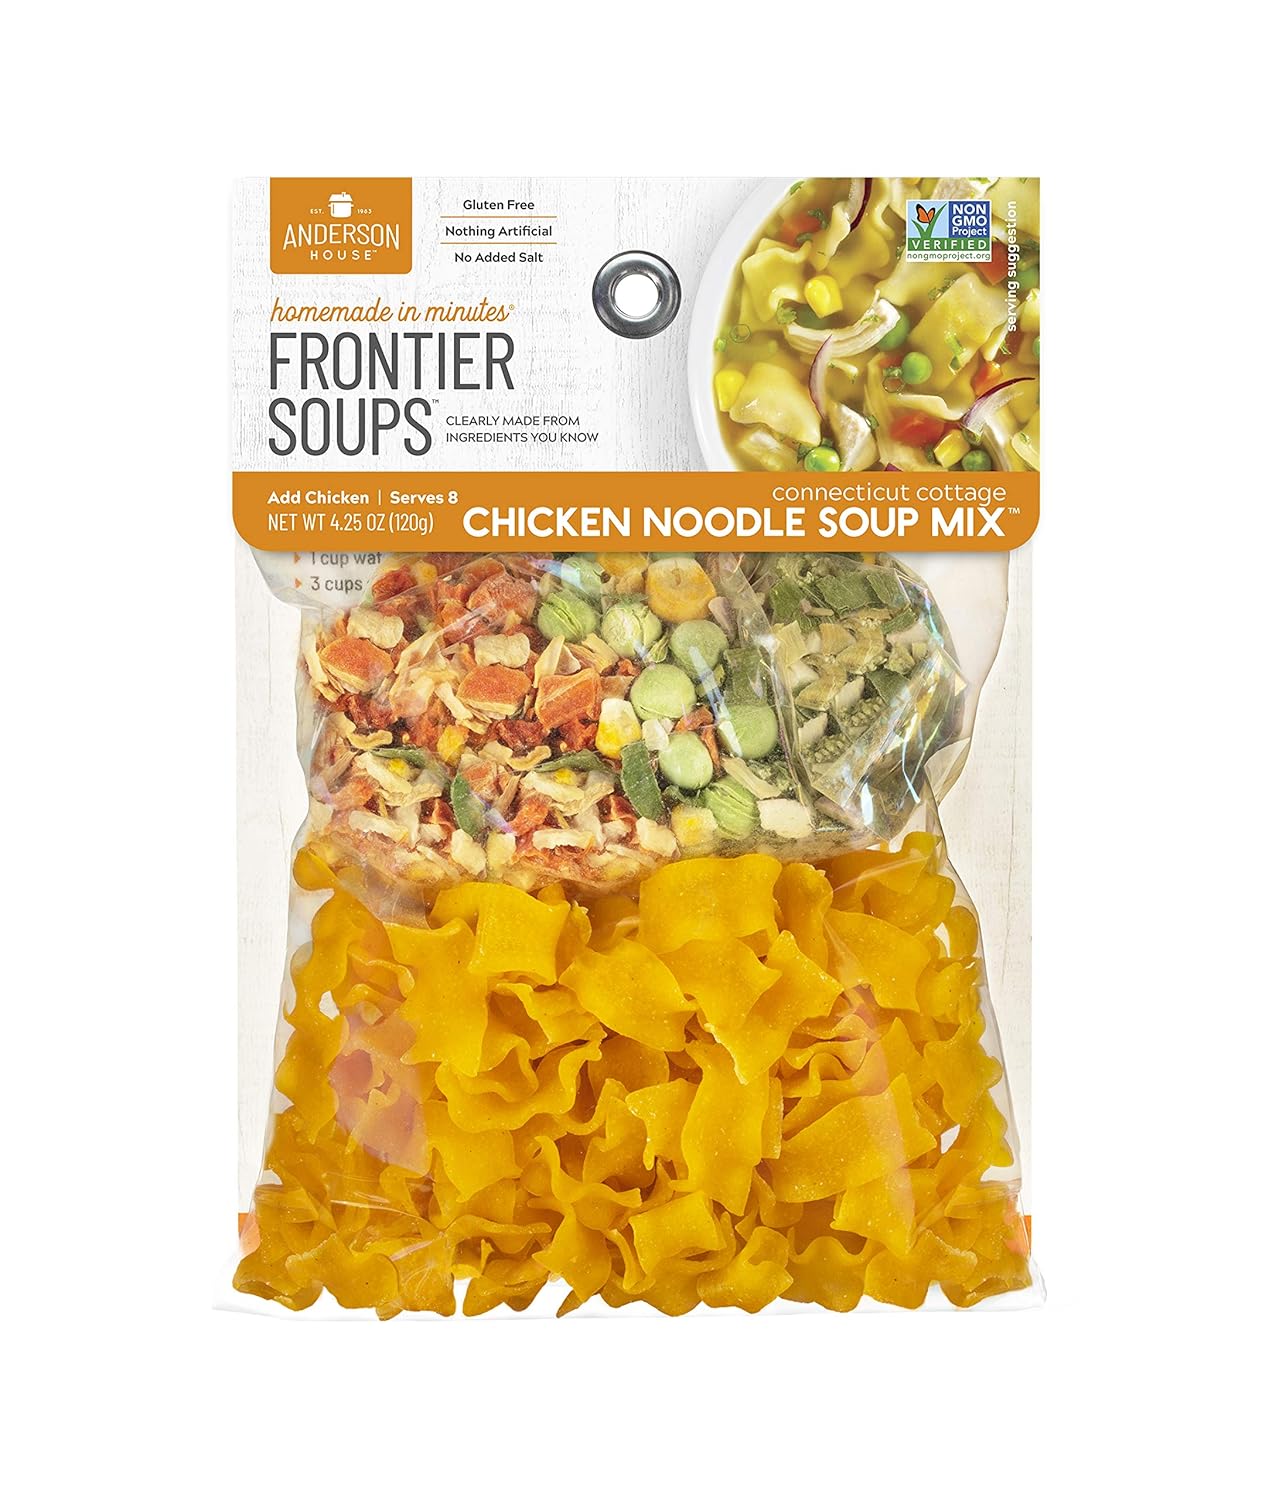
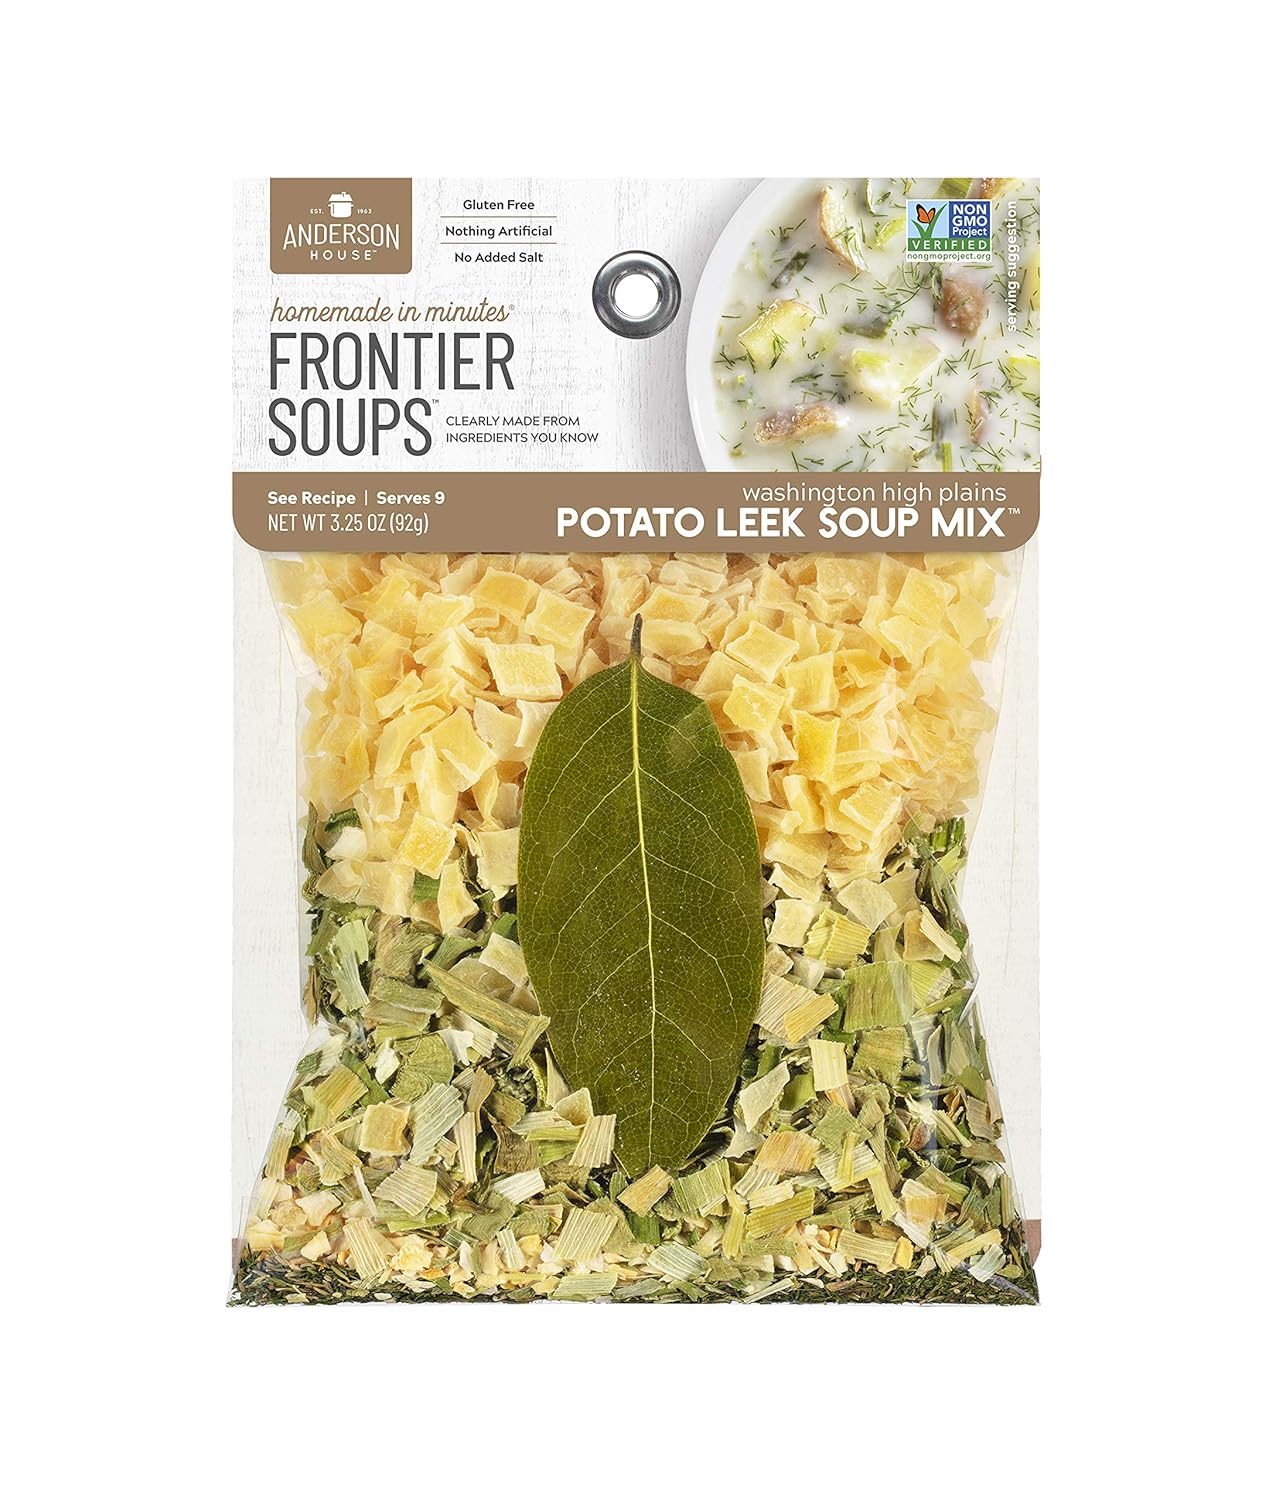
Frontier Brand Tortilla Soup has quickly become a staple in my pantry, and for good reason. The exceptional quality of the dried vegetables gives it a farm-fresh flavor that is rarely found in packaged foods. This soup requires minimal effort—simply add some shredded chicken (I typically use a pre-cooked rotisserie chicken) a jar of your favorite salsa, and broth. The ingredients are Gluten Free and include no preservatives or artificial flavorings. The result? A truly outstanding soup that never fails to impress.
Where to Buy Frontier Soup Mix
Frontier makes many other fantastic soup mixes in addition to the Tortilla Soup. I recommend all of them, but Tortilla is hands down my favorite! They are readily available at Whole foods and can also be ordered online.
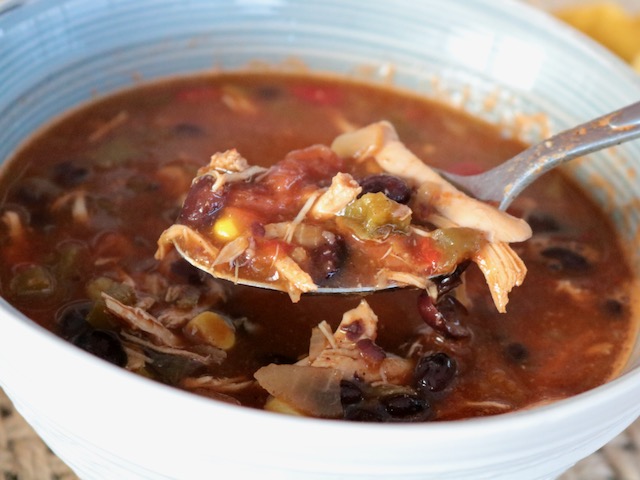
In a 4-quart pot bring broth and water to a boil, add contents of South of the Border Tortilla Soup Mix, chicken and salsa. Simmer, covered, for 25 minutes. Serve as is, or crumble chips into bowls and pour hot soup on top!
Serving Suggestions include sides of shredded cheddar cheese, sour cream, hot sauces, and tortilla chips.
This easy-to-prepare, Gluten-free, delicious soup stands out as one of my all-time favorite comfort foods to make on a chilly night. And as an added bonus, it freezes exceptionally well ensuring no leftovers go to waste.
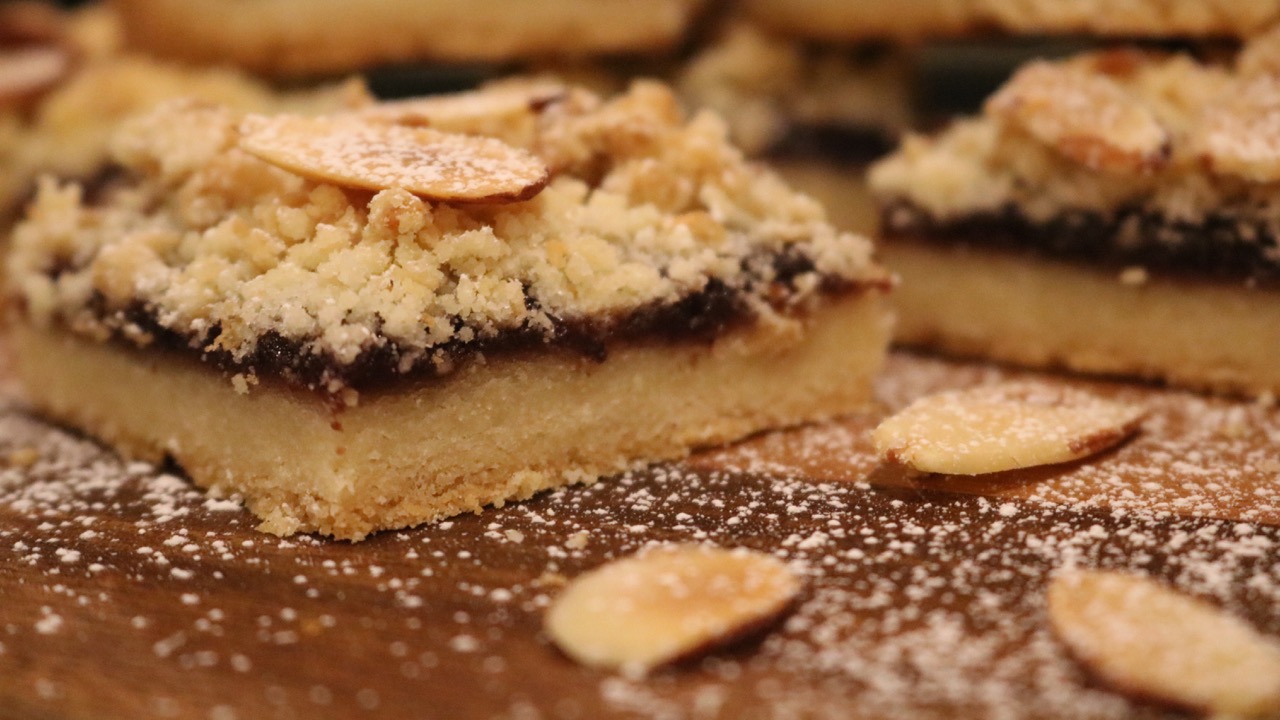
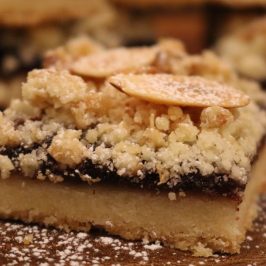
If you love shortbread, which I do, this is a great recipe! I’m not really into overly sweet things so it makes sense that I gravitate towards treats like shortbread. Shortbread has a savory element that cookies or cake don’t typically have. The downside is that the savory element comes mostly from the fairly large amount of butter it takes to make shortbread cookies, or in this case, shortbread bars. But hey- somethings are worth it and this is one of them.
This recipe is inspired by Ina Garten’s recipe for raspberry crumble bars featured in her “Foolproof” cookbook. The major difference between Ina’s recipe and mine is that I prefer to use mixed berry jam over pure raspberry, but that’s a personal choice. When given a jam choice, I always go mixed berry.
For this recipe to be successful you must use room temperature butter or your dough will not come together. (Trust me, I’ve made this mistake before.)
Use the right size pan
You need jam, not jelly. Yes, there is a difference!
Wait for the bars to cool completely before removing from the pan. Removing from the pan is by far, the hardest part of the recipe. Just cut a small square to start and then go from there.
You will need a 9×9 baking pan. It’s necessary to have a good baking pan that reduces your chances of your batter sticking and ruining all your hard work. After a bit of research, I choose a baking pan that was built to allow for air flow for even baking and rapid release. It cooks evenly and always releases easily.
1/2pound2 sticks unsalted butter, at room temperature
3/4cupsugar
1teaspoonpure vanilla extract
2-1/3cupsall-purpose flour
1/2teaspoonkosher salt
10 to 12ouncesmixed berry jam or raspberry jam
2/3cupgood granola without dried fruit
1/4cupsliced almonds
Confectioners’ sugarfor sprinkling
Preheat the oven to 350 degrees.
Instructions
Preheat the oven to 350 degrees.
Place the butter and sugar in the bowl of an electric mixer fitted with the paddle attachment and mix on medium speed just until combined. With the mixer on low, add the vanilla.
Sift the flour and salt together and, with the mixer on low, slowly add to the butter mixture, mixing until it almost comes together in a ball. Turn the dough out on a board. Lightly pat two-thirds of the dough evenly on the bottom of a 9-inch square baking pan and about ¼ inch up the sides. Spread with the jam, leaving a ¼-inch border. Mix the granola into the remaining dough with your hands. Break the dough into small bits and distribute it on top of the jam, covering most of the surface. Sprinkle the almonds on top.
Bake the bars for 45 minutes, until lightly browned.
Cool completely and cut into 9 or 12 bars. Sprinkle lightly with confectioners’ sugar.
Notes
Once cooled, store in an airtight container for 3 days.
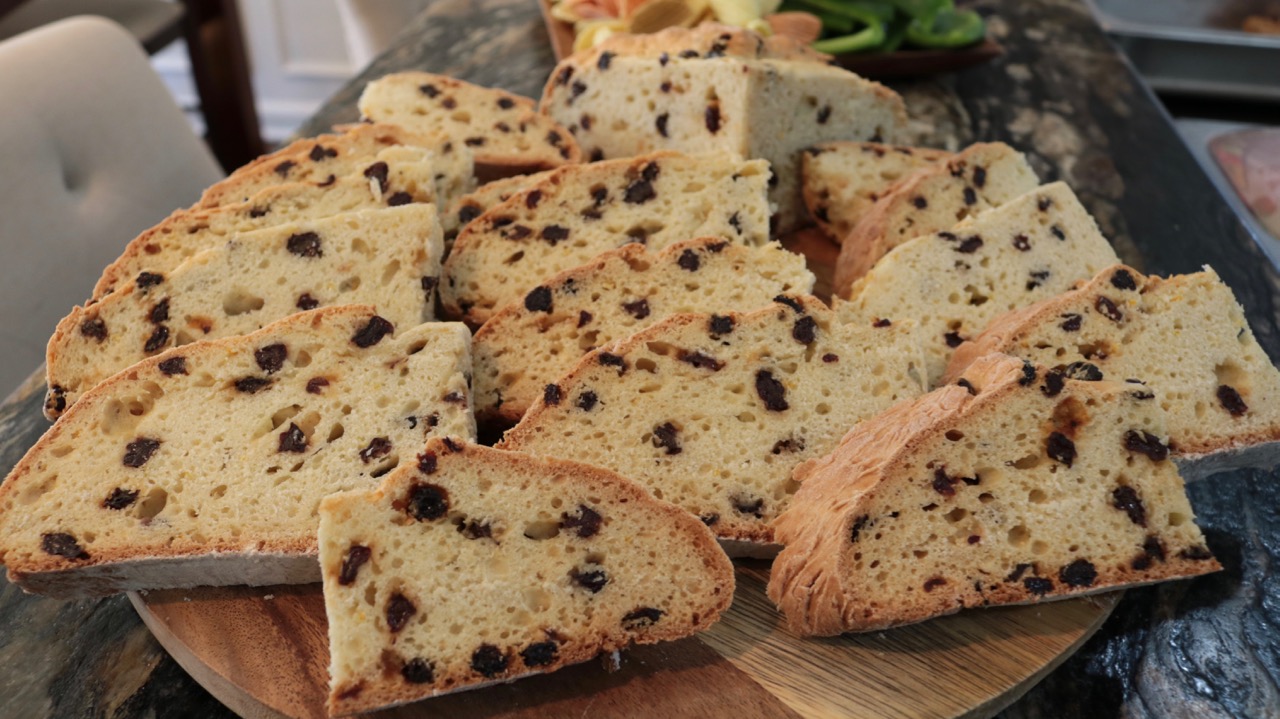
Ina Garten’s Irish Soda Bread recipe makes it easy to bake an outstanding loaf of this traditional sweet & savory bread that is a beloved staple in households around the world, including my own.
The Tradition of Irish Soda Bread
Irish soda bread holds a special place in the culinary heritage of Ireland. Originating in the 19th century, this humble bread was born out of necessity, utilizing basic ingredients like flour, baking soda, salt, and buttermilk. Its rise to popularity was fueled by its simplicity and the ease with which it could be made, even in modest kitchens. Today, it remains a cherished part of Irish culture, often served alongside hearty stews or enjoyed simply with a slather of butter.
Irish soda bread connects us to a rich culinary tradition.
Ina Garten’s Irish Soda Bread Recipe
Ina Garten’s Irish Soda Bread recipe stays true to the essence of this time-honored bread while incorporating her signature touch of elegance, easy-to-follow instructions, and delivering big on flavor. Ina’s recipe combines the essential ingredients of traditional Irish soda bread but includes subtle enhancements, such as currants, to elevate its taste and texture.
Ingredients of Soda Bread
Irish Soda Bread calls for basic pantry staples such as all-purpose flour, baking soda, salt, and buttermilk. However, in modern recipes including this one, soda bread includes a touch of sweetness which is usually sugar and an added level of richness & texture in the form of either raisins or currants. These subtle additions enhance the overall flavor profile of the bread, making it a delightful treat for a St. Patrick’s Day feast, or any occasion!
How to make Irish Soda Bread
With just a few steps, even novice bakers can achieve a loaf of Irish soda bread that’s reminiscent of those found in quaint Irish cottages. The dough comes together quickly, requiring minimal kneading and no rising time, thanks to the reaction between the acidic buttermilk and alkaline baking soda, which produces carbon dioxide gas, causing the bread to rise.
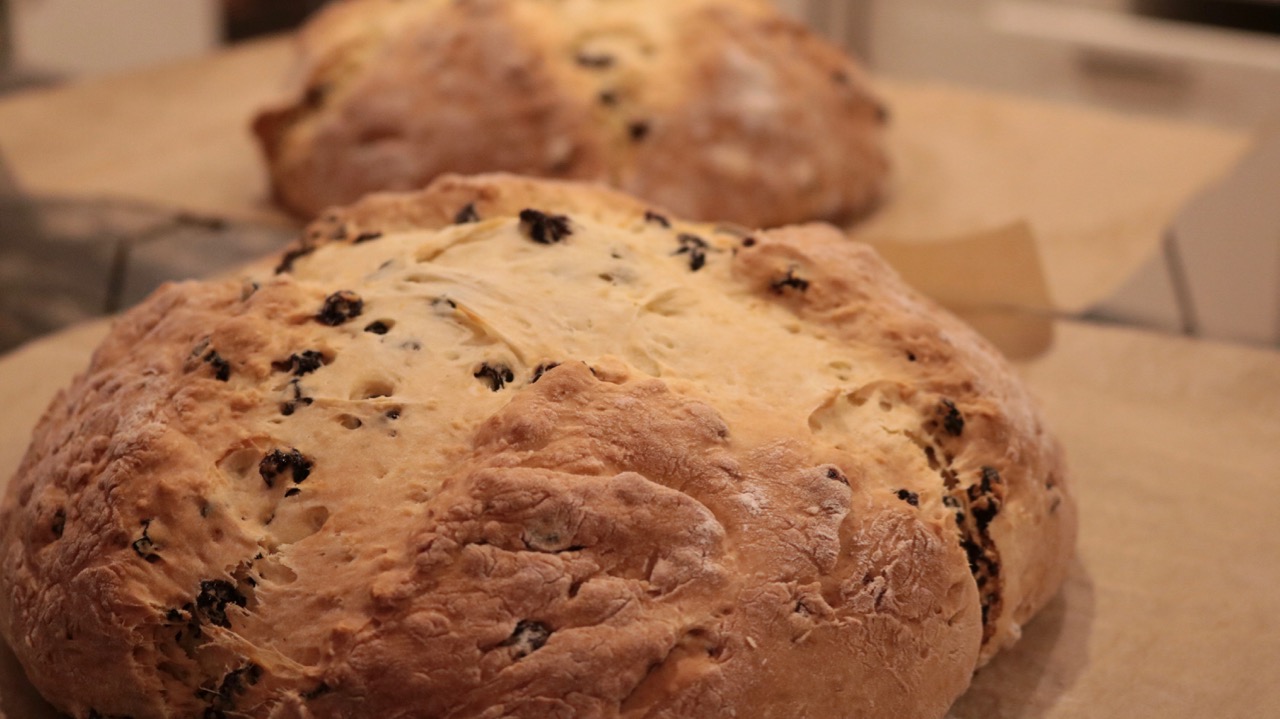
Once mixed, the dough is shaped into a rustic round loaf, slashed with a cross on top (a nod to Irish tradition), and baked until golden brown and crusty. The result is a loaf that’s crisp on the outside, tender on the inside, and bursting with flavor.
A culinary tradition
Making a loaf of Irish Soda Bread is more than just following a recipe—it’s an experience that connects us to a rich culinary tradition. As the aroma of freshly baked bread fills the kitchen and the first slice is enjoyed with a generous spread of butter, we’re reminded of the simple pleasures of home baking and the joy of sharing delicious food with loved ones.
So, the next time you’re in the mood for a taste of Ireland, why not try your hand at baking this timeless classic? With Ina Garten’s recipe, you’ll be on your way to creating a loaf of Irish soda bread that’s truly special.
Pro Tip
The hardest part of this recipe is that the dough is sticky! It can be a little tricky to work with if you are unprepared, but if you work fast, you shouldn’t run into any problems. Just don’t let it sit on the board as you shape it for any longer than you need to.
Preheat the oven to 375 degrees F. Line a sheet pan with parchment paper.
Combine the flour, sugar, baking soda, and salt in the bowl of an electric mixer fitted with the paddle attachment. Add the butter and mix on low speed until the butter is mixed into the flour.
With a fork, lightly beat the buttermilk, egg, and orange zest together in a measuring cup. With the mixer on low speed, slowly add the buttermilk mixture to the flour mixture. Combine the currants with 1 tablespoon of flour and mix into the dough. It will be very wet.
Dump the dough onto a well-floured board and knead it a few times into a round loaf. Place the loaf on the prepared sheet pan and lightly cut an X into the top of the bread with a serrated knife. Bake for 45 to 55 minutes, or until a cake tester comes out clean. When you tap the loaf, it will have a hollow sound.
Cool on a baking rack. Serve warm or at room temperature with room temperature butter.
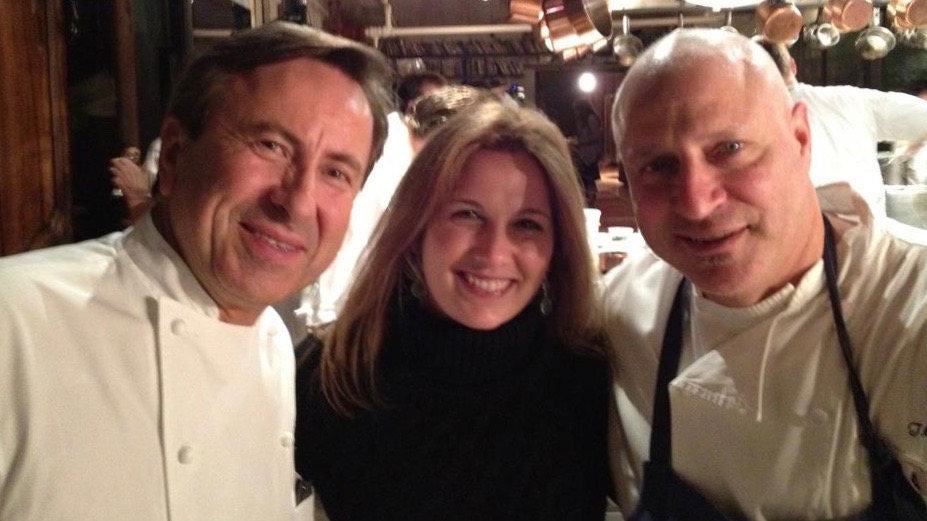
I had the honor and opportunity to meet Chefs Daniel Boulud & Tom Colicchio at a special fundraising event held at the David Bouley Test Kitchen in New York City. It was a stunning cocktail hour followed by a 6 course sit down meal prepared by some of the world’s most renowned and accomplished chefs, namely Tom Colicchio,Daniel Boulud, Daniel Humm, David Bouley and Florian Bellanger. These chefs are the royalty of the culinary world.
The Gold Medal Dining Experience mission was to raise money for the USA Swimming Foundation, with a focus primarily on teaching under privileged children how to swim to reduce the high number of young victims of drowning. Having married into a notable swim family with strong ties to USA Swimming, this event was an important one to me. My father in law, John Collins is one of the world’s most accomplished swim coaches in America producing numerous gold medalists and world record holders and my mother in law, Linda Ludgrove, was an olympian and world record holder herself.
I was one of only 52 guests who had the privilege to be a part of this epic culinary experience that included Venison with heritage grains and huckleberries. Wild mushrooms with toro and black truffles. John Dory poached with citrus. Peekytoe crab with apple and walnut dressing. And a caramelized phyllo dough with lemon sherbet and passion fruit sauce.
Each course was masterfully prepared by one of the chefs and then presented to us describing every element of the dish from the inspiration behind it to the ingredients and preparation. Each course was then paired with a carefully selected wine from a reserved collection.
This experience was truly once in a lifetime and one I am most grateful to my father in law and long time supporter of USA Swimming, John Collins, for providing to me. It inspired me to continue working on my skills in the kitchen, and expanded my pallet to experience some of the best flavors I’ve had the opportunity to taste.