Superior Shepherd’s Pie Recipe

Piece of shepherd’s pie

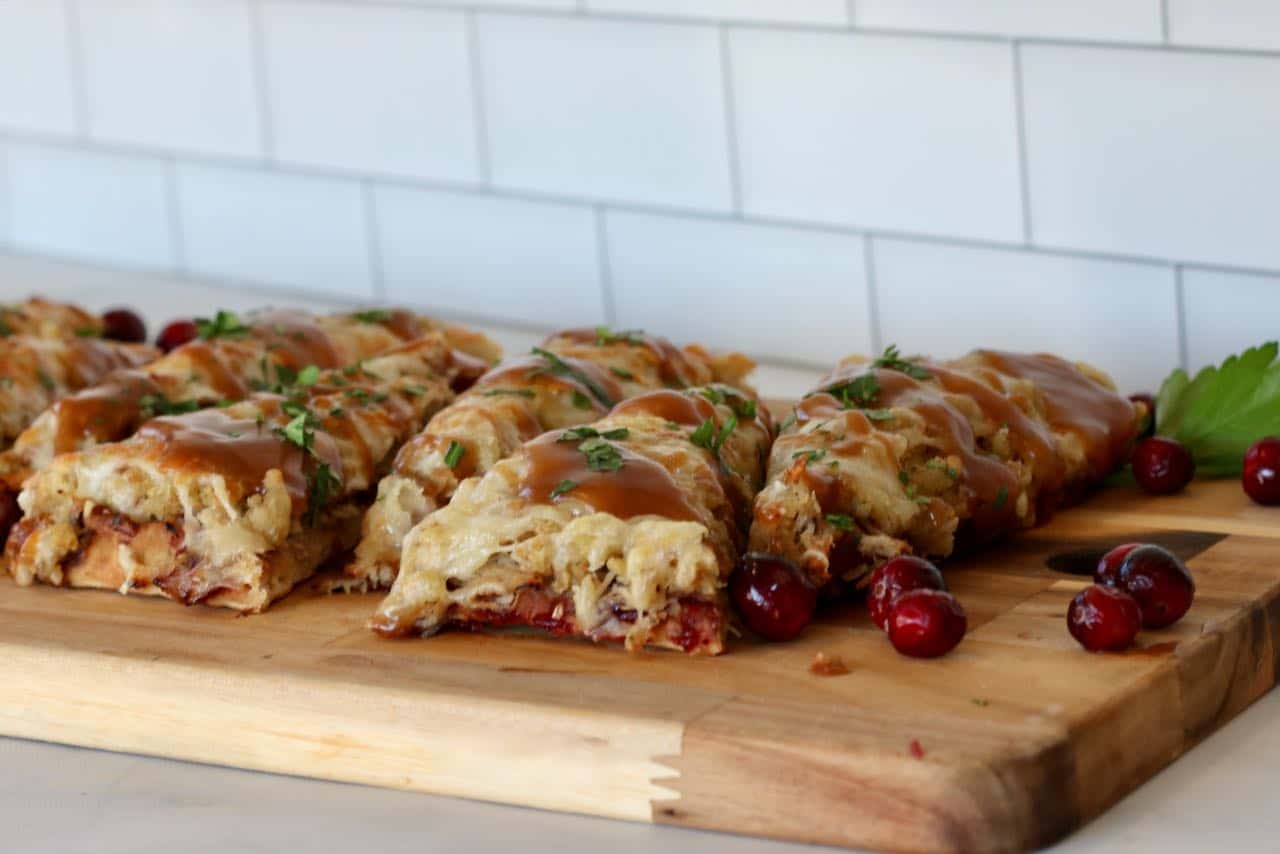
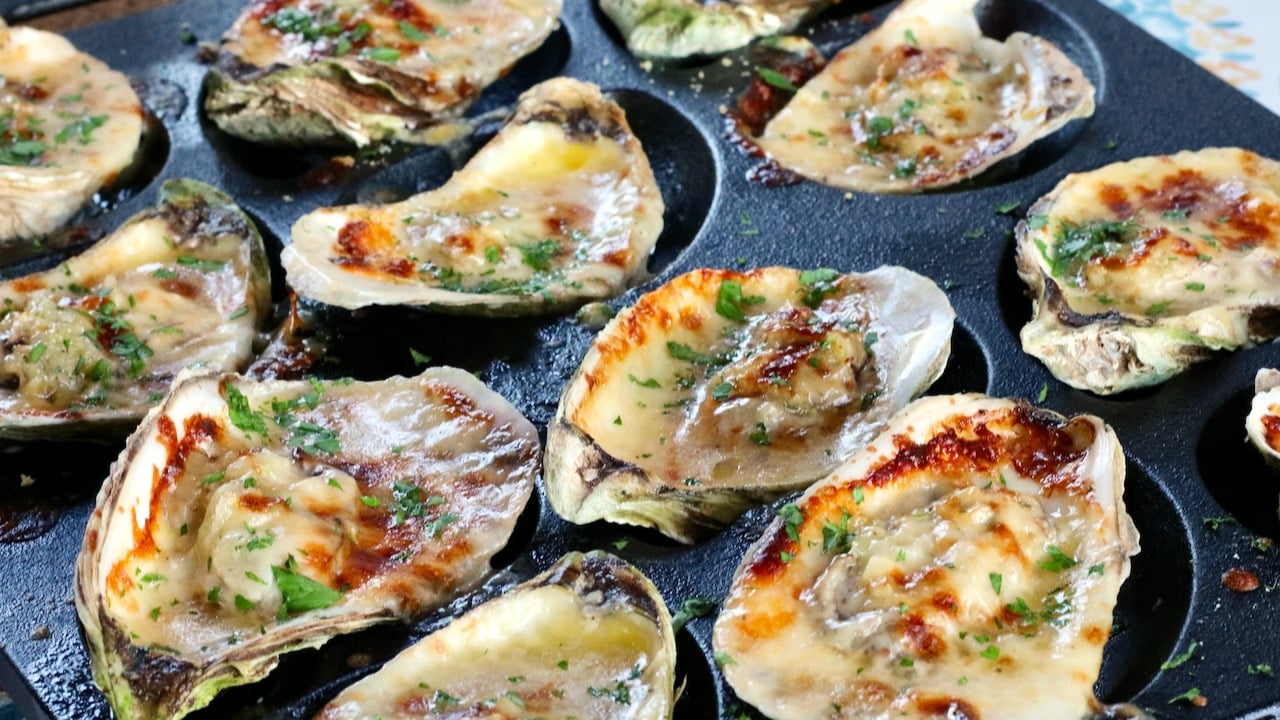
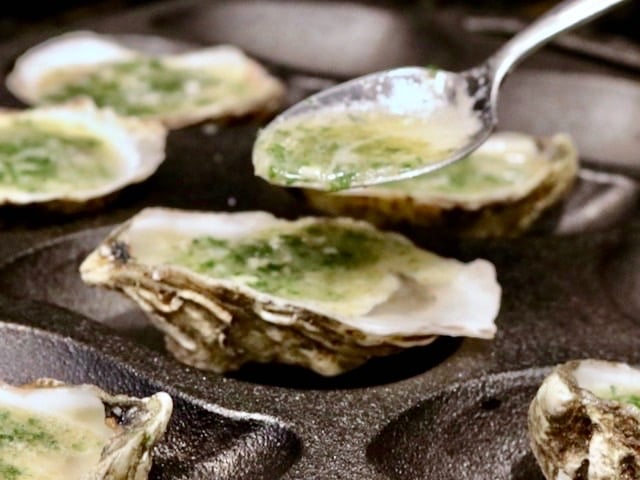
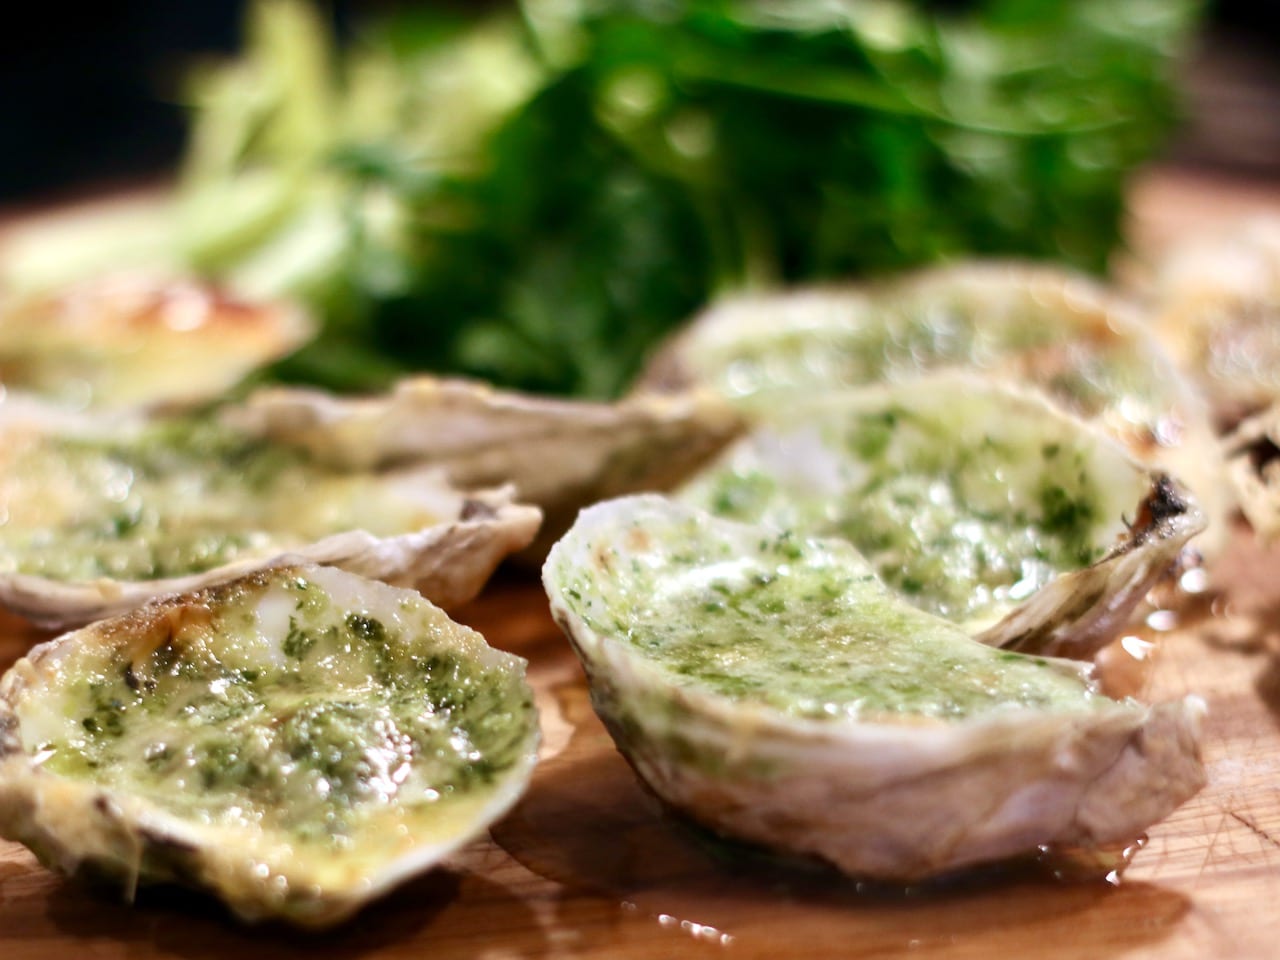
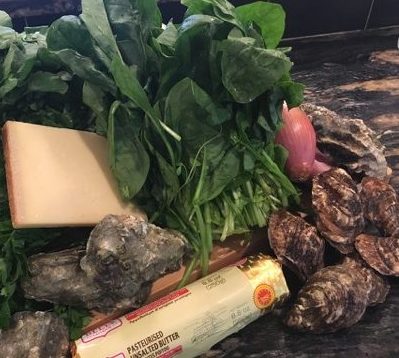
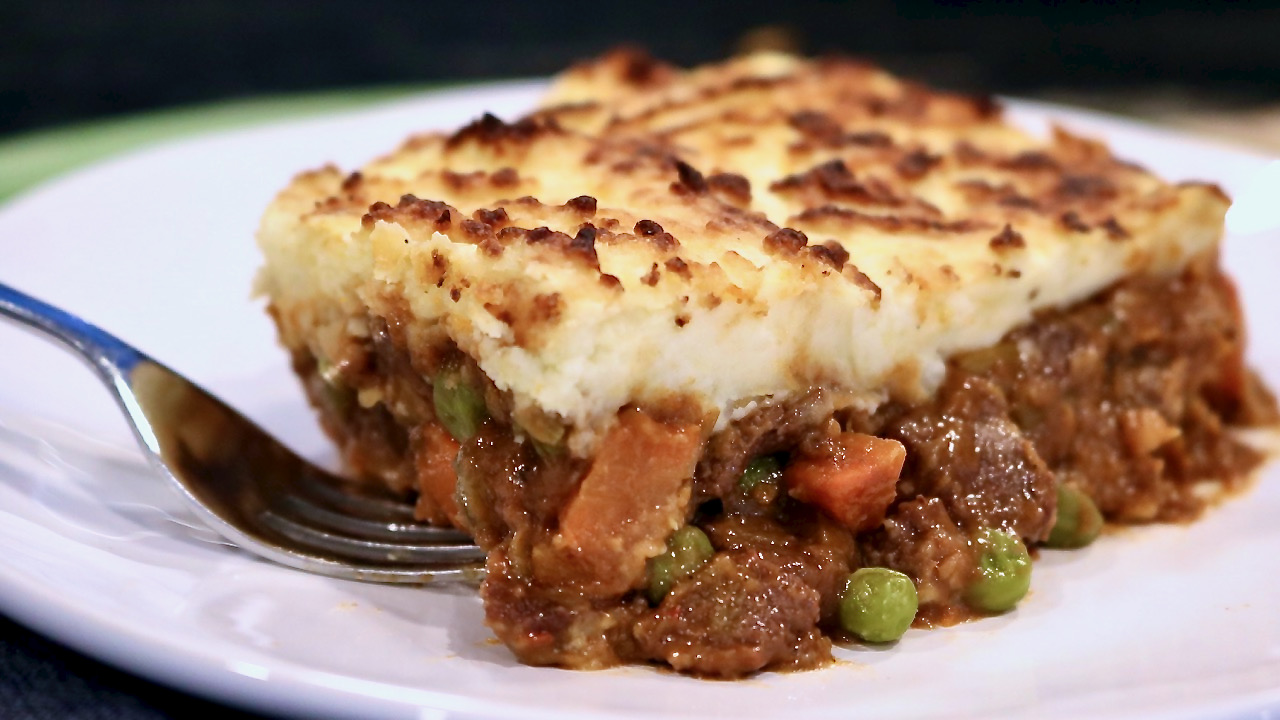
With it’s savory base and creamy mashed potato topping, shepherd’s pie is a timeless comfort food.

History of Shepherd’s Pie

Originating from the British Isles, shepherd’s pie is a hearty and comforting dish that has stood the test of time. Its roots can be traced back to the late 18th century, where it was initially created as a means to utilize leftover roasted meat, particularly lamb, combined with vegetables and topped with mashed potatoes.

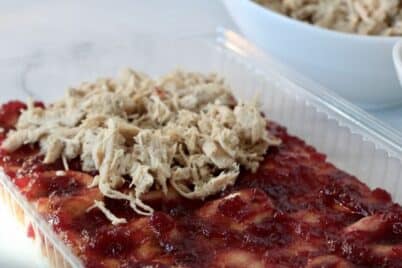
The traditional shepherd’s pie begins with a base of savory minced lamb or mutton, although beef is sometimes used as a substitute. The meat is cooked with onions, carrots, and peas, seasoned with herbs such as thyme and rosemary, and often simmered in a rich gravy or stock to enhance its flavor profile. This mixture is then transferred to a baking dish, forming the hearty foundation of the dish.

Mashed Potato Topping

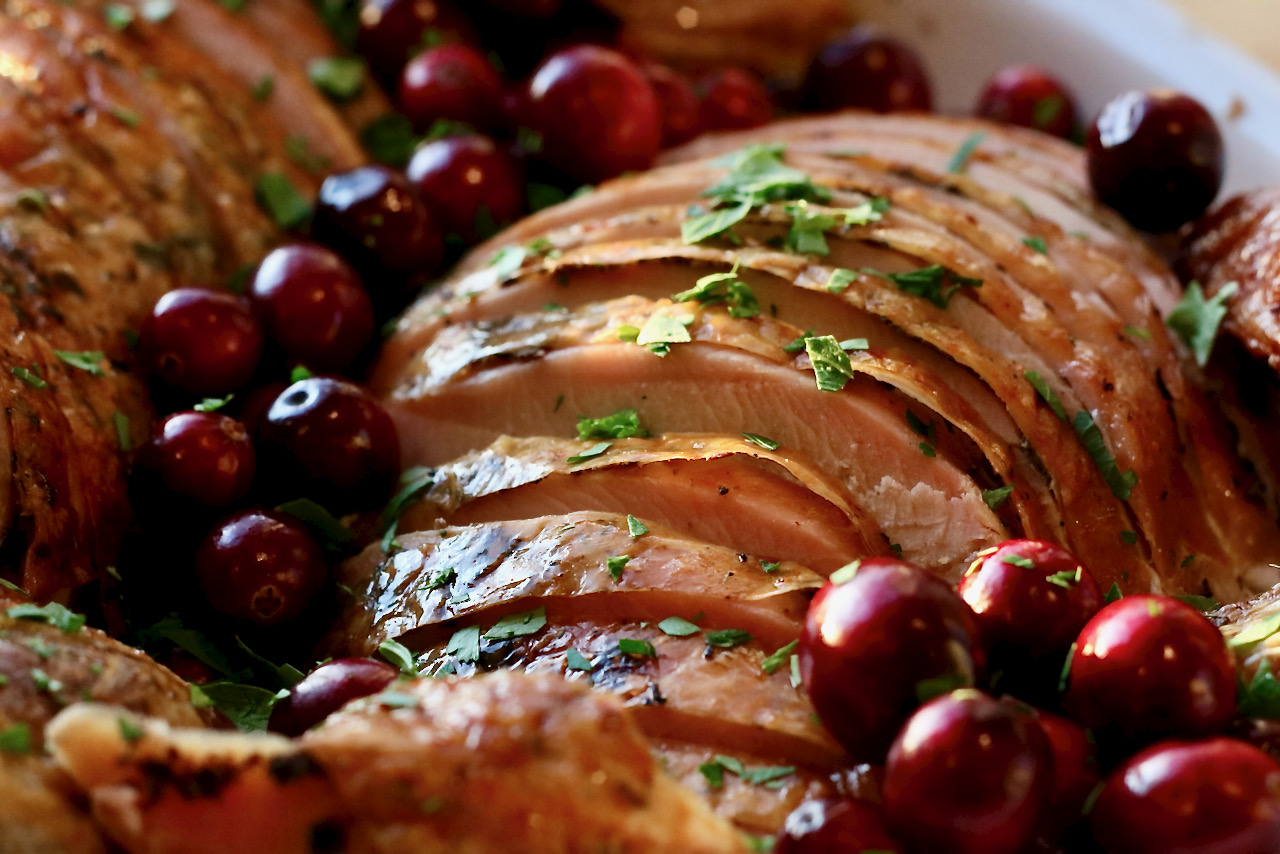
The crowning glory of shepherd’s pie is its topping of creamy mashed potatoes, which are spread evenly over the meat and vegetable filling. The mashed potatoes are seasoned with butter, cream, and sometimes cheese, imparting a rich and indulgent texture to the dish. Once assembled, the shepherd’s pie is baked in the oven until the mashed potato topping develops a golden crust. The result is a savory, delightful, classic comfort food dish.

Shepherd’s Pie (lamb) vs Cottage Pie (beef)

Most people are familiar with what shepherd’s Pie, but not everyone knows that shepherd’s pie refers to the use of lamb, while cottage pie is made with beef. It comes down to availability and personal preference. Being a traditionalist in the kitchen, I usually make mine with lamb.

Why this is the Best Shepherd’s Pie Recipe

I have tested and tasted many recipes for this classic comfort food and this is one that concluded my hunt. Separating itself from the pack, this recipe’s uses 1/4″ diced lamb instead of ground meat which results in much more refined dish. The tender, diced meat is full of flavor and texture that simply can’t be achieved with ground meats. Additionally, By butchering your own lamb, you have much more control over the fat content, avoiding the often oily result of ground meats. The stew base cooks low and slow delivering a perfectly tender for a soul satisfying meal.

Pro Tips

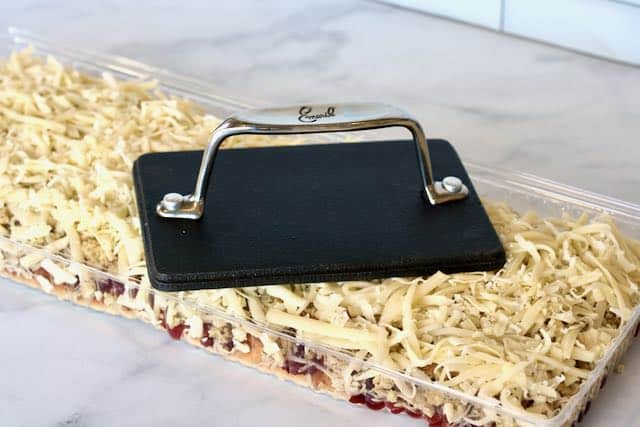
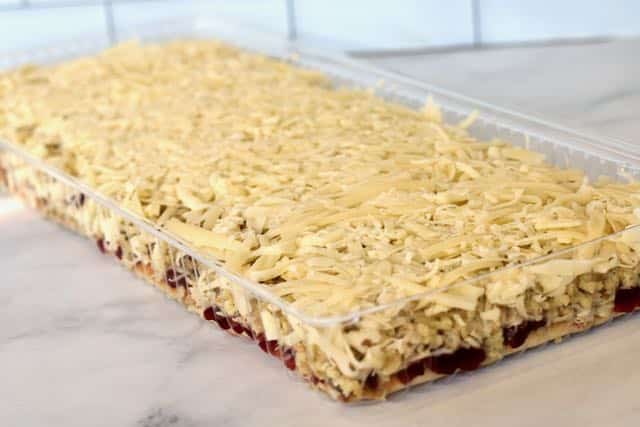
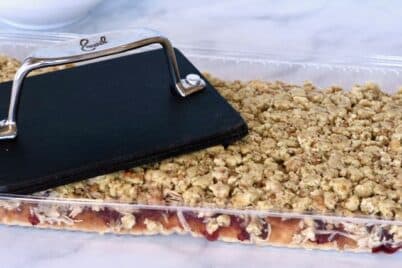
  • Shepherd’s pie can be made in advance.
  • Make one large family style casserole or in individual, oven safe bowls.
  • This recipe freezes well.

With its comforting warmth and rustic charm, shepherd’s pie remains a beloved classic, continuing to bring loved ones around the table, centuries later.

Shepherd’s Pie

This beloved comfort food layered with rich, savory flavors. Anne Burrell uses diced lamb in this classic recipe which refines this dish and elevates it well above the more common minced meat version.
Course: entree
Cuisine: British, Irish
Servings: 6

Ingredients

  • Extra-virgin olive oil as needed
  • 2 pounds boneless lamb shoulder or leg cut into 1/2-inch dice
  • Kosher salt
  • 1/2 cup flour
  • 2 large leeks white part only, cut into 1/2-inch dice
  • 3 ribs celery cut into 1/4-inch dice
  • 3 carrots peeled and cut into 1/4-inch dice
  • 2 cloves garlic smashed and finely chopped
  • 1/4 cup tomato paste
  • 1 cup red wine
  • 3 to 4 cups good quality beef stock
  • 1 tablespoon Worcestershire Sauce
  • 2 bay leaves
  • 1 bundle fresh thyme
  • 2 pounds Yukon gold potatoes cut into 1-inch dice
  • 3/4 to 1 cup heavy cream
  • 2 to 3 tablespoons cold butter
  • 3/4 cup frozen peas

Instructions

  • Coat a heavy duty pan such as a cast iron dutch oven with olive oil and bring to a medium-high heat. Season the lamb with salt and toss with the flour. Shake off excess flour.  Add the lamb to the pan and brown well on all sides. Remove the lamb from the pan and reserve. If there is excess oil left in the pot, remove oil and discard, leaving all the brown bits that remain. Add a splash of new olive oil.
  • Add the leeks, celery, and carrots to the pan. Season the mixture with salt and cook, stirring frequently until the vegetables are soft and very aromatic, about 10-15 minutes. Add the garlic and cook for 1 minute more. Add the lamb back to the pan and stir to combine.
  • Add the tomato paste and cook until the tomato paste starts to brown, about 2 to 3 minutes.
  • Add the wine and cook until it reduces by 1/2. Add enough stock to just cover the surface of the lamb. Add the Worcestershire Sauce. Add the bay leaves and thyme bundle. Bring the stock to a boil and reduce to a simmer. Taste and season with salt, if needed. Partially cover and simmer for 1 hour, or until the lamb is tender. When the stock level reduces replace with more to keep the meat submerged.
  • Place the potatoes in a medium saucepan and cover by 1-inch with tap water. Season the water with salt and bring the water to a boil. Boil the potatoes until they are fork tender, about 15 minutes. Drain the water from the potatoes and pass them through a potato ricer or food mill. In a small saucepan over medium-high heat, bring the cream to a boil. Stir the butter into the cream and stir in the hot cream into the pureed potatoes. Taste and season with salt. The potatoes should be creamy and very flavorful.
  • Remove the lid and simmer for about 15 minutes more to allow the stock level to reduce. Add the peas for the last 5 minutes. Taste and adjust the seasoning, if needed. When done, the lamb mixture should be thick and stew-like. Remove the bay leaves and thyme bundle and discard.
  • Preheat the broiler.
  • Transfer the lamb to a single flameproof baking dish or into individual bakers. Spread the mashed potatoes over the lamb mixture in an even layer. (A piping bag works well for this!) Place the baking dish under the preheated broiler. Broil until the potatoes are golden brown and crispy (about 5-8 minutes.) DO NOT BURN! 

Bloody Mary Recipe

bloody-marys-in-mason-jars

I love Bloody Marys. That’s all.

There are few things in life that I enjoy as much as sipping on a well made Bloody Mary. They are refreshing and reviving. Perhaps that is why they are often linked to curing hangovers!

For me, it is much more than a beverage you drink to shake off the night before. The Bloody Mary is a culinary art form, often referred to as ‘The world’s most complex cocktail.’ It’s all about seasoning, balance, consistency and finishing touches like quality garnish- no matter how simple.

In this video, my partner in crime, Brett, shows us how easy it is to make your own Bloody Mary at home. There are some really good mixes out there (and also some really bad ones!) but I still like to make my own from scratch when I can.

The sad truth is that very few establishments know how to make a good Bloody Mary. It’s unfortunate because more often than not, it’s the great swing in flavor and consistency from one Bloody to the next that turns people off- for good.

Personally, when I get a bad Bloody Mary- I don’t get turned off, I just get really sad. I’m sad because it is completely avoidable and with a little care, Bloody drinkers can rejoice!

And let’s get real, in today’s day and age of $12 -$15 cocktails–am I wrong to expect to enjoy my drink? I think not.

Enough with serving us cheap mixes, slopping a lemon on the side and sending us the bill. It’s time for Bloody Mary lovers to unite and demand a good drink! That’s why I created an app to find great Bloody Marys!

The Best Bloody Mary

Prep Time10 minutes
Course: brunch, cocktail
Servings: 1 serving

Ingredients

  • 1 1/2 ounces vodka I like to eye this depending on the morning 🙂
  • 3 ounces Sacramento tomato juice
  • 1 tablespoon lemon juice
  • 1 1/2 tbsp Worcestershire sauce
  • 1 1/2 tablespoon Pickle Juice or Clam juice
  • Hot Sauce to taste Not Tabasco- I said Hot Sauce!
  • A pinch of fresh ground pepper
  • 1 1/2 tbsp tablespoon prepared horseradish I like Gold's brand

Garnish Ingredients

  • Celery salt
  • Lime wedge
  • Celery sticks
  • Hot pickled green bean

Instructions

  • Combine the lemon juice, Worcestershire sauce, fresh pepper, clam or pickle juice, horseradish and hot sauce in a glass. Add your tomato juice and stir. Add the Vodka. Mix together by pouring it into a mason jar, back and forth, and back again.
  • Pour the celery salt onto a small plate. Rim the top of the mason jar with a lemon wedge and dip the jar upside downit into the celery salt to create a seasoned rim.
  • Now Fill the jar with ice, and pour your bloody mary mix over the ice.
  • Garnish as dynamically as you like. Cheers!

Candied Pecans

candied pecans

Sweet, spice and everything nice

his recipe is one of my favorites to make and package up as a delicious food gift for friends, coworkers and neighbors. But there is a problem with this recipe. The problem is that you need to either make a double batch so you can eat half and still have some leftover, or you need to not eat any because once you start, you can’t stop! They are wildly addicting!

candied pecans

These pecans have it all – sweet, spicy, savory, salty and a great crunch. But that’s not even the best part. The best part of making these is that you likely have most of the ingredients in your pantry and the oven does all the work.

Simply toss the pecans with a whisked egg white and then combine with the dry spice mixture of sugar, cinnamon and cayenne pepper. Pour onto a lined sheet pan and bake. Let cool and serve or store in an air tight container.

Cayenne pepper has a wide range of spice level so I recommend tasting it before deciding how much you want to add to achieve the right sweet and spicy balance.

Wrap in treat bags and tie with a festive ribbon for a fun food gift!

Candied Pecans

These sweet and spicy pecans are perfect to serve with cocktails or over vanilla ice cream! They also make a great homemade gift. 
Prep Time10 minutes
Cook Time40 minutes
resting time30 minutes
Total Time50 minutes
Course: Appetizer

Ingredients

  • 1/2 cup granulated sugar
  • 1/2 cup Light brown sugar packed
  • 1 Tablespoon ground cinnamon
  • 1 teaspoon salt
  • 1/8 teaspoon cayenne (or more to taste)
  • 4 cups (about 12 ounces pecans halves), unsalted
  • 1 egg white whisked

Instructions

  • Preheat oven to 300 degrees F.
  • Add the sugar, brown sugar, cinnamon, salt and cayenne to a large bowl and whisk to combine. Set aside.
  • Whisk one egg white. 
  • In a separate bowl, combine pecans and egg whites, and gently toss until the pecans are evenly coated. Add in the sugar mixture, and toss until the pecans are coated in the spice mixture. 
  • Line 2 sheet pans with parchment paper. 
  • Spread the mixture out in a single layer between the two pans. Bake for 20 minutes, flip left to right and then trade the trays in their oven positions for even cookings. Bake for another 20 minutes. 
  • Remove from the oven, and let the baking sheet cool on a cooling rack until the nuts reach room temperature. Transfer them to an airtight storage container or individual packages. 

Cafe Silvium, Stamford CT

Lasagna Cafe Silvium, Stamford CT

[vc_row][vc_column][vc_custom_heading text=”Simply Italian.” font_container=”tag:h2|text_align:left|color:%23e69b10″][mk_dropcaps style=”fancy-style” background_color=”#727272″]T[/mk_dropcaps][vc_column_text css=”.vc_custom_1544743427508{margin-bottom: 0px !important;}”]I don’t usually find myself struggling to find words. But as I sit here attempting to share my thoughts on Cafe Silvium, I realize that I am struggling with where to start. I think it’s because I am still in a state of disbelief and unable to focus all the things I want to say. Why a state of disbelief? Because for one, I can’t believe how amazing it is, and for two, I can’t believe I only recently discovered it. That then leads me to how angry I also feel for having only learned about Cafe Silvium this year. (That would be the great year of 2018.) Clearly, I am working through some culinary emotions here.

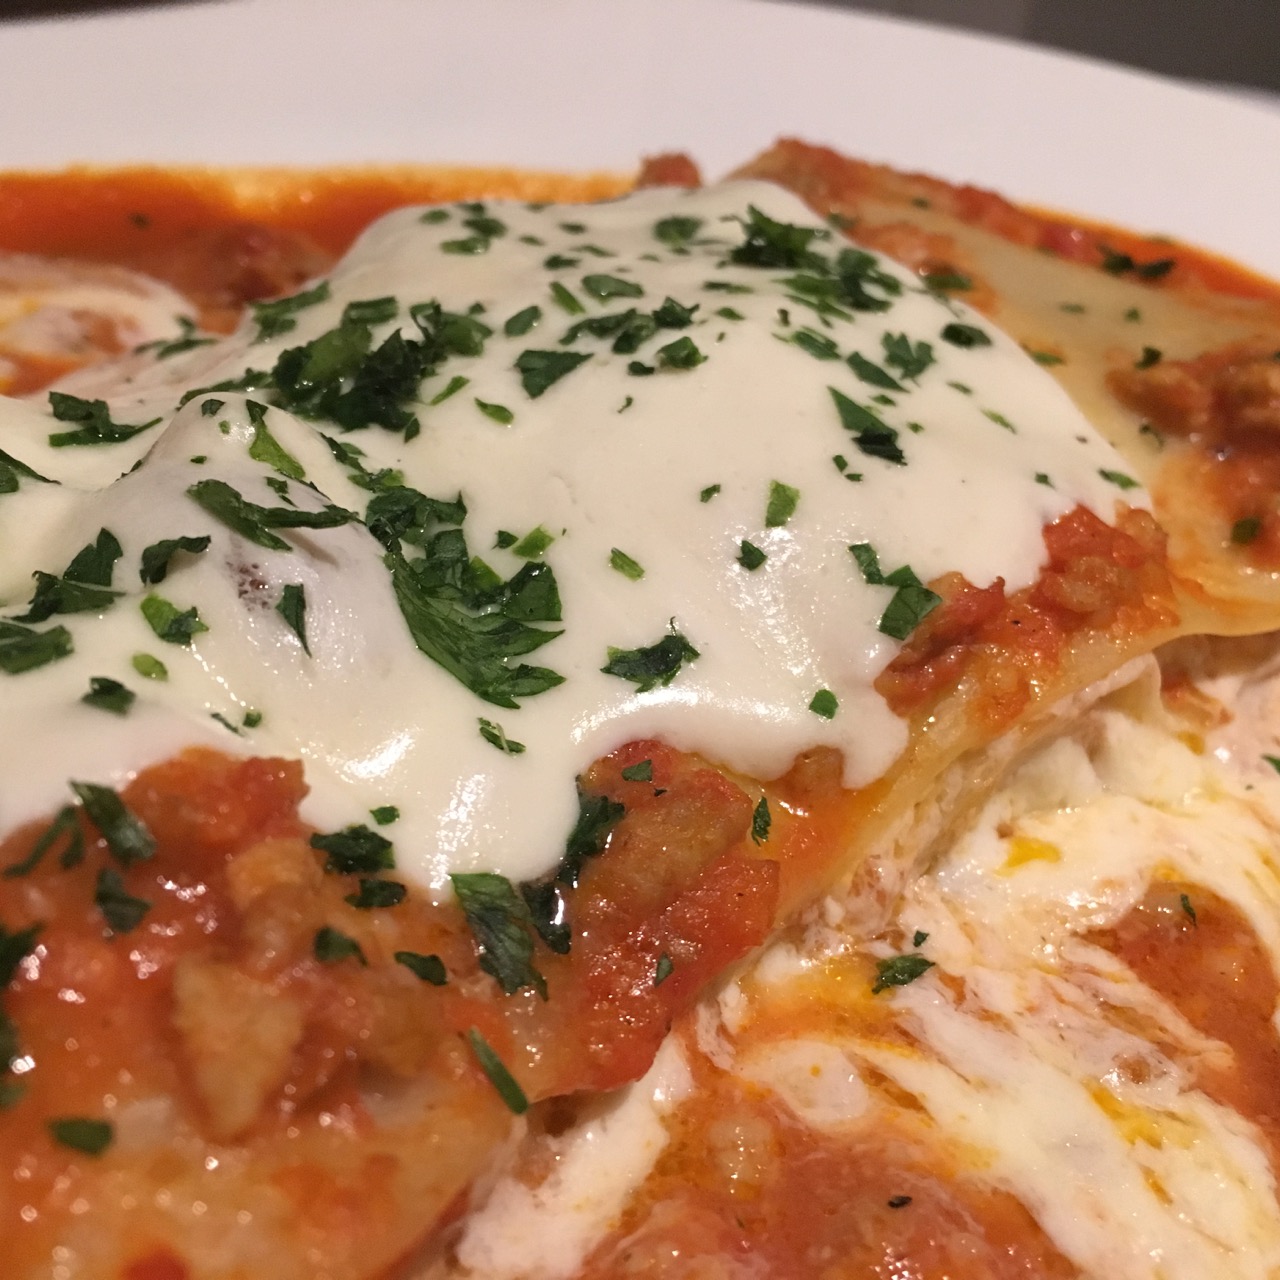
My first attempt to go to Cafe Silvium was a total failure. I was scheduled to meet some friends for dinner and someone suggested we try Cafe Silvium. I checked out the reviews and decided I was excited to try it. It was a Monday night, we were 4 people, and no one stopped to think we would need a reservation. Ummmm…. we were wrong! We arrived and found out quickly that not only did we need a reservation, but they literally couldn’t seat us all night! This is not an uncommon situation- it turns out they have a full house on most nights. The staff were so polite and told us they hoped we would return soon. Unfortunately, we ended up at a sub-par Italian restaurant down the street from Cafe Silvium and depressed. We wanted what we couldn’t have! (But at least we had each other. Shout out to my BFFs!)[/vc_column_text][mk_blockquote font_family=”none”]In Italy you are taught how to savor simplicity and embrace hospitality. This is also true at Cafe Silvium.[/mk_blockquote][vc_column_text css=”.vc_custom_1544743434842{margin-bottom: 0px !important;}”]What happened next? Well, I came home with my mind swirling with the images and smells of Cafe Silvium.  I knew I wouldn’t rest well until I experienced what all the fuss was all about. So I woke up the next morning, waited patiently until they opened, and promptly called to make a reservation! That Thursday at 8:30pm, I walked in and I knew I had found it, finally. The best local Italian restaurant. Cafe Silvium serves homemade, well made, delicious, classic Italian food. And I love it.

From the moment you are seated you feel as welcome as if were invited into someone’s home for dinner. Everyone from the maître d’e, to our server, to our table neighbors were kind, attentive, relaxed and helpful. I was immediately transported back to our time in Italy where we visited places that taught me how to savor simplicity and embrace hospitality.[/vc_column_text][/vc_column][/vc_row][vc_row][vc_column][vc_media_grid element_width=”6″ item=”2387″ initial_loading_animation=”none” grid_id=”vc_gid:1544743514643-6427d318-556a-6″ include=”2993,2992,2991,2990″][vc_column_text css=”.vc_custom_1544742946377{margin-bottom: 0px !important;}”]Everything we ordered that first night and each time we returned since has been fantastic. The menu is impressively large, which usually, I do not like because it typically indicates that a restaurant is more interested in quantity over quality and also typically indicates that the chef doesn’t have a style of his own. However, Cafe Silvium is not to be included in this assumption. The menu is large, but focused on homestyle, tasty, well made Italian dishes. The food is clearly cooked with love and every dish they serve feels like the most important dish on the menu. This includes the delicious white bean salad served to you as you are seated, alongside a basket of focaccia.

We’ve enjoyed a wide variety of the menu since we started going to Cafe Silvium and we have enjoyed everything to the point of craving. Of course, I have my favorites which include the Sausage Stuffed Mushrooms, Eggplant Rollatini, Braised Boar Shank with Gorgonzola Sauce and the Sole Francese (also available with other fishes such as Grouper). There is nothing I have had that I didn’t like, but I would likely not get the lasagna again. It was a bit runny, or loose, and the noodles were more aldente than I like. But that is a matter of lasagna preference, and I simply prefer my own.[/vc_column_text][/vc_column][/vc_row][vc_row][vc_column][vc_custom_heading text=”Recommended for:” font_container=”tag:h2|text_align:left|color:%23e69b10″ use_theme_fonts=”yes”][mk_custom_list style=”mk-icon-ok”]

  • The Food: It is the best, classic, Italian food.
  • Service: The customer service is always fantastic.
  • The Menu: The menu offers something to delight everyone.

Note: Reservations are only available to parties of 6 or more on Friday and Saturday nights. Closed on Sundays. [/mk_custom_list][mk_button dimension=”flat” corner_style=”rounded” size=”large” url=”https://www.cafesilviumct.com” target=”_blank” align=”center” bg_color=”#e69b10″ btn_hover_bg=”#4c4c4c” btn_hover_txt_color=”#ffffff”]Visit Cafe Silvium’s Website[/mk_button][vc_column_text css=”.vc_custom_1544736907298{margin-bottom: 0px !important;}”]

371 Shippan Avenue
Stamford, CT 06902

[/vc_column_text][vc_media_grid item=”2387″ initial_loading_animation=”none” grid_id=”vc_gid:1544743514646-76d80ca1-9682-7″ include=”2996,2998,2999″][/vc_column][/vc_row]

Herb Roasted Turkey Breast

Sliced herb roasted turkey breast on a platter garnished with whole cranberries and parsley

Savory, elegant & easy turkey!

The savory, elegant, and effortless delight that is Ina’s Herb Roasted Turkey Breast has been a staple this recipe in my kitchen for well over a decade now. I’m consistently astounded by its delectable flavors and reliable results. While the tradition of roasting a whole turkey may seem enticing, the challenge lies in achieving perfectly cooked legs and thighs without sacrificing the moisture and delicate meat of the breast. Dry turkey is not exactly my first choice, and that’s why I turned to this Herb Roasted recipe—a decision I’ve never regretted.

herb roasted turkey breast

Over the years, I made two notable tweaks to Ina’s original recipe. The first is that I always double the amount of marinade she calls for. The second is that I always prep the turkey one day in advance so the flavors have time to really infuse the turkey meat.

raw turkey breast in a baking pan covered with herbs
Rub the turkey in the herb mixture the day before
Cooked roasted turkey breast
Roast and let rest before slicing

Simply Delicious Turkey

The combinations of herbs create a really wonderful savory crust that infuses the entire turkey breast. The hardest part is prepping the herbs you’ll need, which I think we can agree is more time consuming than it is difficult!

Look no further, this is simply the best turkey recipe and the only one you’ll ever need.

How to Make Turkey Ahead of Time (and why you should)

Did you know you can make a turkey or a turkey breast and entire day before you are going to serve it? In fact, I highly recommend you do. Its saves a lot of stress, clean up and actually makes it to the table quickly and hot. Not to mention, it actually tastes as good if not better.

When Thanksgiving or Christmas rolls around and turkey is on the menu, as a one man show in the kitchen, I always prepare and cook this turkey breast (or any turkey) entirely the day before, cooking it about 5-10 degrees before it is fully cooked. (You will need a probe thermometer to achieve this.) Let it cool completely, wrap and place in the fridge. (It is significantly easier to slice when cold.)

The next morning before guests arrive, slice the turkey and place on a parchment lined sheet pan or a casserole dish or even directly on an oven safe serving platter. Pour a bit of stock (or gravy if you prefer) over the meat, cover the pan loosely with foil, and refrigerate until ready to reheat.

About 1 hour before serving time, take the meat out of the refridgerator and let it come up to room temperature. Reheat in a 350°F degree oven until heated through, which only takes about 15 minutes depending on how much turkey you are working with. Garnish and Serve.

Pro Tips

  • For guaranteed perfect results, use an in- oven thermometer such as the Thermoworks DOT to ensure you do not overcook the turkey breast (or any cut of meat!)
Thermoworks Dot®
Discover how to achieve perfect temperatures
The Dot™ Probe Thermometer has changed the way I cook forever and I’m not ever looking back! Never again will I over or under cook a roast chicken, a roast beef, or even fried calamari. (Unless I run out of batteries!😂)
Make Ahead Gravy
Perfectly crafted gravy is the crowning touch to your holiday feast with unparalleled warmth and depth of flavor. Explore how to make gravy ahead to clear your stovetop and get maximum flavor.

Herb Roasted Turkey Breast

Savory roast turkey breast is the only turkey recipe you’ll ever need. 
Prep Time30 minutes
Cook Time2 hours
resting time15 minutes
Total Time2 hours 30 minutes
Course: entree
Cuisine: American

Ingredients

  • 1 whole bone-in turkey breast 6 1/2 to 7 pounds
  • 2 tablespoon minced garlic 6 cloves
  • 4 teaspoons dry mustard
  • 2 tablespoon chopped fresh rosemary leaves
  • 2 tablespoon chopped fresh sage leaves
  • 2 teaspoon chopped fresh thyme leaves
  • 3 teaspoons kosher salt
  • 2 teaspoon freshly ground black pepper
  • 4 tablespoons good olive oil
  • 4 tablespoons freshly squeezed lemon juice
  • 1 cup dry white wine

Instructions

  • In a small bowl, combine the garlic, mustard, herbs, salt, pepper, olive oil, and lemon juice to make a paste. Loosen the skin from the meat gently with your fingers and smear half of the paste directly on the meat. Spread the remaining paste evenly on the skin. 
  • Cover the turkey with plastic wrap and refrigerate overnight. 
  • 1 hour before you are ready to cook, take the turkey out to come up closer to room temperature. 
  • Preheat the oven to 325 degrees F. Place the turkey breast, skin side up, on a rack in a roasting pan. Pour the wine into the bottom of the roasting pan.
  • Roast the turkey for 1 3/4 to 2 hours, until the skin is golden brown and an instant-read thermometer registers 165 degrees F when inserted into the thickest and meatiest areas of the breast. If the skin is over-browning, cover the breast loosely with aluminum foil. When the turkey is done, cover with foil and allow it to rest at room temperature for 20-30 minutes (Don't worry- It will stay hot!) Slice and serve with the pan juices spooned over the turkey.

Prosciutto Wrapped Pork Tenderloin Recipe

prosciutto wrapped pork tenderloins

This Pork Tenderloin Recipe is the real deal.

Since discovering this amazing recipe in Ina Garten’s (Barefoot Contessa) Make it Ahead Cookbook, I have made it close to a dozen times. It’s perfect for dinner parties, fall dinners, and just when you need a good make-ahead family meal. Each and every time I make it, I am simply amazing by how good it is and I am pretty sure you will be too! It is served with an apply chutney, which is not to be missed. Trust me when I tell you that you won’t believe the jaw dropping flavor combination of the prosciutto, herbs, pork and apples. It’s simply phenomenal!

Salty. Sweet. Savory. Spice.

This recipes brings all the flavor players to the table – salty, savory, sweet & spicy. Savory herbs like thyme & rosemary season the pork. Then it is wrapped in a delicate, salty pieces of prosciutto. It is then served with an apple chutney that simultaneously brings sweet & spicy into play.

Here’s how it’s done

Simply lay out some plastic wrap. Then lay out butchers twine every few inches and one long ways, across and double the length. Then lay out the prosciutto, overlapping the pieces to make a “sheet” of prosciutto. Place the seasoned pork tenderloin on the prosciutto sheet, roll and tie, using the plastic wrap to help you make it around and even. Refrigerate until ready for baking. That’s it! The recipe is below.

Pork & Apples are the Perfect Pair

A True Make Ahead Recipe

prosciutto wrapped pork tenderloin recipe
This pork can be prepared 24 hours in advance and baked right before serving

After the pork roasts are prepared, you can either cook right away or, if making ahead, simply wrap each tenderloin in plastic and tuck them away in the fridge. They will stay just fine for at least one day, and I have pushed it to two day with no problems. When ready to cook, simply bring down to room temp (or close to it) and bake until the center reads 140 on a digital read thermometer. (I use an internal probe so I can monitor the temperature and cook it perfectly. I highly recommend you get one, if you don’t already have one.)

You Must Make the Apple Chutney

Spiced Apple Chutney
This recipe for Apple Chutney is full of sweet and spice and everything nice! Perfect to serve with a sharp cheddar cheese or a fall pork roast.

We are all accustomed to seeing pork chops served with apple sauce. They are a natural fit. This dish takes that pairing to an entirely new level. This apple chutney is an elevated version of traditional apple sauce and it is incredible. It is NOT to be skipped.

The Apple Chutney can be prepared 2-3 days in advance and stored in the fridge. Simply reheat gently to take the chill off when ready to serve.

NOTE: This chutney recipe makes about 2.5 pint size mason jars. It stores well in the refrigerator for easily a couple of days and also freezes well.

Pro Tips:

  • Use a sharp knife, preferably a filet or boning knife, to slice the cooked pork on a diagonal in 1 inch – 1.5 inch slices. Arrange artfully on a platter.
  • Make sure you let it rest after coming out of the oven! Which is why temperature is important.
  • To ensure the perfect cook, use a probe thermometer, like The DOT!
  • The chutney should not be served super hot but rather warm or room temperature.
Thermoworks Dot Meat Thermometer

Become a better cook.

The DOT is a simple to use in-oven thermometer and is a necessary tool for any cook who cares about perfect temps!

Love Pork Tenderloin? Check out this amazing Cider Roasted Pork Tenderloin recipe! It’s full of flavor and SO easy!

pork tenderloin
prosciutto wrapped pork tenderloins
Print Recipe
5 from 1 vote

Prosciutto Wrapped Pork Tenderloins with Apple Chutney

This recipe has it all- Salty prosciutto, savory herbs, sweet apples and spicy ginger. The flavor combinations are astonishing and a real show stopper.
Prep Time20 minutes
Cook Time15 minutes
Resting Time15 minutes
Total Time35 minutes
Course: Main Course
Cuisine: International
Servings: 4

Ingredients

  • 2 pork tenderloins 2½ to 3 pounds total
  • 1 tablespoon minced fresh rosemary leaves
  • 1 tablespoon chopped fresh thyme leaves
  • Kosher salt and freshly ground black pepper
  • Good olive oil
  • 10 to 12 slices Prosciutto
  • Apple Chutney see recipe

Apple Chutney

  • 1 cup chopped yellow onion
  • 2 tablespoons minced or grated fresh ginger
  • 1 cup freshly squeezed orange juice 4 oranges
  • ¾ cup apple cider vinegar
  • 1 cup light brown sugar, lightly packed
  • 1 teaspoon whole mustard seeds
  • ¼ teaspoon crushed red pepper flakes
  • teaspoons kosher salt
  • 6 Granny Smith apples peeled, cored, and ½-inch-diced
  • ¾ cup raisins

Instructions

  • Preheat the oven to 450 degrees.
  • Place the tenderloins on a sheet pan and pat them dry with paper towels. Combine the rosemary, thyme, 1 tablespoon salt, and 1 teaspoon pepper in a small bowl. Rub the tenderloins all over with 2 tablespoons of olive oil. Sprinkle all sides with the herb mixture. If there is a thinner “tail,” fold it underneath so the tenderloin is an even thickness throughout. Wrap the tenderloins completely with a single layer of prosciutto. (I place the prosciutto sideways with the ends wrapping under the tenderloins.) Tie in several places with kitchen string to hold the prosciutto and the “tail” in place.
  • Roast for 20 to 25 minutes, until an instant-read thermometer, or a leave in probe thermometer, reads 137 degrees. Cover the tenderloins tightly with aluminum foil and allow to rest. They will continue to cook while resting to reach 140+ degrees. Slice diagonally in thick slices and serve warm with the Apple Chutney.

Apple Chutney

  • Combine the onion, ginger, orange juice, vinegar, brown sugar, mustard seeds, red pepper flakes, and salt in a medium-size saucepan. Add the apples, adding them as you chop to keep them from turning brown. Bring to a boil over medium-high heat, stirring occasionally. Reduce the heat and simmer for 50 minutes to 1 hour, stirring occasionally, until most of the liquid has evaporated. Stir in the raisins and serve warm, at room temperature, or cold.

Thanksgiving Leftovers Pizza

Thanksgiving Leftovers Pizza- Feature Image

The ULTIMATE Thanksgiving leftovers recipe.

Thanksgiving leftovers pizza has the best of Thanksgiving dinner in every single bite.  Flatbread style pizza is layered with tart cranberry sauce, covered in shredded turkey, topped with savory stuffing then smothered with cheddar cheese and finished with gravy! It doesn’t get better than this.

Thanksgiving leftovers on flatbread

This Thanksgiving leftovers pizza made it’s first debut at a Friendsgiving party where I had never made anything like it before. I remember it clearly when Thanksgiving pizza first came into our lives- everyone was gathered around the fire pit talking and laughing and I disappeared into the kitchen to attempt to make an experiment. I returned 15 minutes later with my first Thanksgiving pizza.  Well, that first pizza is still being talked about today!

This Thanksgiving pizza is packed with all the flavors of your favorite Thanksgiving dishes so that every bite, really is the best bite! Even better, it’s so simple and a really fun way to use up those leftovers. But you will need to plan to make two, because it’s really good!

It’s all about the base!

When making Thanksgiving leftovers pizza, you really need a flatbread style crust that can support the multiple layers. Homemade or traditional pizza dough just isn’t right for this. I change it up between round and rectangular depending on what is available at the store, but the most important thing isn’t the shape, but rather to select a crust that can support the weight of the ingredients

Recommended: Brooklyn Bred

I have tested many flatbreads and pizza crusts, before landing on Brooklyn Bred Pizza crust as my favorite. It is able to support the weight of the toppings, not overly doughy and easy to slice. I have purchased Brooklyn Bred Crusts at Whole Foods and Acme. Stonefire brand works well too if you can’t find Brooklyn Bred.

How to make the ultimate Thanksgiving Leftovers Pizza

STEP 1: Prep Ingredients & Pre-Heat

Ingredients for Thanksgiving leftovers pizza
  • 2.5 cups shredded turkey (made from leftovers or make shredded turkey in a crockpot.)
  • 2 – 2.5 cups cooked and cooled stuffing
  • 2.5 cups shredded blend of cheddar & Monterey Jack cheese (Always shred your own- it melts better.)
  • 3/4 cup of smooth cranberry sauce
  • 1 cup of gravy- set aside and kept warm.
  • Chopped parsley for garnish
  • Pre-heat gas grill (optional) to about 425°F
  • Pre-heat oven to 425°F

STEP 2: Assemble the Pizza

LAYER 1: Cranberry Sauce

Plain Flatbread

If using Brooklyn Bred like I am here, lay the flatbread in the clear plastic container in comes it to keep the mess contained! Not necessary, but helpful 🙂

Flatbread with a layer of cranberry sauce

Using the back of a spoon to spread 3/4 cup of smooth Cranberry Sauce evenly on the Flatbread Crust.

LAYER 2: Shredded Turkey

flatbread with layer of cranberry sauce and adding shredded turkey on top of the cranberry sauce

Add 2.5 cups of shredded turkey and spread evenly.

Using a cast iron press to even and level out the shredded turkey layer

Use a weighted press (or your clean hands) to press the layer of turkey down gently.

flatbread layered with cranberry sauce and shredded turkey

Don’t press too hard on the weight- just get it flat and tidy!


LAYER 3: Stuffing

flatbread layered with cranberry sauce, shredded turkey and cooked stuffing

Add 2 – 2.5 Cups of cooked and cooled stuffing.

Using a cast iron hand press to even out the stuffing on thanksgiving leftovers pizza

Repeat the step of pressing


LAYER 4: Cheese (always the best part!)

flatbread layered with cranberry sauce, shredded turkey, stuffing & cheese

Evenly spread a generous 2.5 cups of shredded cheese on top.

flatbread layered with cranberry sauce, shredded turkey, stuffing & cheese

Once again, press the layer of cheese to make it nice and flat.

flatbread layered with cranberry sauce, shredded turkey, stuffing & cheese

This is what it should look like and now it’s ready to cook!


STEP 3: Cook the Flatbread Pizza

flatbread layered with cranberry sauce, shredded turkey, stuffing & cheese on grill

Make sure the Grill is around 425°F. (If you make it too hot, the bottom WILL burn!) Grill for about 4 minutes. The goal is to get a grill flavor on the crust. Check the bottom at two minutes to make sure its not burning.

Moving flatbread from grill to sheet pan

Move the Pizza from the Grill to a Sheet Pan.

Tip: Use 2 Spatulas to move the pizza. See image above.

cooked flatbread layered with cranberry sauce, shredded turkey, stuffing & melted cheese

Finish in the oven for about 5-8 minutes or until hot and bubbly. If you like a lot of color, broil it for a minute or two but be careful not to burn it.

OVEN ONLY: You can skip the grill if you need to and just bake on a sheet pan for 10-12 minutes following the same directions.


STEP 4: Slice, Garnish & Serve

How to slice Thanksgiving Leftovers Pizza

if using a Rectangle Flatbread, use this pattern to make pizza style slices.

Thanksgiving Leftovers Pizza- Feature Image

Drizzle with HOT Gravy, garnish with chopped parsley and serve immediately

Pro Tips:

After many, many years of making Thanksgiving Leftovers Pizza, I would definitely call myself a Pro and as a result, I have a few tips for you when making this special and unique Thanksgiving Leftovers recipe!

  • I like Whole Foods 365 Brand chicken flavored stuffing. This can be made 1-2 days in advance.
  • Be generous with your gravy topping right before serving and make sure it’s hot!
  • Use more cranberry sauce than you think- it can handle it.
  • If using Brooklyn Bred, you can prepare it until the point of cooking and refrigerate it for a few hours in advance of cooking.
Thanksgiving Leftovers Pizza- Feature Image
Print Recipe
5 from 4 votes

Thanksgiving Leftovers Flatbread Style Pizza

Flatbread style pizza is layered with tart cranberry sauce, covered in shredded turkey, topped with savory stuffing then smothered with cheddar cheese and finished with gravy! This is the ultimate Thanksgiving leftovers recipe.
Prep Time10 minutes
Cook Time10 minutes
Total Time20 minutes
Course: Appetizer, entree, lunch, Snack
Cuisine: American
Keyword: thanksgiving, turkey
Servings: 8 slices

Ingredients

  • 1 Flatbread style pizza crust such as Brooklyn Bred
  • 3/4 cup Cranberry sauce (Smooth style- not with whole berries)
  • 2 – 2.5 cups Cooked turkey, Shredded
  • 2.5 cups Shredded blend ofCheddar & Monterey Jack cheese (Always shred your own- it melts better.)
  • 1.5-2 cups Stuffing, Cooked
  • 1 cup Hot Gravy
  • chopped parsley- for garnish

Instructions

  • Preheat gas grill to about 425°F (optional.) Preheat over to 425°F.
  • Using the back of a spoon to spread 3/4 cup of smooth Cranberry Sauce evenly on the Flatbread Crust.
  • Next, layer and lightly press the shredded turkey on top of the cranberry sauce. 
  • Add the stuffing on top of the turkey, and again, light press down as you work your way around the pizza. 
  • Top with shredded cheese (use a heavy hand with the cheese)
  • Grill for about 4 minutes. The goal is to get a grill flavor on the crust. Check the bottom at two minutes to make sure its not burning. If you don't have a gas grill, skip this step and bake directly on a sheet pan for 10-12 minutes following the same directions.
  • Use 2 Spatulas to move the pizza to a sheet pan and transfer to the hot oven to finish cooking for 5-8 minutes or until hot and bubbly. If you like a lot of color, broil it for a minute or two but be careful not to burn it.
  • While the pizza is cooking, heat up the gravy. 
  • Slice the flatbread pizza.
    How to slice Thanksgiving Leftovers Pizza
  • Top the pizza slices with a generous drizzle of gravy and a garnish of fresh chopped parsley. Serve hot!
    Thanksgiving Leftovers Pizza- Feature Image

Spiced Apple Chutney

spiced apple chutney

Chutneys are awesomely delicious. They are sweet, but not sweet like a traditional jam. Chutney has a savory components as well which balance it, makes it more versatile, and much more interesting to taste. Chutney’s texture is also unlike it’s cousin in that it is more chunky than jam, which brings some texture to the palate party.

spiced apple chutney
Chutney is the perfect complement to a sharp cheddar or pork roast

Enjoyed all around the world, chutney is most commonly associated with Indian and African cuisines, and can be traced as far back to it origin sometime around 500 AD. (So the Google tells me.) It was at that time that the Romans introduced chutneys to European tables, which is actually where I fell in love with chutney. (English countryside. 17 years old. A picnic with my aunt and uncle. Cheddar and Chutney. Game over.)

Where as in India, the Caribeean, Africa and other parts of the world, Chutneys are often served with vegetables, meats and fishes. Europeans do it a little differently, often seen included on a cheese & charcuterie platters. Cheese and Chutney folks- that’s the good life right there.

The Chutney recipe is a fantastic one and extremely easy to make. I found it in Ina Garten’s cookbook to accompany one of the best pork recipes in the world. (yes, you read that right- I said best pork recipe in the world.)

The flavors were absolute perfection. Savory, spicy, sweet. It is amazing how good this chutney is. The recipe below yielded about 2.5 pint size mason jars, which would mean you would likely get about 5-6 jelly jars out of it, making a great food gift for friends and neighbors.

No question, the pork and apple chutney is superb. But what I really like to do with this chutney is serve it with a really great quality English cheddar. Mmmm….it’s just so good.  You will simply be amazed at how the flavors come together and elevate each other. Your taste buds will thank you after this bite.

Spiced Apple Chutney

Sweet, Savory and Spicy! This chutney is perfect to serve with a sharp cheddar cheese or your favorite pork chop recipe.
Prep Time15 minutes
Cook Time1 hour
Total Time1 hour 15 minutes
Course: Side Dish, Snack
Servings: 10
Author: Adapted from Ina Garten

Ingredients

  • 6 Granny Smith apples peeled, cored and half-inch diced
  • 1 cup chopped yellow onion
  • 2 tablespoons minced fresh ginger
  • 1 cup freshly squeezed orange juice 2 oranges
  • 3/4 cup good cider vinegar
  • 1 cup light brown sugar lightly packed
  • 1 teaspoon whole dried mustard seeds
  • 1/4 teaspoon hot red pepper flakes
  • 1 1/2 teaspoons kosher salt

Instructions

  • Combine the apples, onion, ginger, orange juice, vinegar, brown sugar, mustard seeds, pepper flakes and salt and in a large saucepan. Bring the mixture to a boil over medium-high heat, stirring occasionally. Reduce the heat to simmer and continue cooking, stirring occasionally, for 50 minutes to 1 hour, until most of the liquid has evaporated.
  • Set aside to cool and store covered in the refrigerator for up to 2 weeks.

Notes

This recipe makes approximately 2.5 pint size mason jars. 

Potato Salad with Summer Herbs & Vinaigrette

Ina Garten's French Potato Salad

Perfect. Potato. Salad.

Fresh herbs are one of my favorite things about summer cooking and this recipe is a great way to showcase my garden’s bounty.  The chopped herbs are tossed with warm potatoes, champagne vinegar and white wine to come together for a fabulous summer side dish. Ina Garten’s French style, no-mayo, potato salad is going to take your average summer barbecue to the next level. It’s a fantastic served as a side dish accompanying crab cakes, a grilled steak or even simple hamburgers.

The herbs can take some time to prep, but it’s worth it to serve up what everyone is sure to tell you, is the best potato salad they have ever had. After making this homemade potato salad, you never serve the stuff from the deli counter ever again!

Feaster’s Tip:

This recipe is best if served within a few hours of making, warm or at room temperature, however, this dish holds up pretty well for about 24 hours if you need to make it in advance.  After that, the herbs start to brown and breakdown. If refrigerated, take out about an hour before serving to take the chill off.

The Recipe

Potato Salad with Herbs & Vinaigrette

Ina Garten’s French Potato Salad is full of fresh herbs and vinagar and the perfect dish to elevate your next backyard barbecue!
Prep Time30 minutes
Cook Time30 minutes
Total Time1 hour
Course: Side Dish
Cuisine: American, French
Keyword: potato, side dish, vegetarian
Author: Ina Garten

Ingredients

  • 1 pound small white boiling potatoes
  • 1 pound small red boiling potatoes
  • 2 tablespoons good dry white wine
  • 2 tablespoons chicken stock
  • 3 tablespoons Champagne vinegar
  • 1/2 teaspoon Dijon mustard
  • 2 teaspoons kosher salt
  • 3/4 teaspoon freshly ground black pepper
  • 10 tablespoons good olive oil
  • 1/4 cup minced scallions white and green parts
  • 2 tablespoons minced fresh dill
  • 2 tablespoons minced flat-leaf parsley
  • 2 tablespoons julienned fresh basil leaves

Instructions

  • Drop the white and red potatoes into a large pot of boiling salted water and cook for 20 to 30 minutes, until they are just cooked through. Drain in a colander and place a towel over the potatoes to allow them to steam for 10 more minutes. As soon as you can handle them, cut in 1/2 (quarters if the potatoes are larger) and place in a medium bowl. Toss gently with the wine and chicken stock. Allow the liquids to soak into the warm potatoes before proceeding.
  • Combine the vinegar, mustard, 1/2 teaspoon salt, and 1/4 teaspoon pepper and slowly whisk in the olive oil to make an emulsion. Add the vinaigrette to the potatoes. Add the scallions, dill, parsley, basil, 1 1/2 teaspoons salt, and 1/2 teaspoon pepper and toss. Serve warm or at room temperature.

Melon Salad with Mint & Amaretto

melon salad with mint and basil

Fruit salad never tasted so good!”

Melon means summer. So does fresh herbs. This Giada De Laurentiis recipe combines melon and mint to produce a summer fresh fruit salad that stands far above the rest.

Our garden is full of mint. It grows wild, and is a perennial that spreads, so each year our abundance increases. I used to fight it, but it turns out, most animals, especially deer, don’t like it’s fragrance and since I can use all the help I can get keeping the wildlife away from my plants, I just let it grow. I also found that it was much easier to find new recipes and ways to use the mint, than to try and fight its invasive ways. One of those recipes I found was this melon salad with mint.

This recipe is delicious, can be made in advance, and sure beats any fruit salad from a store! It is perfect for a Sunday brunch or as a light, refreshing, summer dessert.

Melon Salad with Mint & Amaretto

Prep Time30 minutes
Cook Time5 minutes
Total Time35 minutes
Course: brunch, Dessert
Cuisine: American, Italian
Keyword: fruit, fruit salad
Author: Giada De Laurentiis

Ingredients

  • 1 bunch fresh mint chopped
  • 1/4 cup lemon juice from about 1 lemon
  • 1/4 cup simple syrup recipe follows
  • 1/8 teaspoon amaretto
  • 2 cups watermelon balls from about half a watermelon
  • 2 cups cantaloupe balls from about 1 cantaloupe

Simple Syrup:

  • 1/2 cup water
  • 1 cup sugar

Instructions

  • In a blender, combine mint, lemon juice, simple syrup, and amaretto. Blend until smooth.
  • In a large bowl, combine the watermelon and the cantaloupe. Add the vinaigrette and toss. Transfer to a serving bowl and serve.

Simple Syrup:

  • In a saucepan, combine water and sugar over medium heat. Bring to a boil, then reduce heat and simmer for 5 minutes, until the sugar has dissolved. Take pan off heat and cool the syrup. Any extra cooled syrup can be saved in an airtight container in the refrigerator.

Parmesan Roasted Broccoli

A broccoli side dish that raises the bar

Broccoli is the king of the vegetable kingdom. Well, at the very least, the king of my vegetable drawer.  It’s one of my favorite vegetable, incredibly versatile and my go-to side dish most days of the week.  I know I’m not alone in thinking of broccoli as a “weeknight side dish”. It’s certainly not the side dish you think to include when planning a special occasion dinner. However, THIS Parmesan Roasted Broccoli recipe from Ina Garten changes that narrative.

Ina Garten’s Parmesan Roasted Broccoli recipe is not just good enough for a special occasion dinner, it may actually compete for the best thing on the plate. I have more people comment on this side dish than any other. always saying the same thing, “This is the best broccoli I have ever had. What did you do to it?” Well, the answer is simple- I followed the recipe!

This is my absolute favorite broccoli recipe and just trust me, it will be yours too!

The trick to this dish is about preparing the ingredients ahead of time because it gets assembled quickly at the end of its roasting time.

Pro Tip:

Prep ALL the ingredients and set aside before roasting your broccoli. Then right as it comes out of the oven and you are preparing to serve, find a sous chef to assist you (AKA a friend or family member!) Have them toss the broccoli in a large mixing bowl while you add in the prepared and measured ingredients. This will ensure even distribution of flavors and ingredients. Otherwise, you’ll have pockets of too much lemon, or too much salt, etc., so it’s important to be prepared with an extra set of hands!

Parmesan Roasted Broccoli

A delightful twist on a classic vegetable dish. Parmesan roasted broccoli combines the earthy goodness of broccoli with the zesty brightness of lemon and the salty richness of Parmesan cheese.
Prep Time20 minutes
Cook Time25 minutes
Total Time45 minutes
Course: Side Dish
Cuisine: International
Keyword: broccoli, side dish, vegetarian
Servings: 6
Author: By Ina Garten

Ingredients

  • 4 to 5 pounds broccoli
  • 4 garlic cloves peeled and thinly sliced
  • Good olive oil
  • 1 1/2 teaspoons kosher salt
  • 1/2 teaspoon freshly ground black pepper
  • 2 teaspoons grated lemon zest
  • 2 tablespoons freshly squeezed lemon juice
  • 3 tablespoons pine nuts or slivered almonds toasted
  • 1/3 cup freshly grated Parmesan cheese
  • 2 tablespoons julienned fresh basil leaves about 12 leaves

Instructions

  • Preheat the oven to 425 degrees F.
  • Cut the broccoli florets from the thick stalks, leaving an inch or two of stalk attached to the florets, discarding the rest of the stalks. Cut the larger pieces through the base of the head with a small knife, pulling the florets apart. You should have about 8 cups of florets. Place the broccoli florets on a sheet pan large enough to hold them in a single layer. Toss the garlic on the broccoli and drizzle with 5 tablespoons olive oil. Sprinkle with the salt and pepper. Roast for 20 to 25 minutes, until crisp-tender and the tips of some of the florets are browned.
  • Meanwhile prepare all the remaining ingredients, measured out and set aside ready to toss in quickly when the broccoli comes out of the oven. (You’ll need to move quickly!)
  • Remove the broccoli from the oven and immediately toss with 1 1/2 tablespoons olive oil, the lemon zest, lemon juice, pine nuts, Parmesan, and basil. Serve hot.

Roasted Oysters

roasted oysters in a cast iron tray

These oysters are as ‘Rich as Rockefeller!’

My husband Brett and I have an obsession with oysters, but specifically roasted oysters! It started a while back after a weekend trip to Newport, Rhode Island where seafood is abundant and can be found at every eatery. We were out late night and saw a tray of roasted oysters go by, namely the most famous of roasted oysters – Oysters Rockefeller. We had to have them. And then we had to have more.

And there it began….our obsession with the history of Oysters Rockefeller and roasted oysters in general.

After doing a deep dive, we learned that there is a long history, and a bit of a mystery, surrounding the original Oysters Rockefeller recipe. 

The History of Oysters Rockefeller – the most famous of all roasted oysters.

In 1840 Antoine Alciatore opened the doors to “Antoines” – a French Creole restaurant in New Orleans. Antoine’s was a thriving restaurant that specialized in amongst other things, escargot. After Antoine’s death, his son Jules Alciatore took over as head chef and the restaurant continued to thrive.

On a late night in 1899, a hungry unnamed person ordered Antoine’s Escargot, but the Escargot had been 86’d. (That means they ran out.) Not discouraged but certainly disappointed, he asked the chef to create him something from the kitchen. It was late, and only scraps of vegetables lay around the kitchen. Inspired by the butter and herb mixture used to make the escargot, the chef combined these scraps with Oysters and baked them.  Upon tasting the dish the hungry man exclaimed, “Why this is as rich as Rockefeller!” Thus, the legend of oysters rockefeller was born.

Roasted Oysters in Tray

Jules Alciatore went to his grave with the original recipe that was born that night. However, Antoine’s restaurant is still turning out the same dish to this very day in New Orleans. They keep their recipe a secret and it seems that no one will ever know how close todays version is to the one created that night back in 1899.

What are the ingredients of Oysters Rockefeller?

Oysters Rockefeller Ingredients

With the story above as our inspiration, we got to thinking. What ingredients were available in New Orleans in 1899? What would have been in the kitchen? Antoine’s was almost 60 years old when they invented Oyster Rockefeller which means they had established dishes, recipes, clientele, and chefs. That would have played a part in the creation. There are numerous reports of it being a bright green color, which if you have ever seen escargot before it is cooked, you know this is common with this dish as well. Was that all it was? Could it be the recipe for escargot applied to oysters? Or was there more to it? We think a little bit of both.

Likely it was the escargot sauce elevated with less garlic and the addition of new herbs and greens to compliment the briny taste and delicate texture of the oyster.

Keep in mind- Oysters were a main source of food in America dating back to the first settlers. Oysters were plentiful all over the United States, and even were shipped on trains before beef was shipped. The point here is that the chef at Antoines knew how to cook Oysters. He was a talented chef who knew how to handle oysters and how to cook traditional french snails. He most likely simply adapted the classic escargot recipe that Antoine’s had been severing for 60 years and there you have it.

Roasted Oysters in Tray
Preparing Roasted Oysters with cheese
Roasted Oysters in Tray

We tested a few different approaches including with cream and without, with cheese and without, with spinach and without. Here is what we discovered in our test kitchen – any oyster baked with butter, herbs and cheese in any combination will never disappoint. So we started roasted oysters obsessively!

Special Equipment

I purchased a Cast Iron Roasting tray for roasting oysters many years ago. It makes it SO much easier to roast or grill oysters. Shuck them and nestle them into the divets to prevent the oyster juices spilling and bring the whole tray right to the table. This is a great gift for yourself or the oyster lover in your life! If you don’t have time to order this pan, simply use some tin foil to support them if needed.

Cast Iron Oyster Grill Pan
A Must-Have for Seafood Enthusiasts
A Must-Have for Seafood or Grilling Enthusiasts, the cast iron oyster tray is designed to withstand high heat and deliver consistent cooking results, making it ideal for grilling, broiling, or baking oysters to perfection!
Raw oysters in cast iron roasting tray

How to Select Oysters for Roasting

When selecting oysters to roast or grill, tell your fish monger you are looking for oysters with a belly shape, not flat ones. This will provide a plumper cooked oyster and also keep them protected in the shell while roasting which prevents them from drying out.

Classic Shrimp Cocktail
Shrimp cocktail is an elegant yet simple appetizer that’s always a crowd-pleaser. Plus, it’s easy to prepare in advance, making it perfect for entertaining!

Roasted Oysters in Tray
Print Recipe
5 from 2 votes

Roasted Oysters

These baked oysters are succulent and rich and oh so delicious! 
Prep Time35 minutes
Cook Time10 minutes
Total Time45 minutes
Course: Appetizer
Cuisine: Seafood
Keyword: oysters

Ingredients

  • 1 stick butter
  • 1/4 cup finely chopped fresh parsley (and/or any combination of basil, tarragon or chives)
  • 1/8 cup minced celery with leaves (optional, but recommend!)
  • 2 tablespoons finely minced shallots
  • 1 1/2 teaspoons grated lemon zest
  • 1 tablespoon finely minced garlic
  • Kosher salt and freshly ground pepper
  • 3 ounces gruyere cheese (or similar nutty cheese)
  • Sprinkle of breadcrumbs- optional
  • 12-24 fresh oysters (in the shell)

Instructions

  • If you have a oyster roasting pan now is the time to use that! If you don’t, prepare a baking sheet with a roasting grate to support the oysters, or make a bed of dried rice or rock salt to nestle the oysters into on the sheet pan to keep them supported so they do not spill their liquor or the butter sauce you will add.
  • Preheat the oven to 425 degrees F. 
  • Open the oysters with an oyster knife. (if you don’t know how to safely do this, don’t make this recipe!)  
  • Meanwhile, melt together the butter, herbs, shallots, lemon zest, garlic and a dash of salt and pepper. (Feel free to add a dash of white wine) Be careful not to burn the butter sauce but cook it enough to cook down the shallots and garlic. 
  • Once all oysters are in place on your roasting tray, add a heaping teaspoon of the melted butter mixture on top of each oyster. Top with about a teaspoon of shredded cheese followed by a pinch of breadcrumbs, if using. 
  • Roast the oysters until the the oysters are just cooked through and the cheese is melted and turning golden brown. (About 8 to 10 minutes) Serve immediately.

Notes

If your cheese is not browning or you really want a nice dark brown color, Put the oysters on broil for the last 2 minutes.