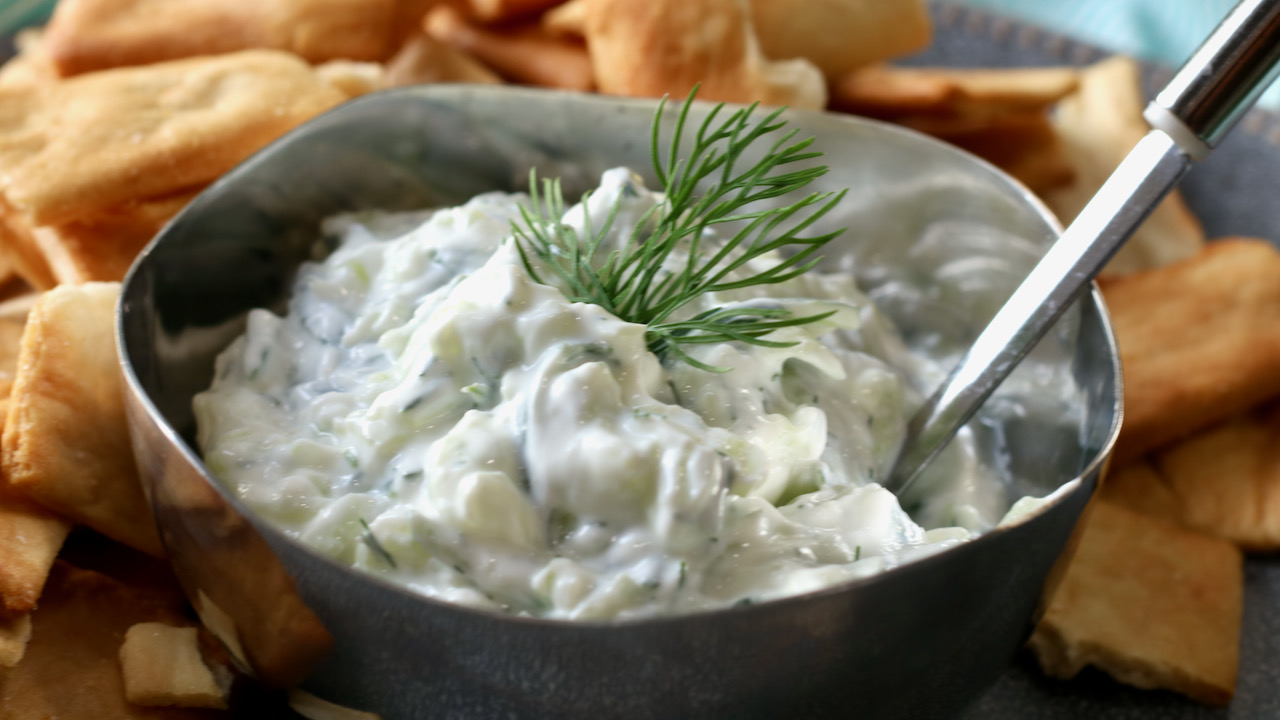
Tzatziki is a very popular Greek yogurt condiment. In this Tzatziki recipe, I use a thick, probiotic rich, Greek strained yogurt that delivers a thick, creamy texture. Fresh, grated cucumber is then added to the yogurt, along with lemon juice, garlic, and fresh herbs. The result is a delicious, healthy, cucumber sauce that is incredibly versatile.
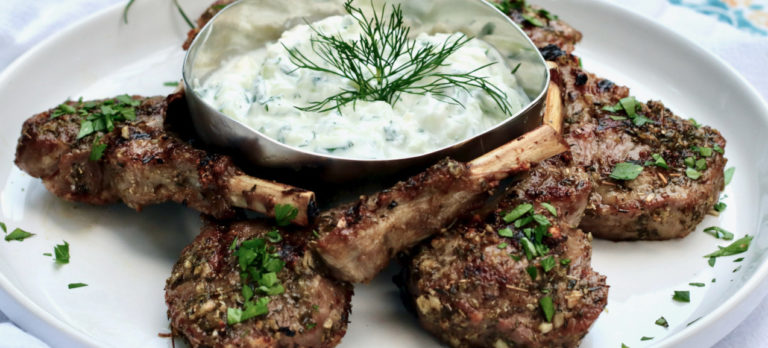
Grilled Lamb Chops
Lamb chops are seasoned with fresh garlic, salt and classic herbs then grilled to perfection.
Tzatziki is so versatile that it is served alongside everything from raw vegetables like bell peppers, mushrooms and carrots, to savory meat dishes such as grilled chicken and lamb. It’s uses and application don’t stop there. It’s also widely used as a spread on sandwiches, and frequently found on mediterranean style platters accompanying pita bread, olives, feta, and stuffed grape leaves.
This delightful yogurt dip can be found on the shleves in most grocery stores, but none of them taste as good as home made, especially in summer when cucumbers are abundant and at the peak of their flavor.
Although thick & creamy, Tzatziki is actually low in calories and sugar, and loaded with probiotics. It’s a great snack for those on a Keto diet and anyone who is Gluten-free.
The secret to Tzatziki success
The trick to making Tzatziki is getting the texture nice and thick. Cucumbers are full of water and when using salt, the salt will pull even more moisture out. Yogurt varieties also differ in thickness, and using one that has excess liquid can contribute to a watery dip. But it’s very easy to avoid watery dip. Here’s how:
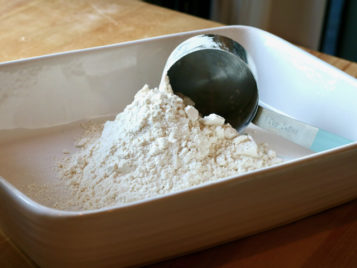
Select & Strain the yogurt. Don’t use anything less than 2% milk fat. Open the yogurt before you get started and if you notice excess liquid, drain it using a fine mesh sieve, lined with cheesecloth, set over a large bowl. Let it drain in the refrigerator for a minimum of 30 minutes or overnight, until significantly thickened.
Shred & squeeze the Cucumbers. Use the large holes on a box grater to shred the cucumber. Then get rid of the moisture. There are several ways to squeeze excess water out of vegetables such as shredded cucumber. You can roll them into a clean tea towel and twist to squeeze out the excess water. You can use paper towels. Or you can use a nut milk bag, which is my preferred method.
Kitchen Tip
When needing to squeeze out excess moisture from vegetables such as frozen spinach or shredded cucumbers, use a nut milk bag. They are reusable, the least messy, and the most effective of any method I have tried.
Simply load up the mesh style bag and squeeze. Watch the excess water flow out. You will be amazed at how well this trick works! Nut Milk bags are sold on Amazon (what isn’t?), Whole Foods, & culinary supply stores. (Game changer for making spinach dip!)
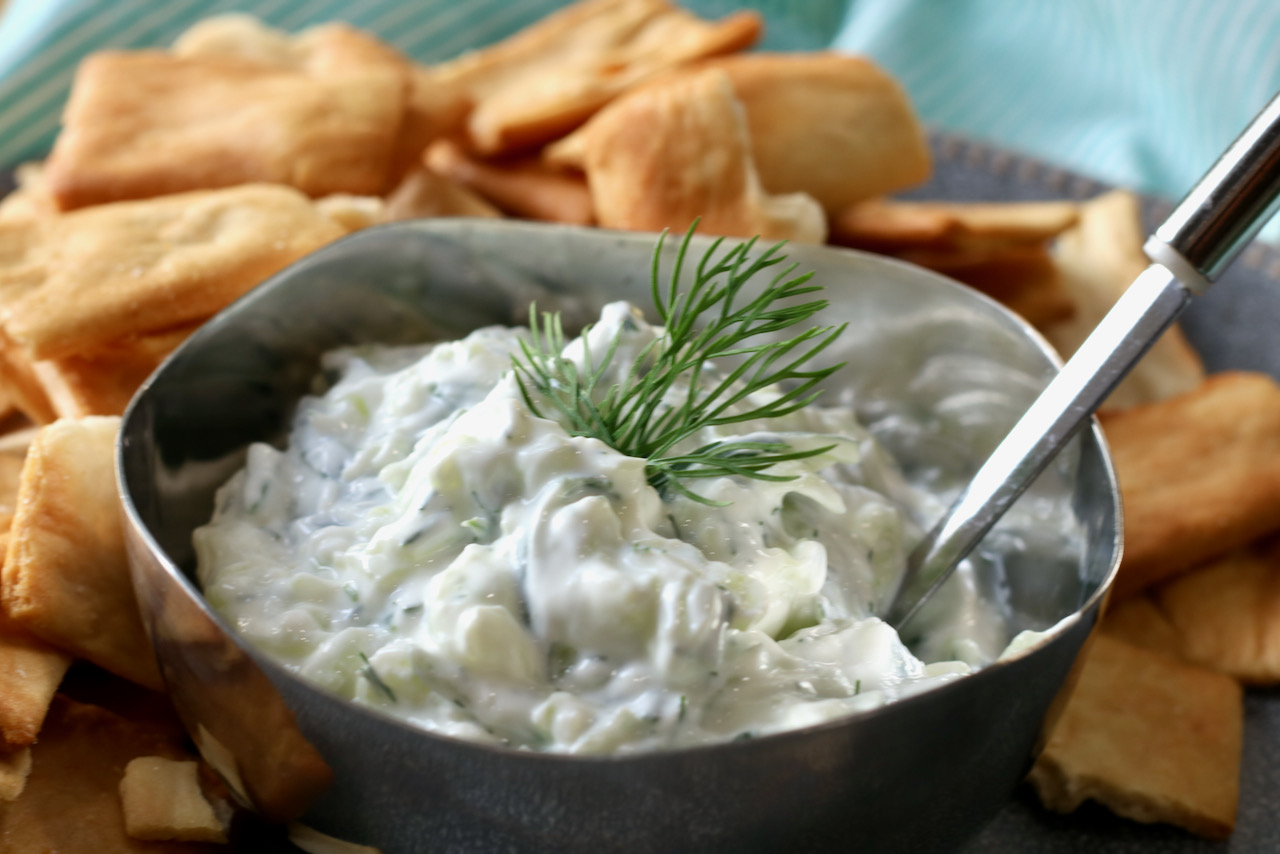
Tzatziki is a very popular Greek yogurt condiment. It is made using thick, probiotic rich Greek strained yogurt to ensure a thick, creamy texture. Fresh, grated cucumber is then added to the yogurt along with lemon juice, garlic, and fresh herbs. Serve with pita, raw vetables, on sandwiches and alongside grilled meats, such as lamb chops.
Prep Time15 minutesmins
Course: condiment
Cuisine: Greek, Mediterranean
Servings: 4people
Ingredients
1mediumcucumber
1 ½cupsplain Greek yogurt
1tbspchopped dill(or to taste)
1tbsplemon juice
1tspfresh garlic,minced
1/2 -3/4tspkosher salt
drizzleextra-virgin olive oil
Instructions
Open the Greek yogurt. If it is wet with excess liquid, drain it using a fine mesh seive lined with cheesecloth set over a large bowl. Let it drain in the refrigerator for a minimum of 30 minutes, or until significantly thickened.
Grate the cucumber on the large holes of your box grater.
Squeeze the excess liquid of the cucumber using a tea towel to squeeze liquid or multiple sheets of paper towel. (I use milk nut bags to drain things like cucumber or spinach.) Ensure as much moisture as possible has been removed without severly overworking the shredded cucumber.
Transfer the squeezed cucumber to a cutting board and give it a rough chop.
Transfer the cucumber to a serving bowl.
Mix the yogurt, herbs, lemon juice, garlic, and salt. Taste and add additional seasoning as needed.
Before serving drizzle with olive oil. Leftover tzatziki keeps well, chilled, for about 4 days.
If not serving immediatly, store in a mason jar or other air tight container and refridgerate for 1-3 days. Drain off any excess liquid before serving.
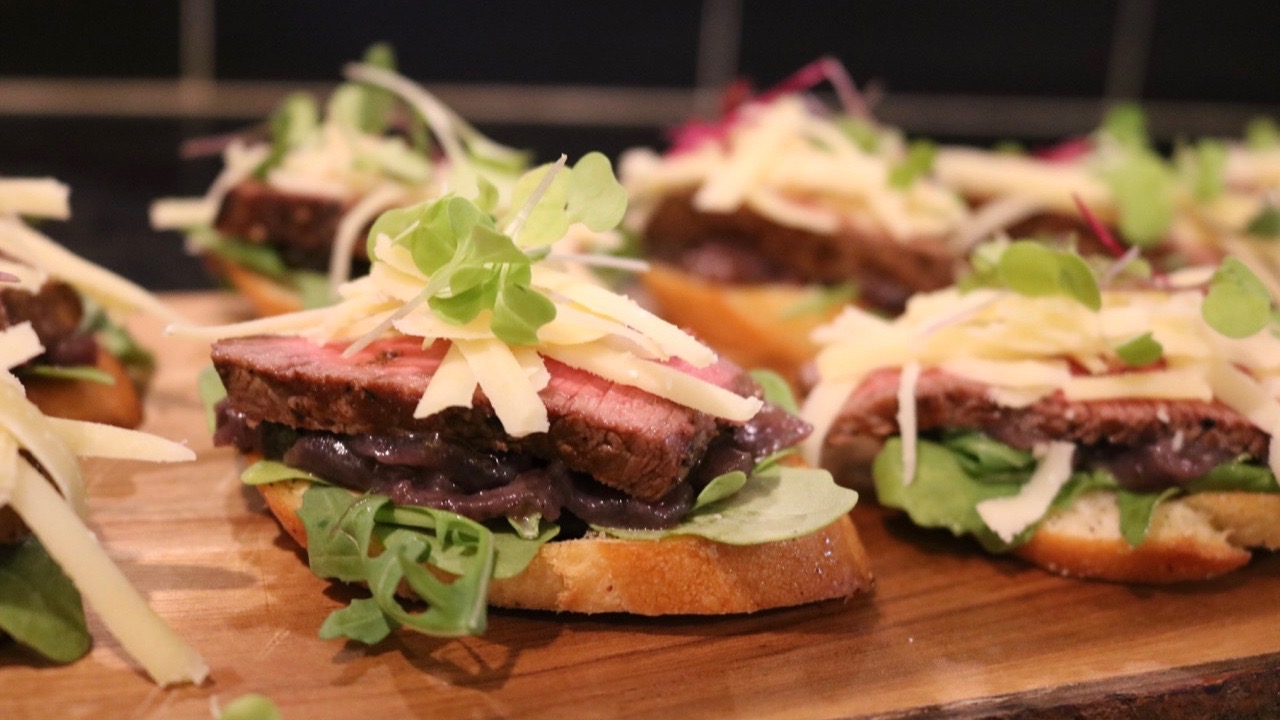
Cros·ti·ni: Noun. A fancy name for small slices of toast with toppings. (FYI, that’s my definition. Not Merriam-Webster’s!)
If there’s one thing you can always count on when I’m hosting—whether it’s an intimate gathering with a friend or a full-blown party—it’s crostini! In fact, I like to call it the “Crostini du Jour” because there’s always a new topping to try. These crispy little toasts are the perfect pairing for a glass of wine and good conversation, yet they’re just as effortless to scale up for a crowd. Versatile, elegant, and endlessly customizable, crostini are my go-to appetizer for any occasion!
Crostini is nothing more than a blank canvas for culinary creativity
It’s all about the base
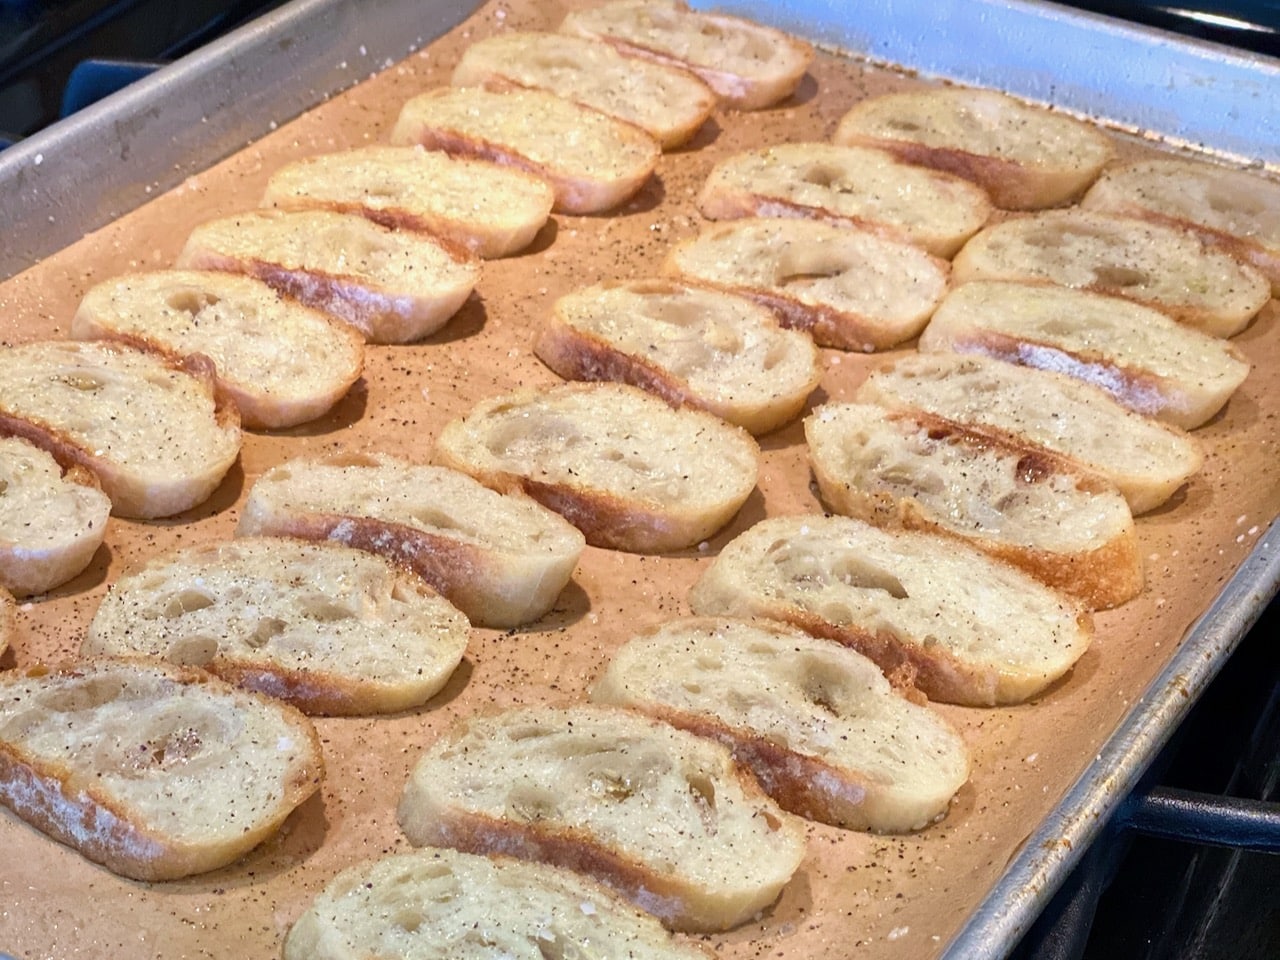
Crostini is all about the base. Your toppings may be delicious, but if they don’t hold up on the base because the bread is soggy, or the base is too hard and crumbles in your hands, then it doesn’t matter how good the toppings are. Think about the crostini toast as the foundation to your building – it’s essential. All you need for a great foundation is a fresh baguette, extra virgin olive oil (evoo) spray, an oven, and a sheet pan.
How to make Crostini
Making Crostini is so simple! Slice a thin baguette into 1/4″ slices (or thickness of your choice) and arrange in a single layer on a sheet pan lined with parchment. Coat evenly with EVOO spray and sprinkle of salt & pepper. Bake, flip, finish. Let cool completely and store in an air tight container or a ziplock bag for up to 3 days, or use immediately.
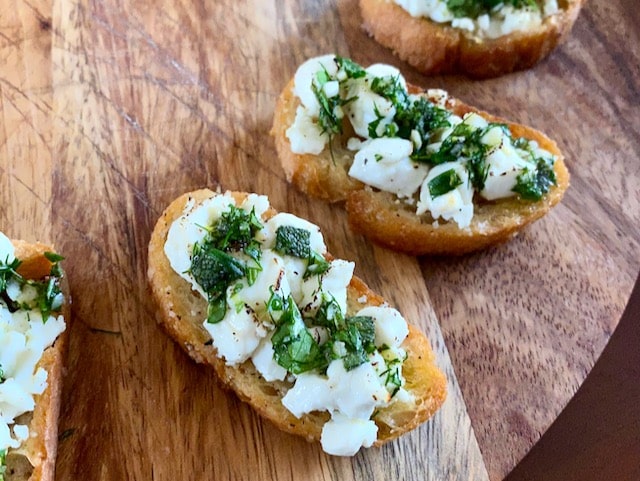
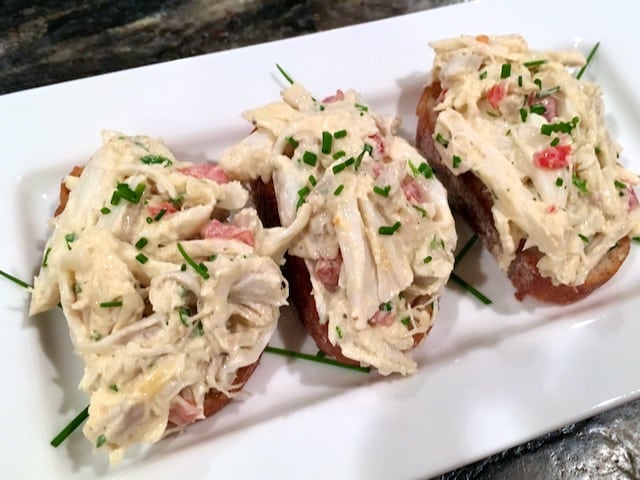
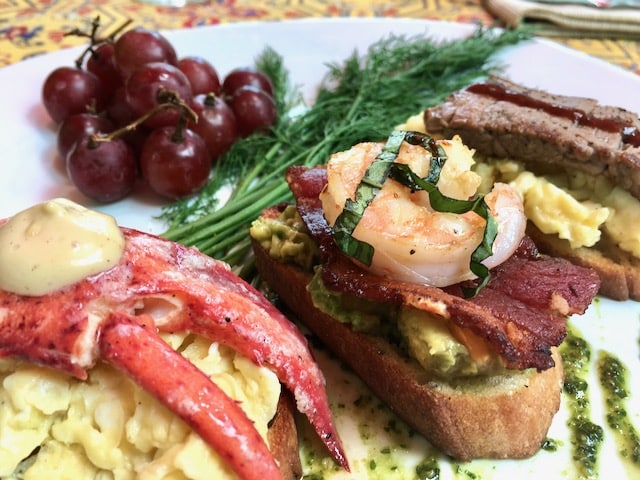
Crostini is nothing more than a blank canvas for culinary creativity. Toppings can be as simple as classic tomato bruschetta or as elevated as lobster salad. With endless possibilities, you can follow traditional recipes or simply use the ingredients you have on hand and get inspired to craft your own unique combinations. Once you master the perfect crispy base and understand which flavors complement each other, the real fun begins. You’ll soon find yourself creating delicious toppings from pantry staples, leftovers, and discovering new flavor pairings. Here are some popular combinations to get you started:
Goat Cheese with Fig Jam
Ricotta & Herbs
Tomato Bruschetta
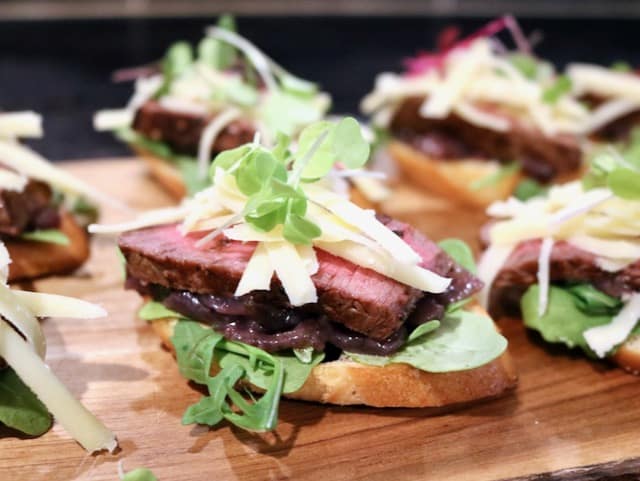
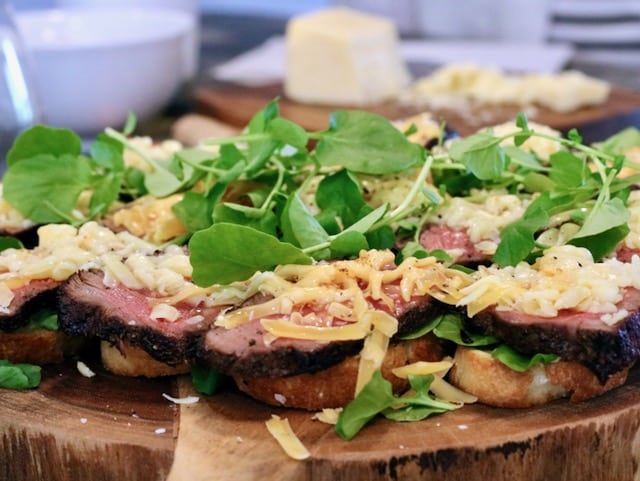
Beef & Horseradish Sauce
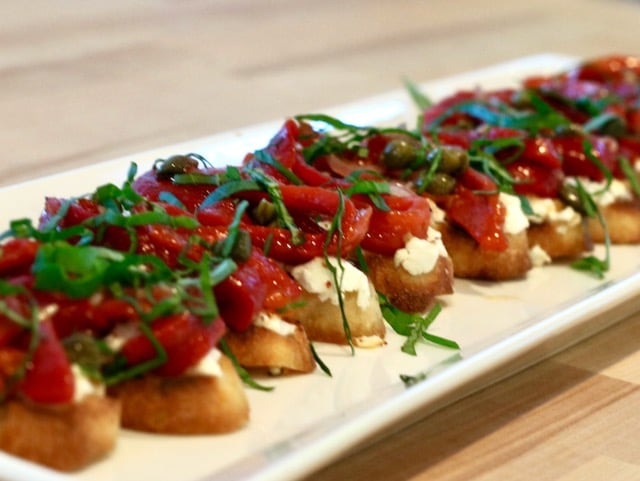
Goat cheese & Roasted Peppers
Olive Tapenade
Whipped feta & tomatoes
Goat cheese, Whipped Feta or Ricotta Cheese with Truffle Honey
Crostini with Goat Cheese & Roasted Peppers
Crispy toasted baguette slices are layered with smooth goat cheese, marinated roasted red peppers. This is an elegant yet easy appetizer.
Like most things in the kitchen, mastering crostini comes down to trial and error. Over time, I’ve picked up a few tricks that have made the process easier, more consistent, and even more delicious—and I’m excited to share them with you!
The Secret to Evenly Oiled Toasts
Traditional recipes call for brushing the bread with olive oil before baking. While that sounds great in theory, I found it to be time-consuming and inconsistent—some spots would end up drenched in oil while others stayed too dry. Plus, it made a mess! Then I had a lightbulb moment– olive oil spray. A quick, even mist of extra virgin olive oil spray (not Pam or canola spray) gives you perfectly crisp, golden crostini every time—no fuss, no waste, and no greasy fingers.
Homemade Always Wins
I’ll keep this one short and sweet: store-bought crostini just don’t compare. They’re often dry, overly crunchy, and lacking that fresh, toasty flavor. Once you make your own, you’ll never go back!
Size Matters
When it comes to crostini, smaller is better. A narrow baguette works best, creating bite-sized toasts that are easy to eat in one or two bites. Anything larger, and you’re veering into open-faced sandwich territory!
Master these simple tips, and you’ll be on your way to making crostini that are effortless, elegant, and packed with flavor. Trust me—you’ll taste the difference!
Make Ahead Tips:
Slice the baguette and store for up to one day in a zip- lock bag, with the air squeezed out. This way, the bread is ready to spray, season and toast when you are.
Many of the toppings can be prepared at least one day in advance such as herbed ricotta or whipped feta. Just be sure to bring things topping close to room temperature before serving, especially vegetables or certain cheeses.
If your topping can handle some garlic flavor, take a peeled clove of garlic and rub it on the toasted bread slices before serving. This is a great tip from Ina Garten. You won’t believe the level of flavor it adds. (Do this sparingly- it adds more flavor than you think!)
Preheat Oven to 425 degreees F. Line a sheet rtay with parchment paper.
Slice Baguette at a slight angle, about 1/3- 1/5 inch thick. (I prefer thinner, but they need to be thick enough to hold toppings. Need to use some judgement.)
Lay the bread slices in a single layer on the parchment lined sheet tray.
Spray the toasts with the EVOO. Spray enough to coat them so they have some oil to absorb and crisp up, but don't saturate them or they will burn before crisping or risk getting soggy.
Sprinkle with salt and pepper.
Flip and repeat- EVOO, salt, pepper.
Bake for 6-8 minutes. Check for doneness. Flip if desired. Bake in 1 one minute increments until lightly toasted and crisp. Set aside to cool. (They should continue to crisp)
Notes
A great way to add another layer of flavor is to rub a peeled garlic clove on on side of the baked toast. It really changes the flavor and is perfect for some toppings that pair well with garlic such as tomatoes, olives and some meats.
Whether you’re hosting a backyard barbecue, enjoying a picnic with friends, or simply craving a healthy snack, this versatile dip is the perfect accompaniment to any gathering.
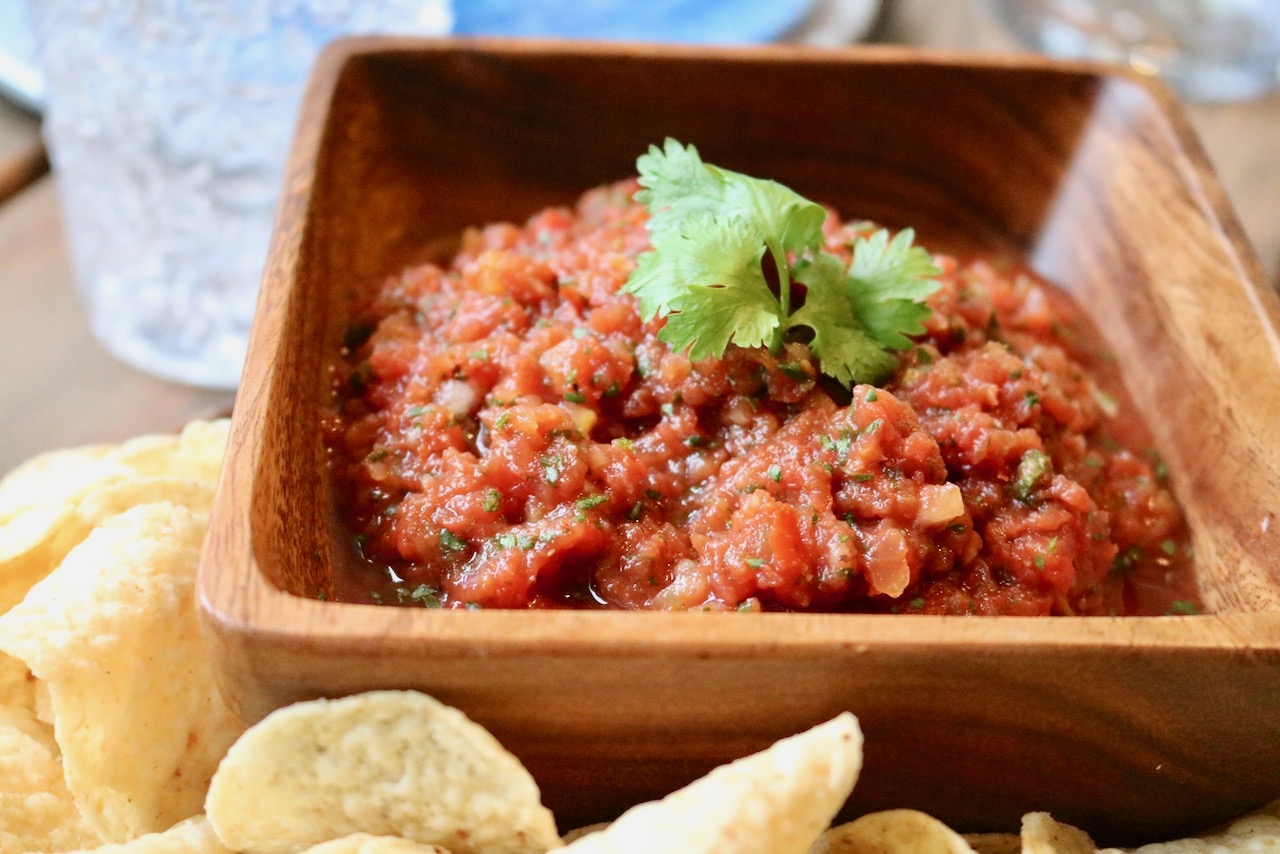
This homemade salsa recipe is made with juicy tomatoes, onions, zesty lime juice, and a kick of cilantro. The result is a salsa that bursts with vibrant flavors. You can easily adapt the recipe for spice by adding and increased or decreased amount of diced jalapeños.
Not only is salsa delicious, but it’s also packed with nutrients. Tomatoes are rich in vitamins and antioxidants, while herbs and vegetables add fiber and hydration. Pair your salsa with crispy tortilla chips, use it as a topping for tacos, or mix it into your favorite dishes for an extra burst of flavor.
Best of all, making salsa at home is incredibly simple! With just a few fresh ingredients and a little chopping, you can whip up a tasty salsa in no time. So the next time you’re in the mood for a zesty treat, try making your own homemade salsa and watch it disappear quickly! Enjoy!
Whether you’re hosting a backyard barbecue, enjoying a picnic with friends, or simply craving a healthy snack, this versatile dip is the perfect accompaniment to any gathering.
Prep Time30 minutesmins
Total Time30 minutesmins
Course: Appetizer, condiment
Cuisine: Mexican
Servings: 4people
Equipment
Food processor
Ingredients
1 1/4lbsripe Roma tomatoesabout 5 – 6
114.5 oz can petite diced tomatoes*
2green onions (scallions)ends trimmed, chopped into thirds
1/3cupchopped onion
1jalapeno pepperseeded and roughly chopped
1/3cupfresh cilantro
1large clove garlicroughly chopped
2Tbspfresh lime juice
1/2tspchili powder
1/4tspground cumin
1/2tspgranulated sugaroptional / to taste (not need when tomatoes are in season)
Salt and pepper to taste
Instructions
With the machine running, drop the garlic and jalapeño through the feed tube to finely chop.
Add the onion, and pulse to chop, about 3 pulses.
Add the remaining ingredients and pulse to chop until desired consistency is reached, about 8 to 10 pulses. You want to make sure the ingredients are chopped, NOT pureed. Texture is key! Taste and adjust seasoning accordingly. Depending on desired consistency, strain salsa to remove excess liquid.
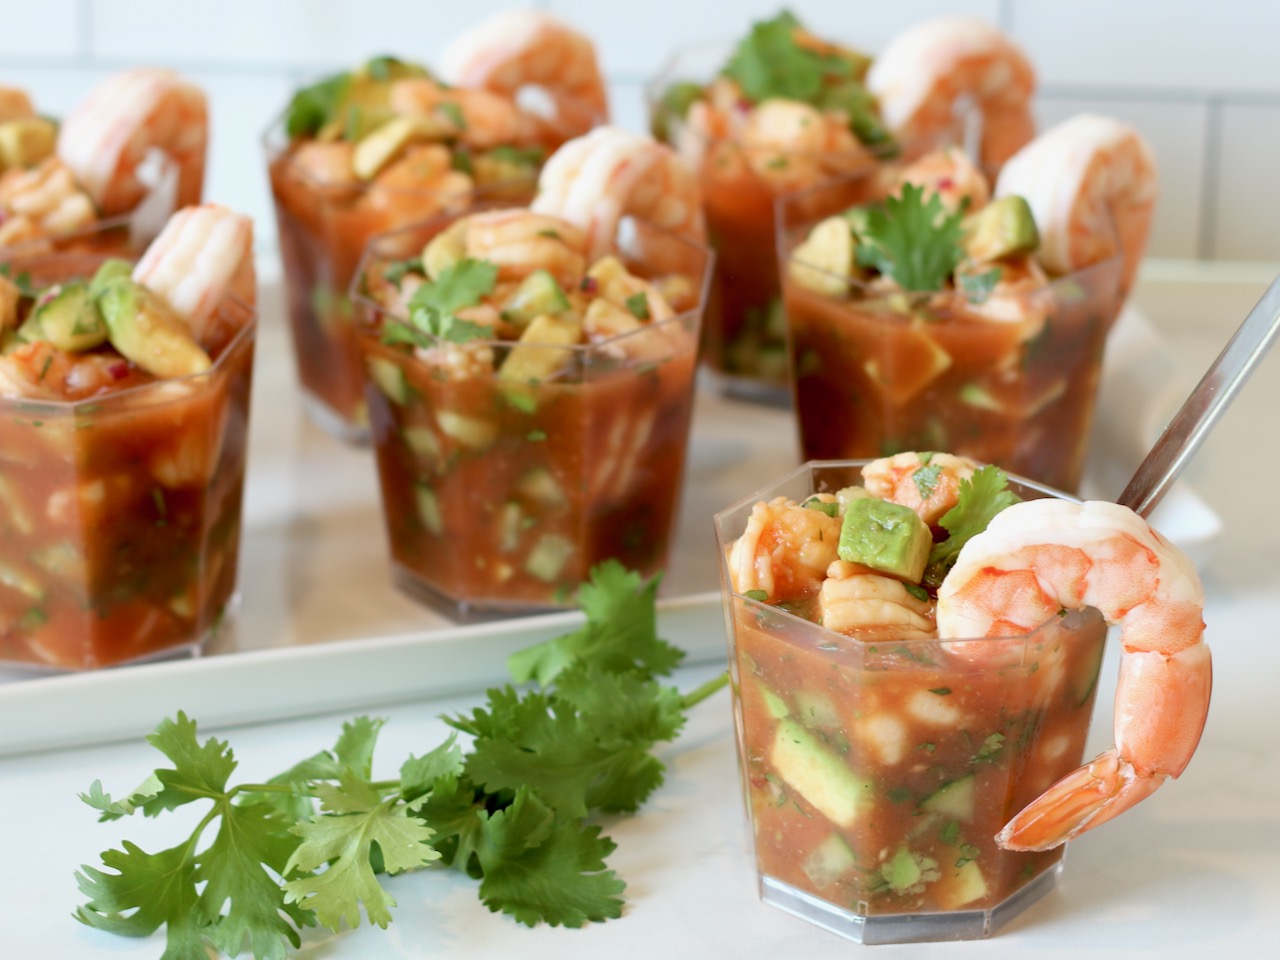
Everyone loves shrimp cocktail! But let’s face the facts- it’s overly popular and most of the time, not very flavorful. On the other hand, Mexican shrimp cocktail is jam packed with flavor! It’s cold, crisp and damn delicious!
This is such a great dish to serve in the summer when everyone really appreciates a cold, refreshing seafood dish. The tomato sauce is tangy, the cucumbers are crisp and crunchy and the shrimp are briny and meaty. It may just be the perfect combination of flavors and textures of any dish. Every bite is unique and equally as delicious.
I like to serve this Mexican Shrimp Cocktail as an appetizer, along with fresh guacamole and a pitcher of cold margaritas. Seriously, who wouldn’t love to kick off an afternoon BBQ with that?!
About sourcing Shrimp
The quality of shrimp that is most readily available mostly comes from shrimp farms in Asia or Latin America. I encourage you to read the back of the bags most frozen shrimp come in to see the list of chemical solutions the shrimp are preserved in. Personally, I cannot pronounce most of them. In addition to being raised in overcrowded pens, the shrimp are fed poor quality feed and antibiotics. All of which end up in our food supply.
It is very important to understand that these farmed shrimp are what you commonly are sold by your fish shop or food store behind the counter, and almost always what you are served in restaurants. The source of shrimp are rarely advertised to the buyer or diner. Be sure to ask if the shrimp are farmed or wild. Additionally, never ever be fooled by the term “sustainably sourced” as it means absolutely nothing beneficial to the consumer. I recommend doing some independent research and trying to source quality, wild shrimp whenever possible.
Feaster’s Tips:
You can assemble this dish 1-24 hours advance. However, don’t add the avocado or cilantro until right before serving.
This dish is low calorie, low fat, low carb and Gluten free! (Winning!)
Serving Suggestions for Mexican Shrimp Cocktail
This is a fabulous dish to serve in a big bowl and let everyone help themselves, or serve as individual portions. (I love anything that can be served individually.) I make this shrimp appetizer when we are enjoying a Mexican themed night which is great for group gatherings. I like to set out individual portions of Mexican Shrimp Cocktail, Guacamole & Chips, and serve Chicken Enchiladas for dinner. All of which can be pre-made so you can enjoy the company and the food.
About the Avocado
The avocado is an optional ingredient in this dish. I encourage it, but Avocados can be tricky to buy. They are pricey and when you slice into an under or over ripe one, its so frustrating! Here is a helpful article on how to select the perfect Avocado.
Fresh shrimp, tomato juice, cucumber, jalapeños & avocado are combined with seasonings to deliver a refreshing and exciting appetizer. The perfect starter for a summer gathering.
Prep Time30 minutesmins
Cook Time5 minutesmins
Course: Appetizer
Cuisine: Mexican, Tex-mex
Keyword: individual appetizer, shrimp
Servings: 10people
Ingredients
For the Shrimp
2poundsmedium size shrimp (Approx 31-35 per pound) deveined, tail shells removed. (Thawed if frozen) (+ extras if you want to garnish each serving with extra poached shrimp)
1/4 cup kosher salt
1/4 cupsugar
For the Cocktail Mixture
2cupChilled Tomato Juice(Sacramento brand if you can find it)
1cupChilled Clamato Juice
1cupKetchup
.5cupFreshly squeezed lime juice
1tbspWorcestershire sauce
2tbspHot Sauce (Not Tabasco-Frank's hot sauce recommended.)
2cupsEnglish cucumber-seeded, 1/8-1/4 inch dice
4tbspjalapeños – seeded and finely diced
1cupred onion – finely diced
2-3medium avocados –halved, pitted, and cut into 1/4-1/2 inch pieces right before mixing in.
4tbspchopped fresh cilantro
Instructions
Prepare the Shrimp
Fill large bowl halfway with ice and water. Set aside.
In a medium pot, combine the salt, sugar, and 6 cups of water. Bring to a boil over medium-high heat.
Add the shrimp to the boiling water mixture and poach for about 2 minutes, until the shrimp are pink and opaque. (Note: The water will not fully return to a boil once you add the shrimp.) If you are nervous about the shrimp not being cooked, pull one and slice to make sure they are cooked through.
Transfer shrimp to ice bath and let cool for 3 to 5 minutes. Once cool, pay dry and cut each shrimp into 2-3 bite size pieces per shrimp, depending on size.
**If garnishing with one shrimp per serving, be sure to set these shrimp aside!
Assemble the Mexican Shrimp Cocktail
In a large mixing bowl, combine tomato juice, clamato juice, ketchup, lime juice, worcestershire sauce, and hot sauce. Mix well. Add the cooked, chopped shrimp, cucumber, jalapeño & red onion and gently stir until evenly coated.
Cover and chill in the fridge for at least one hour and up to 24 hours. Taste for seasoning once all the flavors have married. Add salt, pepper hot sauce, and/or lime juice to taste.
Right before serving, gently fold in the avocado and cilantro.
To serve, portion into individual cups, and optionally garnish with one cooked shrimp. Serve with a bowl of lime wedges, chips and extra hot sauce on the side.
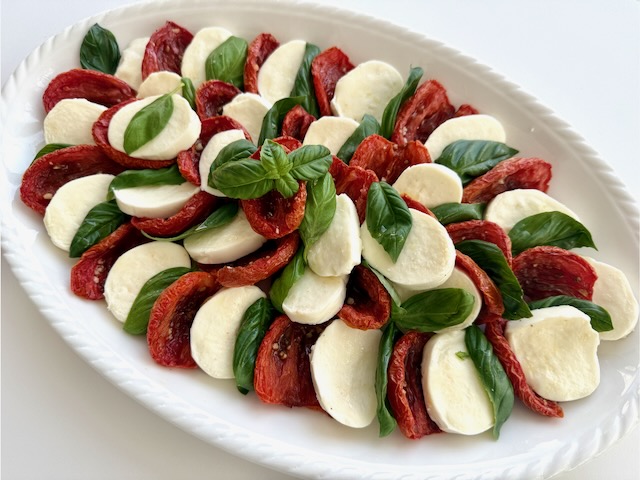
Elevate the classic Caprese salad with this Roasted Caprese Recipe! Juicy cherry tomatoes are roasted until blistered and caramelized, then paired with creamy mozzarella, fresh basil, and a drizzle of balsamic glaze. The warm, roasted tomatoes bring out an incredible depth of flavor, making this dish perfect as an appetizer, side, or light meal. Simple, elegant, and bursting with freshness—this is Caprese like you’ve never had before!
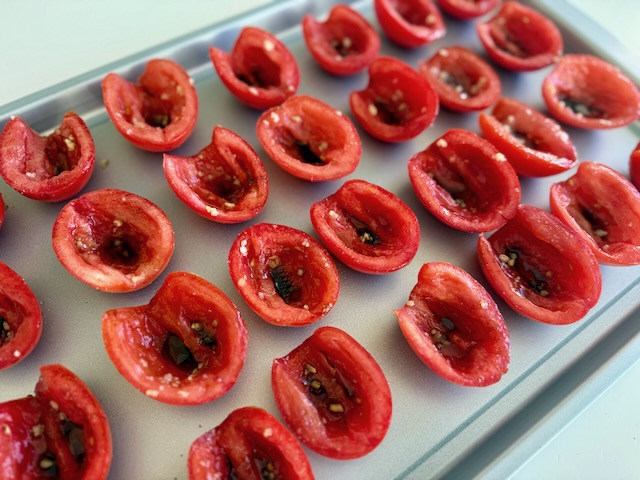
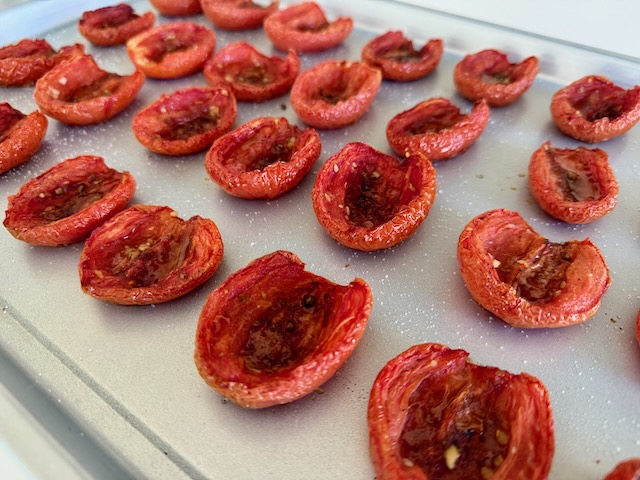
Half & Core Plum Tomatoes. Season with Salt, Pepper, Garlic and drizzled with EVOO & Balsamic Vinegar. Roast for 1.75 – 2 hrs at 275°F.
Caprese commonly refers to a tomato & mozzarella topped with basil. The more common variety of this salad features fresh tomatoes, fresh mozzarella and fresh basil. And while nothing is quite a wonderful as a vine ripened fresh tomato in the peak of summer, nothing is quite as terrible as a tomato grown halfway around the world in the dead of winter. So with one of two main ingredients being extremely seasonal, it’s hard to find a really good Caprese salad in the northeast, during winter. The solution is to roast the tomatoes! And they are so good, you may never want to serve a raw slice of tomato again!
Once out of the oven, let cool and serve at room temperature and store for up to 1-2 days in the refrigerator.
Slow roasting plum tomatoes in the oven helps bring all their sweetness and delicious rich flavors out. The tomatoes are absolutely delicious served by themselves, in a salad, alongside a chicken or steak, but my favorite way to serve these roasted tomatoes is by making a Caprese platter to serve to friends or bring to gathering.
Arrange artfully on a platter of any size. Serve as is or with a drizzle of balsamic glaze.
With so few ingredients in this Caprese salad, or any Caprese salad, the quality of the ingredients in this dish is vital to its success. You need to select really good fresh mozzarella, preferably from a good Italian market or cheese shop. I use a basic balsamic vinegar for the roasting, and I finish with a high quality, thick balsamic that I use sparingly for drizzling.
Make Ahead: The roasted tomatoes can be made up to 2 days in advance but be sure to pack them gently in a single layer, if possible. Bring to room temperature before serving.
Elevate the Classic Caprese salad with Slow Roasted Tomatoes. Plum tomatoes are roasted at 275°F until blistered and caramelized, then paired with creamy mozzarella, fresh basil, and a drizzle of balsamic glaze.
Course: Appetizer
Cuisine: Italian
Servings: 8people
Ingredients
12plum tomatoeshalved lengthwise, seeds removed and excess liquid drained.
1/4cupgood olive oilplus more for drizzling
1 1/2tbsbalsamic vinegar
2large garlic clovesminced
2tspsugar
Kosher salt and freshly ground black pepper
16ozfresh salted mozzarella
12fresh basil leavesjulienned
Instructions
Preheat the oven to 275° F.
Arrange the tomatoes on a sheet pan, cut sides up, in a single layer.
Drizzle with 1/4 cup of olive oil and the balsamic vinegar. Sprinkle with the garlic, sugar, 1 1/2 tsp kosher salt, and 1/2 tsp pepper. Roast for 2 hours until the tomatoes are concentrated and begin to caramelize.
Allow the tomatoes to cool to room temperature.
Cut the mozzarella into slices slightly less than 1/2-inch thick. (If the slices of mozzarella are larger than the tomatoes, cut the mozzarella slices in half.)
Layer the tomatoes alternately with the mozzarella on a platter and scatter the basil on top.
Sprinkle lightly with salt and pepper and drizzle lightly with olive oil and a very good quality, thick balsamic vinegar or syrup.
Serve at room temperature.
Notes
The roasted tomatoes can be made up to 2 days in advance but be sure to pack them gently in a single layer, if possible. Bring to room temperature before serving.
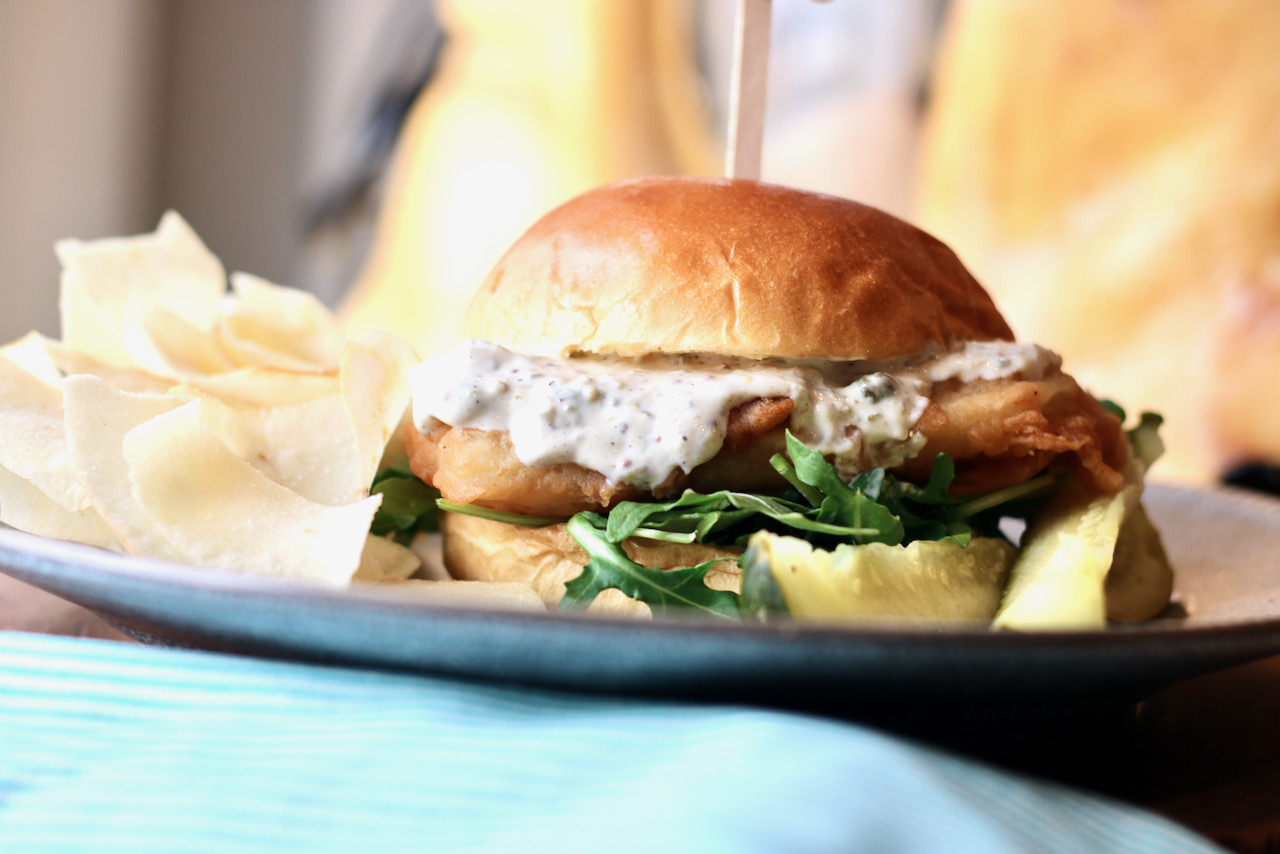
Tartar sauce is the perfect accompaniment to fried fish and once you make this easy homemade version, you will NEVER buy it from a store ever again. This very easy tartar sauce recipe is significantly better tasting than anything from a jar, and it only take 3 minutes to make.
Change it up and make a delicious Fried Fish Sandwich with homemade Tartar Sauce
To make this easy recipe, you simply add all the ingredients in the food processor and pulse until well combined. That’s it! Its extremely flavorful and can be made at least 3 days in advance.
The Best Fish and Chips
The best Fish & Chip recipe is a batter that is thin and crunchy encapsulating a moist, flavorful piece of cod. Serve it with a tangy, homemade tartar sauce that is very easy to make.
The most perfect accompaniment to fried fish of any kind.
Course: condiment
Cuisine: British, Seafood
Ingredients
1/2cupgood mayonnaise
2tablespoonssmall-diced pickles or cornichons(drained and patted dry)
1tablespoonChampagne or white wine vinegar
1tablespooncapers(drained & patted dry)
1teaspooncoarse-grained mustard
Pinchkosher salt
Pinchfreshly ground black pepper
Instructions
Place all the ingredients in a food processor or mini chopper fitted with a steel blade and pulse several times until the pickles are finely chopped and all the ingredients are well mixed but not pureed.
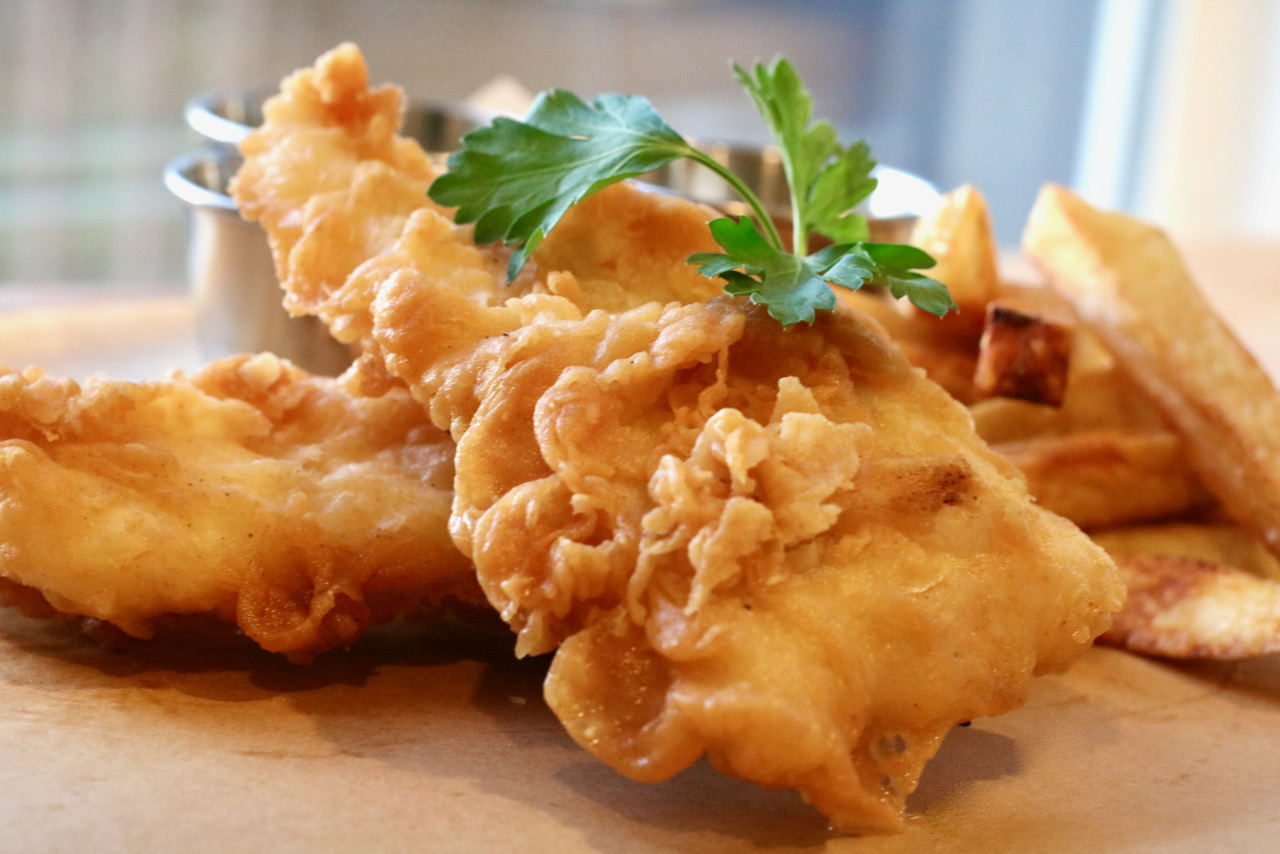
Finally… A Foolproof Fish & Chips Recipe that brings the British Pub Classic right into your kitchen!
“Fish & Chips” is a classic British pub food that transcends borders and has captured the hearts and taste buds of countless people around the globe. Succulent fillets of fish, encased in a crispy golden batter, served alongside piping hot, perfectly cooked potato fries. Mmmm- It’s a match made in culinary heaven.
Anyone who is a true Fish and Chip lover knows that when ordering it out, disappointment is more common than satisfaction. It can almost become an obsession trying it over and over again, seeking out that perfect, crunchy bite that rarely is found. This beloved English classic has lost its way here in America, and has gone all wrong. But I was determined to figure out how to make it right.
And after testing countless fish & chip recipes, watching videos, and reading endless articles on the history of this British classic, I finally found the best fish & chips recipe that produces perfect results. If you can follow directions, you can make the best fish & chips in town!
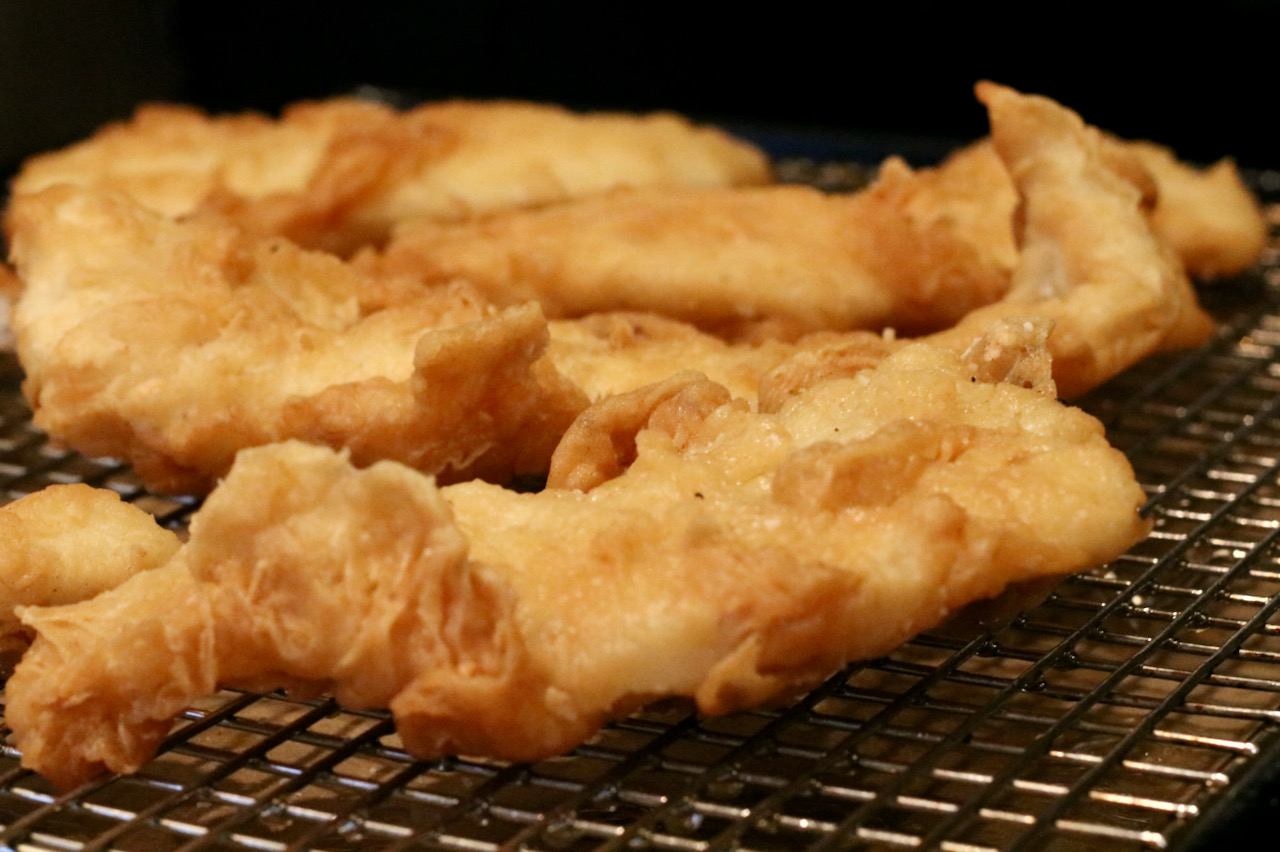
The batter is the secret to perfect Fish & Chips.
The best Fish and Chip recipe starts with a good, strong batter. The batter’s job is to encapsulate the fish to form a crust, allowing the fish to steam within the crust and never crack. If the batter is done well, no oil will ever penetrate the batter and have direct contact with the fish’s flesh. (When that happens, you get greasy, soggy fish.)
The batter mixture should be thin, yet tacky enough to cling to the fish. It needs seasoning, but not so much that it over powers the delicate flavor of the cod, or other white fish.
Once cooked, the batter should be very crispy and crunchy and not at all doughy. It should stick to the cooked fish when cutting through it, and not pull off and separate from the fish.
It should never, ever, ever be soggy or greasy.
What I have learned is that there is only one way to ensure a crispy coating on the outside, and a moist, delicate fish on the inside. You have to make it yourself.
And after testing a wide variety of recipes, watching videos, and reading countless articles on the history of fish and chips, I finally found a great recipe the produces the perfect results. If you can follow directions, you can make these fish & chips.
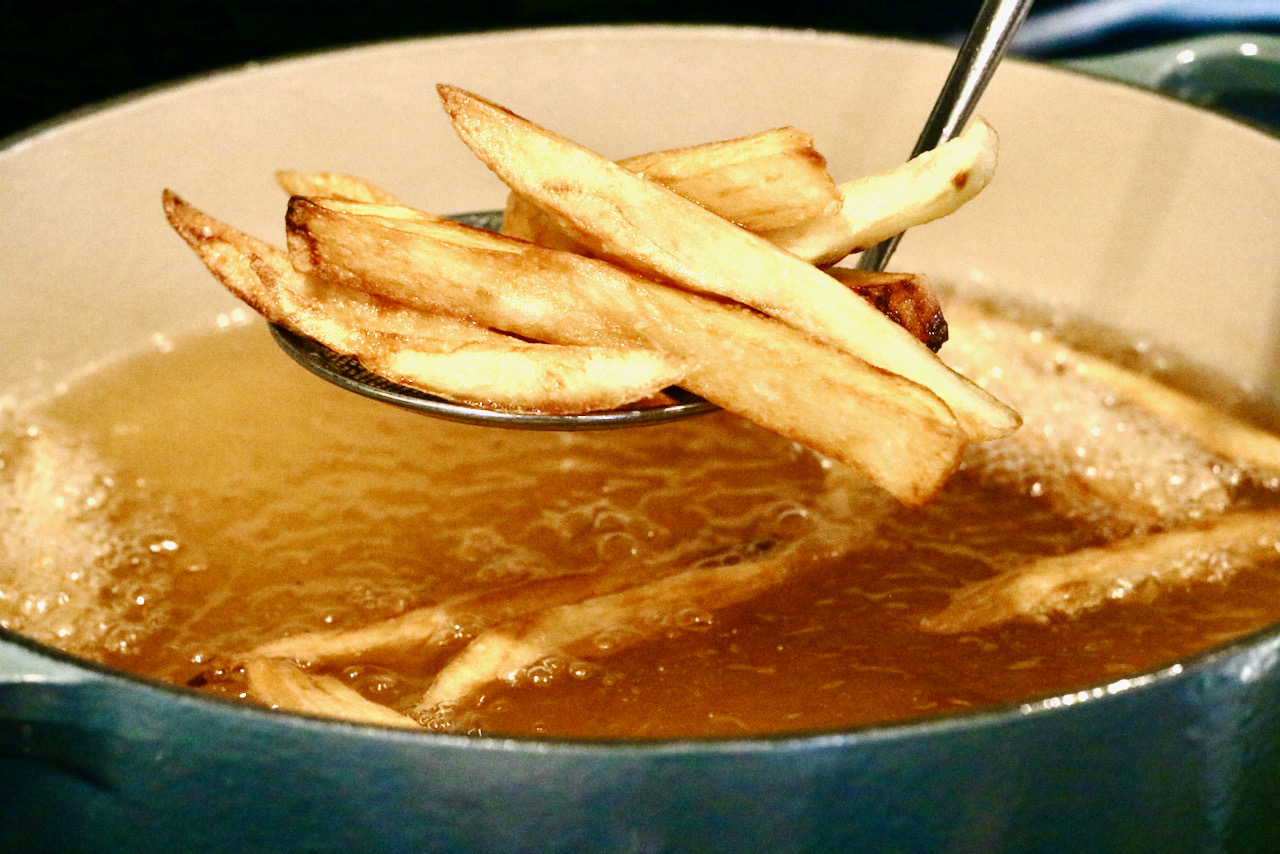
Nanny’s Traditional English Chip Recipe
I found my now treasured fried fish recipe in the America’s Test Kitchen archives, and while their fish recipe is great, the chip recipe was not up to my standards. They cook their potatoes in the microwave and this is far (very far!) from traditional. This is not what I was looking for when trying to achieve a traditional fish & chip experience. I prefer to make my chips just as I was taught from my husband’s English grandmother, Gladys. We all called her Nanny and she would want you to as well.
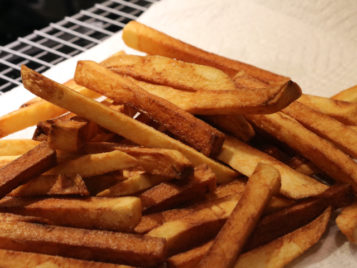
Nanny made her chips for over 90 years so why mess with perfection? Her method is rustic, and involves hand peeling the potatoes imprecisely- that is to leave some of the skin on the potato. The thickness of the chips is also imprecise, but should be about 1/2 inch thick. As a child, my husband Brett, would watch her expertly peel and cut the potatoes with a pairing knife, dropping the chips into the fresh water as they were cut, removing the starch, eagerly awaiting the time they would be fried. Nanny would then pat the chips dry on tea towels and ready them from frying.
Gladys hand style chips are simply the best. They are the right shape and thickness, and brown beautifully when fried. Don’t mess with a good thing.
When frying Fish & Chips, I prefer to work two separate pots of oil to ensure the potato flavor is not influenced by the fish oil. However, its a personal choice and I am sure many people fry both the fish and the chips in the same oil.
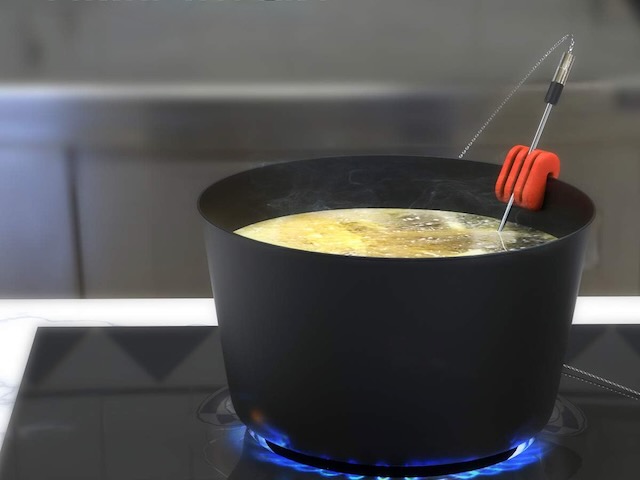
The Real Secret to Success is Temperature
If you really want to take your frying game for fish & chips, or frying anything, to the next level, then I HIGHLY RECOMMEND getting a Thermoworks Dot and probe. This tool can be used to monitor the exact temperature of the oil throughout the cooking process, which can fluctuate greatly when frying. For example, you could set the oil temperature to 375°F, but once you drop anything into the oil, it WILL drop. Monitoring the temperature with a Dot allows you to adjust your heat control accordingly to get it back up to the right temperature and maintain it while frying until golden brown.
If frying in batches be sure to wait for the temperature to reach 375° again before dropping.
Fish & Chips is a very nostalgic dish and if you take a moment to read some of the comments that have been sent in from folks who have tried this recipe, you’ll start to understand how special this recipe really is.
Made this tonight – perfection! Exactly what I was looking for and tasted sooooo good. Big hit with the rest of the family as well – THANK YOU!
KC
I grew up in the Scottish town of Kearny, NJ where Fish & Chip shops were everywhere, so I am a Fish & Chip-aholic! Having moved away many years ago, I’ve been searching for a wonderful recipe to make it myself. Two years ago, I spent a week in Scotland and ate Fish & Chips seven (7) nights in a row! Never tire of it!!!!
Gerry
February 23, 2025
Since I can remember my mother made fish and chips. Being English and working in my Grandad’s chip shop she had the recipe memorized. Fast forward to today and dementia has claimed that recipe. I learned sourdough at my dad’s side but never the fish and I am grieving it’s loss. Hopefully I will be able to create something close with this.
Felicity
November 3, 2024
I’ve waited 30 years for this recipe. I’ve tried countless F&C batter recipes and NONE have been satisfactory. I did yours with not only cod but with shrimp as well. Fried everything in 3 batches and the fish and shrimp stayed glass brittle crunchy from the first fry all the way through dinner and beyond. This will be the only recipe that I’ll use for fish. Can’t wait to try it on crappie and rock cod! Thanks!
Alan
January 25, 2025
Soooo good! I used a deep fryer recently received as a gift, but having used oil in a pot before, I might try that next time instead. The fish was delectable and stayed crispy, which was fantastic. My British-born husband declares it a hit!
Shelia
February 8, 2025
WOW! Oh My Goodness this is wonderful. Yes, it’s messy but so worth it. The fish is so crispy and crackly even after refrigerating the leftovers. It reheats beautifully. You can’t get decent Fish N Chips near me so Thank You So Much for sharing your recipe.
Diane
March 6, 2025
I’ve never been good at frying…but you promised us that if we followed your instructions, we would have authentic Fish and chips, so I tried it. It was easy, just a little messy, and absolutely perfect. Thank you so much for teaching us this recipes.
Laurie
March 7, 2025
This was delicious. First time making fish and chips,instructions were ideally laid out, nice write up beforehand and perfect outcome. Thank you!!! Keith
Crispy on the outside, moist on the inside. Classic fish and chips are always best homemade. The real secret to this recipe is using a fresh, quality piece of flaky white fish, such as cod or haddock.
Prep Time15 minutesmins
Cook Time15 minutesmins
Course: Main Course
Cuisine: British
Servings: 4people
Ingredients
3poundsRusset potatoesabout 4 large potatoes.
3quartscanola oil for fryingplus 1/4 additional cup
3cupsall-purpose flour
1cupcornstarch
½teaspooncayenne pepper
½teaspoonpaprika
1/4teaspoonground black pepper
3tspDiamond kosher salt
2teaspoonbaking powder
1 ½ – 2pounds1-inch-thick cod filletor other thick white fish, such as hake or haddock cut into approximately 3-ounce pieces. (Thoroughly dry fish with paper towels)
up to 3cupsbeer24 ounces, cold. (Any beer will work in this recipe, even nonalcoholic beer with the exception of dark stouts and ales.)
Instructions
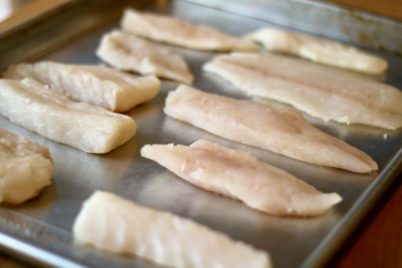
1. Prep the fish
Slice fish into your preferred size portions. I like smaller pieces, about 2 ounces per piece, but sometimes you need to follow the natural cuts of the filet. You want portions that are evenly sized as much as possible. Pat dry with paper towel and set aside in the refrigerator.
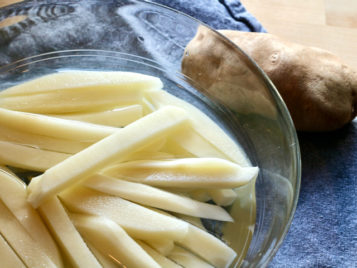
2. Prep the potatoes
Peel the potatoes and slice off the “top & tail” to square off the ends of the potato and discard. Cut each potatoes lengthwise into 1/2 inch fries. Add potato pieces into a water bath for about 30 minutes.
Remove from water and pat dry with paper towel.
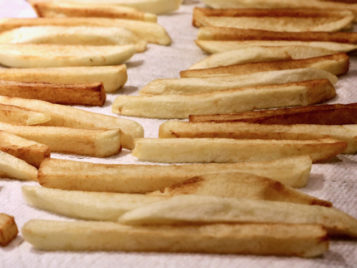
4. Fry the Potatoes
In heavy-bottomed Dutch oven (about 7 quart capacity), heat TWO of the three quarts oil over medium heat to 350°F. Pro Tip: Use a Oil safe Probe to monitor and control temperature for perfect results. Add fries to hot oil and increase heat to high. Fry, stirring with mesh spider or slotted metal spoon, until potatoes turn light golden and just begin to brown at corners, 6 to 8 minutes.
Transfer fries to paper towels to drain.
3. Set up the dredging station
Whisk the flour, cornstarch, cayenne, paprika, pepper, and salt in a large mixing bowl.
Remove 1.5 of a cup of the flour mixture and add it to a casserole dish and set this flour & dish aside.
Go back to the flour mixture that remains in the bowl and add baking powder. Whisk to combine.
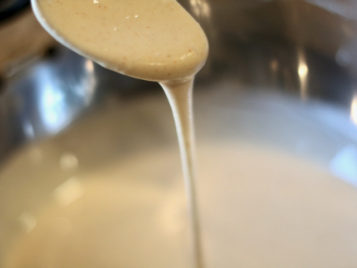
Add 1.5 cups beer to the flour mixture in the mixing bowl and stir until mixture is just combined (batter will be lumpy). Add remaining beer as needed, 1 tablespoon at a time, whisking after each addition, until batter falls from whisk in thin, steady stream and leaves faint trail across surface of batter.
5. Dredge & fry the fish
With the fries done, increase the heat of the oil to medium-high, add remaining quart of oil if necessary and heat oil to 375°F. Pro Tip: Use a Oil safe Probe to monitor and control temperature for perfect results. (Meanwhile, thoroughly dry fish with paper towels. Dredge each piece of fish in the flour mixture shaking off excess flour. Dip 1 piece of fish in batter at a time and let excess run off, shaking gently. Place battered fish back into the dish with the flour mixture and turn to coat both sides. (This is messy, but worth it!)
If you are working with a partner in the kitchen you can now add each piece directly to hot oil if or, if you choose, keep pieces in single layer on baking sheet and repeat until all pieces are coated. (It’s best if you have one person frying and another dredging. However, you can certainly do it in batches if working alone, just be careful not to let it sit too long to avoid the batter sticking to the sheet pan)
Tip: As you add the fish, you will likely need to adjust the heat to keep it maintained at 375-385°F. Not adjusting your temperature to maintain oil temperature when frying is a common, and costly, mistake. The fish will not crisp up. But make it too high, and everything will burn. Use an oil safe thermometer for best results.
Fry the fish, stirring occasionally, until golden brown, about 5 minutes depending on thickness. Use a kitchen spider to remove fish from hot oil and transfer fish to a sheet pan lined with a gridded cooling rack. Never walk away!
Tip: If you are unsure about the doneness, remove one piece of fish and use an instant read thermometer to test for a minimum of 145° F.
6. Re-fry the potatoes
Add the previously fried potatoes back to the hot oil for about 2 minutes to crisp up. Remove to fresh paper towel or directly to a cooking rack. Immediately sprinkle with sea salt or kosher salt.
Serve hot
Serve fish & chips with traditional malt vinegar and tartar sauce.
Notes
• You can keep fish hot and crispy in a 200° F. oven for about 10 minutes if you are cooking in batches. • This recipes makes a large amount of batter. It can be reduced by half if you choose.• I prefer to use separate pots of oil for the fish and the chips to avoid your chips tasting, well, like fish! But its totally a personal preference and influenced by the quantity you are making.
Easy Tartar Sauce Recipe
This homemade version is significantly better tasting than anything from a jar and it only take 3 minutes to make.
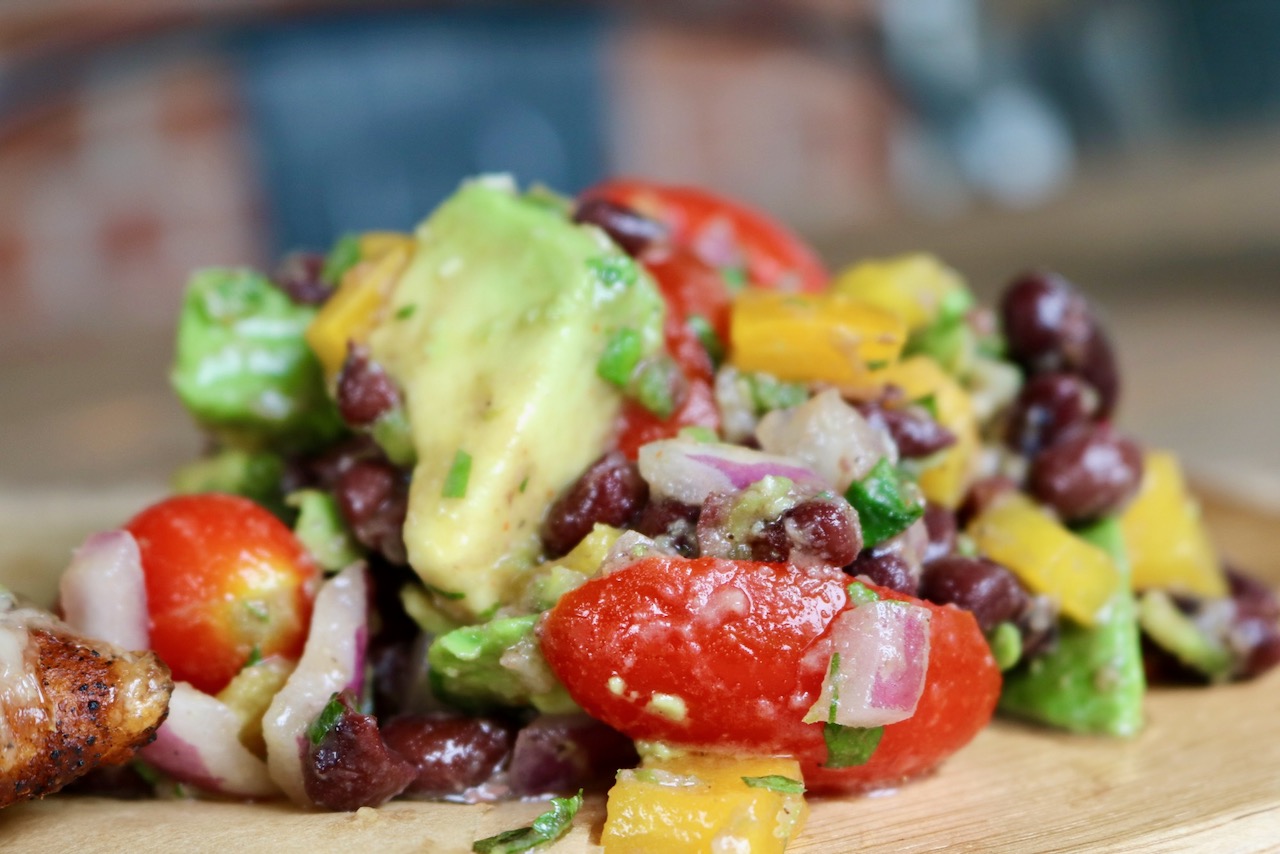
This Mexican-inspired guacamole salad is heart-healthy, gluten-free and vegetarian. It’s both colorful and delicious!
When making Mexican style foods, we often think of rice and/or beans as the obvious side dish. But Ina Garten’s guacamole salad provides a more vibrant, fresh, healthy option. This is a great recipe to serve alongside enchiladas, tacos and other hearty Mexican inspired meals.
This salad is as refreshing as it looks!
This recipe is heart healthy, gluten free, vegetarian, low-carb and simply bursting with flavor. Does it get better than that? YES, it does. This salad is simply beautiful to look at- just look at all those colors! And it can be made in advance!
How to buy Avocados?
According to “Love one today” (A site dedicated to avocados) “The best way to tell if an avocado is ripe is whether it yields to a gentle squeeze in the palm of your hands.” They have the best breakdown on how to choose avocados based on your expected time of use. It’s a very helpful chart! Check it out!
Pro Tips:
This recipe doubles well, but be sure to use a big bowl so you can carefully mix everything without smashing the vegetables, especially the beans and avocado.
To make in advance, prep all the vegetables except for the beans and avocado. Make the dressing and store in a mason jar. This can all be refrigerated at this point. When ready to serve, bring everything to room temperature (or close to) and then add the beans and the dressing (be sure to shake it up well first!) and then finally gently fold in the avocado.
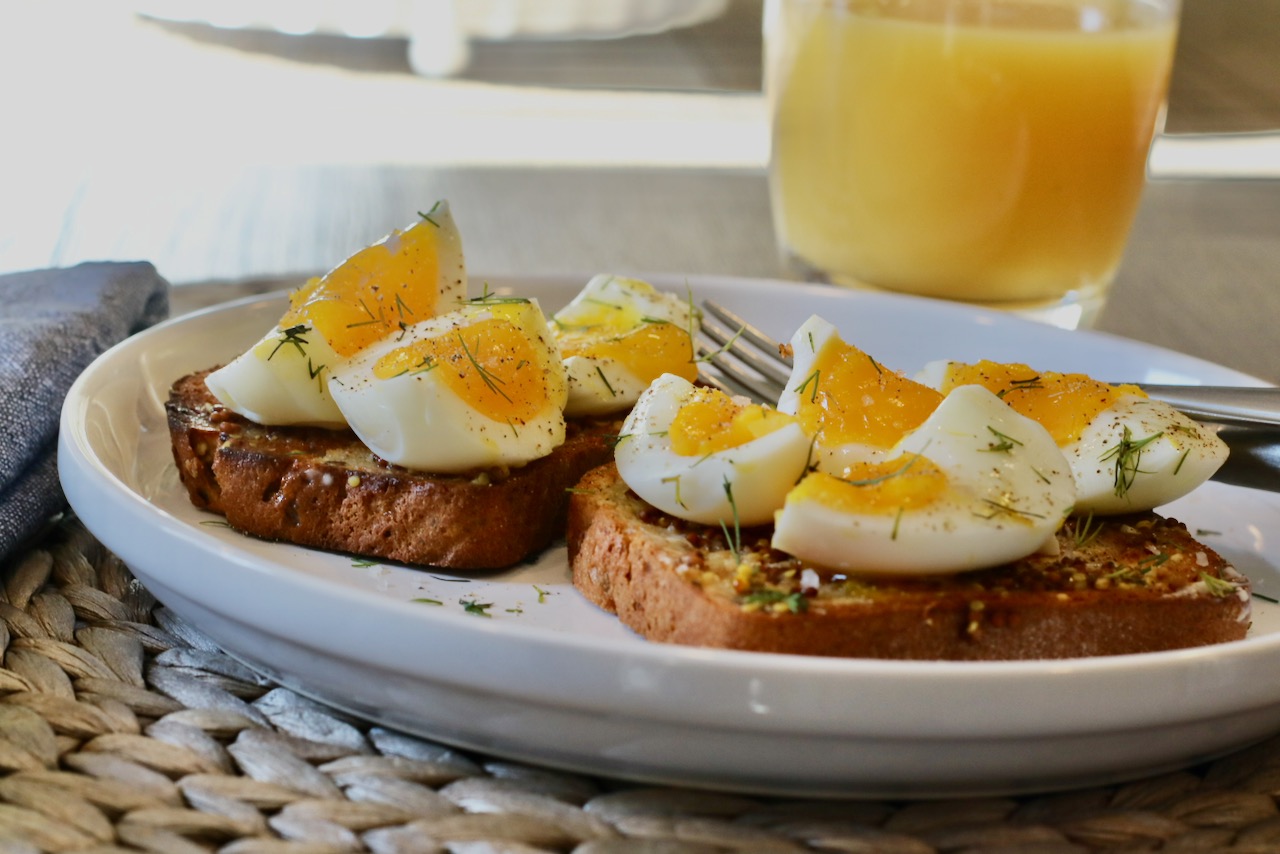
There is nothing more lovely than a farm fresh egg on a Sunday morning. I often make the classic over easy eggs with toast and bacon because I never get tired of that oozy, gooey yolk to dip my bread in. However, sometimes I like to change it up! After all, variety is the spice of life! This Jammy Eggs on Toast recipe is nothing more than a soft boiled egg with some perfectly selected seasonings that elevate the dish making it restaurant worthy.
Finding joy in an easy breakfast recipe
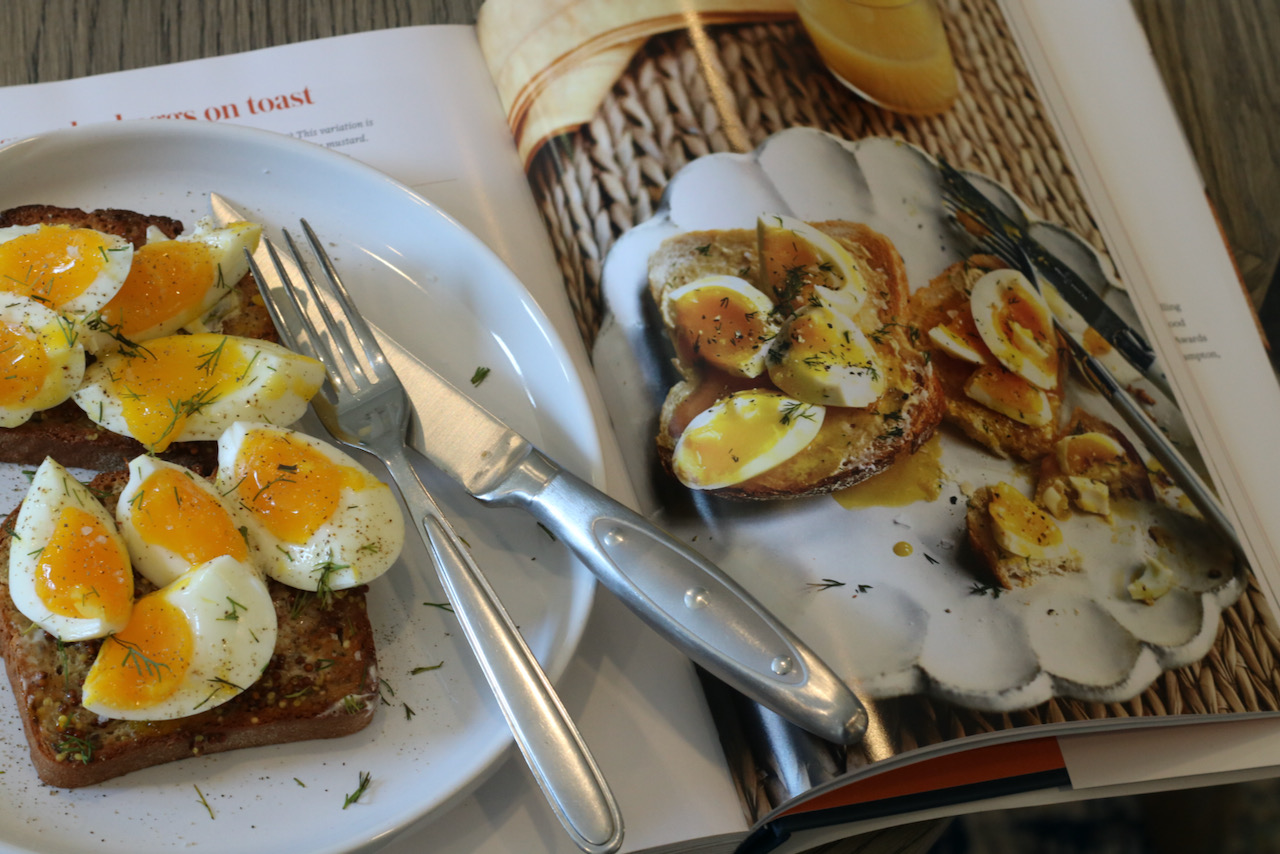
The problem with changing up the basic breakfast is that sometimes the recipes are just too complicated and time consuming for early in the morning. So when I found a recipe in Ina Garten’s cookbook, Modern Comfort Food, that had only a few ingredients and looked delicious, I was very excited to give it a try.
Don’t you love when a recipe comes out looking just like the cookbook? I do!
There is actually a substantial difference in Ina’s recipe and mine and that is how we each make our eggs. My method has yielded perfectly jammy yolks and cooked through whites each and every time,. I prefer my method compared to Ina’s because Ina adds her cooked eggs to an ice bath for a few minutes after cooking, and simply put, I like hot jammy yolks, not cold ones.
This recipe for a perfect soft boiled egg on toast is such a delicious way to enjoy a beautiful farm fresh egg and it couldn’t be any easier or impressive. This is the perfect breakfast to make for houseguests, a regular breakfast or a special occasion. It’s simply impressive and simple. What’s better than that?
Feaster’s Tip:
The eggs are the star of this dish and so I highly recommend using good quality eggs. (Eggs are never the item on your shopping list that you want to compromise quality on.) If you are interested in learning more about the difference in eggs and how to select the best eggs, click here.
With the whites compleatly set and the yolks just starting to cook through, the results are stunning!
Prep Time2 minutesmins
Cook Time5 minutesmins
Course: Breakfast
Cuisine: American, French, International
Keyword: eggs
Servings: 4
Ingredients
4cold eggslarge or extra large
4slices of toast
4tbsbutter at room temperature
4tbswhole-grain mustard
4tbsminced fresh dill
kosher salt & freshly ground black pepper
fleur de sel (finishing sea salt)
Instructions
Carefully add the eggs to a pot of water, large enough for the eggs to have space to not knock into each other.
Bring the water with the eggs to a boil. (Do not walk away- watch for the water to start to boil or the eggs will over cook!)
When the water starts to boil, start a timer for exactly 3 minutes. If the water is boiling too intensly and the eggs are moving too much around, bring it down to a lower boil.
Carefully remove the eggs using a slotted spoon from the water, and set aside.
As soon as the eggs are cool enough to handle, peel the eggs.
Meanwhile, toast the bread. Spread each slice with 1/2 tbs of butter, then 1/2 tbs of whole grain mustard.
Place each egg on the center of each toast and slice the eggs down the middle, and then across, for 4 quarters. Be careful not to slice through the toast.
Sprinkle with dill, kosher salt & pepper. Finish with a sprinkle of fleur de sel (sea salt.)
Anyone who knows me knows without questions that I am an Ina Garten fan. Correction- I am a mega fan. Not a day goes by that Ina isn’t on my mind. I ask myself constantly, “WWID?” She is my culinary soul mate. She just doesn’t know it it.
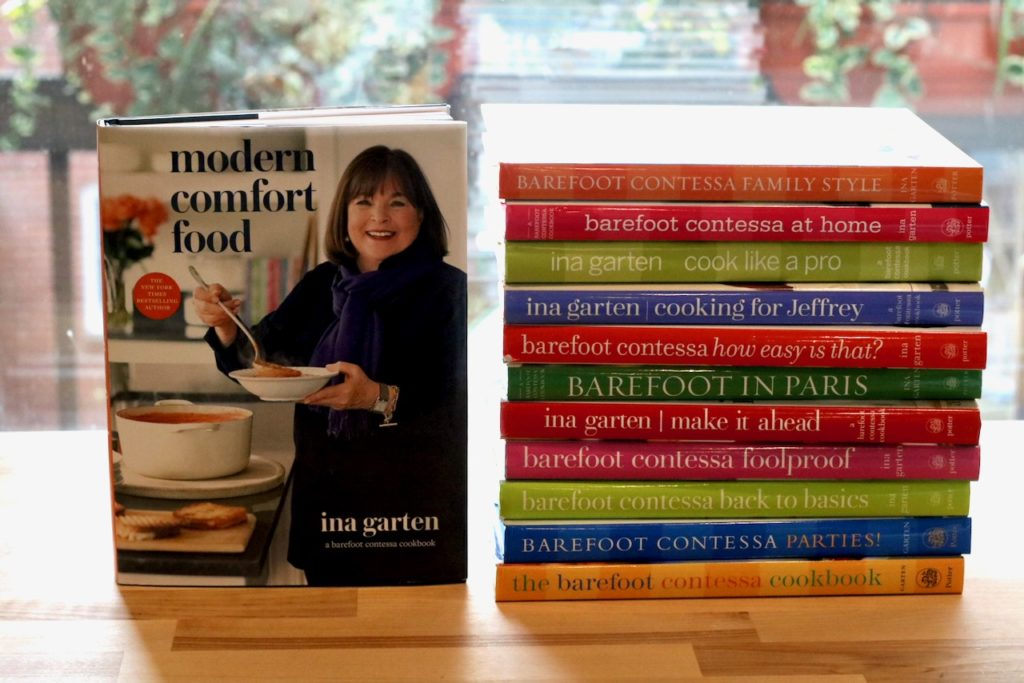
I own every single one of the Barefoot Contessa cookbooks and they are my prized possessions. I never get tired of flipping through them. Ever.
The reason why I am so loyal to Ina and her cookbooks is because they are reliable. Period. I have made countless recipes of hers. No, seriously, I mean actually countless. I tried to count and lost track. There are maybe one or two that didn’t come out as good as I had expected. But zero have actually disappointed me. Additionally, Ina’s cookbooks feature incredible pictures that don’t just inspire me, but they are real. When I follow her recipe it actually comes out looking just like the picture. See below are decide for yourself:
Ina Garten’s Modern Comfort Food Recipe pictures compared to mine.
So when her latest cookbook, Modern Comfort Food, was released in October 2020, I was one of the first to order it.
When it first arrived I was excited as ever! I couldn’t wait to sit down with a glass of wine and my stack of post-its, and go slowly, page by page, reading each recipe, the notes, and get inspired by the pictures.
I’ll be honest. My first time looking it over, I wasn’t so impressed! Looking back I’m not sure why. I thought I wouldn’t want to make too many of the featured recipes in Modern Comfort Food. Well, I was wrong because guess what happened next? I started cooking. And I couldn’t stop. And dare I say it, but it may be her best cookbook yet. It is a fantastic cookbook and I am obsessed.
It started with the sausage & peppers. Which I have now made twice in two weeks. Then onto the Cauliflower with lemon and capers which is now my absolute favorite way to make cauliflower. Then, although I have made both before, a re-visit & rekindled love for Ina’s homemade caesar dressing & green salad vinaigrette.
Next came smashed eggs over toast, and the creme de le creme… the creamed spinach with baked eggs.
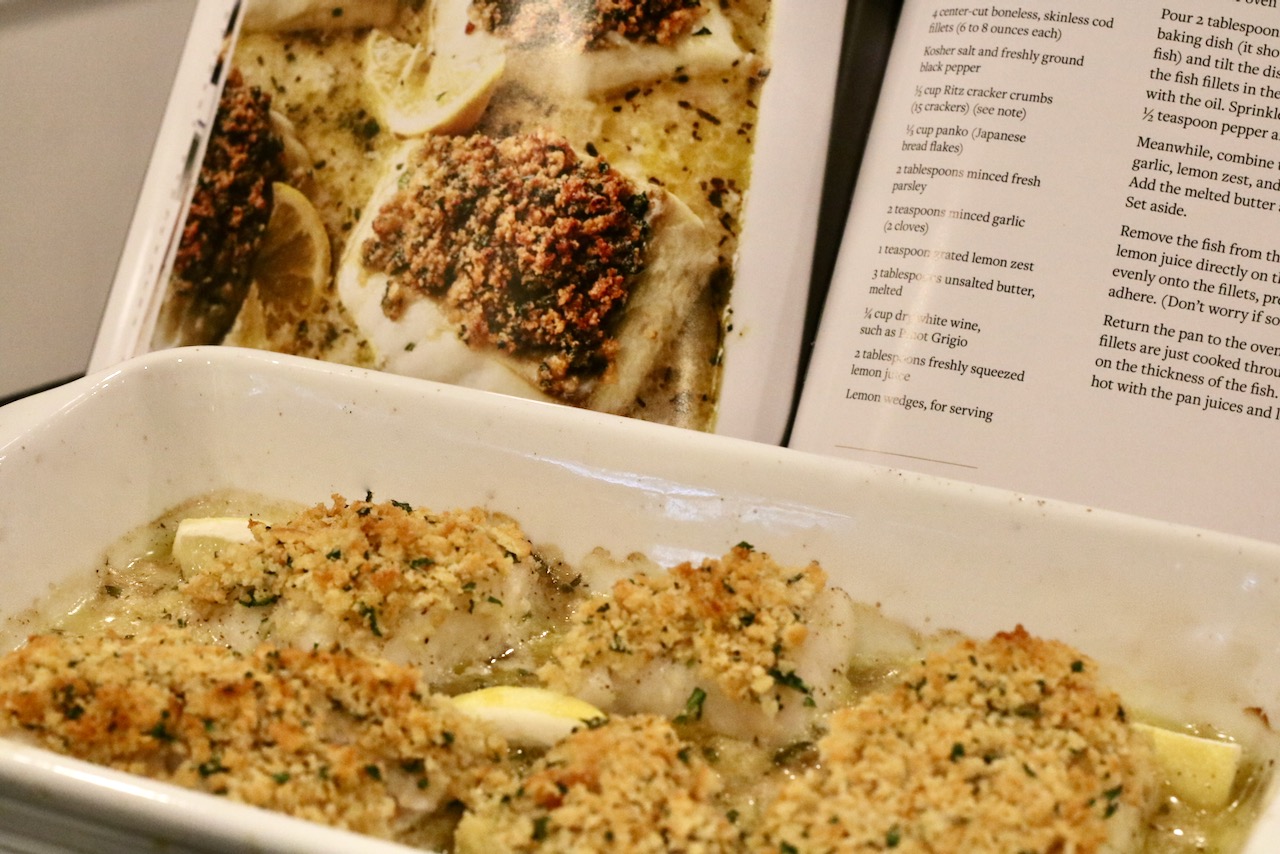
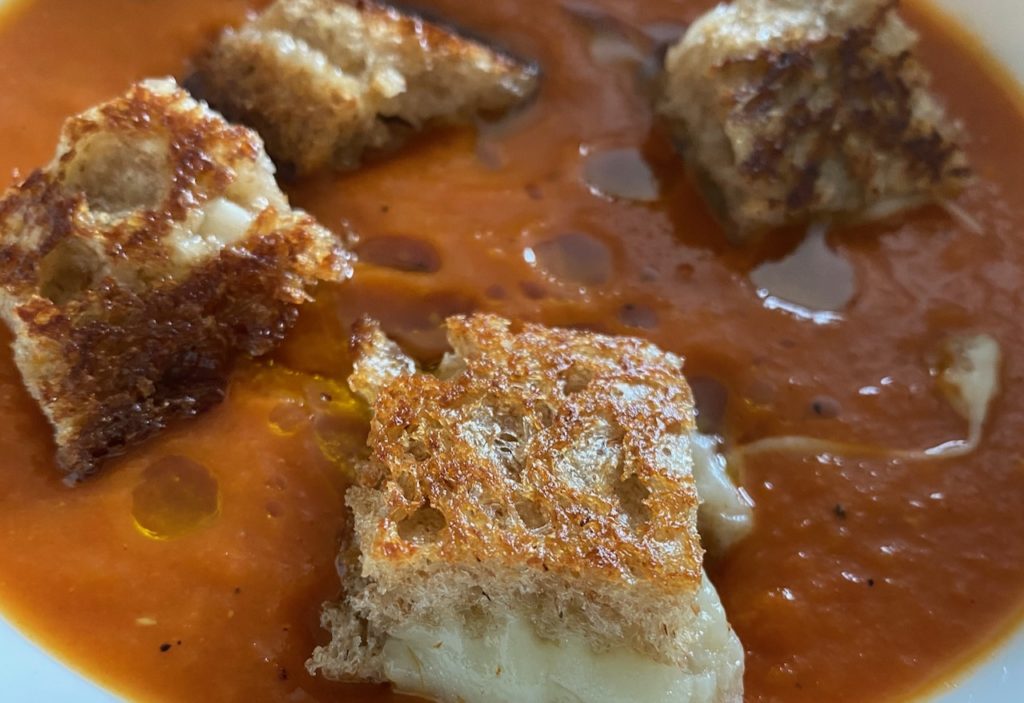
It didn’t stop there. I made the Baked Cod with garlic & ritz crumbs, ultimate tuna melts and creamy tomato soup.
The creamy tomato soup is incredible!
I kept cooking. I made the grilled oysters with lemon dill butter (I roasted them- Shhhh! Don’t tell Ina.) I made the fig & cheese toasts and the potato galettes with smoked salmon.
Every single recipe has impressed me. I don’t know how she does it. Ina Garten has a impeccable palate, a way of making seemingly difficult recipes approachable, and her recipes can be counted on.
Modern Comfort Food is the newest released cookbook by Ina Garten
In each of Ina’s cookbooks she offers tips, stories and recommended products. In Modern Comfort Food she included some of her favorite staple ingredients. And contrary to what some may think about her cooking being “too fancy”, the ingredients are actually quite basic and include things like DeCecco pasta, Goya chipotle peppers in Adobo sauce, and Hellman’s Mayo. She has done her homework, so it’s best just to trust her recommendations and buy what Ina does. I do!
I highly recommend this cookbook if you are looking for new inspiration, new skills and recipes you can really rely on. I have no doubt that within the next two months I will have made just about every recipe featured in the Modern Comfort Food Cookbook. I confidently give it 5 stars!
I’m off to the kitchen… Ina’s Penne Vodka is on the menu! (Recipe from the Foolproof Cookbook.)
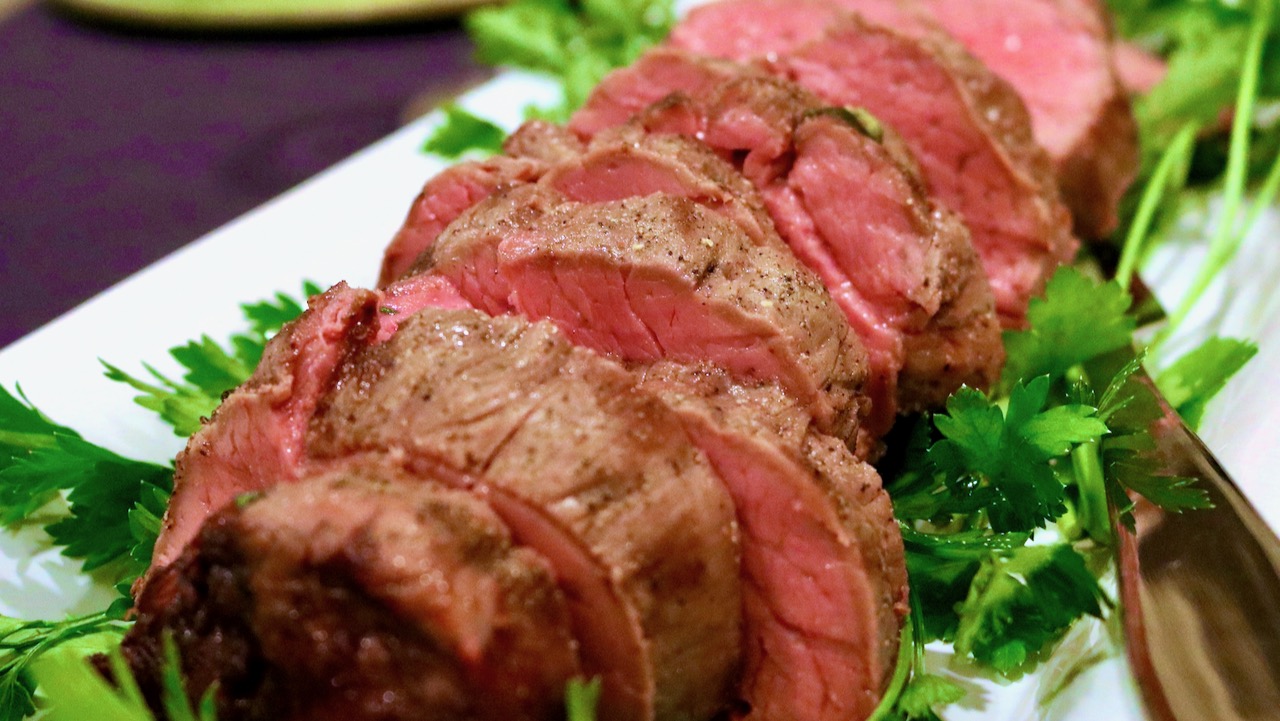
Beef Tenderloin is the ultimate special occasion meal.
Everyone loves a roasted filet of beef and for good reason- when cooked properly it is described as “melting in your mouth.” It’s the most tender cut from the cow and is universally known as a luxury meal. So when it comes to holidays and special occasions, Ina Garten’s Slow Roasted Beef Tenderloin recipe is always what I make.
When you decide to invest in making this beef tenderloin recipe, you want to make sure you have everything you need to ensure absolute perfection and this is where I can help.
The right tools make all the difference
What you need to guarantee a stunning beef tenderloin that is cooked to perfection:
No data was found
How to Choose a Good Beef Tenderloin
When it comes to selecting a good cut of beef, Trager Grills advises to “avoid beef that is a dull color, or has an excess of juice in the package. These are signs that the beef wasn’t stored properly, or has been sitting in the case for too long.” I agree with the advice so I always try to buy fresh, never frozen, beef tenderloin whenever possible. When beef is vacuum sealed, the excess moisture is squeezed out of the beef which it sits in and this impacts the texture and ability to brown. Additionally, when meats are packed and sold vacuum sealed, this usually indicates it was previously frozen and mass distributed. While that is fine for some recipes, this one works best if you can source a fresh, dry cut from a butcher’s counter.
Filet Mignon Vs Beef Tenderloin- What’s the difference?
It can be confusing that this cut of beef often goes by a few names including filet mignon, filet of beef, filet, beef tenderloin, roast beef, and châteaubriand. So what’s the difference? Well, much of this depends on your region, and your butcher’s preference, although there are some differences in the cuts. For example, filet mignon typically refers to an individual steak cut off the tenderloin. Châteaubriand refers to the center cut, or most prized part, of the whole beef tenderloin. If you want to learn more about the names and cuts of beef, check out this article from Kitchn– A complete guide to steak.
6 Steps to Beef Tenderloin Perfection
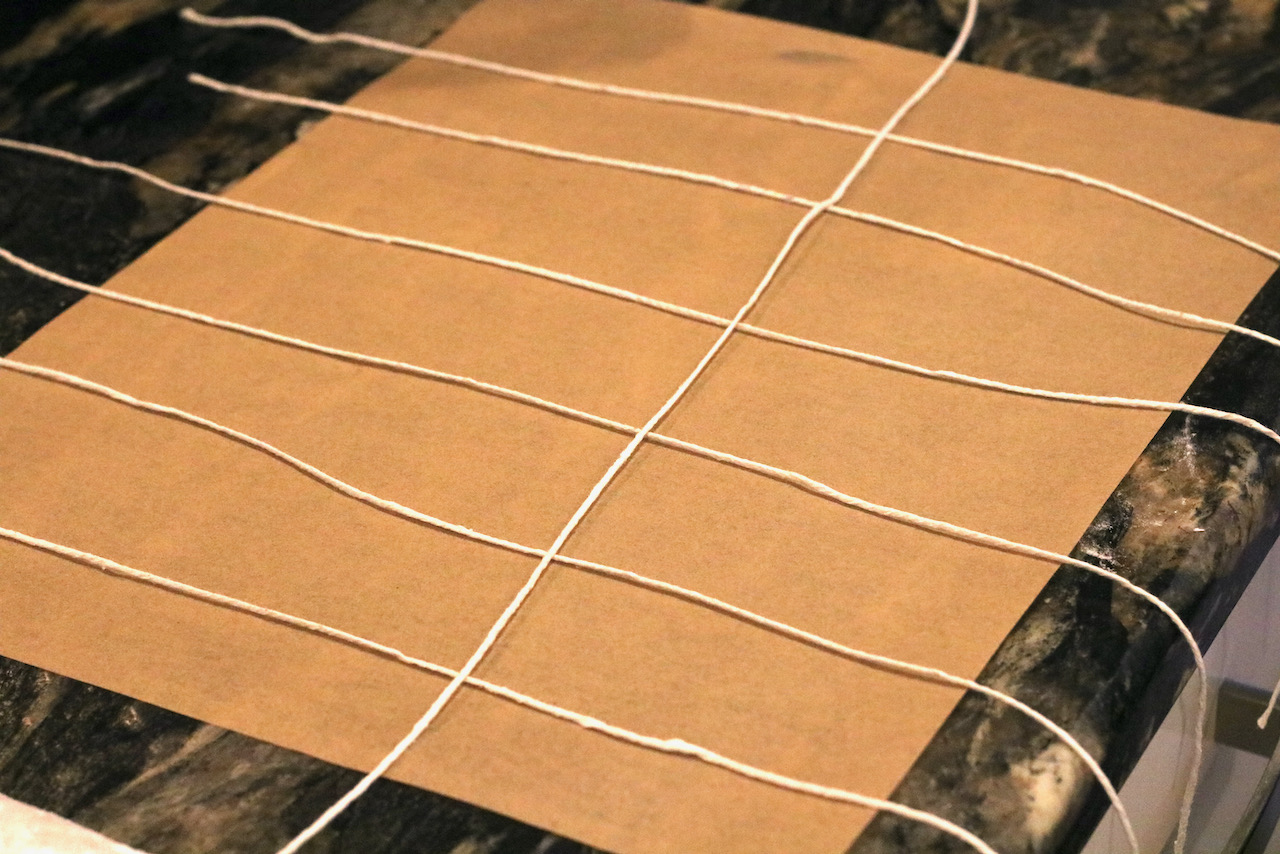
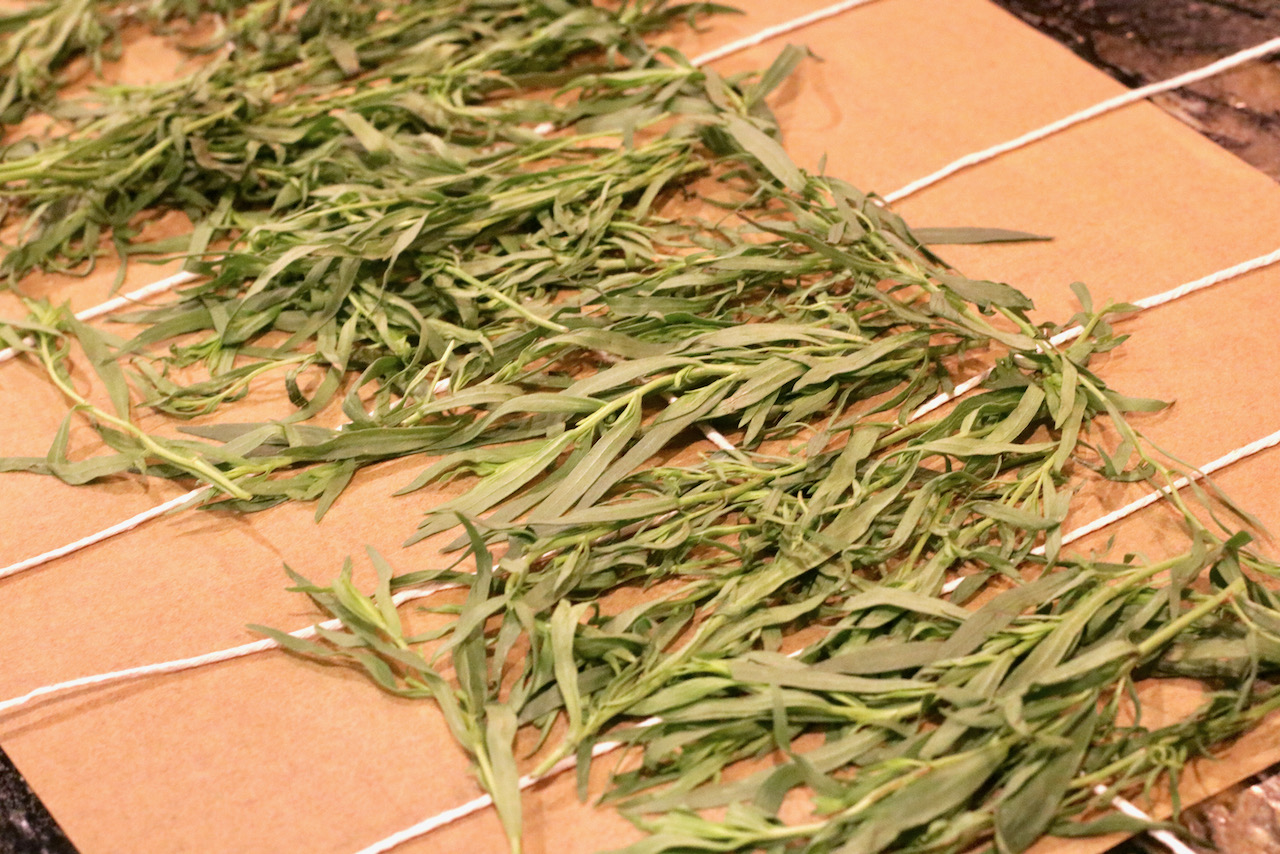
Step 1- Prepare the Twine
Lay Butcher’s twine in vertical strips about 3 inches apart and one 2.5 times the length of the roast down the middle.
Note: If your beef is already tied, leave in place and wrap this layer less tightly just to hold the herbs in place.
Step 2- Time for Tarragon
Lay the tarragon leaves across the twine. It doesn’t need to be perfect- a rustic approach is fine.
Note: You don’t have you use tarragon if you can’t find it or don’t like it, but you’d be missing out!
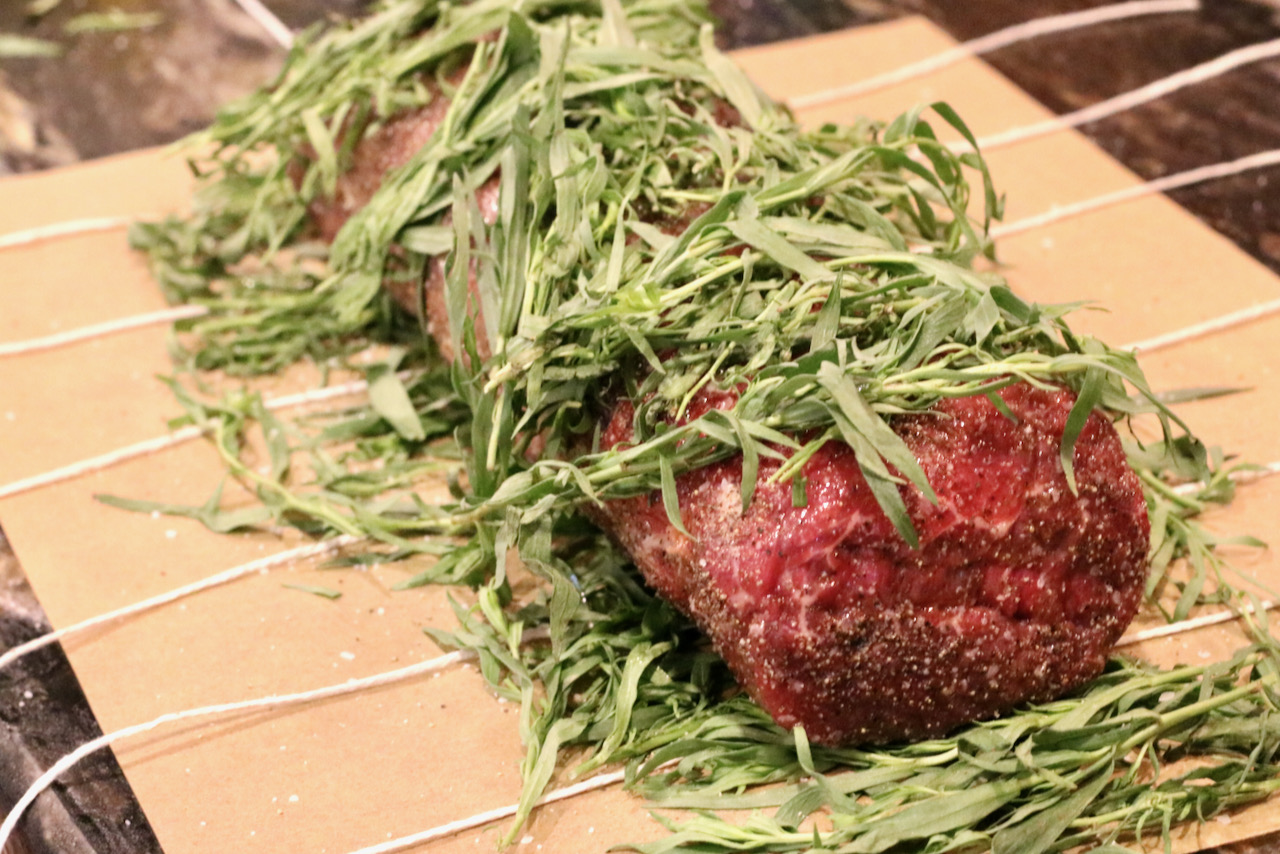
Step 3 – Season and more Tarragon
Season the beef generously with Kosher salt & fresh cracked pepper.
Place the Tenderloin onto the tarragon leaves then top the roast with the remaining tarragon placing it in various directions to cover it as much as you can. There is no wrong way to do this step.
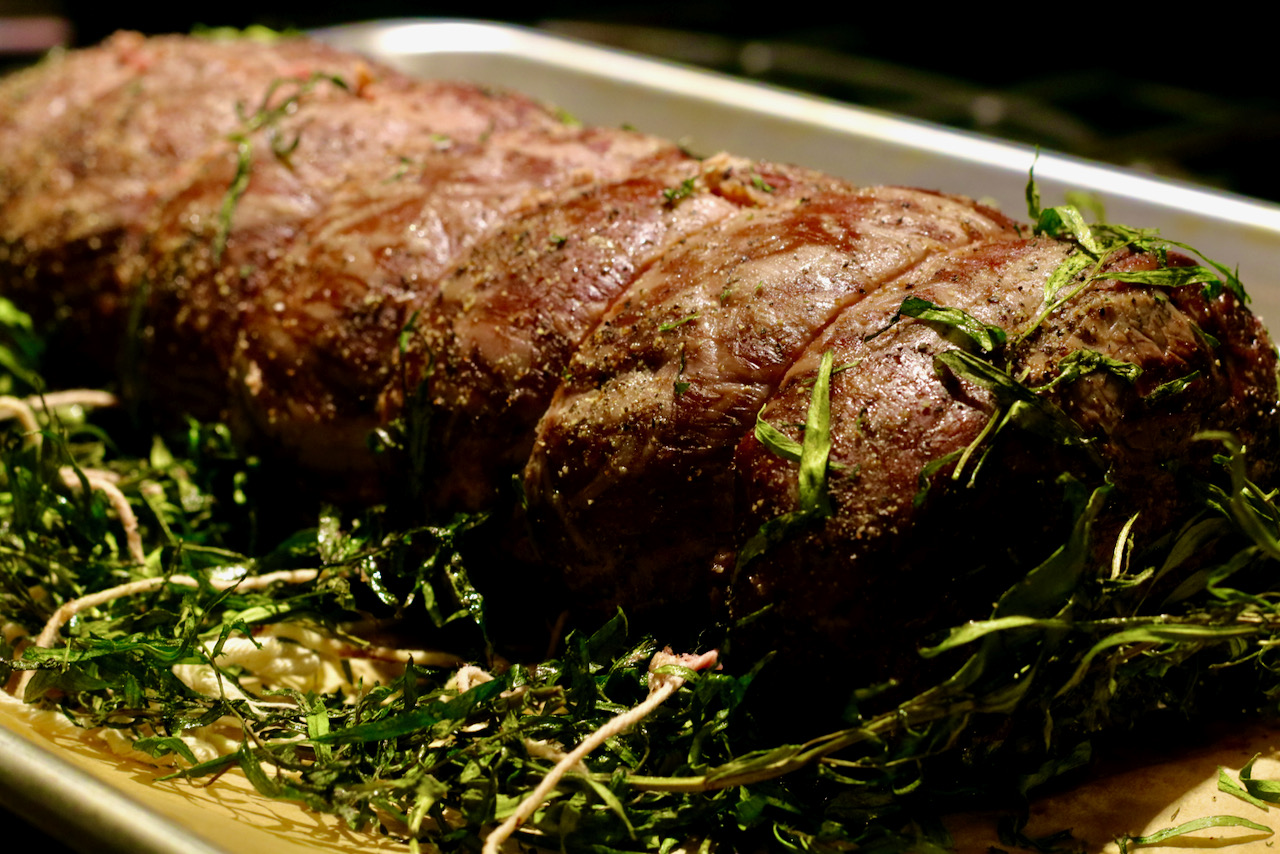
Step 4 – Tie up the Roast
Grab each end of twine positioned at 3 inch intervals and tie them around the roast, one at a time. The ties should be just firm enough to hold the tarragon in place and hold the shape of the beef. Finally, wrap the long piece of twine up and over with a final tie, like wrapping a gift.
Carefully move the roast onto a sheet pan, preferably one with a raised insert grid.
Step 5 – Insert a Probe Thermometer
Insert a “leave in” probe thermometer, like the Dot, into the center of the meat. Set the probe to your desired temperature according to the temperature chart below:Rare: 126-130°F Medium-Rare: 130- 135°F for medium-rare. (I think 130 is the sweet spot.) Medium: 135-140°F
Preheat oven to 275°F. Roasting typically takes around 1.25 hours to reach med-rare, but many factors influence this including the temperature of beef when placed in the oven, oven efficiency, other foods in the same space, etc. That is why we go by temperature and not time. Let the roast rest for 15-20 minutes. Slice and Serve.
The Dot™ Probe Thermometer has changed the way I cook forever and I’m not ever looking back! Never again will I over or under cook a roast chicken, a roast beef, or even fried calamari. (Unless I run out of batteries!😂)
Source your beef. It’s worth the extra money to purchase this cut at a reputable Butcher shop. If you can only find vacuum sealed or previously frozen (which most vacuum sealed cuts are) then you will need to roast the beef for longer and the results will be a “wetter” or “bloodier” meat. This is avoided by using a fresh cut. Trust me, I have learned this the hard way.
Use the right tools. Invest in a in oven probe and a good sheet pan with a raised grid rack.
Allow time for the beef to rest. Don’t skip rest time due to fear of it cooling off. Don’t worry- it will hold its temperature for a long time and still be warm after resting. And if it’s not piping hot, it’s okay! Beef tenderloin roasts are often served at room temperature at some of the finest dining experiences in the world! This is another reason it is perfect for a large gathering.
Master Chef Tip– Make sure everything else is on the table first before slicing and plating- that’s when it cools off quickest.
Horseradish Sauce
Horseradish cream sauce is most often served alongside beef roasts and baked ham. And of course, sandwiches! Ina’s Garten Horseradish sauce is the best I’ve ever had and the only recipe you need.
This filet of beef tenderloin is cooked at a low temperature for an extended period of time which ensures an even medium-rare from edge to edge. Serves 6-8 people.
Prep Time10 minutesmins
Cook Time1 hourhr25 minutesmins
Resting time15 minutesmins
Total Time1 hourhr35 minutesmins
Course: Main Course
Cuisine: American
Servings: 8
Ingredients
1whole filet of beef tenderlointrimmed and tied (4 1/2 pounds)
3tablespoonsgood olive oil
4teaspoonskosher salt
2teaspoonscoarsely ground black pepper
15-20branches fresh tarragon
Instructions
Preheat the oven to 275°F degrees.
Place the filet on a sheet pan and pat it dry (all over) with paper towels. Brush the filet all over with the oil, reserving about half a tablespoon. Sprinkle it all over with the salt and pepper. Place the tarragon branches around the beef, tying them in 4 or 5 places with kitchen twine to keep them in place, and then brush the tarragon with the reserved oil.
Roast the filet of beef for 1 1/4 to 1 1/2 hours, until the temperature registers 125-130°F degrees in the center for rare and 130-135°F degrees for medium-rare. Cover the filet with aluminum foil and allow to rest for 20 minutes. Remove tarragon & strings, slice thickly and serve warm or at room temperature.
Recommended: Serve with Basil Parmesan Sauce or Classic Horseradish Cream Sauce.
Notes
Because the beef is slow roasted, the recipe can be adjusted to accommodate a small cut of beef without altering the time. Of course, keep an eye on it, but I have produced excellent results using varying size cuts. Simply, adjust your seasonings correctly. Recommended side sauces for serving are Horseradish Cream Sauce or Ina’s Basil Parmesan Mayonnaise.
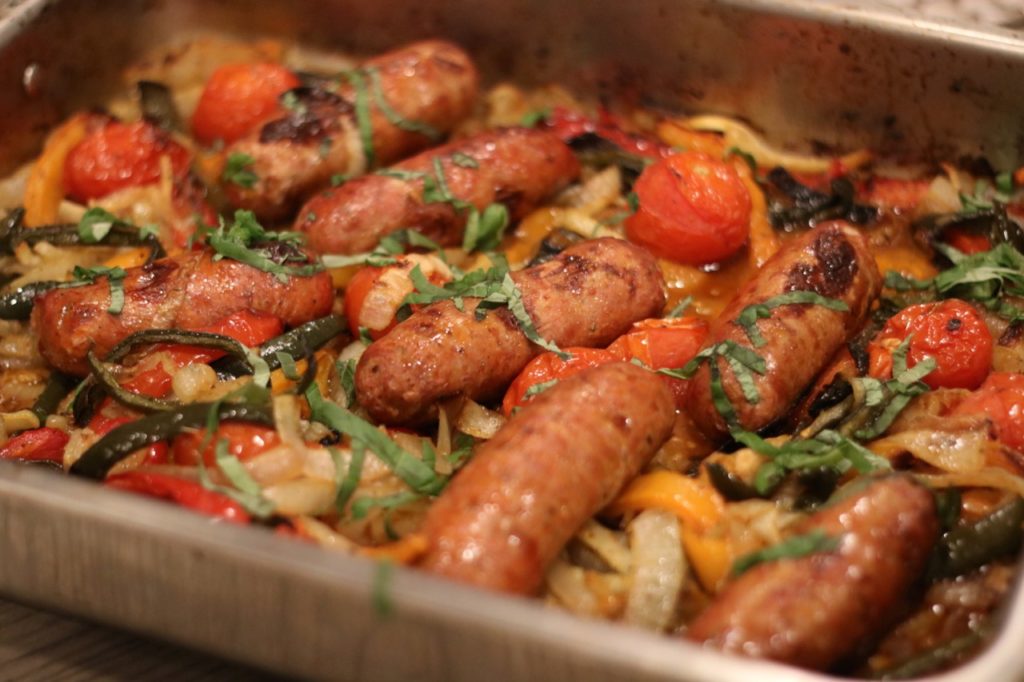
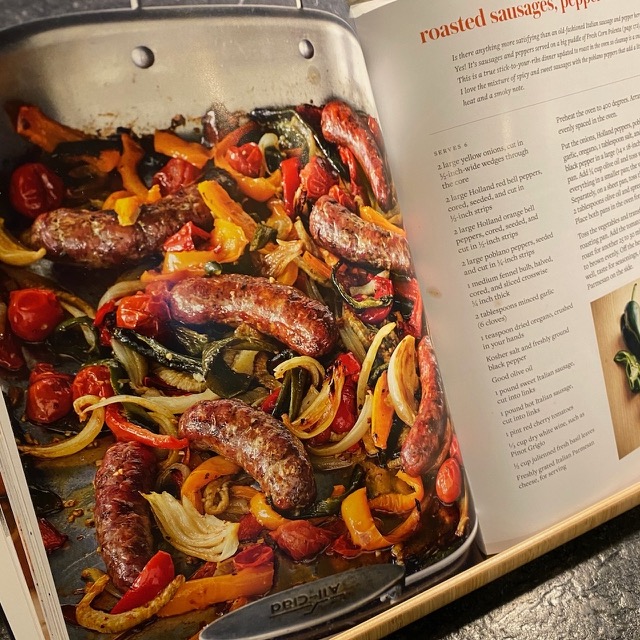
Sausage and Peppers is a delicious, easy to make Italian-American dish that many of us are familiar with. However, when I discovered the Ina Garten recipe for Roasted Sausage and Peppers in her cookbook, Modern Comfort Food, it changed everything! With just a few twists on the classic version, this dish goes from “basic” to “dinner party worthy.”
Old School vs New School
Growing up in the Italian-American household that I did, I can recall my mother or aunt standing at the stove for what felt like hours as they pan fried each sausage. The dish was made mostly on the stove top and Oh!, what a mess it would make! The whole kitchen had a grease lick on it when they were done making “old-school” sausage and peppers. The tradition continued when I started cooking – there I would be standing over the stovetop, but it turns out, there is simply no reason to waste the time, or mess, when roasting yields better results in a truly delicious dish.
The Ingredients set this recipe apart
These independently simple ingredients of sausage, peppers and onions are a winning combination without much else. However, with the addition of just a few more ingredients, the results are simply outstanding.
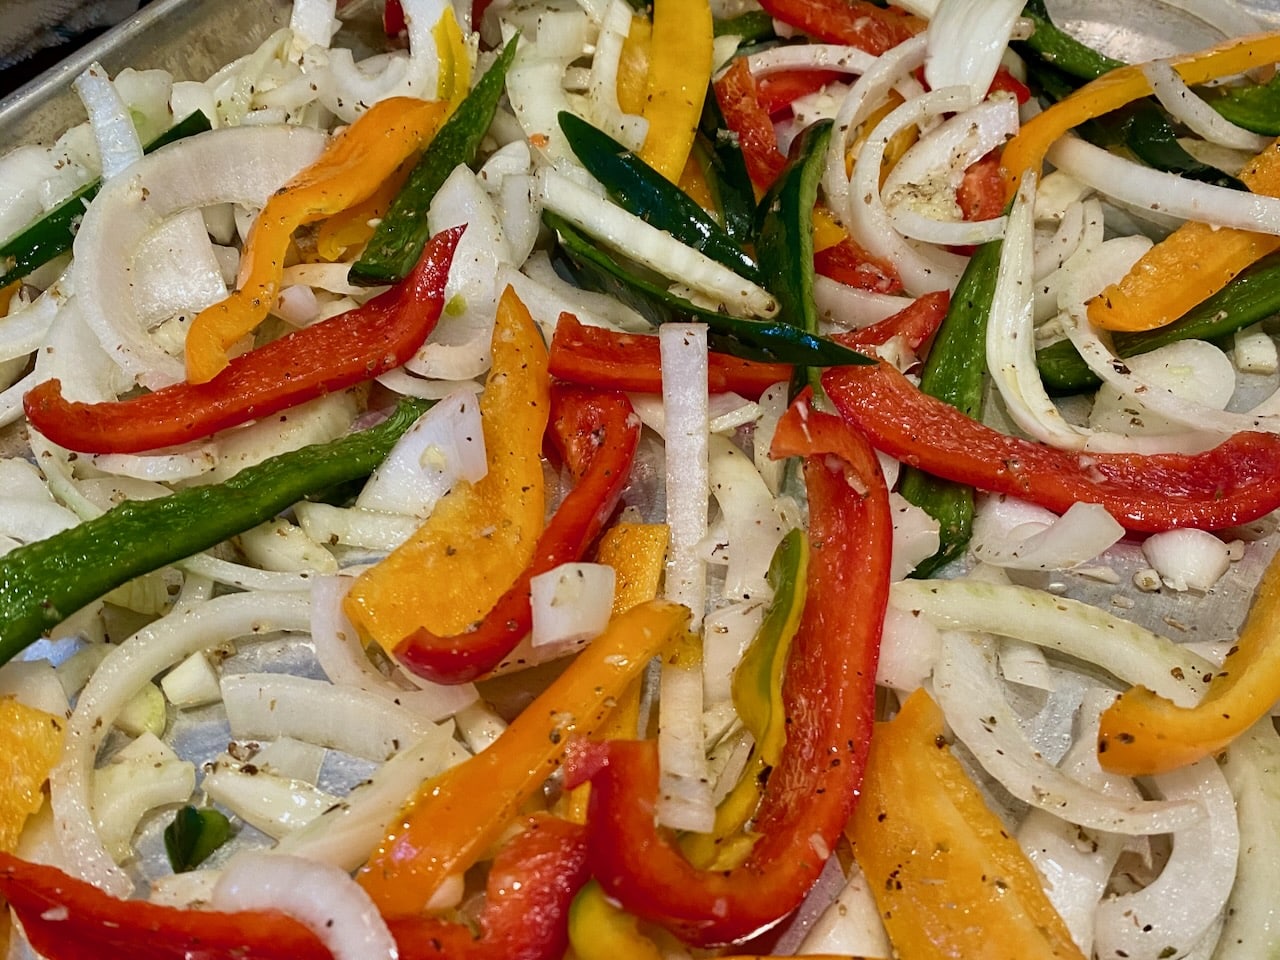
This recipe includes the addition of poblano peppers, which have mild heat and an earthy flavor, mixed with colorful red, yellow and orangebell peppers. including thinly sliced fennel adds a unexpected layer of flavor and complexity. The vegetables are then tossed with extra virgin olive oil, oregano and seasoning and then roasted. After the initial vegetable roasting, the sausage is added on top of the vegetables where the flavors from the sausage seep into the vegetables, getting tossed occasionally. Finally, adding a touch ofwhite wine, cherry tomatoes, basil and parmesan take this Roasted Sausage & Peppers recipe all the way to the top. This is all star level sausage & peppers!
You can use spicy or sweet Italian sausage, or a combination. (Spicy always wins in our house!)
Ina’s Sausage & Peppers – Pg. 120
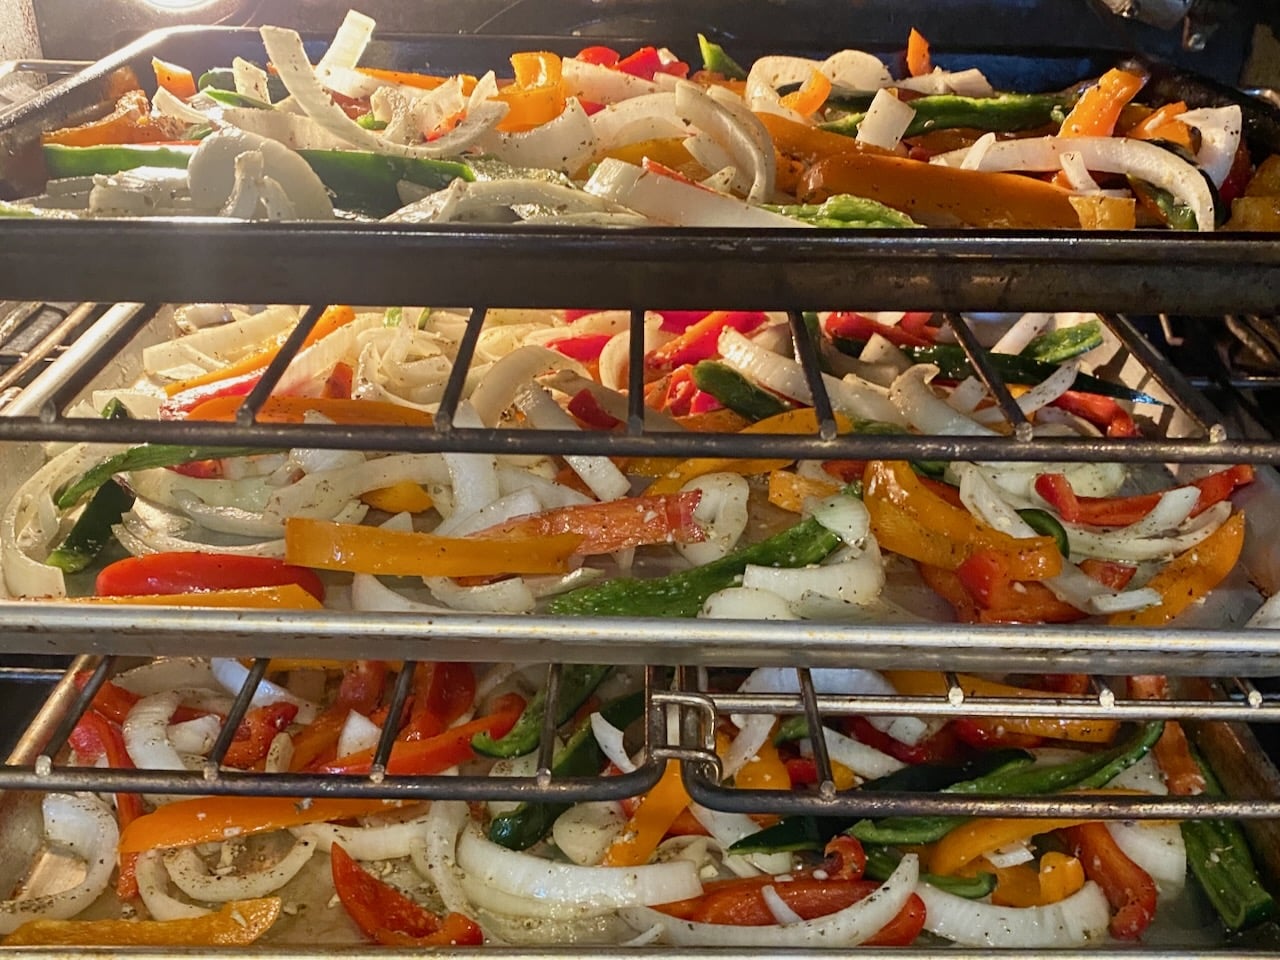
My Sausage & Peppers
Pro tip:
Don’t over crowd the vegetables on initial roasting or they will steam rather than roast. Instead, use as many sheet pans as necessary to spread out the vegetables. Then, combine into a single pan and continue the recipe steps. (It’s worth the effort.)
Popular Questions about Sausage & Peppers
Q- Can I make Sausage & Peppers in advance?
Yes! Roasted Sausage & Peppers can be made in advance. Cook entirely except for adding the basil (if using). Let cool completely and the refrigerate up to 48 hours. Reheat in the oven at 400°F. You can also freeze Sausage and Peppers and it reheats very well.
Q- What side dish to serve with oven roasted Sausage and Peppers?
If serving Sausage and Peppers for a sit down meal, serve with a pasta such as penne all vodka. Sausage and Peppers also goes well with rice or mashed potatoes. If serving to a party or in a casual environment, serve with club rolls on the side and let everyone make their own Sausage & Pepper sandwich.
Q- How do I reheat Sausage and Peppers?
Preheat oven to 400°F and heat covered for about 20-25 minutes or until hot.
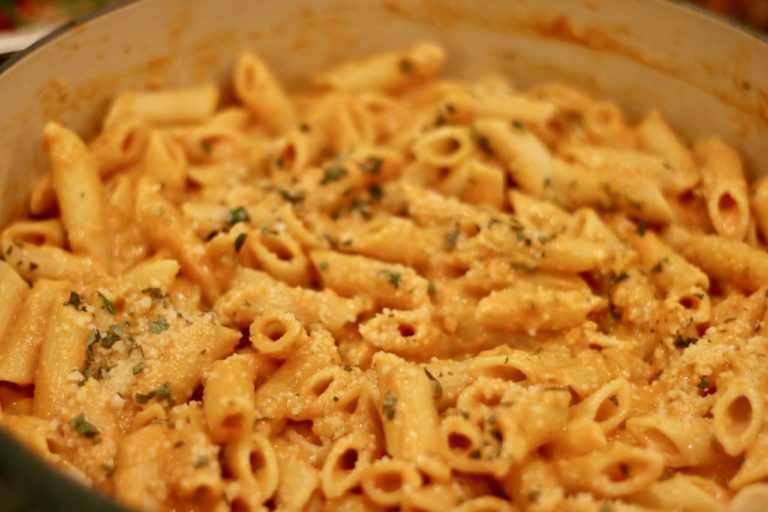
Penne Alla Vodka
This is the best recipe for Penne alla Vodka you will find. It is creamy, luscious, bursting with flavor and just a pinch spicy. It’s extremely crave-able, it’s addicting, and you will eat too much.
A "sure to please" classic dish made with sausuages, onions & peppers. Serve along side pasta, rice or with club rolls to make sandwiches.
Prep Time20 minutesmins
Cook Time1 hourhr
Course: Main Course
Cuisine: Italian
Servings: 6people
Ingredients
3large yellow onions-1/2 inch strips
3large red bell peppers-1/2 inch strips
3large orange bell peppers-1/2 inch strips
3large poblano-1/4 inch strips
1medium fennel bulb-halved, cored and sliced crosswise ¼ inch thick
2tbspfresh minced garlic
1tspdried oregano
salt and freshly ground black pepper(Diamond brand kosher salt recommended)
Extra Virgin Olive oil
1lbsweet Italian sausage links
1lbhot Italian sausage links
1pintred cherry tomatoes
1/3cupdry white winesuch as Pinot Grigio
½cupjulienned fresh basil leaves
freshly grated Parmesan cheesefor serving
Instructions
Arrange racks evenly spaced in the oven. Preheat the oven to 400 degrees F.
Toss together the onions, peppers, fennel, garlic, oregano, 1 tbsp kosher salt and 1 ½ tsp fresh black pepper & ¼ cup olive oil. Spread evenly in a single layers between 2 large sheet pans. Don’t crowd everything in a smaller pan or the vegetables won’t brown.
Separately, on a 3rd sheet pan or baking dish, toss the sausages with 2 tbsp olive oil and spread them out in one layer. Roast the vegetables & the sausages for 20 minutes.
(If you do not have 3 sheet pans, use a roasting pan for one set of vegetables or the sausage, or, simply roast the vegetables first, then the sausages next, and then continue on with the recipe.)
Toss the vegetables to combine to a large roasting pan and place the the sausages top of the vegetable mixture.
Add the tomatoes. Pour in the wine and roast for another 25 to 30 minutes, turning the sausages to brown evenly. (If the tomatoes are small, wait 10 minutes to add them.)
Off the heat, sprinkle on the basil, toss well, taste for seasonings and serve hot with grated Parmesan on the side.
Notes
This recipe can serve 6 as a main course assuming 2 sausage links per person. Alternatively, serve with club rolls and make 12 sausage & pepper sandwiches.