Pan Seared Chicken

4 pieces of pan seared chicken on a white plate with a sprig of parsley

Explore the Versatility of Pan Seared Chicken

It’s probably safe to assume that chicken is the most frequently cooked protein in most of our homes. One of the many reasons I cook so much chicken is how versatile it is— it compliments more flavor profiles than any other protein, or it’s just fine all by itself – on top of a salad or in a sandwich. Once you learn the basic technique of how to pan sear chicken, you will be able to get very creative with flavors.

This post is not intended to provide you an exact recipe for pan seared chicken, but rather teach you how to make it. Its so easy that it can be scaled up or down in quantity for 1 person, or a family of 6. Once you have the technique, you can start to create new flavor combinations to sass up your meal prep, lunches and dinners.

Watch how to make pan seared chicken in just 4 minutes!

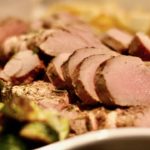
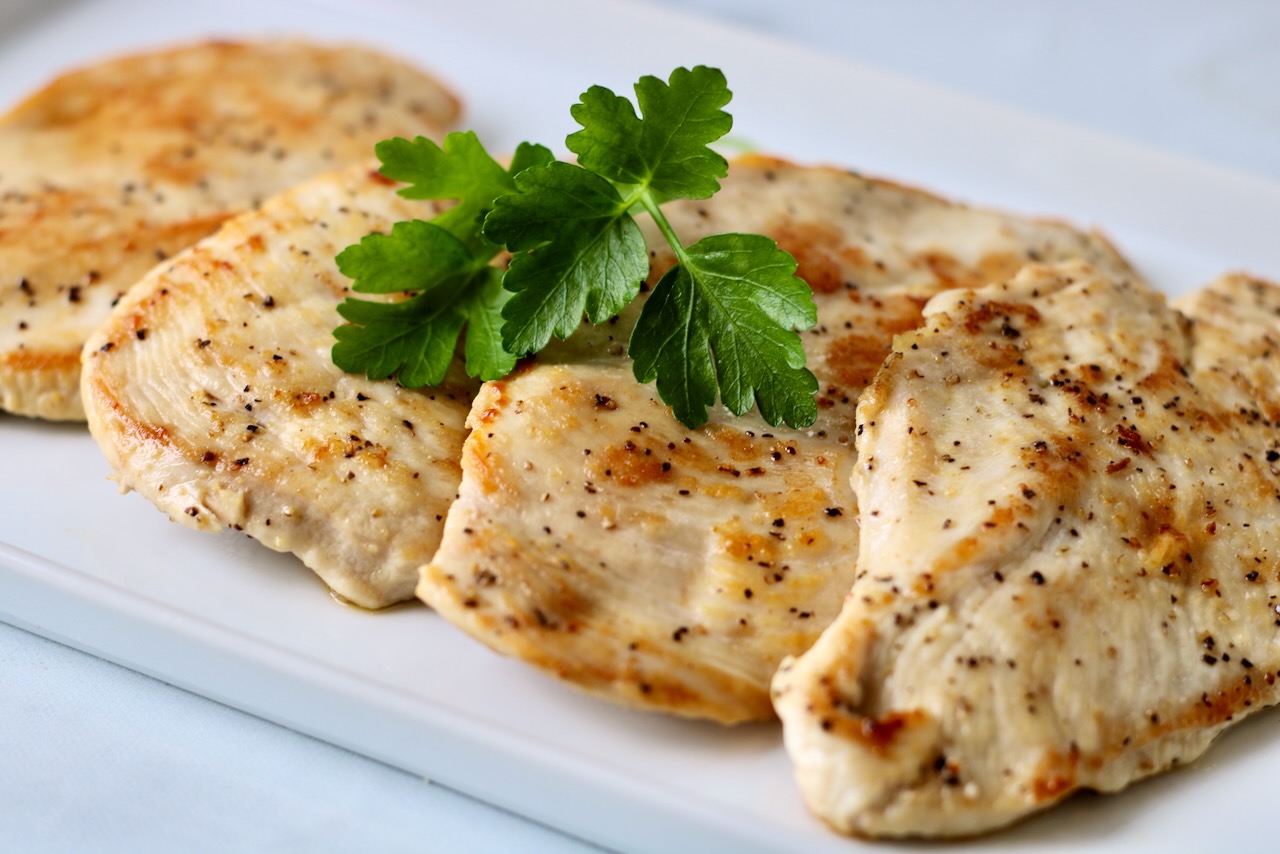
Simple Pan Seared Chicken is a versatile base for countless meal combinations.

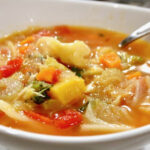
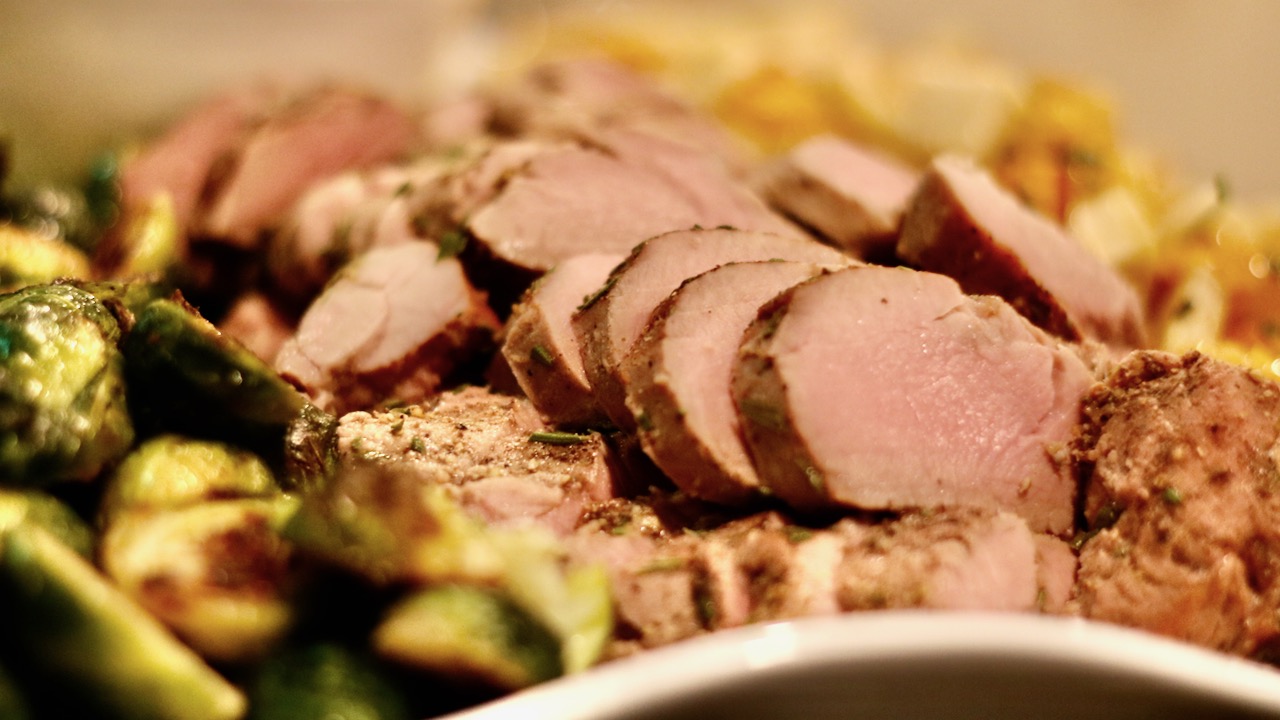
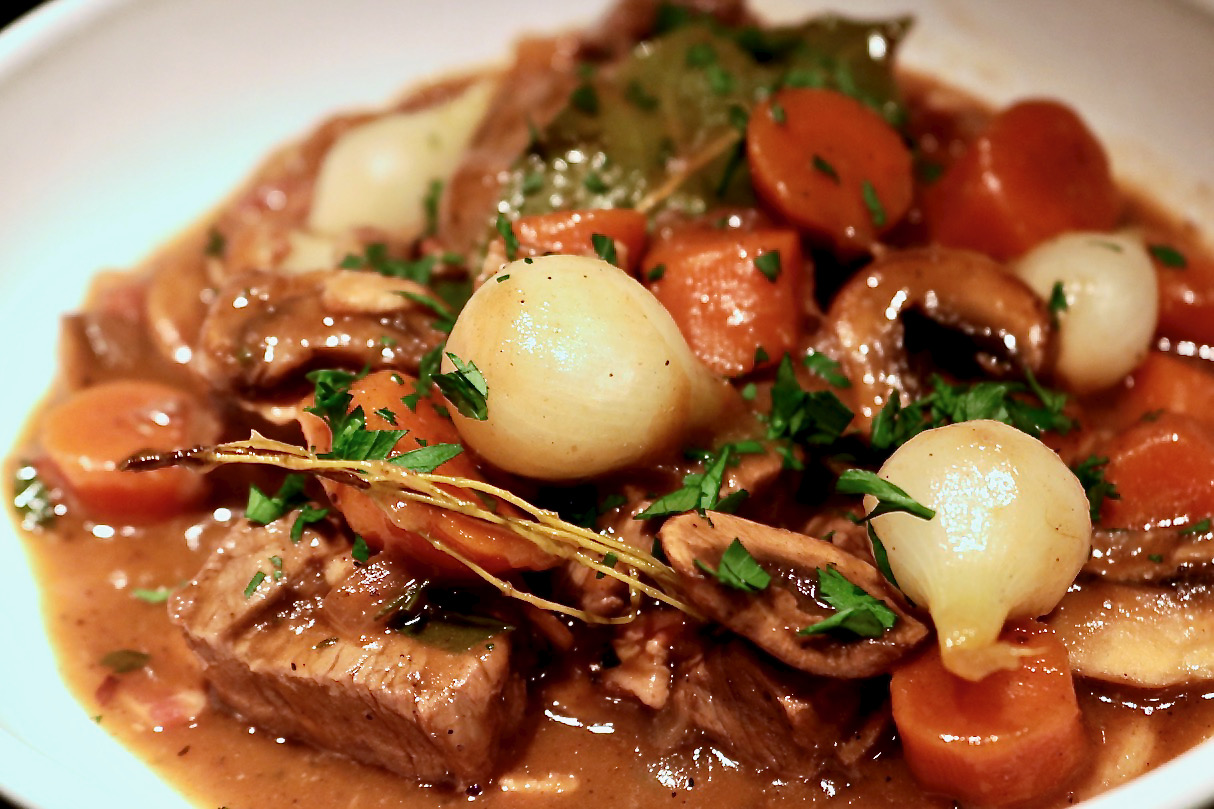
Simple pan-seared chicken serves as a versatile foundation for an endless variety of meals. Its the perfect canvas for different seasonings, sauces, toppings. Whether sliced over a fresh salad, layered into a hearty sandwich, tossed into a grain bowl, or paired with roasted vegetables, the possibilities are truly limitless.

It fits seamlessly into various diets and lifestyles, making it a go-to protein for easy, healthy meals. Plus, its ability to be prepped in advance makes it a meal-prep staple, ensuring you always have a delicious, protein-packed option ready to go.

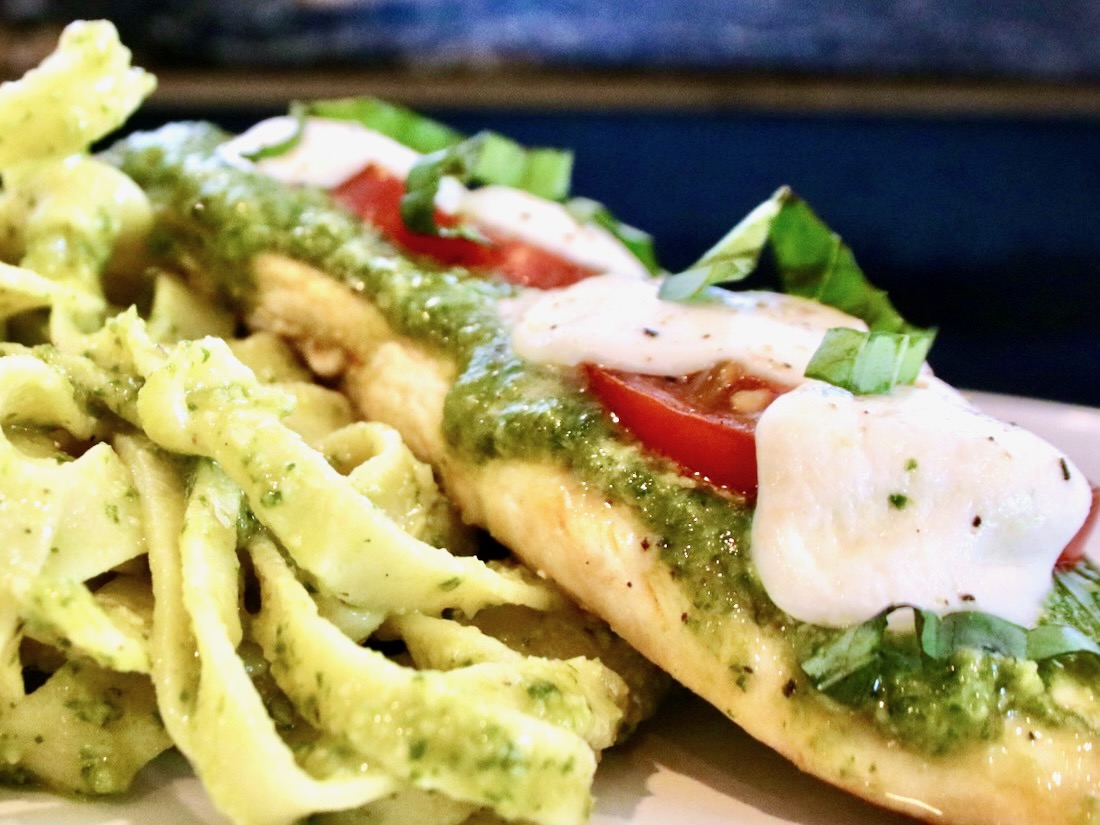
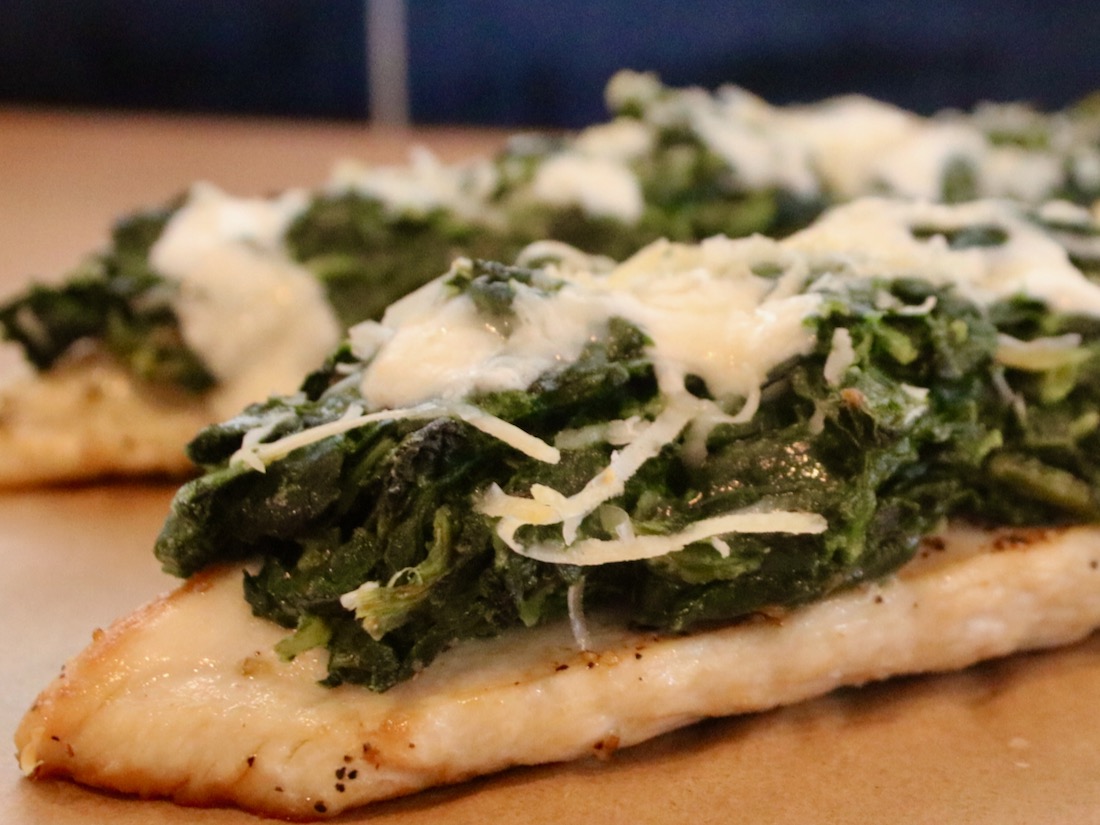
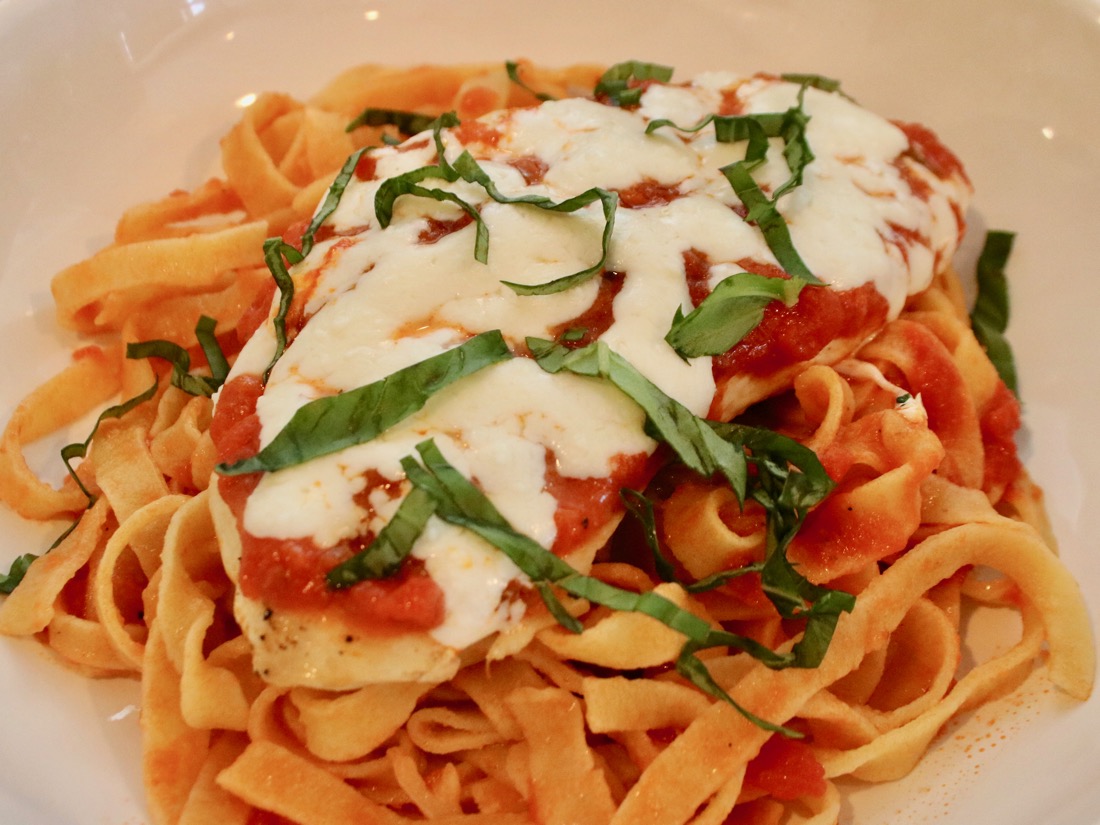
Easy Inspiration for Everyday Meals!

Pan Seared Chicken is Excellent for Meal Prep & Busy Schedules

Pan-searing chicken breasts is an excellent technique for meal preppers, beginners in the kitchen, and anyone who loves experimenting with flavors. It’s also a perfect foundation for KETO and gluten-free meals. Quick, easy, and delicious, it can be made ahead of time—truly one of the most versatile cooking methods out there.

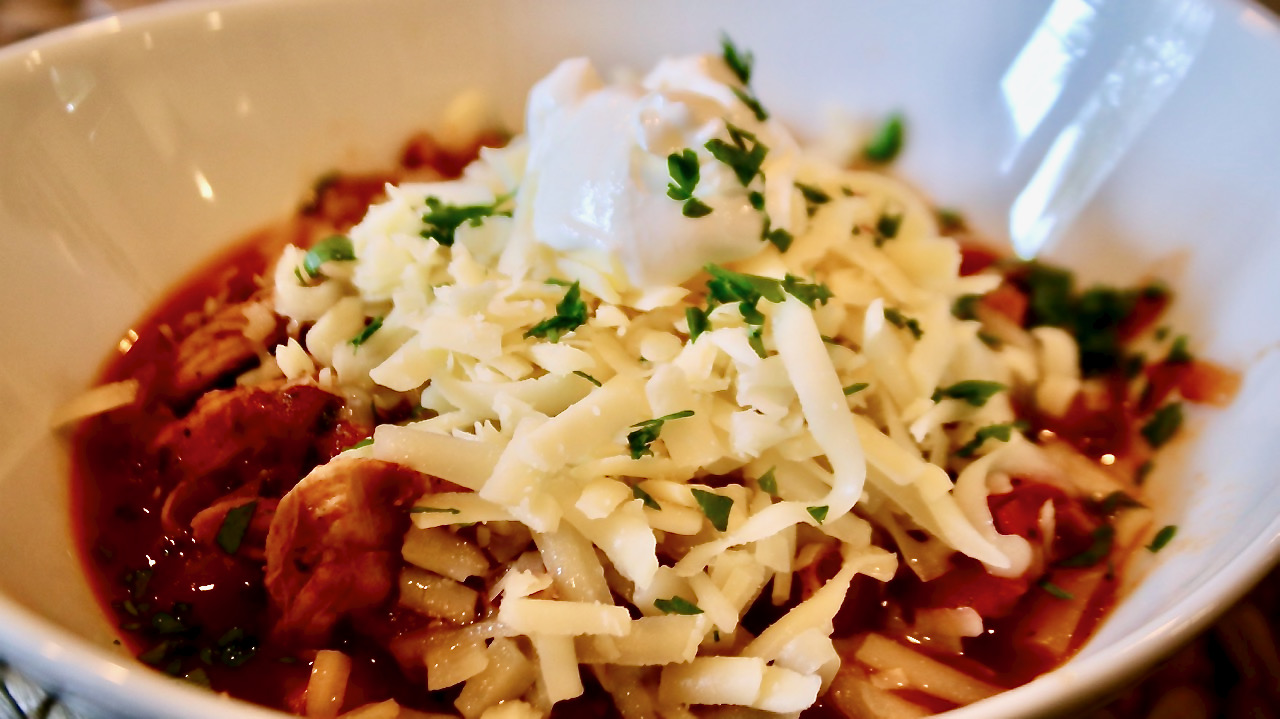
I typically pan sear several portions on a Sunday or Monday as part of my meal prep for the week and then use the chicken throughout the next few days for work lunches or quick dinners. I try to create different combination so I never get bored eating the same thing two days in a row. I often take inspiration from leftover vegetables, sauces and cheeses that I have on hand. Or, I simply chop it into a salad or make a chicken sandwich. The ideas are endless for how to enjoy a basic piece of pan seared chicken.

Feaster’s Tips:

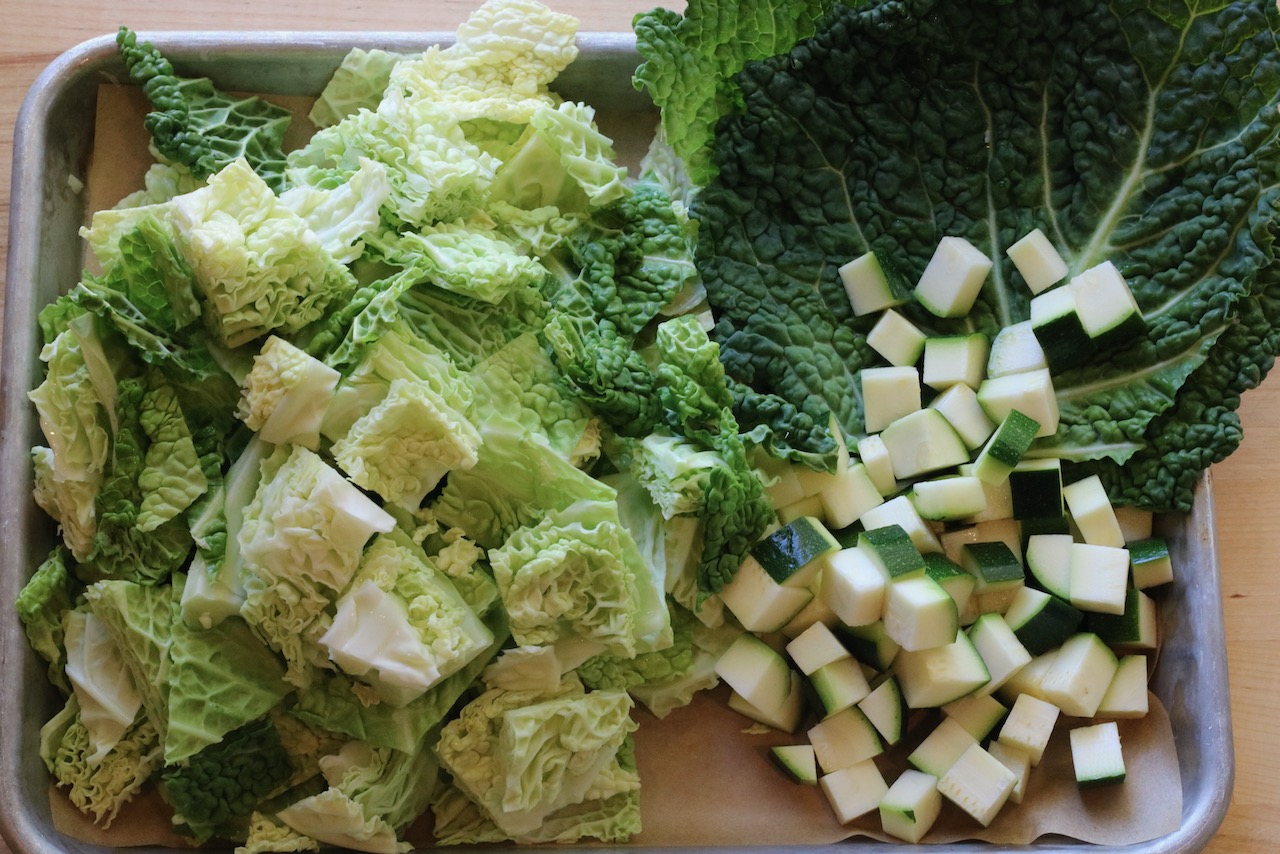
• For plant based eaters this same approach can be used by substituting the chicken for 1/2″ long strips of zucchini or a sweet potato slice and follow the same technique.

• When I use this chicken with toppings (rather than in a salad), I simply set the chicken breasts on a parchment lined sheet pan (for easy clean up), add the toppings, and bake for about 6-8 minutes or until heated through. Serve hot.

Pan Seared Chicken

Pan-seared chicken is a quick, flavorful, and versatile. Enjoy it plain and simple, or use it as a base for toppings of all kinds.
Prep Time1 minute
Cook Time4 minutes
Course: dinner, lunch
Keyword: chicken, gluten free, keto, make ahead, meal prep

Ingredients

  • boneless chicken cutlets sliced thin
  • extra virgin olive oil or EVOO spray
  • Kosher salt & fresh ground pepper

Instructions

  • Heat a non-stick skillet pan, preferably a griddle pan, over medium-high heat.
  • Spray or baste chicken with EVOO and season with salt & pepper. Flip & repeat. (I like to pepper one side only.)
  • Place chicken on griddle, presentation side down. Sear for 2 minutes. The chicken should be turning white from the bottom up and should have a light brown sear. Flip. Cook for another 2 minutes. (Timing may change based on thickness of chicken breast)
  • If you are unsure about doneness, use a pairing knife to make a very small slice and check the inside for pink. Remember that it will keep cooking off the heat and if you are using it for a hot meal, it will finish cooking in the oven so you don't want to over cook it.
  • Remove the chicken from the pan to a plate and let rest. *If you are not using the chicken right away, make sure to cool compleatly before refridgerating.

Notes

This is not a recipe but rather an explanation of technique. The quantity of ingredients is flexible based on individual preferences. 

How to Make Homemade Pasta

Pasta is my passion.

I started rolling pasta dough around age 4 or 5. I have very distinct memories of my great grandma GiGi and my aunt working countless eggs into a giant well of flour, to create a dough, that I would then be allowed to “roll into snakes.” It was one of my most favorite days when we made pasta dough. Unfortunately, I lost my great grandmother not too many years later and thus, my homemade pasta making education ended and left me only as an experienced “snake maker!”

Many decades later, another family member inspired me to revisit pasta making. I was gifted a pasta roller, which is the traditional way of rolling fresh pasta. That did it- I was hooked. Hard core. I dove right in and I haven’t looked back. I am now classified as an obsessed pasta maker, and year after year, the obsession grows stronger, and deeper.

making pasta

What does it mean to be obsessed with the art of fresh pasta? It means I never stop watching videos, reading recipes, taking classes. When I can’t sleep, I think about ravioli fillings and pasta shapes and reflecting on the last dough batch. I think I could reach a true peak of happiness if I could just make homemade pasta all day, every day. (But only if I never had to clean up!)

When I first started this journey, that I now call The Pasta Project, I learned to make fresh pasta dough using the traditional “well method” which I encourage every cook to try at least once in their cooking lifetime. From there I moved to the KitchenAid approach which is still a time saver, and less effort, compared to the hand rolled approach. Then I discovered my favorite method- using a food processor. This method is significantly less messy and much easier than hand rolling. It’s pretty much foolproof.

In the video below I show you how to make pasta dough in a food processor. Anyone can do it!

All homemade, all different shapes, all the same dough recipe.

fresh cut homemade Tagliatelle pasta

Tagliatelle

dried homemade garganelli pasta

Garganelli

dried homemade spaghetti nests

Spaghetti

Making homemade pasta is equal parts art and science.

The science of fresh pasta

As far as the science part, there is of course the basic recipe. But in addition to following the recipe, it’s also helpful to understand that the temperature of the room, humidity of the room, egg weight, egg liquid density (fresher eggs have denser whites), flour density differences, and even temperature of your work surface impact the final dough. These are the elements that drive my obsession because the more you understand each one of these components, the more consistent your dough becomes.

The soul of homemade pasta

I can’t teach you how to cook with soul, but I can tell you this; You can’t make pasta when you are angry- the pasta knows and it just won’t work. I know it sounds crazy! But it’s the truth. You need to clear your mind, focus only on the dough, and let yourself become one with it for the duration of the time it takes to create it, and bring it to life. I always say “Pasta is my Yoga!”

Fresh Pasta Recipe

With all that said about science and soul, it still takes a basic recipe and you don’t really need to know much more than that. The details I just mentioned take it to a whole other level, but all you really need is a good basic recipe.

Pro Pasta Tips:

  • If the fresh pasta dough is still dry after adding all the eggs, it could be because of the size of your eggs vs the size of my eggs. Just add a teaspoon of water at a time until you get the right consistency.
  • Trust your judgment. If it’s too dry, just add another egg yolk, or/and a teaspoon of water at a time. If you are using the food processor and if it’s not coming together in the perfect ball, just dump it on a board and knead it. You can do it!
  • Use very clean hands!

How to Roll Pasta Dough

After the dough is made, it needs to be rolled out and then shaped. There are a few different methods to choose how to roll out pasta so it’s then shapable and ready to cook.

Rolling pin

Option 1: The way the pasta grannies do it with a rolling pin. (That’s not for 99% of us!)

pasta roller

Option 2: The poplar and traditional crank roller. It’s a good option, the way I started and reliable. But it takes practice.

KitchenAid Pasta attachment

Option 3: The more modern solution and my preferred method is the KitchenAid roller attachment. Learn more.

Different types of Pasta for Different Sauces

The general rule is the wider the noodle, the heavier the sauce. For example, a hearty pork or beef ragu pairs perfectly with a pappardelle pasta, which is a wide ribbon pasta noodle. While a light olive oil and garlic sauce and homemade spaghetti are a match made in culinary heaven. I find the best match for a cream sauce to be Tagliatelle or Fettuccini, both which also work well with a bolognese sauce.

Introduction to Red Pepper Pasta Dough (and other flavored pastas)
Roasted Red Pepper pasta has a beautiful aroma and a subtle smoky sweetness. I think I may be obsessed!

Pasta Trivia

Can you guess how many types of pasta shapes there are? According to Italy Magazine the answer is somewhere around 350! The Food 52 Blog has a good list and description of the more popular varieties.

Pasta Dough

Homemade Pasta is one of life's simple pleasures. It's silky texture melts in your mouth and leaves you wanting more and more!
Prep Time10 minutes
Servings: 6 people

Equipment

  • Food processor

Ingredients

  • 225 grams Double 00 Flour
  • 75 grams Semolina Flour
  • 3 large eggs (organic, farm fresh recommended)
  • 1-2 large egg yolks. (Start with one. If too dry, add second)

Instructions

  • Measure out all ingredients.
  • Add Double 00 Flour and Semolina Flour to the bowl of a large food processor fitted with a steel blade. Pulse 2-3 times to combine.
  • Use the back of a spoon to make a crevice and fill the crevice with one egg. Pulse 7-10 times. Repeat until the dough begins to form.
  • Once a dough ball has begun to take shape, dump the dough onto a clean surface, such a butcher's block, and kneed the dough for 1-2 minutes until the dough bounces back when gently pressed with your thumb.
  • Wrap in plastic wrap and then a dish towel and set aside for 30 minutes and then begin to roll and shape. Or, wrap in plastic wrap and then a dish towel and refrigerate for ups to 24 hours.

Notes

https://youtu.be/HSH4Mptlz1g

Spaghetti with Tomatoes & Basil
This is an all-star of a recipe and one of my absolute favorites, especially in the summer months. It highlights the best of the summer garden- fresh cherry tomatoes & fragrant basil.
Fettuccine with Truffle Butter and Mushrooms
This dish brings me the greatest joy to make, and to eat! It’s decedent, delightful & delicious. Indulge just once and you’ll wonder how you ever lived without it. By far, one of my all-time favorite recipes.

Ruben Raviolis

ruben ravioli

An Irish twist on an Italian classic

If you know me at all, you’ll already know that I love making raviolis. What you may not know is that I love eating Ruben sandwiches. So I thought what not combine the two? This may have been the best idea I’ve ever had- They were incredible and a fabulous new addition to our annual St. Patty’s day feast.

Please note, this is one of those recipes that is intended to provide inspiration and not an exact recipe. It’s geared towards a comfortable cook who can run with an idea and execute. You got this!

Make the pasta

  • 2 large eggs + 2 egg yolks. (2 egg whites reserved)
  • 200 grams double 00 flour
  • 50 grams semolina flour
  • 1 teaspoon extra virgin olive oil

First, I make the pasta for the ravioli. If you are reading this recipe, you do probably make your own pasta dough and know everyone who makes homemade pasta has their favorite recipe. For me, when I make raviolis, I am currently liking the recipe of using 200 grams of double 00 flour, 50 grams of semolina flour, 2 large eggs, 2 large egg yolks, teaspoon to tablespoon of olive oil and then tweak as needed.

Make the Filling

  • Cooked Corned Beef, shredded
  • Sauerkraut (drained and squeezed dry)
  • Mashed potatoes
  • Spicy Mustard
Ruben ravioli inside

While the pasta rests, make the filling. I combined approximately 2 cups of corned beef, about 1.5 cups sauerkraut. Pulse 2-3 times in a food processor using a steel blade.

Mix about 2 tablespoons of dijon mustard into about 1.5 – 2 cups of mashed potatoes and then fork combine only enough of the mashed potatoes to bind the mixture.

Assemble the Ravioli

Prepare the pasta sheets and assemble ravioli using your favorite method. I prefer to use a jumbo ravioli tray for this and most raviolis that I make.

Making Fresh Ravioli

Make the Sauce

Again, I don’t have the measurements at all for this. It was a creation that happened to turn out really, really well so I wanted to make sure I preserved it somehow. If you are an intermediate level home cook, you can likely execute this independently without needing exact measurements. When St. Patty’s day rolls around next year, I will definitely be making these again so I’ll work on refining the recipe then. So check back!

  • Good quality extra virgin olive oil
  • Shallots (diced)
  • Salt, fresh ground pepper, red pepper chili flakes
  • Whisk in Dijon mustard
  • Make and swirl in Beurre manié (flour mashed with butter)
  • Whisk in cream & season
  • Gently add in ravioli to coat in sauce.
  • Garnish with chopped chives
ruben ravioli

3 Ingredient Salsa Chicken Recipe for the Slow Cooker

slow cooker chicken

This 3 ingredient recipe is for what I would describe as “Mexican style shredded chicken”, but it is also well known as “salsa chicken.”

As far as slow cooker recipes go, this salsa chicken recipe ranks at the top of my list. It’s gluten free, low carb, and incredibly versatile. It requires minimal effort, yet the results are incredibly rewarding. I use this recipe to make chicken tacos, chicken enchiladas, stuffed peppers and more. Best yet, it can made in advance and even frozen. How great is that?

Check out this How to Video to see how easy it is to make this Mexican chicken recipe.

Why this is a winning recipe.

  • It’s delicious
  • Its an easy recipe
  • It’s Low carb / KETO approved
  • It’s Gluten Free (Be sure to use gluten free ingredients)
  • It can be enhanced to preferred spice level
  • It can be made in advance & even frozen
  • It is versatile
  • It requires 3 affordable ingredients
  • It’s a crowd pleaser!
salsa chicken recipe
Slow Cooker Salsa Chicken Makes Great Tacos!

Shredded Salsa Chicken Recipe – 3 ingredients & 3 easy steps

Add any amount of boneless chicken breasts into the bottom on the slow cooker. (I typically use 3-6 boneless chicken breasts). Add one teaspoon of taco seasoning per chicken breast. Top with enough salsa to cover the chicken. Use tongs to toss and coat the chicken in the salsa. Set the slow cooker to high for 3-4 hours. Take note- the more chicken, the longer it may take. Periodically check on it to make sure everything is coated and positioned wellThat’s all there is to it. .

To tell if the chicken is done, use two forks and see if a piece easily shreds. If it does, it is done.

If the sauce is thick enough from cooking, you can shred directly in the slow cooker in the sauce in cooked in. (This all depends on the consistency of the salsa you selected and brand of taco seasoning because some have thickening agents in them.) If the sauce is too thin, simply drain everything in a colander and then add the chicken back into the slow cooker pot. From there, use your judgment and if the mixture is now too dry, add a few tablespoons of fresh salsa, and then begin to fork shred.

Once it is all shredded, it’s ready to eat as is or use any way you can think of. I love making chicken enchiladas and chicken tacos with this. And when I have leftover meat, I add a few extra tablespoons of salsa and vacuum seal it to freeze for another use. It defrosts very well.

Enchiladas

Chicken Enchiladas are a great way to use shredded Salsa Chicken

Recipe suggestions:

  • Chicken Enchiladas (my favorite!)
  • Tex-Mex salads (or topped on any salad)
  • Wraps with lettuce, tomato & cheddar cheese (a side of sour cream or guac doesn’t hurt!)
  • Hard shell or soft tacos (most common!)
  • The ever reliable….quesadilla (who doesn’t love a quesadilla?)

Pro Tips:

• If the sauce is thin after cooking, (all salsas are different) simply remove the chicken from the slow cooker and place in a large bowl and discard some or all of the excess moisture. Alternatively, just drain the whole mixture in a colander.

• When hosting Taco night, I rinse out the slow cooker and re-add the now shredded chicken, and set the slow cooker to “keep warm” until ready to use. I set up the taco bar and everyone can help themselves and build their own tacos!

slow cooker chicken
Print Recipe
5 from 1 vote

Slow Cooker Salsa Chicken

Prep Time2 minutes
Cook Time6 hours
Course: dinner, entree, lunch
Cuisine: Mexican
Keyword: chicken
Author: Christina Collins

Equipment

  • Slow Cooker

Ingredients

  • 3 Boneless chicken breasts
  • 3 tsp Taco seasoning
  • 1 jar salsa (enough to cover chicken breasts)

Instructions

  • Lay the chicken breasts into the bottom of the slow cooker
  • Add 3 teaspoons of taco seasoning and enough salsa to cover the chicken.
  • Use tongs to toss and coat the chicken, then nestle back to submerge the chicken in the salsa.
  • Cook on low for -6 hours or until the meat shreads easily with a fork.
  • Remove chicken to a bowl and add about 1/2 cup of fresh salsa. Fork shred and let the chicken absorb the flavors of the fresh salsa.

Video

Notes

This recipe doubles well. 
 

How to make Ricotta Cheese

Ricotta

Anyone can learn how to make ricotta cheese. It’s just that easy.

With a creamy texture and mild flavor, ricotta is widely used in baked and raw pastas, blended with other cheeses, topped on crostini, rolled in omelettes and stuffed into chickens. It’s culinary uses are endless, and delicious. Most people are familiar with the store bought However, the store bought kind found in plastic containers at the grocery store, but I’m here to tell you that store bought ricotta cheese is garbage compared to homemade. The good news is, it’s really easy to make your own.

What is Ricotta cheese?

Ricotta is what’s called a “whey cheese” which means to separate milk into two distinct things- the solids, called curds, and the liquid called whey. In order to separate the curds and whey, milk is heated and then a form of acid is introduced, usually in the form of lemon juice or white vinegar. Once the separation occurs (which only takes minutes) the mixture is strained through cheesecloth. The liquid passes through and what remains is the ricotta cheese.

Ingredients in Ricotta

Ricotta Cheese only requires 4 basic ingredients- whole milk, heavy cream, white wine vinegar and salt. *The milk and cream must be unpasteurized or separation will not occur.

How to Make Ricotta Cheese:

Ingredients to Make Ricotta Cheese

  • 4 cups whole milk
  • 2 cups heavy cream
  • White wine vinegar (or lemon juice)
  • Kosher salt

Equipment Required

  • A basic sieve
  • Cheese cloth

*IMPORTANT NOTE: The milk and cream must NOT be Ultra- Pasteurized. The process of ultra pasteurization kills off the enzymes required for it to turn into cheese! (Trust me on this… I learned the hard way!) You will end up with a pot of hot dairy and nothing more.

Uses for Ricotta Cheese

Ricotta is an incredibly flexible ingredient. My absolute favorite way to use homemade ricotta is to make classic cheese raviolis, because, well, I am obsessed with making raviolis. This ricotta is so light, and I roll fresh pasta that is oh, so thin! The end result is like eating delicious, Italian air. It will also transform spaghetti and meatballs just by adding a dollop of ricotta in place of parmesan giving it a creamy, indulgent richness. Another favorite of mine is to serve it simply with crostini toast. Or, make fig ricotta cake, or ricotta pancakes, or scrambled eggs with a touch of ricotta. Or…just do as I do and grab a spoon and eat it right out of the bowl and hope no one catches you 😉

Ricotta Cheese

Prep Time3 minutes
Cook Time3 minutes
Course: cheese, condiment
Cuisine: Italian

Equipment

  • Sieve
  • Cheesecloth

Ingredients

  • 4 cups whole milk (not ultra- pasteurized!)
  • 2 cups heavy cream (not ultra- pasteurized!)
  • 1.5 teaspoon kosher salt
  • 3 tablespoons good white wine vinegar (MUST be fresh!) Lemon juice works too!

Instructions

  • Set a large sieve over a deep bowl. Dampen 2 layers of cheesecloth with water and line the sieve with the cheesecloth.
  • Pour the milk and cream into a stainless-steel or enameled pot. Stir in the salt. DO NOT WALK AWAY from the stove top.
  • Bring to a full boil over medium heat, stirring occasionally. Turn off the heat and stir in the vinegar or lemon juice. Allow the mixture to stand for 1 minute until it curdles. (Add more if you do not see it start to separate.) It will separate into (the curds) and milky parts (the whey).
  • Carefully pour the mixture into the cheesecloth-lined sieve and allow it to drain into the bowl at room temperature for 20 to 30 minutes, occasionally discarding the liquid that collects in the bowl. The longer you let the mixture drain, the thicker the ricotta. (I like mine thick.) You can even bundle it and give it a gentle squeeze to remove even more moisture.
  • Transfer the ricotta to a bowl, discarding the cheesecloth and any remaining whey. Use immediately or cover and refrigerate. The ricotta will keep refrigerated for at least 3 days.

Healing Cabbage Soup

Cabbage soup in bowl

A nutritional powerhouse – the effects of this healing cabbage soup recipe can be felt almost immediately.

Healing Cabbage Soup is one of my oldest recipes. I started making back it back in college when my immune system always seemed to feel run down. Over two decades later, making a frequent appearance during the long and scary days of the pandemic, it is still what I turn to when I am under the weather or just feeling sluggish.

Cabbage Soup for the Soul

In times of uncertainty and stress, there’s something deeply comforting about a warm bowl of soup. And when it comes to nurturing both body and soul, few dishes can compare to the simplicity and nourishment of healing cabbage soup. Packed with wholesome ingredients and bursting with flavor, this humble yet powerful soup has earned its name rightfully so… as Healing Cabbage Soup.

The Healing Properties of Cabbage

Cabbage is often hailed as a nutritional powerhouse, and for good reason. Rich in vitamins C and K, as well as fiber and antioxidants, cabbage offers a wide array of health benefits. From boosting immune function to promoting digestive health and even potentially reducing inflammation, this cruciferous vegetable is a true superfood.

But perhaps most notably, cabbage is known for its potential healing properties. In traditional folk medicine, cabbage has been used for centuries to treat various ailments, including digestive issues, ulcers, and even arthritis. Its high vitamin C content is thought to support collagen production and tissue repair, making it an excellent choice for those looking to promote overall wellness and healing.

The Magic of Healing Cabbage Soup

Healing cabbage soup harnesses the nutritional power of cabbage and combines it with other wholesome ingredients to create a nourishing and comforting meal. While recipes may vary, the basic components typically include cabbage, onions, carrots, celery, broth, and herbs and spices.

With just a handful of ingredients, it’s easy to prepare and requires minimal effort. Yet the resulting dish is nothing short of magical—a hearty and flavorful soup that’s as soothing to the soul as it is nourishing to the body. The results can be felt almost immediately.

Make it your own

Not only does healing cabbage soup provide a hearty dose of vitamins and minerals, but it’s also incredibly versatile. I encourage you to customize the recipe to suit your taste preferences or dietary needs. Add in extra veggies, swap out the broth for a different flavor, or experiment with different herbs and spices. The possibilities are endless, allowing you to create a soup that’s truly your own.

Pro Tips

  • Use a good quality stock, preferably a homemade or high quality bone broth.
  • This soup freezes exceptionally well so you can always have some on hand for those days you wake up feeling low.

My wish for you

My hope is to inspire even just one person to make this soup (or another vitamin packed meal) to help boost your immune system as we continue to navigate our way through this new, challenging, virus filled world. I wish wellness to all, and very speedy recoveries.

Cabbage soup in bowl
Print Recipe
5 from 7 votes

Healing Cabbage Soup

With just a handful of heart healthy, immune boosting ingredients, Healing Cabbage Soup is easy to prepare and requires minimal effort. Yet the result is nothing short of magical—a hearty and flavorful soup that's as soothing to the soul as it is nourishing to the body. The results can be felt almost immediately.
Prep Time15 minutes
Cook Time30 minutes
Course: dinner, lunch
Cuisine: International
Keyword: gluten free, healthy, keto, paleo, soup, vegetarian
Servings: 4 people

Ingredients

  • 1 cup (about one small onion)- 1/2 inch dice
  • 2 cups (about 2 -3 carrots)- peeled and 1/2 inch diced
  • 2 cups (about 3 large celery stalks)- thin sliced- about 1/4 inch
  • 3 tsp minced or sliced garlic – (more or less to taste. I like garlic.)
  • 8 cups (about 1/2 head of savoy cabbage)- large chop (about 1.5 inch cubes)
  • 1 cup Diced zucchini (about 1/2 inch) or any other mix of fresh vegetables you have on hand. (about one average sized zucchini)
  • 1 14oz can petite diced tomatoes
  • 4 cups good quality chicken stock (bone broth if possible) (preferably homemade – it is so much healthier!)
  • 2-3 sprigs fresh thyme
  • 1 tbs fresh rosemary- minced
  • 1/4 cup parsley leaves- rough chop
  • Kosher salt, freshly ground black pepper, red peper chili flakes

Instructions

  • In a med-large stock pot, sauté chopped onion in 3 tablespoons of olive oil over medium heat for about 3 minutes. Add in the celery and carrots. Sauté for about 7-10 minutes, or until soft. Season with one teaspoon kosher salt, a few grinds of fresh pepper, and a 1/2 tsp red pepper chili flakes. Stir in garlic, whole sprigs of thyme and rosemary and sauté for another minute or two.
  • Add in chicken stock and bring to a boil. Add in cabbage and tomatoes and simmer for about ten minues. Taste for seasoning and adjust. I usually find it needs a dash more salt.
  • Add in diced zucchini and continue to simmer until just cooked through. Right before serving, stir in parsley.

Cider Roasted Pork Tenderloin with Cherry Chutney

Sliced pork tenderloin on a platter

Savor the flavors of this restaurant quality pork tenderloin.

It was only a few years ago that I started appreciating pork tenderloin. Let’s face it- it’s not the most attractive piece of meat at the butcher’s shop and pork can be so intimidating to cook. I regret that it took me so long to appreciate this cut of meat because it has become an absolute favorite of mine.

I have two equally wonderful pork tenderloin recipes that I make, and each time I make one of them, it becomes my new favorite! Then I make the other, and that one becomes my favorite! The struggle to pick an actual favorite is real and both are perfect for a dinner party menu or for a cozy meal at home. In addition to the cider roasted pork tenderloin with cherry chutney recipe featured here (my current flavor of the moment), I also really, really enjoy Prosciutto Wrapped pork tenderloin. It’s outrageously good as well! Currently though, I’m on the Cider Roasted Pork Tenderloin kick. It hits all my marks for a best recipe- unique and surprising ingredients, make ahead, and insanely tasty. What’s not to love?

A blend of seasonal spices to make the marinade

It all starts with a mortal and pestle to grind up fennel seeds, peppercorns, coriander, and cinnamon. These spices might sound intimidating to some people, but they shouldn’t. This dish is totally approachable and the spices need to be strong to round out the sweetness of the hard cider and maple syrup.

After combining the spices with remainder of the ingredients, all you have to do it leave the pork to marinate in a large plastic bag for 8-24 hours. This means you can assemble this dish a full day in advance, which I think is awesome!

Charm them with Chutney.

cherry chutney in pan

However, every meat needs a sauce. Or in this case, a chutney. I tried Ina’s plum chutney and surprisingly, I really did not like it at all. But I liked the texture and I get what she was going for. So I turned to one of my own recipes and the combination was truly spectacular. Cherry chutney- now that’s where it’s at! The chutney can also be made in advance, up to three days, so all you need to do is reheat slightly, and serve alongside the pork. Anyone can do that!

Bring it all together.

It’s time to eat the cider roasted pork tenderloin with cherry chutney and all that needs to be done is to preheat your oven, pat dry the pork, and roast for 20 minutes. Reheat your chutney while the pork is resting, slice and serve. It doesn’t get much easier than that for such an elegant and impressive dinner.

This pork tenderloin recipe is truly very delicious, and easy! What a winning combo that is! If you like this recipe, you should also check out the recipe for Prosciutto Wrapped Pork Tenderloin with Apple Chutney which, although more work and a bit more difficult, is also an incredible superstar recipe.

Cooking Tips:

  • Use a thermometer. The trick to cooking this pork tenderloin perfectly (and any other roast) is using an in oven thermometer. I love the Thermoworks DOT. I like pork tenderloin pork tenderloin cooked medium around 135 degrees F, plus rest time. However, most people prefer pork at 140.
  • Rest Time. You must let meat rest before you slice it or it will be dry no matter how well you cooked it.
  • Sharp Knives. Make sure to use a sharp knife when slicing for clean, beautiful slices.

You may also like….

Prosciutto Wrapped Pork Tenderloin Recipe
Ina Garten’s Prosciutto Wrapped Pork Tenderloin recipe with Apple Chutney is one of my all time fall favorites. Salty, sweet, spicy and the entire meal can be made in advance!

Cider Roasted Pork Tenderloin

Prep Time25 minutes
Cook Time25 minutes
Course: entree
Cuisine: International
Keyword: pork
Servings: 4

Ingredients

  • 1 12-ounce bottle hard cider, such as Crispin
  • 1/4 cup pure Grade A maple syrup
  • Kosher salt and freshly ground black pepper
  • 1 teaspoon whole fennel seeds
  • 1 teaspoon whole black peppercorns
  • 1/2 teaspoon whole coriander seeds
  • 1/2 teaspoon ground cinnamon
  • 2 pork tenderloins 1 to 1 1/4 pounds each, trimmed
  • 1 1-inch piece fresh ginger, thinly sliced
  • 1 1/2 tablespoons coarsely chopped fresh rosemary leaves
  • Good olive oil
  • Chutney for serving

Instructions

  • Combine the cider, maple syrup, and 3 tablespoons of salt in a 4-cup glass measuring cup.
  • With a mortar and pestle, grind the fennel, peppercorns, coriander, and cinnamon together and add to the cider mixture.
  • Place the tenderloins in a 1-gallon Ziploc bag and pour in the marinade. Add the ginger and rosemary, squeeze the air out of the bag, seal, and refrigerate for 8 hours or overnight.
  • Preheat the oven to 450 degrees.
  • Remove the tenderloins from the marinade and dry them well with paper towels. Discard the marinade.
  • Place the tenderloins on a sheet pan and rub them all over with 1 tablespoon of olive oil, then sprinkle with 1 teaspoon salt and 1/2 teaspoon pepper.
  • Roast for 20 to 25 minutes, until a meat thermometer inserted in the center reads 125 degrees.
  • Remove from the oven and cover the pan tightly with aluminum foil. Allow to rest for 10 minutes. Cut the tenderloins diagonally into 1/2-inch-thick slices, sprinkle with salt, and serve warm with chutney.

Cherry Chutney

Ingredients

  • 1 tablespoon good olive oil
  • 1/4 cup small-diced shallots 1 large shallot
  • 1 1/4 pounds frozen pitted dark cherries – defrosted.
  • 1 Granny Smith apple peeled and 1/4-inch-diced
  • 0.25 cup dark brown sugar lightly packed
  • 0.25 cup freshly squeezed orange juice
  • 2 tablespoons Port wine
  • 1 tsp chopped rosemary or more to taste
  • 1 3-inch cinnamon stick
  • 1/8 tsp ground clove
  • 1/8 teaspoon ground mace
  • 1/8 tsp red pepper chili flakes
  • 1/4 teaspoon Kosher salt

Instructions

  • Preheat the oven to 425 degrees F.
  • Heat the oil in a medium (10-inch) ovenproof sauté pan over medium heat.
  • Add the shallots and cook over medium-low heat for 5 minutes, stirring occasionally, until tender.
  • Add the cherries, apple, brown sugar, orange juice, Port, cinnamon, clove, mace, red chili pepper flakes, rosemary and salt.
  • Bring to a boil on top of the stove, place in the oven, and roast for 25 to 35 minutes, stirring occasionally, until the liquid is reduced and syrupy.
  • Remove from the oven and discard the cinnamon stick. (Be careful of hot pan handle!) Mash the fruit roughly with a dinner fork.
  • Let cool and store. (A mason jar is perfect for storing 3-5 days.)

Greenwich Cheese Company

cheese platter

The best of the best

Greenwich cheese company is by far, my most favorite market to shop in. When I’m having a bad day, off I go. Because let’s be honest here- cheese makes everything better.

comte wheel

Along with sister Fairfield cheese company, Greenwich cheese company, is hyper focused on quality, artisanal products. This includes their carefully selected and sourced cheeses, as well as the accoutrements such as jams, pickled fruits and vegetables, olive oils, pastas and more. Owners Laura and Chris take great care in making sure customers are getting exactly what they want when they shop here, which is why you are offered a taste of each cheese before you commit to purchasing, and each piece is cut to order. It’s a real foodie’s dream to be able to try before investing, in most cases, over $25.00 a pound. I have discovered some of what are now my favorite cheeses at this shop all because staff encouraged me to try this, or that.

Speaking of staff, they are all incredibly knowledgeable and friendly. With each cheese you select, they will tell you about it including where it comes from, if it is raw or pasteurized, aged or young, what type of milk, and perhaps a comparison or pairing note. The more questions you ask, the more answers you receive. They are as committed to the transaction as you want them to be. It’s truly unique. As someone who loves talking about food in great detail, I really enjoy interacting and learning from them.

alpine cheeses on platter
Thanksgiving isn’t complete without Alpine cheeses from Greenwich Cheese Company!

One of the many things I applaud Greenwich cheese company for doing is carrying a large selection of raw milk cheeses which are nearly impossible to find in a traditional grocery store. Raw milk cheeses are full of healthy bacterias and complex nutrients, and yes fat. However, pasteurized cheeses are nothing but fat. The pasteurization process kills everything that a raw milk cheese delivers to you. I really enjoy supporting the small farms that still produce cheese in the traditional way, and these are the cheeses that are typically raw milk cheeses. They are soo much better for you and frankly, they are just typically better quality cheeses.

cheese school
At this class we learned the art of making a cheese board

Another one of the many things I love about this artisanal cheese shop is cheese school! Cheese classes are offered in both their Cos Cob and Fairfield, CT locations. Laura and Chris are committed to providing cheese education and do so, not just through every transaction, but through offering classes throughout the year. I have attended several classes and plan to attend many more. I learn so much every time I go. (Granted I’m a foodie nerd and love this stuff.) If you live in the 914 / 203 area, I highly recommend checking out their class offering. It’s a fun thing to do alone or with a foodie friend. And usually a few pairings of wine are involved, which never hurts!

Finally, I can’t end this post without talking up their gift boxes which have become my favorite client gift or to take to a friend’s house as a hostess gift. They come artfully packaged in crates and I really, really care about packaging. I won’t send corporate gifts, or any gifts really, that are not packaged creatively and with care. The gift becomes very impersonal, very quickly. Packaging sets the tone for the gift and Greenwich cheese shop gets that. The raves reviews I get from clients and friends don’t hurt 🙂

Well, now that I spent the last hour writing about how much I love this place, I think I’ll take a ride and go get myself some cheese! See you there!

Recommended for:

  • Top quality cheeses: Artisinal cheeses from around the world.
  • Charcuterie: Carefully selected and sourced charcuterie to accompany any cheese platter.
  • Education: With a goal to teach people about cheese, the Greenwich cheese company offers a wide array of small group classes.
  • Platters & Gift boxes: Impressively curated cheese platters and gift boxes are available.

Award winning chicken chili

bowl of chicken chili topped with shredded cheese and sour cream

The best chicken chili recipe

When we talk about chili, most of think about beef and beans. So when I was challenged to participate in a chili contest I spent weeks trying out twists on the classic beef and beans version. I tried ground beef, diced sirloin, kidney beans, black beans, a variety of peppers. But something wasn’t sitting well with me. I knew everyone would be making a some kind of version of the classic beef chili and there is only so much I could do to it to make it stand out. And I wanted to win! So I decided I was going to take a chance and do something totally different.

Nothing warms your bones or pleases a crowd quite like a bowl of chili

I kept coming back to Ina Garten’s recipe for chicken chili. I wasn’t convinced it would be great. The main ingredients were bell peppers and chicken which are not at all what I think of when I think of chili. I had so many reservations and questions about the ingredients in this recipe, but I just kept coming back to it until I decided I had to try it. And when I finally did, I knew I had something special. This is one of those recipes that simply surprises you. How can chicken and peppers come together and taste like chili? I just don’t know, but they do! And it’s damn good!

I invited a few feasters over to taste test the chicken chili and discuss the pro and cons of going with a chicken chili vs a traditional beef chili in the contest. It was so helpful to get honest feedback so I could make a confident decision about which chili to submit. It was a unanamyous decision that I had to step out of the box if I wanted my chili to stand out and we all agreed this dish could be a real contender. So, that’s what I did. I spent the next few weeks deciding what tomatoes to use, what type of chili powder to use and what cheese worked best as a garnish. I worked hard to make it the best it could be.

Then the day came.

My chili was up against 18 other chilis. Voters could only vote for their top choice. When the votes were tallied I did not come in first (hold- I need to wipe the tears) but I came in second and by 1 vote! That means a heck of a lot of people choose this chili as their top choice! That’s a win in my book and I have no regrets. This is a great recipe and it now on rotation at Casa De Collins and will be… at least until next year when I go for gold and take that first place prize!

The Recipe

chicken chili with sour cream
Print Recipe
5 from 2 votes

Chicken Chili

Prep Time45 minutes
Cook Time1 hour 30 minutes
Course: entree
Cuisine: American, International, Mexican, Tex-mex
Keyword: chicken, chili
Servings: 6 people

Ingredients

  • 4 cups chopped yellow onions 2 large onions
  • 1/8 cup good olive oil plus extra for chicken
  • 1/8 cup minced garlic
  • 2 red bell peppers cored, seeded, and large-diced ( about 3/4 inch dice.)
  • 2 yellow bell peppers cored, seeded, and large-diced
  • 1 teaspoon chili powder
  • 1 teaspoon ground cumin
  • 1/4 teaspoon dried red pepper flakes or to taste
  • 1/4 teaspoon cayenne pepper or to taste
  • 2 teaspoons kosher salt plus more for chicken
  • 2 28-ounce cans whole peeled plum tomatoes in puree, undrained
  • 1/4 cup minced fresh basil leaves
  • 4 split chicken breasts bone in, skin on
  • Freshly ground black pepper

Instructions

  • Preheat oven to 350°F
  • Rub the chicken breasts with olive oil and place them on a baking sheet. Sprinkle generously with salt and pepper. Roast the chicken for 35 to 40 minutes, until just cooked. Use a quick read thermometer to temp the chicken occasionally and pull them when they are between 163-165°F. (Keep in mind rarely are breasts the exact same size so they will likely be done at different times.) Once cool, separate the meat from the bones and remove the skin. Cut it into 3/4-inch chunks. 
  • While the chicken is cooking, cook the onions in the oil over medium-low heat for 10 to 15 minutes, until translucent. While onions are cooking, use a pairing knife to pierce and slightly break open the tomatoes to release their water and seeds. Crush the tomatoes by hand, or in batches in a food processor fitted with a steel blade (pulse 6 to 8 times), or simply chop well with a sharp knife. Set aside.
  • To the onions, add the garlic and cook for 1 more minute. Add the bell peppers, chili powder, cumin, red pepper flakes, cayenne, and salt. Cook for 1 minute.
  • Add the tomatoes & basil. Bring to a boil, then reduce the heat and simmer, uncovered, for 30 minutes, stirring occasionally.
  • Add the chicken (and any accumulated juices) to the chili and simmer, uncovered, for another 20 minutes. Taste for seasoning and adjust if needed.
  • Serve with the toppings, or refrigerate and reheat gently before serving.

Apple Pie Bars

Apple Pie Bars

This is a “wow” dessert recipe. Actually, it’s a double wow! And frankly, it ought to be because I’ll tell you right now- these Apple Pie bars require a notable amount of time to make, and a decent amount of love, but the pay off is big in the end because they are simply awesome! 

The first time I made these amazing bites of deliciousness, I individually wrapped a few and dropped them off to a few friends for them to try and give me feedback. One friend came back and said “The only feedback I have for you is MAKE MORE!”

Apple Pie Bars

It all starts with a savory shortbread crust. I don’t care what anyone says, no one can resist a buttery, soft, salty shortbread anything. The shortbread crust is then topped with perfectly sliced tart apples and then finished with a delicious crumble. The layers of savory, salty, tart, and sweet guarantee a truly exceptional apple dessert.

I am not going to lie to you! It takes a couple of hours to assemble these Apple Pie bars, but you get 9 large or 12 small portions and they will stay good for a day or two, but no more. (They would never last longer than that anyway- you’ll want to eat the entire batch.) My recommendation is to make sure you buy all your ingredients the day or two before so you have everything on hand for when you decide to get started. Then, pick out a great album and put that apron on- you’re going to be here for a while. But I promise you, it will be worth it!

The Recipe

Apple Pie Bars

Prep Time1 hour
Cook Time1 hour
Course: Dessert
Cuisine: American
Keyword: apple pie

Equipment

  • 9 x 13-inch baking pan

Ingredients

  • 1 1/2 pounds Granny Smith apples peeled, quartered, cored, and sliced 1/8 inch thick (about 3 large)
  • 1 1/2 pounds Golden Delicious apples peeled, quartered, cored, and sliced 1/8 inch thick (about 3 large)
  • 2 tablespoons freshly squeezed lemon juice
  • 1/4 cup granulated sugar
  • 1 teaspoon ground cinnamon
  • 1/8 teaspoon ground nutmeg
  • 4 tablespoons 1/2 stick unsalted butter

Instructions

  • Preheat the oven to 375 degrees.
  • For the crust, place the butter, granulated sugar, brown sugar, and vanilla in the bowl of an electric mixer fitted with the paddle attachment and beat on medium speed for 2 minutes, until light and creamy. Sift the flour and salt together and, with the mixer on low, slowly add to the butter-sugar mixture, beating until combined. Scatter two-thirds of the dough in clumps in a 9 x 13-inch baking pan and press it lightly with floured hands on the bottom and 1/2 inch up the sides. Refrigerate for 20 minutes. Bake for 18 to 20 minutes, until the crust is golden brown, and set aside to cool.
  • Meanwhile, put the mixing bowl with the remaining dough back on the mixer, add the walnuts and cinnamon, and mix on low speed to combine. Set aside.
  • Reduce the oven to 350 degrees.
  • For the filling, combine the Granny Smith and Golden Delicious apples and lemon juice in a very large bowl. Add the granulated sugar, cinnamon, and nutmeg and mix well. Melt the butter in a large (10-inch-diameter) pot, add the apples, and simmer over medium to medium-low heat, stirring often, for 12 to 15 minutes, until the apples are tender and the liquid has mostly evaporated. Spread the apples evenly over the crust, leaving a 1/2-inch border.
  • Pinch medium pieces of the remaining dough with your fingers and drop them evenly on top of the apples (they will not be covered). Bake for 25 to 30 minutes, until the topping is browned. Cool completely and cut into bars.

Beef Bourguignon

Beef Bourguignon

Elevated comfort food for the soul

Almost every culture around the world has some version of braised beef, or more commonly known as beef stew. The Italians make theirs with potatoes, celery and tomato puree. The Mexicans make theirs with corn, cumin and chili powder. And the French call theirs Beef Bourguignon and it’s made with mushrooms, pearl onions and a bottle of red wine. There are countless versions around the world of variations on beef stew. But when I get that craving for a soul satisfying, mouth watering, hearty stew, nothing else will do except for the French classic, Beef Bourguignon, served alongside a big hunk of crusty rustic sourdough bread (buttered, of course) to soak up every drop of stewed deliciousness. It’s just about the best snowy night dinner to enjoy in front of the fire with a bottle of Bordeaux.

Beef Bourguignon
Perfectly braised beef with carrots, onions, and a full bottle of wine creates a luxurious version of classic beef stew perfect for any occasion

The style of cooking stew is called braising and something magical happens when you braise a meat and no one does it better than the French. Coq au vin, Cassoulet, Lapin a La Cocotte and yes, Beef Bourguignon are amongst my favorite slow cooked, French country meals. When you braise, the flavors have hours to develop and permeate every bite. When you sear or grill, you simply can’t produce the same depth of flavor as you can with braising.

This Beef Bourguignon recipe comes from Ina Garten and uses cognac and a full bottle of red wine that creates a rich, elegant sauce that will have you scraping every last drop from your bowl. The inclusion of mushrooms brings a second level of heartiness that complements the beef perfectly and the pearl onions and carrots pull the party together with their natural sweetness. Together, they make every bite the best bite, which is always the goal of a perfect recipe.

Cooking Tips:

• Rather than buy the pre-cubed stew meat from the butcher counter, I prefer to cut my own beef cubes from one large cut of chuck to ensure uniform sizes and can control the quality of the cuts.

• Always make more than you think you need when you make this dish. It does not go as far as you think because everyone will go back for seconds.

The Recipe

Beef Bourguignon

Prep Time30 minutes
Cook Time1 hour 15 minutes
Course: entree
Cuisine: French
Keyword: beef, stew
Servings: 4 people
Author: Ina Garten

Equipment

  • Dutch oven

Ingredients

  • 1 tablespoon good olive oil
  • 8 ounces dry cured center cut applewood smoked bacon diced
  • 2 1/2 pounds chuck beef cut into 1-inch cubes- VERY IMPORTANT TO CUT 1 X 1 CUBES!
  • Kosher salt
  • Freshly ground black pepper
  • 1 pound carrots sliced diagonally into 1-inch chunks
  • 2 yellow onions sliced
  • 2 teaspoons chopped garlic 2 cloves
  • 1/2 cup Cognac
  • 1 750 ml. bottle good dry red wine such as Cote du Rhone or Pinot Noir
  • 1 can 2 cups beef broth
  • 1 tablespoon tomato paste
  • 1 teaspoon fresh thyme leaves 1/2 teaspoon dried
  • 4 tablespoons unsalted butter at room temperature divided
  • 3 tablespoons all-purpose flour
  • 1 pound frozen whole onions
  • 1 pound fresh mushrooms stems discarded caps thickly sliced
  • Country bread or Sour Dough toasted or grilled and rubbed with garlic clove
  • 1/2 cup chopped fresh parsley.

Instructions

  • Preheat the oven to 250 degrees F.
  • Heat the olive oil in a large Dutch oven. Add the bacon and cook over medium heat for 10 minutes, stirring occasionally, until the bacon is lightly browned. Remove the bacon with a slotted spoon to a large plate.
  • Dry the beef cubes with paper towels and then sprinkle them with salt and pepper. In batches in single layers, sear the beef in the hot oil for 3 to 5 minutes, turning to brown on all sides. Remove the seared cubes to the plate with the bacon and continue searing until all the beef is browned. Set aside.
  • Toss the carrots, and onions, 1 tablespoon of salt and 2 teaspoons of pepper in the fat in the pan and cook for 10 to 15 minutes, stirring occasionally, until the onions are lightly browned. Add the garlic and cook for 1 more minute. Add the Cognac, stand back, and ignite with a match to burn off the alcohol. Put the meat and bacon back into the pot with the juices. Add the bottle of wine plus enough beef broth to almost cover the meat. Add the tomato paste and thyme. Bring to a simmer, cover the pot with a tight-fitting lid and place it in the oven for about 1 1/4 hours or until the meat and vegetables are very tender when pierced with a fork.
  • Combine 2 tablespoons of butter and the flour with a fork and stir into the stew. Add the frozen onions. Saute the mushrooms in 2 tablespoons of butter for 10 minutes until lightly browned and then add to the stew. Bring the stew to a boil on top of the stove, then lower the heat and simmer for 15 minutes. Season to taste.
  • To serve, toast the bread in the toaster or oven. Rub each slice on 1 side with a cut clove of garlic. For each serving, spoon the stew over a slice of bread and sprinkle with parsley.

Notes

YOU MUST CUT 1 x 1 CUBES IN ORDER FOR THESE INSTRUCTIONS TO BE CORRECT! 

Rigatoni with Sausage & Fennel

Rigatoni with Sausage & Fennel

Simply, the best pasta recipe.

Making pasta is an art form, from start to finish.  From making the pasta itself, to cooking it correctly, to the very last sprinkle of garnish. It’s not really something that can be taught. A cook needs to feel the dish, understand how the pasta is reacting to the additional ingredients, and the sauce. This is more true of making pasta than most other dishes that can be executed depending on technique alone.  This is not easy for some people.

Rigatoni with Sausage & Fennel
Rich, rustic and absolutely delicious!

Harder so, is to create an incredible pasta dish, remake it, confirm consistency, and then instruct others on how to replicate it. This is what most chefs, even at the highest levels, cannot do. There is however one person who does this exceptionally well. Ina Garten creates culinary masterpieces, recreates those incredible dishes until it the recipe is foolproof (without loosing an ounce of flavor), and then teaches exactly how to make it taste like her original recipe. All that is left to do is follow instructions. Well that, and to buy good quality ingredients 🙂

I had been hesitant too try this recipe for a long time. I love fennel but not everyone does and the idea of rigatoni with sausage didn’t seem like anything all that exciting. Thinking back, I don’t know what inspired me to finally decide to give it a try. What I do know is that it was one of the best culinary decisions I have ever made. It is now become not just a favorite pasta recipe, but a top 10 recipe of the year for me.

It is creamy, luxurious and bursting with flavor. It does’t look like much on a platter and lacks a bit of eye appeal with its muted color, but it makes up for it all when you take your first bite. I will never forget the time I made it for 6 of my closest friends and quite literally silenced the room. Just imagine how good this dish must be that it silenced a crowd of 6 close friends who were drinking wine all night – it’s THAT good.

Cooking Tips

• When buying the rigatoni, looks for roman style rigatoni, such as the one made by Colavita. (This is not an endorsement and I do not get paid to recommend it!  It’s just the pasta I discovered works the best in this recipe.) It’s not as dense as the more classic rigatonis made by Ronzoni, DeCecco, Barilla, etc. It also holds the sauce beautifully and helps create the luxurious silky bite we are looking for.

block of parmigiano-reggiano cheese

• Use certified parmigiano-reggiano cheese. Nothing else.

• Although it adds an extra step, I like to cook the sausage as outlined in the recipe, but just before it is finished, I dump it onto a large cutting board and chop it roughly. This breaks up the meat better than the back of a spoon can resulting in greater distribution and more even bites of sausage throughout the dish.

• Although it’s not a “make ahead” dish, it can be a “start ahead” dish, which is what I like to do. I sauté the fennel & onion, I cook, crumble & chop the sausage, add in the garlic and other seasonings and then I turn off the stove. I do this about an 30-45 minutes in advance of serving time.  This allows me about 20 minutes to clean up, prep the remainder of the ingredients, pour myself a glass of wine and wait for my friends to arrive. When we are ready to eat, I pick up where I left off starting with heating up the meat and vegetable mixture, adding in the wine and going from there. Twenty minutes later, dinner is on the table and it’s easy enough that I can handle it while also entertaining. Worth it.

The Recipe

Rigatoni with Sausage & Fennel

Prep Time40 minutes
Cook Time20 minutes
Course: entree
Cuisine: Italian
Keyword: pasta
Servings: 6 people
Author: Ina Garten

Ingredients

  • 3 tbsp extra virgin olive oil
  • 3 cups chopped yellow onion
  • 1 1/4 lbs sweet Italian sausages
  • 2 tsp fresh minced garlic
  • 1/2 tsp whole fennel seeds, crushed with a mortar and pestle
  • 1/2 tsp crushed red pepper flakes
  • kosher salt & fresh ground black pepper
  • 1 cup dry white wine
  • 1 cup heavy cream
  • 2/3 cup half-and-half
  • 2 tbsp tomato paste
  • 1 lb Rigatoni (Colvita roman rigatoni or similar)
  • 1/2 cup chopped fresh parsley leaves
  • 1 cup freshly grated Italian Parmesan cheese, divided

Instructions

  • Heat the olive oil in a large heavy pot or Dutch oven, such as Le Creuset, over medium heat. Add the fennel and onion and saute for 7 minutes, stirring occasionally, until tender. 
  • Add the sausage and cook for 7 to 8 minutes, crumbling it with a fork, until nicely browned.
  • Add the garlic, crushed fennel seeds, red pepper flakes, 2 teaspoons salt, and 1 teaspoon black pepper and cook for one minute.
  • Pour in the wine, bring to a boil.
  • Add in the heavy cream, half-and-half, and tomato paste. Bring back to a boil, lower the heat, and simmer for 20 minutes, until the sauce has thickened.
  • Meanwhile, bring a large pot of water to a boil, add 2 tablespoons salt, and cook the rigatoni according to the directions on the package. Drain and add to the sauce, stirring to coat the pasta. Cook over low heat for 5 minutes to allow the pasta to absorb the sauce.
  • Off the heat, stir in the parsley and 1/2 cup of the Parmesan. Serve hot in shallow bowls with the remaining 1/2 cup Parmesan on the side.